Re: Brett\'s RS GTD
Brett
Some thoughts for you to consider or bin as you see fit!
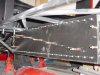
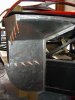
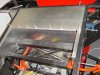
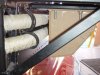
I see you have the square tube rear stay bars. Rumour comes back to me that these are highly unlikely to be acceptable to RAC MSA as part of any competition roll cage as they have gone off square tube construction. My suggestion is to say remanufacture these in appropriate round tube (I think 48mm CDS2 2.5 mm wall thickness but check to make sure first!) and also to raise the top mounting point as high as you can get it. You crrently have left space for the deck catches, but I would re-jig those with the higher mounting point as if you do roll it, you won't give a stuff about deck catches compared to creaming your head!
If you drill a small hole in the struts (and I was always told to do it about 1/3 in from an end) this will allow scrutineers to check wall thickness of the material without destructive testing.
As to square tube struts, I do have these on my car. However as the original person to do this, I did have the design that I used independantly certified by the MSA after computer analysis of the GTD chassis by a highly qualified engineer/crash investigator contact. But I used a different section square tube than you have used and the lower mounting set up is slightly different. However as time went by the MSA have changed their minds on square tube generally and as others have experienced since, there is a big tendancy to requiring these to be round tube struts now. You may not get your competition Log Book with your current set up.
As with all advice, what you do with the above comments is totally up to you!
But I thought you knew......