Richard's SPF 2197 Build

Where to start, I ask myself because the car is built and I've shared some of my build on other thread's. I'm doing it because there is so much I haven't shared (don't think for a moment I didn't hear you screams of NO!! in the background) and I would like to put it in all in one place. Much will be new and some old but expanded. I'm sure I'll bore many to death but I hope some will find it interesting.

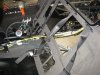
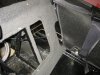
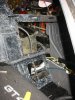
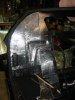
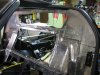
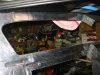
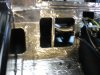
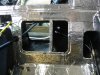
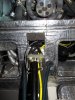
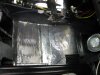
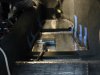
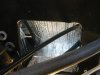
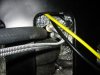
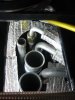
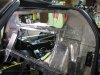
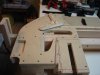
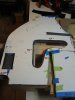
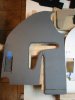
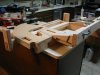
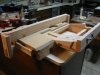
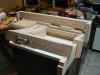
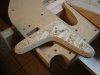
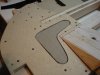
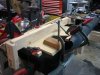
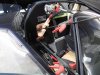
In the beginning (no this is not the Bible) I started by taking much of the car apart trying to understand how it went together. I spent a couple of weeks taking pictures of everything and felling like a proctologist sticking a borescope in places I maybe shouldn't have but I learned a lot.

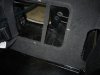
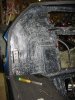
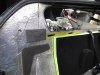
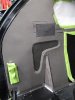
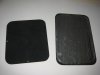
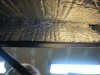
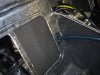
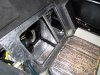
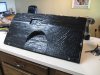
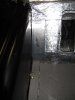
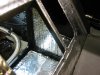
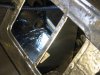
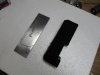
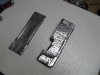
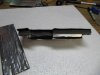
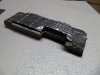
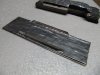
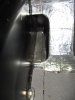
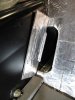
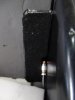
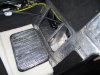
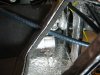
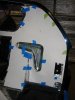
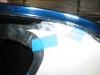
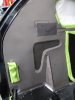
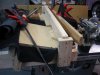
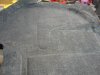
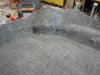
I'm going to start with sound and heat insulation which has been a topic of conversation on a few other threads. As my goal has always been to build a road car I felt adding 100+ pounds to the car to make it more streetable was well worth it.

To prove my point I recently took the car on a two week 3000+ mile trip from Northern Idaho to Monterey, L.A., San Diego and back. As many of you know the worst thing that happened was running over a dead dear.

The car is very comfortable to drive on a long trip, I did however miss cruise control as there isn't much room to move your legs around and keep the blood flowing. And then the Butler killed the woman with the candlestick in the bedroom. Good to know you're still with me.

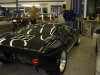
The first picture is the car the day I picked it up at the dealership. the other pictures are of me before and after the build.
 

Attachments

  • Cannon 12-7-07 006.JPG
    Cannon 12-7-07 006.JPG
    269.9 KB · Views: 358
  • images.jpg
    images.jpg
    4.5 KB · Views: 256
  • Brains.jpg
    Brains.jpg
    68.2 KB · Views: 342
Last edited:
Genesis 1,1

In the beginning (maybe this is the bible) I did a lot of research on sound and heat insulation. I picked products from Second Skin. Not sure it's the best but it seems to works for me.

After removing the carpet from the bulkhead I add a layer of their Damplifer Pro (like DynaMat) to most surfaces on the interior side of the car, I then made a template of the bulkhead and if you think the two sides are the same just look when I overlaid the right side template over the left side. I then cut out and glued their Luxury Liner Pro. The luxury Liner Pro is a multidensity product the first layer is very dense and the top layer is like a wet suit material.

One of the details I wanted to keep was the kidney shaped depressions (bad idea) so the material I removed from the top layer got inverted and filling the space in the original bulkhead. Also I didn't remove the top black layer of the engine cover I put the Damplifer Pro on its back side. I did the same for the two small access panels.
 

Attachments

  • Camera 3-10-08 027.JPG
    Camera 3-10-08 027.JPG
    417.9 KB · Views: 354
  • Camera 3-10-08 028.JPG
    Camera 3-10-08 028.JPG
    343.1 KB · Views: 289
  • Camera 3-10-08 029.JPG
    Camera 3-10-08 029.JPG
    347.6 KB · Views: 293
  • Camera 3-10-08 030.JPG
    Camera 3-10-08 030.JPG
    427.8 KB · Views: 289
  • IMG_3497.JPG
    IMG_3497.JPG
    451.2 KB · Views: 308
  • IMG_3496.JPG
    IMG_3496.JPG
    438.5 KB · Views: 291
  • IMG_3499.JPG
    IMG_3499.JPG
    308.2 KB · Views: 254
  • IMG_3511.JPG
    IMG_3511.JPG
    317.6 KB · Views: 282
  • IMG_3508.JPG
    IMG_3508.JPG
    223.7 KB · Views: 260
  • IMG_3500.JPG
    IMG_3500.JPG
    284.1 KB · Views: 264
  • IMG_3733.JPG
    IMG_3733.JPG
    240.9 KB · Views: 285
  • IMG_3734.JPG
    IMG_3734.JPG
    287.7 KB · Views: 250
  • IMG_0266.JPG
    IMG_0266.JPG
    238.2 KB · Views: 265
  • IMG_3512.JPG
    IMG_3512.JPG
    237.3 KB · Views: 244
  • IMG_3728.JPG
    IMG_3728.JPG
    244 KB · Views: 287
  • IMG_3738.JPG
    IMG_3738.JPG
    287.8 KB · Views: 263
  • IMG_3883.JPG
    IMG_3883.JPG
    231.5 KB · Views: 258
  • IMG_0439.JPG
    IMG_0439.JPG
    178 KB · Views: 225
  • IMG_0442.JPG
    IMG_0442.JPG
    147.5 KB · Views: 237
  • IMG_3884.JPG
    IMG_3884.JPG
    207.8 KB · Views: 262
  • IMG_3730.JPG
    IMG_3730.JPG
    154 KB · Views: 235
Last edited:
Now a trip to the heat side of things. I started by cutting out a piece of their heat shield material which when folded would insulate the area under the small access panels. I also made covers for the holes made for the shift rod to go through out of thin aluminum and covered on the back side with the heat insulator and on the front side with the same material I used on the inside.

I also made a small triangular piece which blocks hot air and fumes from entering that same area from the engine side (see pictures). I added a layer of the heat insulation material painted black to the engine side of the engine cover. Its other side is covered with the sound deadening and carpet. I happen to think that the engine cover is a key element in controlling both heat and sound.

The access panels were treated in the same way a the engine cover.
 

Attachments

  • IMG_3861.JPG
    IMG_3861.JPG
    136.2 KB · Views: 222
  • IMG_3862.JPG
    IMG_3862.JPG
    121 KB · Views: 231
  • IMG_3864.JPG
    IMG_3864.JPG
    371 KB · Views: 249
  • IMG_3866.JPG
    IMG_3866.JPG
    108.5 KB · Views: 211
  • IMG_3868.JPG
    IMG_3868.JPG
    241.7 KB · Views: 203
  • IMG_3871.JPG
    IMG_3871.JPG
    285.8 KB · Views: 218
  • IMG_3877.JPG
    IMG_3877.JPG
    350.5 KB · Views: 236
  • IMG_0248.JPG
    IMG_0248.JPG
    166.5 KB · Views: 197
  • IMG_0428.JPG
    IMG_0428.JPG
    140.5 KB · Views: 192
  • IMG_0262.JPG
    IMG_0262.JPG
    174.2 KB · Views: 188
  • IMG_0263.JPG
    IMG_0263.JPG
    160.8 KB · Views: 238
  • IMG_3835.JPG
    IMG_3835.JPG
    131.2 KB · Views: 199
  • IMG_3832.JPG
    IMG_3832.JPG
    118.4 KB · Views: 194
  • IMG_3881.JPG
    IMG_3881.JPG
    149.3 KB · Views: 220
  • IMG_0161.JPG
    IMG_0161.JPG
    205.7 KB · Views: 205
  • IMG_0162.JPG
    IMG_0162.JPG
    147.4 KB · Views: 208
  • IMG_0163.JPG
    IMG_0163.JPG
    172.7 KB · Views: 205
  • IMG_0164.JPG
    IMG_0164.JPG
    161.5 KB · Views: 191
  • IMG_0165.JPG
    IMG_0165.JPG
    164.6 KB · Views: 193
  • IMG_0166.JPG
    IMG_0166.JPG
    168.5 KB · Views: 184
  • IMG_0167.JPG
    IMG_0167.JPG
    174.4 KB · Views: 184
  • IMG_0171.JPG
    IMG_0171.JPG
    174.5 KB · Views: 207
  • IMG_0169.JPG
    IMG_0169.JPG
    136.6 KB · Views: 177
  • IMG_0173.JPG
    IMG_0173.JPG
    106.5 KB · Views: 180
  • IMG_0247.JPG
    IMG_0247.JPG
    139.7 KB · Views: 189
  • IMG_4612.JPG
    IMG_4612.JPG
    295.6 KB · Views: 175
  • IMG_4614.JPG
    IMG_4614.JPG
    287.9 KB · Views: 203
  • IMG_4615.JPG
    IMG_4615.JPG
    227 KB · Views: 199
Last edited:

Jack Houpe

GT40s Supporter
Richards car is the quietest GT40 I've rode in as of yet on the inside, I think all his work and that double window have paid off. We could be on the freeway at 65 MPH and talk normal without shouting or reading lips.
 
I guess it's time for a little more. As you'll see from the pictures I basically covered everything with dynamat. Next I made a template of both sides (left/right) of the bulkhead which by the way is not symmetrical so I could cover it with the foam layer and carpet. One of the details I wanted to keep was the kidney shaped depressions which in the end made things much more difficult. I used the kidney shaped part I cut out of the foam material to fill in the that part of the bulkhead then added the foam.

The small rectangle to the left of the window is a 3/8" piece of ABS that gives a firm backing to the VIN plate. I lined the corner holes in the ABS with 1/8 ID stainless tubing so the pop rivet wouldn't break out the holes as it would be really hard to fix afterwards.

Next came the fun part as I knew nothing about how carpet is made to conform to the contours of a cars interior. I knew it must have something to do with heat so I ended up making a buck for each side of the cars bulkhead to mold the carpet around.

As you can see from the rest of the pictures it was a lot more work than I had planed but the results were rewarding. I had to shave the carpet under the VIN plate so it would sit flat.

More later.....Hint. Yes the whole carpet ended up in the oven.
 

Attachments

  • IMG_3511.JPG
    IMG_3511.JPG
    145 KB · Views: 200
  • IMG_3883.JPG
    IMG_3883.JPG
    231.5 KB · Views: 214
  • IMG_3884.JPG
    IMG_3884.JPG
    207.8 KB · Views: 185
  • IMG_3886.JPG
    IMG_3886.JPG
    136.3 KB · Views: 222
  • IMG_0441.JPG
    IMG_0441.JPG
    132.4 KB · Views: 190
  • IMG_3966.JPG
    IMG_3966.JPG
    249.5 KB · Views: 198
  • IMG_3967.JPG
    IMG_3967.JPG
    205 KB · Views: 209
  • IMG_3969.JPG
    IMG_3969.JPG
    178.4 KB · Views: 200
  • IMG_3972.JPG
    IMG_3972.JPG
    209.9 KB · Views: 198
  • IMG_3980.JPG
    IMG_3980.JPG
    233.7 KB · Views: 199
  • IMG_3981.JPG
    IMG_3981.JPG
    243.2 KB · Views: 200
  • IMG_3982.JPG
    IMG_3982.JPG
    235.9 KB · Views: 229
  • IMG_3991.JPG
    IMG_3991.JPG
    233.2 KB · Views: 184
  • IMG_3992.JPG
    IMG_3992.JPG
    240.3 KB · Views: 187
  • IMG_4068 - Copy.JPG
    IMG_4068 - Copy.JPG
    210.3 KB · Views: 191
  • IMG_4071 - Copy.JPG
    IMG_4071 - Copy.JPG
    239.1 KB · Views: 179
  • IMG_4081 - Copy.JPG
    IMG_4081 - Copy.JPG
    253.8 KB · Views: 183
  • IMG_4082.JPG
    IMG_4082.JPG
    227.5 KB · Views: 191
  • IMG_4073 - Copy.JPG
    IMG_4073 - Copy.JPG
    305.8 KB · Views: 192
  • IMG_4074.JPG
    IMG_4074.JPG
    251.3 KB · Views: 199
  • IMG_0447.JPG
    IMG_0447.JPG
    193.3 KB · Views: 220
  • IMG_0459.JPG
    IMG_0459.JPG
    176.5 KB · Views: 234
Last edited:
You have got to have the most quiet SPF around. Nice work! Seeing some of your workspace reminds me of a Satch Carlson column years ago about kitchen people vs garage people. Obviously you don't have that problem!
 
Back
Top