Southern GT 21

So the deed is done. I have finally taken delivery of Southern GT 21 and plan to build over the next 2 years. I intend for the car to be used more for track days and fun.

No idea how this build will go but seem to be hooked after completing my 289 FIA from Hawk. Which I did to as near original as possible. Hope I can give something back to the community by doing a detailed log of build and high lighting all those silly things that turn out to be gotchas!

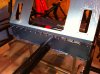
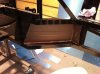
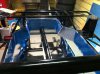
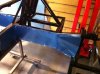
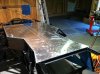
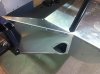
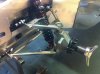
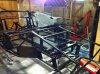
So to start a pick of the chassis sitting in my garage.
 

Attachments

  • IMG_0989.jpg
    IMG_0989.jpg
    69.5 KB · Views: 707
Inner Cockpit Skin
Got time last week end to do the inner cockpit. I must say I am impressed with Southern GT panel kit. It is nicely pressed and seems to fit well with some nice detailing. They recommend that the rear panel be done first (not the floor!). I thought this would present an untidy finish when you come to do the inner rear bulk head. So I presented both and pre drilled the rear bulk head at the same time. Then used temporary rivets to hold while sealer set.

Good idea to do inner panels first and not the floor, against my natural tendency to do the floor first! you can literally sit in the car and work making fitting easier.

I will use sounds proofing in all panels. two stage i. sticky back ii. high density foam all designed for sound and thermal protection.
 

Attachments

  • IMG_1011.jpg
    IMG_1011.jpg
    162 KB · Views: 578
  • IMG_1012.jpg
    IMG_1012.jpg
    159 KB · Views: 529
  • IMG_1015.jpg
    IMG_1015.jpg
    148.3 KB · Views: 509
  • IMG_1016.jpg
    IMG_1016.jpg
    111 KB · Views: 541
Footwell and Engine Bay
Got some time last weekend to do some panelling. All went very well, no problems with fit etc.

I would recommend a "power file" for final trimming. Got one from ebay for about 30 pounds. Really impressed so far with the ease of fitting. Sorry but think this may turn out to be a softy build at the panelling stage.
 

Attachments

  • IMG_1025.jpg
    IMG_1025.jpg
    175.8 KB · Views: 623
  • IMG_1023.jpg
    IMG_1023.jpg
    176.4 KB · Views: 534
Softy build a nick, I,ll remind you of that later !
Good progress so far though, keep it up.
 
Looking good Nick, have to disagree with this statement though!
Good idea to do inner panels first and not the floor, against my natural tendency to do the floor first!

I really feel you are missing the bigger picture, I mean if you don't do the floor first, how on earth are you going to do this..........


cca9ebe813a03e3cad9681c0c77d1817_zps396f1674.jpg
 

Randy V

Moderator-Admin
Staff member
Admin
Lifetime Supporter
Paul, that picture is positively priceless!!!! :thumbsup:
 
Ok , OK Paul so the floor had to be done.

Foor Panel
Fairly straight forward, but nearly made a mistake. The floor panel looks symmetrical, be aware, it's not (of course)! The front / rear water ducked etc is slightly off set! Nearly made this mistake of starting to drill. But picked it up just in time.

As for the comment......... well if I keep saying it hopefully it may come true.
 

Attachments

  • IMG_1034.jpg
    IMG_1034.jpg
    173.7 KB · Views: 558
  • IMG_1035.jpg
    IMG_1035.jpg
    185.5 KB · Views: 490
Hi Nick it was nice meeting with you. Car is looking great keep up the good work. Hope we passed on some useful tips about the build.
 
Thanks Belinda, yes got home a committed to paper several tips. Hope to see you guys at the Silverstone Classic. Will take the AC.
 
Body Paneling now Complete

Some interesting points to remember. As Paul found out the rear box sections need to be rivet nut fixed. Easy to do and as usual all panels fitted really well.

I made a mistake on the main engine bay cover - surround. The ring that fits on the rear bulkhead is fitted engine bay side. So that when the engine panel is fitted it is flush with the main bulk head in side the cockpit area.

Summary of panelling is that all fits really nicely but I am sure I will need to open out some holes etc. The guys at Southern GT have been great and easy to communicate with.

Now the real build starts!
 
Good work Nick :thumbsup: you beat me, I still have the front outer (inner) wings and sills to do, should be done this month though :)

What's next on your list then? Are you going to revival?
 
Gear Box

Chris Cole back to great form. Picked up my gearbox. Chris has put Quaife internals and a taller 5th gear. We have had the casing lacquered in gold and all the bright work Cadmium plated.
 

Attachments

  • IMG_1157.JPG
    IMG_1157.JPG
    397.7 KB · Views: 494
  • IMG_1160.JPG
    IMG_1160.JPG
    450.2 KB · Views: 506
Now that I have the picture button sorted I can include some chassis pictures. Has been a bit miss and hit on the attaching of photos but now got it - size matters!

Hopefully these will show the completed chassis. Now going onto suspension, and wet systems then to wiring.
 

Attachments

  • IMG_1141.JPG
    IMG_1141.JPG
    299.5 KB · Views: 524
  • IMG_1142.JPG
    IMG_1142.JPG
    389.7 KB · Views: 522
  • IMG_1145.JPG
    IMG_1145.JPG
    330.2 KB · Views: 483
  • IMG_1146.JPG
    IMG_1146.JPG
    342.9 KB · Views: 498

Udo

Supporter
Hi Nick, I ordernd #23 or 24, not sure, but for sure I will order the so far not considered panel Kit
 
Footwell and Engine Bay
Got some time last weekend to do some panelling. All went very well, no problems with fit etc.

I would recommend a "power file" for final trimming. Got one from ebay for about 30 pounds. Really impressed so far with the ease of fitting. Sorry but think this may turn out to be a softy build at the panelling stage.

Nick, what do you mean with "power file". What is power file for? Would you upload a picture of "power file". Thank you.
 
Front Suspension
All quite straight forward and went together without problems. One tip would be clean out powder coating from holes before panelling. As some of the bolts have restricted access this turn out to be very tedious.
 

Attachments

  • IMG_1140.JPG
    IMG_1140.JPG
    490.8 KB · Views: 495
  • IMG_1139.JPG
    IMG_1139.JPG
    450.7 KB · Views: 527
  • IMG_1138.JPG
    IMG_1138.JPG
    420.3 KB · Views: 476
  • IMG_1137.JPG
    IMG_1137.JPG
    368.8 KB · Views: 509

Keith

Moderator
Hi Nick, greetings from the sunny New Forest. Yeah, ok. Is it me, the camera or the design in that the forward strut of the lower wishbone seems longer than the norm? And from that, it appears to be of quite 'slender' proportions for it's length?

Suspension is not my bag but I like to try and understand everything, so please forgive what might be a pretty stupid question - it's my eyes you see - it's a curse :laugh:
 
Back
Top