
This “HowTo” details a fix for early SPF GT40 cars that experience fuel smells inside the cabin. This fix assumes you have already fixed the skip welded filler necks on many of the early cars also. The filler neck fix is detailed in a separate “How To” elsewhere on the forum. I am not sure what serial number implemented a factory fix like this but the first one I saw was Richard Woerz's P2197. His car has similar parts factory installed and that's where I got the idea. Rather than making the parts, you might try ordering them from SPF GOOD LUCK with that !!!!!!!!!!!!!!!!!.
The problem that this fix addresses is one where fuel vapors are down in the sponson area around the fuel tanks. Obviously, you need to make sure all your hose clamps are tight and there are no leaks. However, if you should happen to spill fuel during fill up some can and likely will get into the sponson area which has a direct path into the cabin. These vents will help.
The first thing you need to do is make a vent hole up front. I don't have a photo for this because I forgot to shoot one before I put the car back together but follow my verbiage and you'll figure it out.
Release the Hartswell latches on the front clamshell. Lift the rear of the clamshell up and forward enough to gain access to the large plastic plug at the top of the tub to the outside of the filler cap just in front of the door on each side of the car. You may need to remove the windshield wiper blade to do this. Drill a ½ inch diameter hole in this plug. This will allow air into the sponson from the front of the car.
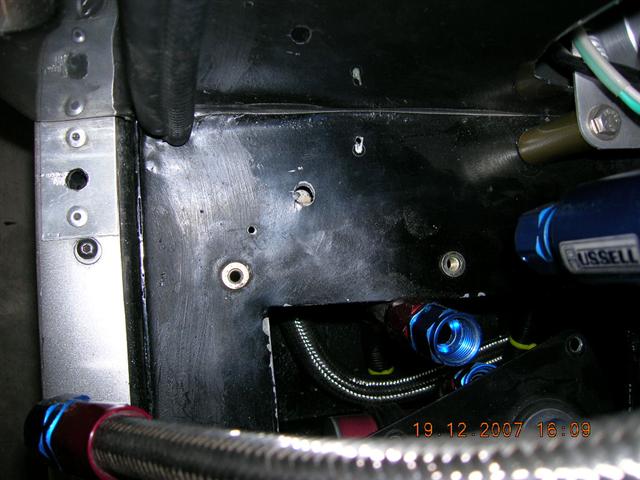
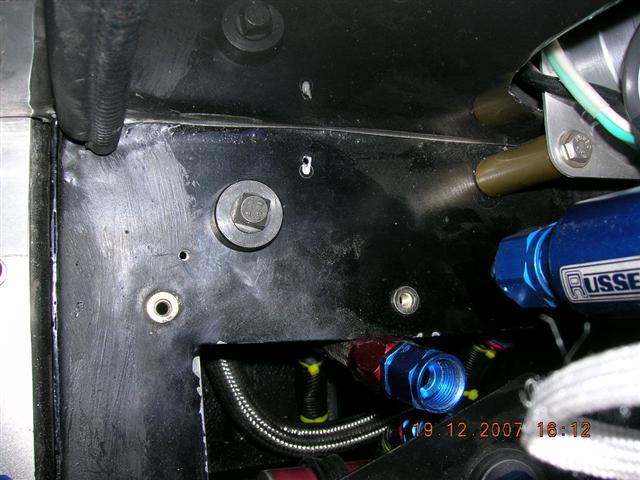
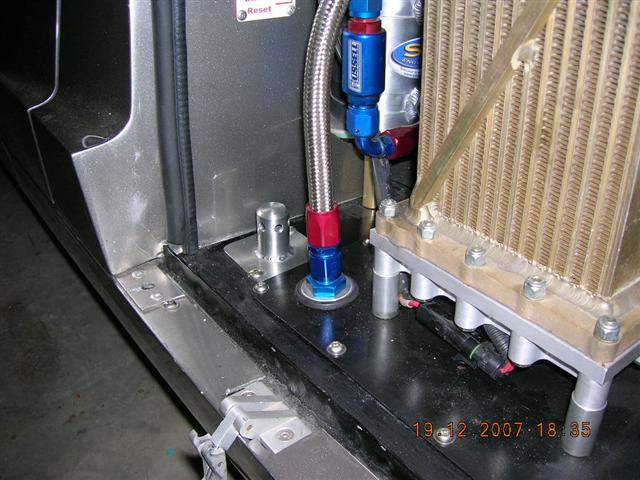
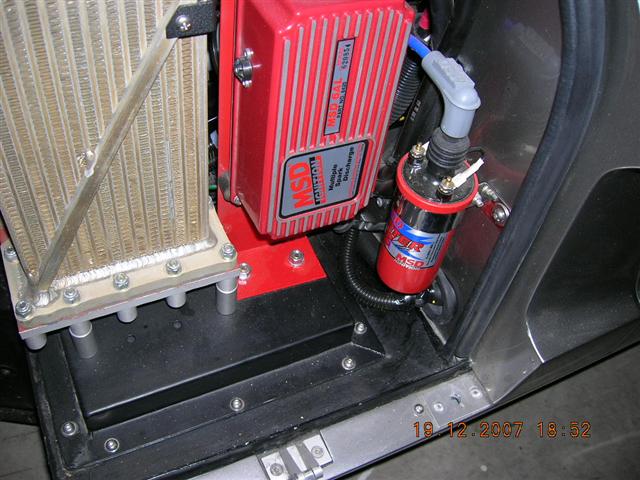
At the rear bulkhead area study where to locate the vents detailed below. There are reinforcement panels and such to look out for. The point is that you don't want to interfere or drill into anything especially the fuel tank that is in the way.
This may a good time to note that all you really have to do is drill a vent hole back here and be done but these aluminum vents look cool.
Drill a hole of sufficient size to use a chassis punch to make a big hole. I used a 7/8 inch punch.

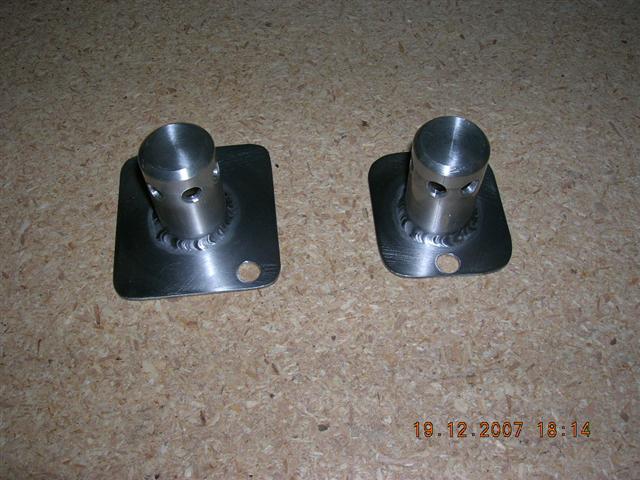
Next, I made the vent stack from a piece of 1 inch dia aluminum rod by drilling a ¾ inch hole up the center on a lathe and then turned a 7/8ths collar on the open end. Then using a V-Block, I drilled six holes around the top as shown below.

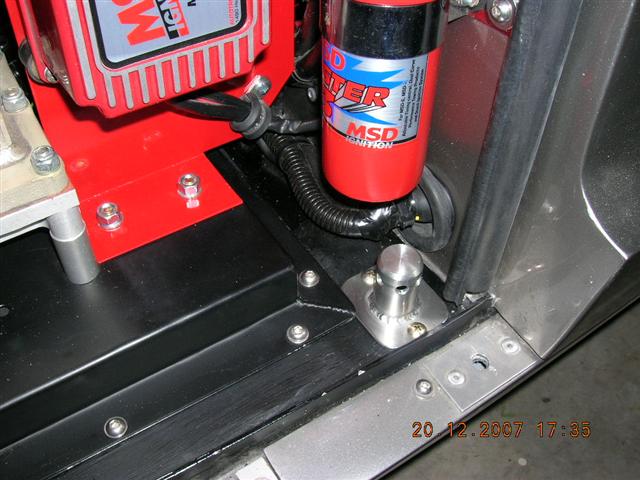
Now, fab up mounting plates as required to weld to the vent stack.
Weld them up, use a Scotch Brite pad to clean them up and powder coat them clear.
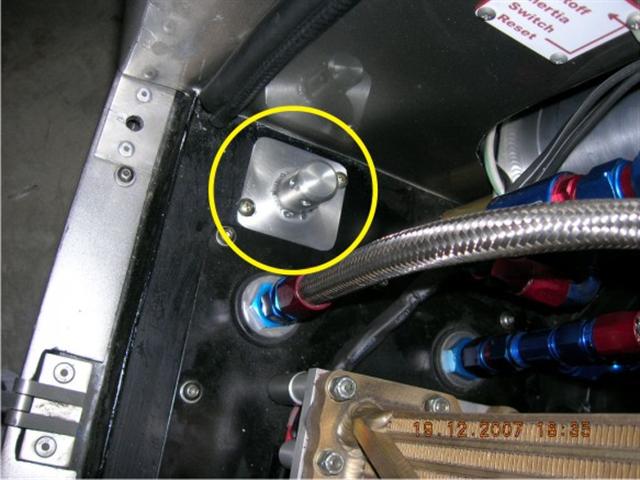
Install them using sheet metal screws and you are done. This is not a 100% cure all but it helps a great deal.
The problem that this fix addresses is one where fuel vapors are down in the sponson area around the fuel tanks. Obviously, you need to make sure all your hose clamps are tight and there are no leaks. However, if you should happen to spill fuel during fill up some can and likely will get into the sponson area which has a direct path into the cabin. These vents will help.
The first thing you need to do is make a vent hole up front. I don't have a photo for this because I forgot to shoot one before I put the car back together but follow my verbiage and you'll figure it out.
Release the Hartswell latches on the front clamshell. Lift the rear of the clamshell up and forward enough to gain access to the large plastic plug at the top of the tub to the outside of the filler cap just in front of the door on each side of the car. You may need to remove the windshield wiper blade to do this. Drill a ½ inch diameter hole in this plug. This will allow air into the sponson from the front of the car.
At the rear bulkhead area study where to locate the vents detailed below. There are reinforcement panels and such to look out for. The point is that you don't want to interfere or drill into anything especially the fuel tank that is in the way.
This may a good time to note that all you really have to do is drill a vent hole back here and be done but these aluminum vents look cool.
Drill a hole of sufficient size to use a chassis punch to make a big hole. I used a 7/8 inch punch.
Next, I made the vent stack from a piece of 1 inch dia aluminum rod by drilling a ¾ inch hole up the center on a lathe and then turned a 7/8ths collar on the open end. Then using a V-Block, I drilled six holes around the top as shown below.
Now, fab up mounting plates as required to weld to the vent stack.
Weld them up, use a Scotch Brite pad to clean them up and powder coat them clear.
Install them using sheet metal screws and you are done. This is not a 100% cure all but it helps a great deal.