
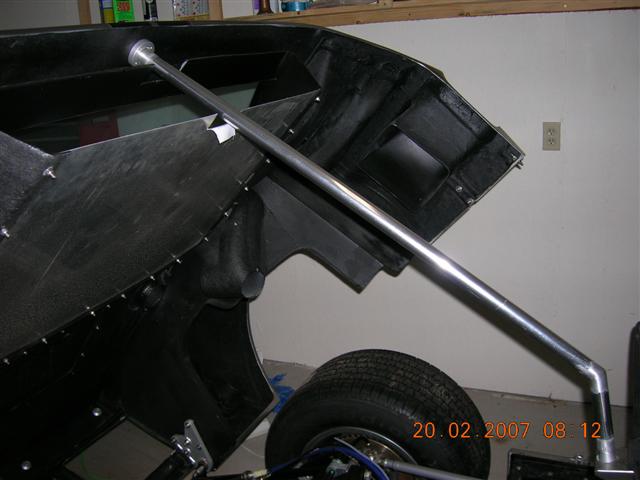
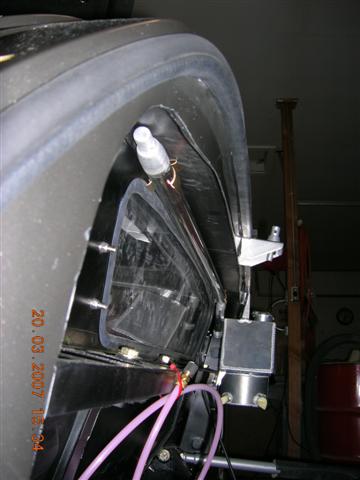
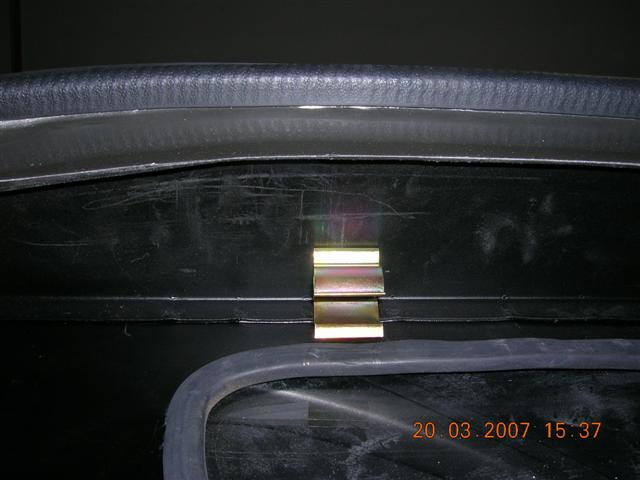
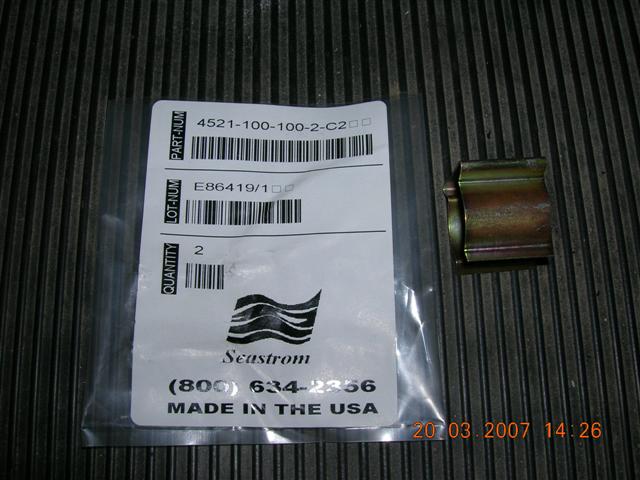
The following are the photos, drawings, and details of how to make a rear deck prop rod for the SPF GT40. It is very similar to the one developed by Dynamic (OH) in shape but it has several additional advantages. It is made from thin wall aluminum tubing and has a total weight of only 12 ounces. Because of its' size and weight, it will easily fit securely above and behind the bulkhead window using spring clips allowing it to travel with the car.
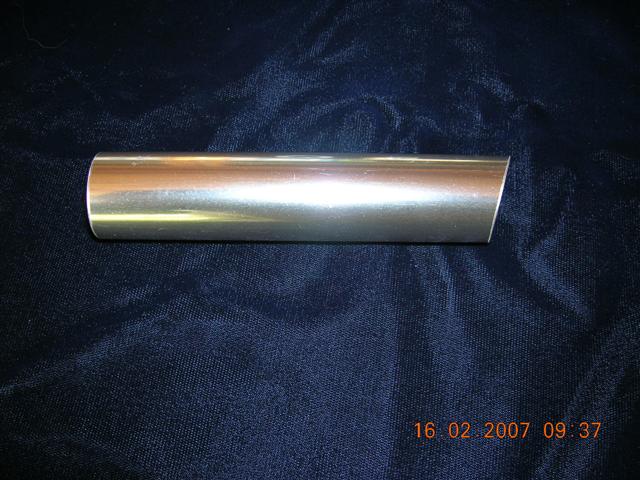
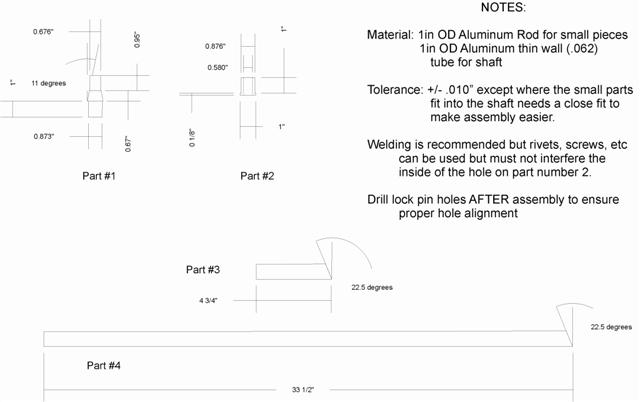
Another option is to make it with smaller diameter tubing (requiring redesign of the end fittings). I chose 1” OD tubing to give it a more substantial 'look”, but it is only personal preference. Also one could make this without the tapered section on the top piece. I could have made a shouldered piece which would have served the same purpose but (just like the locking holes, see below), the deck would be loose in anything but the most calm of days.
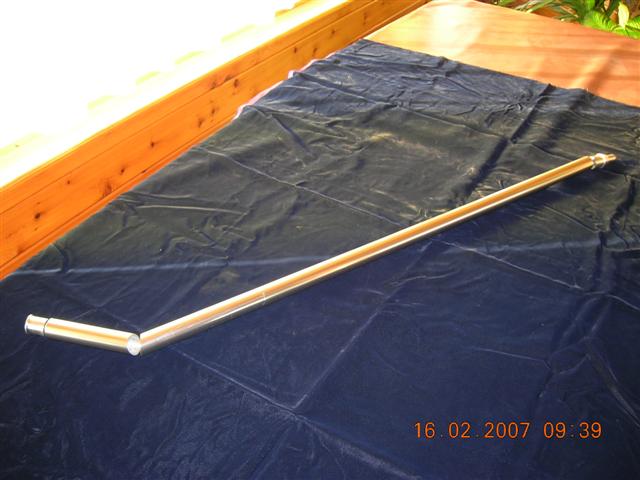
I recommend welding the parts together for a more secure final assembly but screws, rivets, roll pins, etc could be used for the end pieces. The tubing has to be welded (unless it is put in a tubing bender to achieve the required 135 degrees of angle between the two ends). If fasteners are used instead of welding, remember that they can not extend into the ID of the of the lower piece that fits over the part that extends out of the roof of the car.
DO NOT pre-drill the locking pin holes until the unit is fully assembled. The alignment of these holes is critical for a nice close fit. Once the unit is welded and laying squarely on a drill press, drill the holes to the proper size. Not doing it this way will require oversized holes. The purpose of this prop rod (beyond maintenance of the engine) is to securely hold the deck from wind gusts while open. Sloppy holes will defeat the purpose.


The prop fits perfectly above the rear window using the clips show below. It's easy to get to and is out of the way.

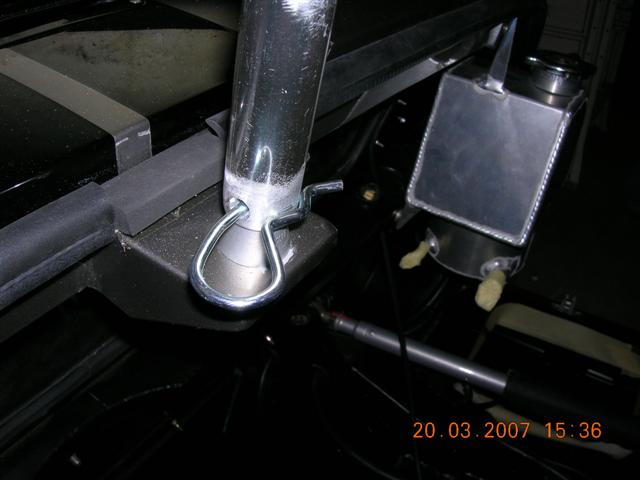
Another option is to make it with smaller diameter tubing (requiring redesign of the end fittings). I chose 1” OD tubing to give it a more substantial 'look”, but it is only personal preference. Also one could make this without the tapered section on the top piece. I could have made a shouldered piece which would have served the same purpose but (just like the locking holes, see below), the deck would be loose in anything but the most calm of days.
I recommend welding the parts together for a more secure final assembly but screws, rivets, roll pins, etc could be used for the end pieces. The tubing has to be welded (unless it is put in a tubing bender to achieve the required 135 degrees of angle between the two ends). If fasteners are used instead of welding, remember that they can not extend into the ID of the of the lower piece that fits over the part that extends out of the roof of the car.
DO NOT pre-drill the locking pin holes until the unit is fully assembled. The alignment of these holes is critical for a nice close fit. Once the unit is welded and laying squarely on a drill press, drill the holes to the proper size. Not doing it this way will require oversized holes. The purpose of this prop rod (beyond maintenance of the engine) is to securely hold the deck from wind gusts while open. Sloppy holes will defeat the purpose.
The prop fits perfectly above the rear window using the clips show below. It's easy to get to and is out of the way.