
Sorry, I'm working on this thread so if you see problems with it hopefully it's something I'm working on.
I hope you find this useful or at least thought provoking. Please PM or email me if you have any question or comments.
I guess I can thank my dealer for this one even though I wasn’t too happy with them at the time. When I went to pick up my car (SPF GT40), what I found the first time I opened a door was water all over the interior. They had just washed the car in preparation for detailing.
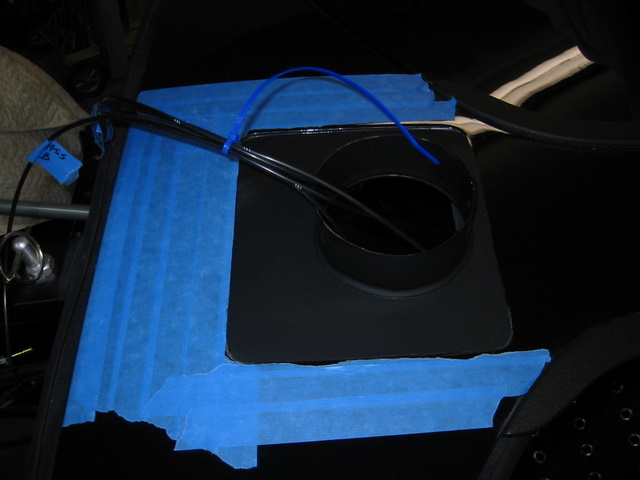
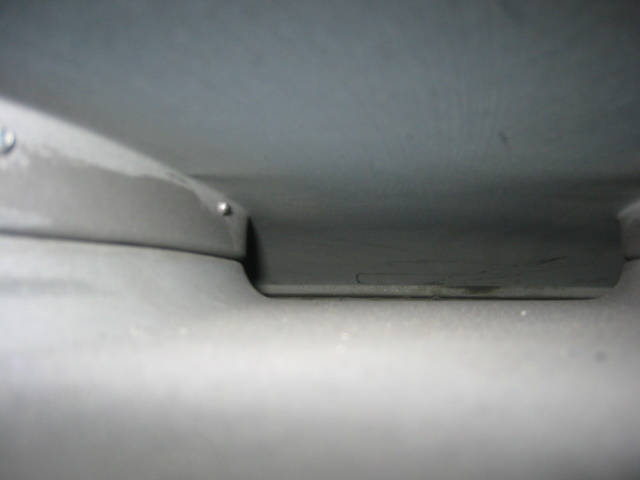
Ever since that day I’ve been looking for ways water might enter the car (not just the interior). Because the car was not moving at the time I looked primarily at the top door seals and the roof vent. At least for now I’m concentrating on the roof vent which you will recognize in fig. 1.
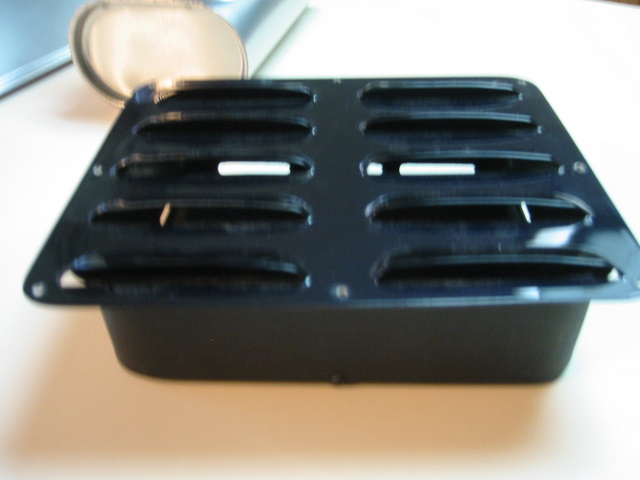
Fig. 1
It is only necessary to remove the six screws and the louvered vent to do this modification. Do NOT run out and remove the small ABS vent box beneath it. The vent box is very delicately held in place with some sort of seam sealer and tape and of course the tiny drain tube. It would be best not to put too much force on it. I’m still working on the best way to re-install mine.
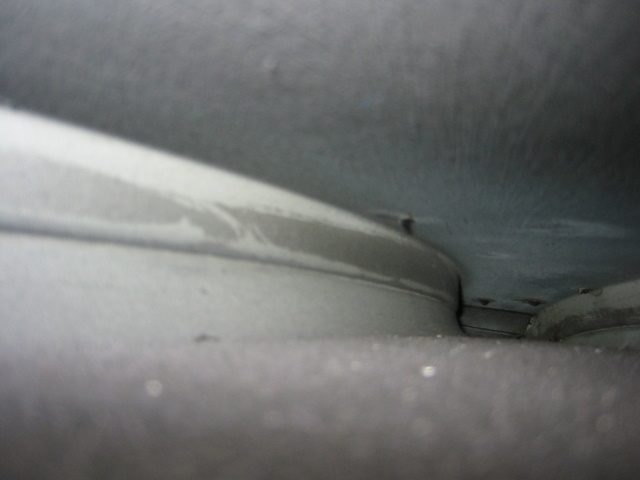
Ok, put yourself in the place of some water that has just come through the louvers in the top of your car and you have your choice of going out that little hole in the back of the vent box Fig. 2 or the five big slots at the front Fig 3.
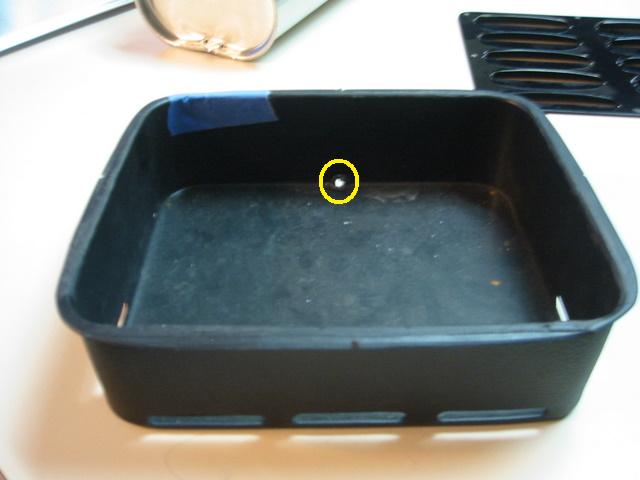
Fig. 2
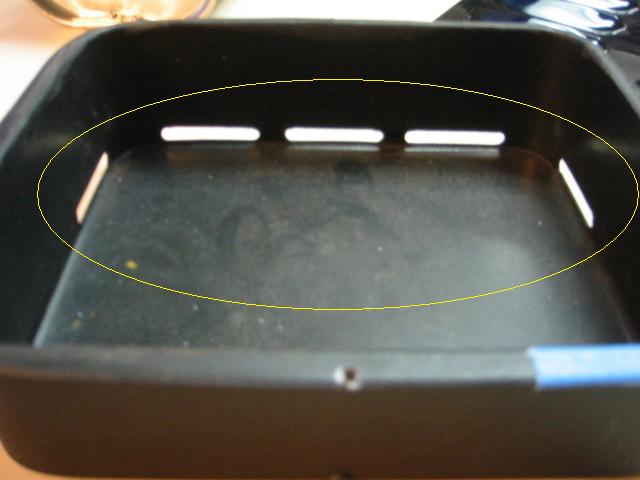
Fig. 3
Well I think I know which one I would use. What I did was look for a way to keep air flowing through the vent box while directing the water to the back of the box and out the drain tube. By the way please ignore the blue tape it holds a broken edge from coming apart.
I came up with two designs, both very similar and easy to do. I mocked them up using some white foam board I picked up at the local craft store. If I were to build one of these I would make it out of 1/8” ABS the same material the vent box is made out of. ABS glue is available at almost any hardware store. Black sewer pipe is made out of ABS. You could also make it out of anything you can get to stick to the vent box that is waterproof.
Try too only use enough glue to hold the pieces in place and seal the edges as the vent box is very thin from being vacuum formed. Too much glue will soften the walls of the vent box and the glue lines may show through.
The first piece I made fits against the top front edge of the vent box and slops down and back far enough to deposit any water behind the two vent slots in the sides of the box (at least 3 1/2”) Fig. 4 and 5.
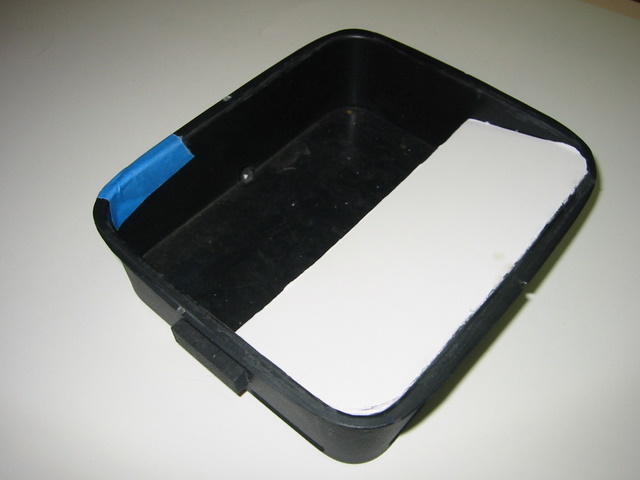
Fig. 4
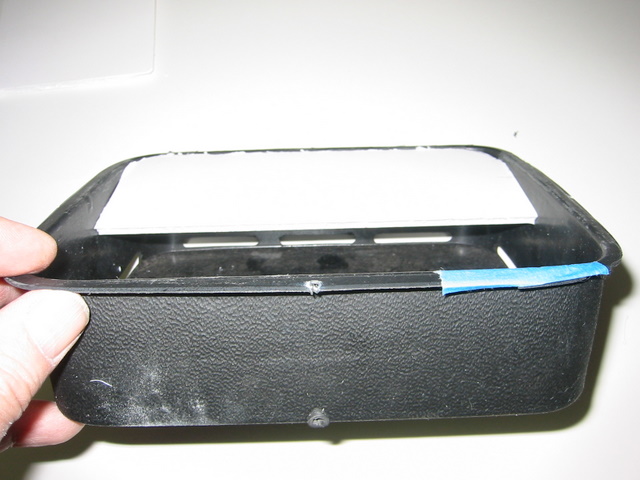
Fig. 5
The bottom piece is more a matter of taste. The first one I made slopped up and forward from the bottom rear of the vent box and up under the top piece leaving enough space for air to flow above it and below the top piece. The entire cross sectional area of the front air slots is only amounts to 1.4 square in. so you don’t need much of a gap. I added a small dam at the top lip of the bottom piece to keep any water wanting to sneak up, over and out the front of the box from doing so Fig. 6, 7 and 8.
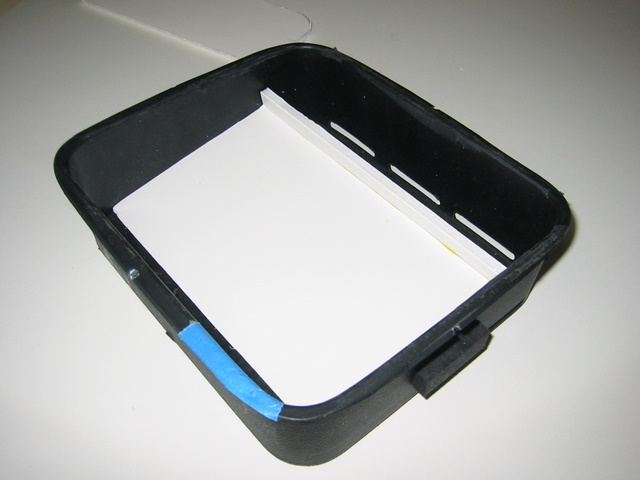
Fig. 6
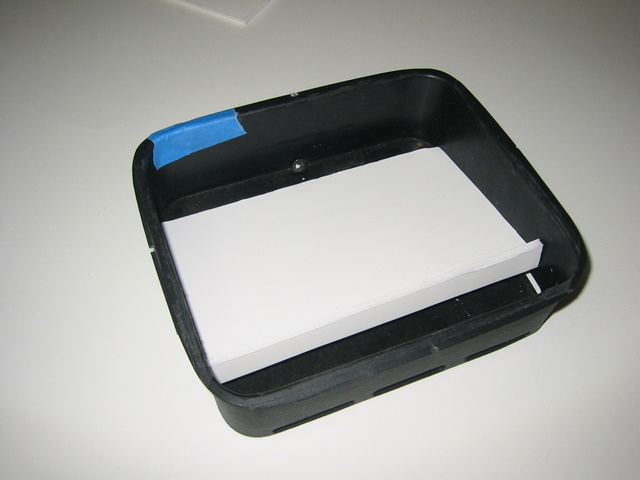
Fig. 7
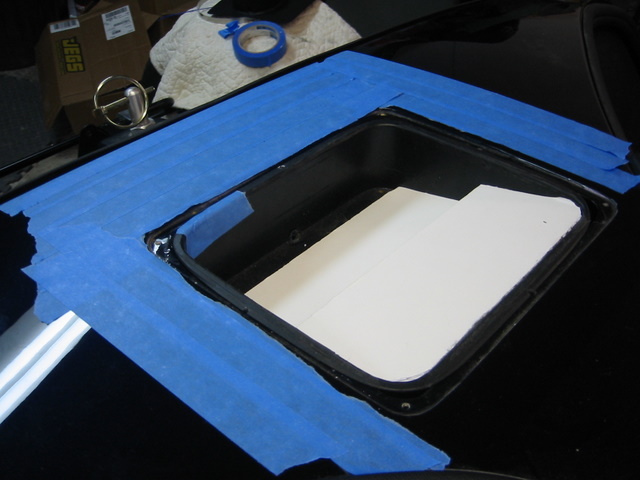
Fig. 8
The other design was just a vertical wall Fig. 9 tucked just under the top piece which remained unchanged. The advantage here is the amount of water storage as the drain tube is very small.
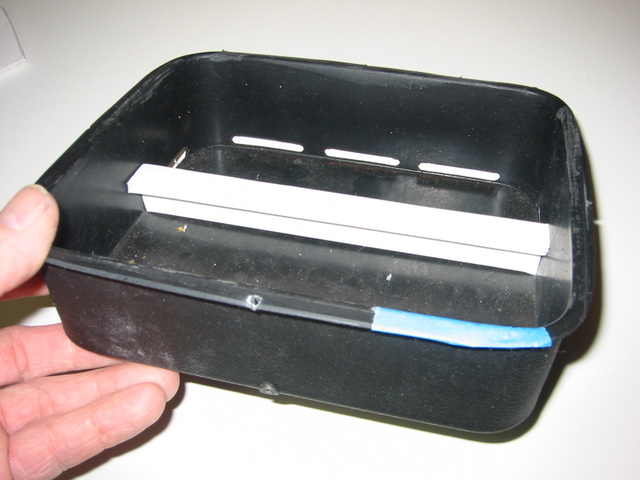
Fig. 9
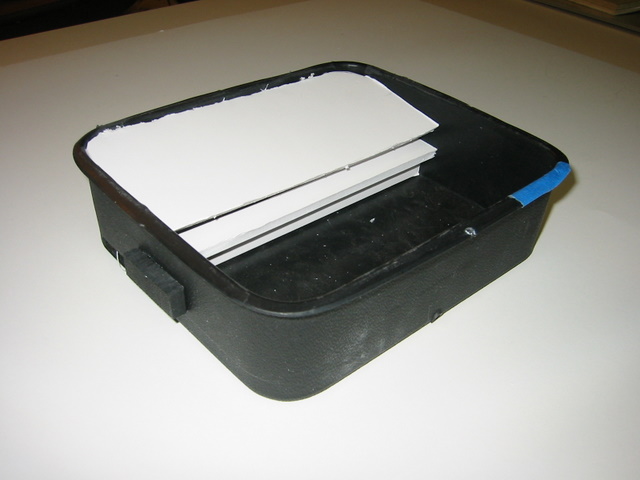
Fig. 10
Unless Superformance has changed the way they build the vent boxes ever owner of a SPF GT40 should look into doing something similar to what I showed here.
So far this is one of those projects that I should have stopped at versions 1 or 2. I’m now on 7.5 and it’s not nearly as simple and elegant. My hope would be that Superformance implements something similar so no one else winds up sitting water.
<?xml:namespace prefix = o ns = "urn:schemas-microsoft-comhttp://www.gt40s.com/forum/ /><o:p> </o:p>[/FONT]
*
[FONT=Weather]*
<font face=" /><o ></o>
></o>
Sneak peak of Version 7.5
 <o></o>
I told you it wasn’t as simple or as elegant. Now where was that wood stove? I guess it’s back to the drawing board.<o></o>
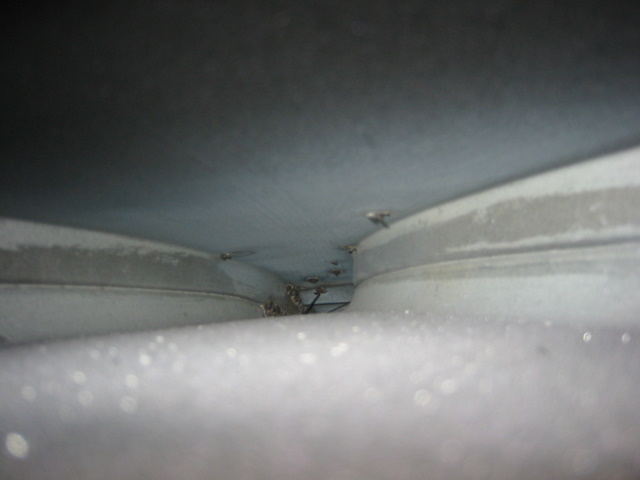
Just some additional interesting information. These are some pictures of the gap between the ceiling and the roof from the hole left when the vent box is removed.
Looking forward.<o></o>
Looking left at the top of the driver B pillar (someone needs welding lessons)
<o>
 </o>
</o>
Looking right at the top of the passenger B pillar.
I found a great tool for poking around inside the car. The only thing it lacked was a way to record the video. It’s made by Ridgid and it’s called a See Snake. It’s a small hand held video display with a video camera and lights out on the end of a long goose neck. I browed the one in the picture but as soon as they add video out I’m getting one.

I hope you find this useful or at least thought provoking. Please PM or email me if you have any question or comments.
I guess I can thank my dealer for this one even though I wasn’t too happy with them at the time. When I went to pick up my car (SPF GT40), what I found the first time I opened a door was water all over the interior. They had just washed the car in preparation for detailing.
Ever since that day I’ve been looking for ways water might enter the car (not just the interior). Because the car was not moving at the time I looked primarily at the top door seals and the roof vent. At least for now I’m concentrating on the roof vent which you will recognize in fig. 1.
Fig. 1
It is only necessary to remove the six screws and the louvered vent to do this modification. Do NOT run out and remove the small ABS vent box beneath it. The vent box is very delicately held in place with some sort of seam sealer and tape and of course the tiny drain tube. It would be best not to put too much force on it. I’m still working on the best way to re-install mine.
Ok, put yourself in the place of some water that has just come through the louvers in the top of your car and you have your choice of going out that little hole in the back of the vent box Fig. 2 or the five big slots at the front Fig 3.
Fig. 2
Fig. 3
Well I think I know which one I would use. What I did was look for a way to keep air flowing through the vent box while directing the water to the back of the box and out the drain tube. By the way please ignore the blue tape it holds a broken edge from coming apart.
I came up with two designs, both very similar and easy to do. I mocked them up using some white foam board I picked up at the local craft store. If I were to build one of these I would make it out of 1/8” ABS the same material the vent box is made out of. ABS glue is available at almost any hardware store. Black sewer pipe is made out of ABS. You could also make it out of anything you can get to stick to the vent box that is waterproof.
Try too only use enough glue to hold the pieces in place and seal the edges as the vent box is very thin from being vacuum formed. Too much glue will soften the walls of the vent box and the glue lines may show through.
The first piece I made fits against the top front edge of the vent box and slops down and back far enough to deposit any water behind the two vent slots in the sides of the box (at least 3 1/2”) Fig. 4 and 5.
Fig. 4
Fig. 5
The bottom piece is more a matter of taste. The first one I made slopped up and forward from the bottom rear of the vent box and up under the top piece leaving enough space for air to flow above it and below the top piece. The entire cross sectional area of the front air slots is only amounts to 1.4 square in. so you don’t need much of a gap. I added a small dam at the top lip of the bottom piece to keep any water wanting to sneak up, over and out the front of the box from doing so Fig. 6, 7 and 8.
Fig. 6
Fig. 7
Fig. 8
The other design was just a vertical wall Fig. 9 tucked just under the top piece which remained unchanged. The advantage here is the amount of water storage as the drain tube is very small.
Fig. 9
Fig. 10
Unless Superformance has changed the way they build the vent boxes ever owner of a SPF GT40 should look into doing something similar to what I showed here.
So far this is one of those projects that I should have stopped at versions 1 or 2. I’m now on 7.5 and it’s not nearly as simple and elegant. My hope would be that Superformance implements something similar so no one else winds up sitting water.
<?xml:namespace prefix = o ns = "urn:schemas-microsoft-comhttp://www.gt40s.com/forum/ /><o:p> </o:p>[/FONT]
*
[FONT=Weather]*
<font face=" /><o
></o> Sneak peak of Version 7.5
></o>I told you it wasn’t as simple or as elegant. Now where was that wood stove? I guess it’s back to the drawing board.<o
></o>Just some additional interesting information. These are some pictures of the gap between the ceiling and the roof from the hole left when the vent box is removed.
Looking forward.<o
></o>
Looking left at the top of the driver B pillar (someone needs welding lessons)
<o
>
>Looking right at the top of the passenger B pillar.
I found a great tool for poking around inside the car. The only thing it lacked was a way to record the video. It’s made by Ridgid and it’s called a See Snake. It’s a small hand held video display with a video camera and lights out on the end of a long goose neck. I browed the one in the picture but as soon as they add video out I’m getting one.
Last edited:


