Headliner to Roof Connection

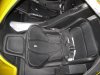
For you guys with an interior, how are you mounting the ceiling/headliner of the car to the body roof?

Bonding looks like it would be the cleanest way to do it, but this would mean that if the body ever has to be removed in the future (e.g. for servicing the windshield wiper motor or for removing the fuel tank), the body, ceiling and roll bar would all have to be removed in one piece. . .
 

Attachments

  • IMG_20150526_095808944.jpg
    IMG_20150526_095808944.jpg
    169.9 KB · Views: 305

Fran Hall RCR

GT40s Sponsor
High quality automotive double sided adhesive tape or industrial hook and loop and then the pinch seal weatherstrip helps too.
oOherwise low profile rivets and drill them out if need be.
 

PeteB

GT40s Supporter
I used #10 button head machine screws, with the head on top, each just long enough to get a nylock nut on the bottom. I'm glad I had it screwed on, not bonded, as I've had to unbolt it several times.
 
I used #10 button head machine screws, with the head on top, each just long enough to get a nylock nut on the bottom. I'm glad I had it screwed on, not bonded, as I've had to unbolt it several times.

What did you do about the connection just under the windshield?
 
If you have a duct for the vent (as several builders do), you don't need to seal the area under the windshield. My car just has upholstery material wrapped over the edge with no special sealing needed.

IMO, the sealing around all portions of the roof panel that is necessary without a sealed duct from the outside vent opening to the engine compartment is difficult, but vital to not only keep water and exterior air from leaking into the cockpit, but also to keep heat and fumes from the engine compartment from the interior.

That's why I think the sealed duct approach is so much better- it decouples the sealing issue from the roof, ensures that no engine compartment heat or fumes can get to the interior via the opening, and makes the sealing around the edges of the roof panel non-critical.

Jack Molleur produces a duct that fits really well, from a mold made by Wayne M. Several cars have had these installed- the duct fits cars with the tub, or the traditional roof panel.
 
If I have this correct it is a tunnel that runs the length between the roll cage bows. This part gets bonded to the roof of the body. There is a similar part in my build thread.
 

Michael Fling

Supporter
Place duct tape on the underside of the roof. Hot glue foam to the duct tape to the desired tunnel shape. It goes between the roll cage and should not extend below it. It indeed has a bow. Remove the spyder and set it uo 90 degrees. Apply fiberglass. After it hardens, remove it from the roof/duct tape. Remove foam... acetone can be used to dissolve excess. Sand and refine as needed. Verify shape and then bond/fiberglass the new tunnel to the roof.

IMG_6656.jpg


IMG_6653.jpg


Because this is solid, air leaks are not an issue. I am running vents from this tunnel into the cabin. This tunnel supplies air to my cold air box.

IMG_6657.jpg
 
Nice. I wish I would've done that.

Yep - it's a good idea, it'll keep outside hot air from migrating past the roof trim panel into the cabin. Even with A/C the interior can get quite warm in the summer. Wish the factory would have done it.....
 
Fran: Could you please post a part no. or source for the "pinch seal weatherstrip"?

Pete: What are you using to hide the machine screw heads? Are these being covered with weatherstripping, or are they visible when the door is open? I assume they don't protrude far enough to interfere with the door seal?

Jack: What are you charging for the duct? (please PM me if you prefer).
 

PeteB

GT40s Supporter
I'm not covering the screw heads. Button heads don't stick up very far and I've got the same screws all over the car, so it doesn't look bad.
 
I agree, go with the sealed duct approach.

My ceiling panel is held in place at the front by the A-pilliar covers. Then I trimmed the ceiling panel to follow the contour of the door openings and used an edge molding to hold it together. Its a clean look and a solid installation. Its also easy to remove the ceiling panel for maintenance.

I used a rubberized edge molding with a metal core and an internal gap that is a little wider to capture the thickness of both the ceiling panel and the body's doorway.
 

Attachments

  • IMG_5250.jpg
    IMG_5250.jpg
    201.4 KB · Views: 307
  • IMG_5282 small.jpg
    IMG_5282 small.jpg
    293.5 KB · Views: 291
Back
Top