Floor swage heights and datum detals

Hey all,

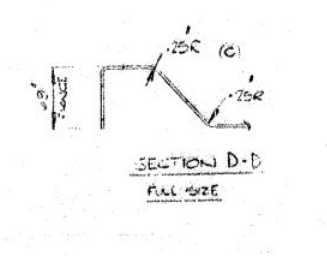
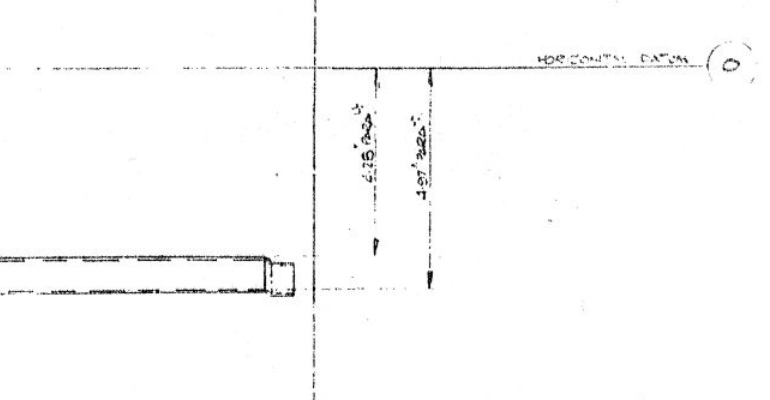
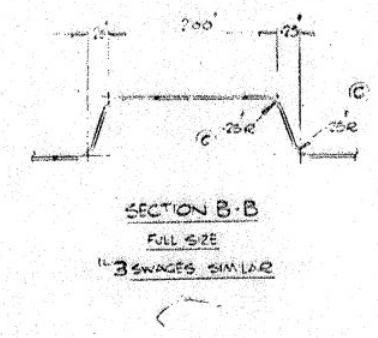
Starting at drawing up the floor from plans GT40P-1-2061 and GT40P-1-2061A but having trouble reading a couple of the dimensions. Would anyone be able to tell me the height of the "3 Swages Similar" in section B-B which i assume is a maximum depth of the floor panel overall. Also, is Section D-D the outer most edge on the RH and LH side of the floor/vehicle? If so, the height of this should also be the height of the swages in section B-B (?), but i cant make out the writing. 3rd an final question; The dimensions for the horizontal datum for the overall floor height (on drawing 2016A). Thankyou all

Section B-B:
Section_B-B.png


Section D-D
Setion_D-D.png


Floor height horizontal datum:
Floor_height.png
 
Height is 4,25 or 4,26" and 4,97", that will give you the height for all except for the one under the seatbase which is 0,22"

You can also have a look at the floorpanel in the enginebay and the central tunnel. If i recall right there are some dimensions which deviates for the outer profile, you need to pick one of them and stick with that...

Another tip is to dump the drawing into a cad software and scale it. So you can measure and verify.
 
That's what I read them as, 4.25/4.26 and 4.97 and that is to the top of the panel, not the bottom of the panel.
If you are referencing photos of other monocoques, be careful to make sure they are original ones, and not later reproduction cars as some of the reproduction ones have omitted 1 or 2 of the ribs in the floor, particularly the one at lowest point of the seat base.

I have also seen some photos where this swage/rib has been modified and reversed to gain even more seat clearance. A dropped pan if you will, for the taller driver.
 
  • Like
Reactions: lgs
Thanks for the info guys.

Here's what I have so far as a first attempt. Its bit rough with a few things to be desired, but all the major dimensions and profiles are there. I'll likely have to redraw the part eventually when I become a bit more proficient at solidworks. I ended up drawing a form tool for the profiles of section B-B and E-E, which also led to making a big tool. I dont know if this was the right approach for this part, as solidworks wont let you overlap forming tools, so that's why I ended up building one big tool. This caused problems down the line as making sheet metal operations on areas that were within the pressed part would not work.

Before starting the drawing I started out thinking about how I would go about making the part in real life, which influenced how I made the part - i.e., from a form tool. Making the profiles and then running them out on a power hammer (or pullmax) would give the ribs, but getting the shape around the the edge at grid reference 10"- 20" was another animal - Would it be safe to assume this is just done by hand? From the few images I have of the floor panel, it looks like the ribs are drawn first on the sheet.

Some areas of improvement in the current part are:

Around the transition from the swages/ribs to the outer profile - I wasn't quite sure how to do this in solidworks. I also see that the transition from the lowest rib (far rear - circled in purple) to the outer profile is shown in the image below (reference: GT40 workshop). The transition at the far front is sharper (blue), however the pair in the middle look to be on the plans more gradual around the bend (green).

I also wasn't quite sure about the jog at the rear, if it should follow the profile around the edges, on the plans it does look like there is a cut there. Again, not sure how to get this done on solidworks (a jog on a profile).

open to critique :)

1.jpg
2.jpg


Large form tool.
3.jpg


profile transitions
4.jpg


6.jpg
 
Looking good Tony. This is one of the few parts that I have drawn as a solid body and not a sheet metal part. I just using it for its datum and set out purposes in the CAD model.

Making it will certainly be a challenge and it something that I have given some thought to.

The rear swage is to allow GT40P-1-2031 to join onto it.

Ryan.
 
I’m not sure what chassis is in the last photo. I’m guessing it is a new recreation as it looks too pristine to be an original. Based on that I would not use that as a reference for what the originals were like. I have radiuses all my corners as in my mind sharp joints/corners are stress risers that will lead to week spots, manufacturing difficulties, metal tears, cracking and potential rust spots.
 
Back
Top