Dusty's SLC Build

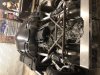
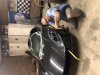
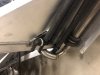
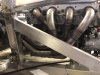
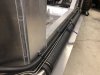
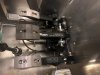
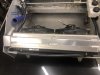
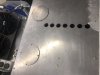
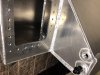
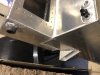
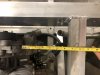
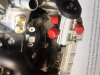
Earl sold me his previously started SLC. The car arrived via transport to my house in the Fresno area just days ago. I only found out about these cars recently while contemplating the purchase of a used factory five GTM.

I feel fortunate to find this car that Earl was selling. He already has done so much and the work is excellent
 

Attachments

  • 4343330A-E1F7-4B83-85A2-3B34AA017ED6.jpeg
    4343330A-E1F7-4B83-85A2-3B34AA017ED6.jpeg
    459.2 KB · Views: 746
  • 1FCA9373-41F8-47C1-887A-B5455ABBE189.jpeg
    1FCA9373-41F8-47C1-887A-B5455ABBE189.jpeg
    362.5 KB · Views: 727
  • 07FD7908-4471-41AE-B472-14A69BEF0EA7.jpeg
    07FD7908-4471-41AE-B472-14A69BEF0EA7.jpeg
    234.3 KB · Views: 727
  • 96727496-8BC5-4F40-8354-D3EAE10A4581.jpeg
    96727496-8BC5-4F40-8354-D3EAE10A4581.jpeg
    313.8 KB · Views: 715
  • 75D0759B-F749-496E-AE99-BBD028528BC4.jpeg
    75D0759B-F749-496E-AE99-BBD028528BC4.jpeg
    285.8 KB · Views: 718
  • 70A6EAE7-AFF9-4CA5-B8F7-62E563D744F8.jpeg
    70A6EAE7-AFF9-4CA5-B8F7-62E563D744F8.jpeg
    310.5 KB · Views: 683
  • 0B34BF82-05B0-40A7-819B-C7CF6303B6B0.jpeg
    0B34BF82-05B0-40A7-819B-C7CF6303B6B0.jpeg
    318.7 KB · Views: 709
  • 996924F2-15F3-4373-A688-E9CF14C58DD5.jpeg
    996924F2-15F3-4373-A688-E9CF14C58DD5.jpeg
    346.7 KB · Views: 746
I want to drive this car all the time. May or may not take it to a track. It has the 376/530 gm crate LS in it and the lambo transaxle.
I have already read many of the builds on this forum and on slc WIKI. Im ready to get to work. I post here because I know the forum members can help me solve problems and get driving this thing as soon as possible.

As seen in the pics Earl has already plumbed the radiator, brakes, and AC systems. His fab work is excellent. The headers are way nice. I will send them in for ceramics. the tig work on the stainless radiator hard lines is also top notch. I love what Earl did with the AC. he even finished all the brake and clutch hard lines. I need to lay down some heat shielding but these things are complete.

there are some things a need to finish...see pics. The fuel tank work Earl did is trick. I don't want a surge tank and Earl has started a great solution...
 
Pics of fuel tank mod
 

Attachments

  • 0C6106D6-E96B-47A5-91CB-3417FD017AE1.jpeg
    0C6106D6-E96B-47A5-91CB-3417FD017AE1.jpeg
    246.5 KB · Views: 791
  • 8062FAFD-F6A5-4D3D-B631-D10E8DB86DAF.jpeg
    8062FAFD-F6A5-4D3D-B631-D10E8DB86DAF.jpeg
    317.5 KB · Views: 697
  • BCEA3579-A4F7-434B-B535-5592789737BD.jpeg
    BCEA3579-A4F7-434B-B535-5592789737BD.jpeg
    271 KB · Views: 691
  • 4F1085D5-46D6-4C85-B0E9-B0208E394BA7.jpeg
    4F1085D5-46D6-4C85-B0E9-B0208E394BA7.jpeg
    348.6 KB · Views: 655
  • 2C101A4F-0A1A-4D42-A733-D0FFE462F93D.jpeg
    2C101A4F-0A1A-4D42-A733-D0FFE462F93D.jpeg
    398.6 KB · Views: 684
Earl welded the sump to the drivers side of tank. the sump sits lower than the main tank. the size of the sump tank is perfect to fit the holly hydromat Earl built the sump tank around. the hydromat pluming exits out the side of the sump tank and from there goes to the fuel pump. as the sump is lower than the main tank it will have gravity to fill it. in addition to that I will plump the regulator return to the sump tank and from there the sump will drain into the main tank.

I found some 3M sealant online that is used to seal aircraft wing fuel tank access ports. I will use this to bolt the access panel to this sump tank. 5 oz of this stuff is $40.
 
See the threaded hole going from the main tank into the sump tank. This is inside of the sump tank. Note that the sump tank has a threaded bung leaving the rear of it. This lines will go to the fuel and will be sucking fuel from the Hydro Matt

I suspect that the one bung on the side of the tank up above the sump tank will be a return for the fuel pressure regulator
 

Attachments

  • 8BF88425-30DB-409B-A8EF-8C560E800D9C.jpeg
    8BF88425-30DB-409B-A8EF-8C560E800D9C.jpeg
    324.8 KB · Views: 663
  • B814F2D7-2BE5-42F4-AAE8-0D7F596B2025.jpeg
    B814F2D7-2BE5-42F4-AAE8-0D7F596B2025.jpeg
    307.6 KB · Views: 639
This tank is a great start and I will be using it. No surge tank for me. The question is this:
1. wouldn't I want to return the fuel pressure regulator bleed off into the sump tank?? And if I did that wouldnt I want to have the surge tank to overflow into the main tank??

So wouldnt I want to drill some holes inside the cavity of the sump tank so that there is more flow between the main tank and the sump tank??
Speak up Earl. What you thinking??
 
one more question for the night
I want to run a daily engineering 3 stage dry sump pump/pan. this pump goes where the current ac compressor sits. what brackets are you guys using to put the ac compressor up by the pass side head??? according to the vintage air website Their ac bracket wont fit. by my measurement the compressor will hit the aluminum frame that passes by the pass head.
see the pics
 
See what I mean
According to the diagram from vintage air the AC pump mounted to pass side cylinder head won’t clear this aluminum framing as evidenced by my tape measure. I need to be able to put the AC compressor up by this head so that I can fit the dry sump pump down below where the AC compressor currently resides.
 

Attachments

  • 35DB080B-7A49-4127-8A38-9576BF4DFAAC.jpeg
    35DB080B-7A49-4127-8A38-9576BF4DFAAC.jpeg
    292 KB · Views: 643
  • 45A264CA-2E63-40C9-94F0-7E7637DCC88D.jpeg
    45A264CA-2E63-40C9-94F0-7E7637DCC88D.jpeg
    406.3 KB · Views: 639
  • C20E1EC1-A5A6-4BB6-AE0A-EF20E15635FA.jpeg
    C20E1EC1-A5A6-4BB6-AE0A-EF20E15635FA.jpeg
    725.7 KB · Views: 632
oops I was in a hurry on that measurement. Perhaps it will fit

is anyone running the head mount for the ac unit?
 

Joel K

Supporter
Hi Dusty, welcome to the forum and thanks for sharing the photos. I don’t live too far from Earl and had a chance to see his car while I was waiting for my kit to be delivered. Super nice guy and an excellent fabricator.

Looking forward to seeing your progress.
 

Joel K

Supporter
See what I mean
According to the diagram from vintage air the AC pump mounted to pass side cylinder head won’t clear this aluminum framing as evidenced by my tape measure. I need to be able to put the AC compressor up by this head so that I can fit the dry sump pump down below where the AC compressor currently resides.

Looks like Johan is using a similar dry sump pump and mounted the AC compressor on top on the passenger side. He custom made a bracket.

Here is his build thread...

 
thanks joel K. that's exactly what I need. if just I could buy that instead of having to make it...

Another option is to use this Aviad system that puts the sump pump by the head. but id rather use a daily system with the pump down low next to the block. here is a pic of both the head mount ac pump as referenced by Joel as well as the head mount sump pump as made by AVIAD
 

Attachments

  • RightFront[2].jpg
    RightFront[2].jpg
    77.3 KB · Views: 542
  • FrontAccessories.jpg
    FrontAccessories.jpg
    77.4 KB · Views: 634
  • untitled.png
    untitled.png
    538.7 KB · Views: 651
  • Aviaid.jpg
    Aviaid.jpg
    83.8 KB · Views: 602

Joel K

Supporter
I would imagine you could search high mount LS alternator brackets and find something that works.

Here is one for the Sanden compressor that may do the job, but there are no dimensions...


Ian Anderson

Lifetime Supporter
Question here for the un-initiated.
Why do you not drive the oil pump off the accessory belt instead of having a Gilmer belt as an additional item in the system?
I see it if the Gilmer belt breaks you only know about it when the engine makes no oil noises.
Whereas if the main belt breaks the charge / ignition light immediately comes on to warn you to turn off.

I could also see difficulties in getting the pump to prime the higher it is - at sump level makes more sense to me.

But I have been wrong before :)


Also with the firewall tilting back towards the top there is less space higher up, so low mounting would give more clearance.

Ian
 
I have been playing on the Internet on and off all day. There are plenty of hi mount AC brackets for LS engines in the tuck and F body belt configuration. Unfortunately I cannot find a high mount bracket for the LS accessory belt configuration. Vintage air compressor makes a bracket but the bracket is so wide that it won’t work. I did find one company that Makes a bracket solution that mounts the AC compressor more towards the middle of the engine by the throttlebody but this bracket also includes a different alternator that is also mounted high up. I’ll keep looking.

As far as the high mount dry sump option goes I’d rather illuminate the hoses that go from the oil pan to the dry sump pump. Daily engineering has just such a pump. Just less stuff to go wrong.

I have been using the same Gilmer belt for the last eight years on my rock racer and it has never failed. That Belt is exposed to lots of dirt and grime and high rpm’s. Those Gilmer those belts are tough.

That said I am really close to just buying the head mount three stage dry sump system from AviAd
 

Brian Kissel

Staff member
Admin
Lifetime Supporter
Dusty,
Take a look here.
These guys have a setup for Daily dry sump currently. They custom build all of their stuff one at a time. This illustration shows P. S. also, which is not needed. I'm thinking it might be worth a call to them. When I get to that stage of the game, that is who I was going to call first. If you do contact them, please let us know the results.

Thanks
Regards Brian
 

Ken Roberts

Supporter
Here is one made by Holley that fits the small SD7 compressor, high mounted and on the Corvette belt line (short). I guess it's much the same as the Vintage Air setup you mentioned in post #9 unfortunately.


Last edited:
Back
Top