Intake Saddle

Does anyone have any suggestions for how to build a saddle to support the back of the intake? (see arrow in picture).

Thanks for any tips!
 

Attachments

  • IMG_20150101_092504960.jpg
    IMG_20150101_092504960.jpg
    259.5 KB · Views: 414
You mean one of these? It's made of aluminum, one piece and secures to the spider frame with small socket head cap screws. It's my design but I may reproduce them if enough demand exists.
 

Attachments

  • image.jpg
    image.jpg
    124.7 KB · Views: 381
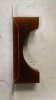
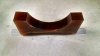
There are probably better ways to do this, but here's what I wound up doing for the intake saddle:

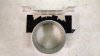
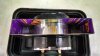
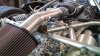
The intake tube needed to be shortened to fit the car. The cut portion of the tube made for a handy mold, when combined with some old cereal boxes and lots of electrician's tape.

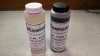
The two-part urethane rubber compound (16 oz kit of 75-60 is $15 at Molding Rubbers) was about the consistency of epoxy resin (molasses) when first mixed together, so electrician's tape was needed to make a waterproof seal around the cardboard and tube mold.

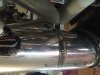
Some 1/8" x 1/2" hardware store flat stock aluminum was bent so that it would be captured by the rubber. Holes were drilled in the middle of the aluminum, to help the rubber fully capture the aluminum (probably this wasn't necessary?)

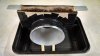
Before pouring the compound into the mold, the mold was sprayed with mold release (Stoner Urethane mold release $10 at Mold Releases). This made it very easy to remove the mold; it pretty much fell off the part once the tape was removed.

The tray was to capture any compound that leaked out (none did) and the popsicle sticks kept the tube from rolling over while the rubber cured.

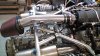
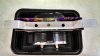
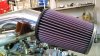
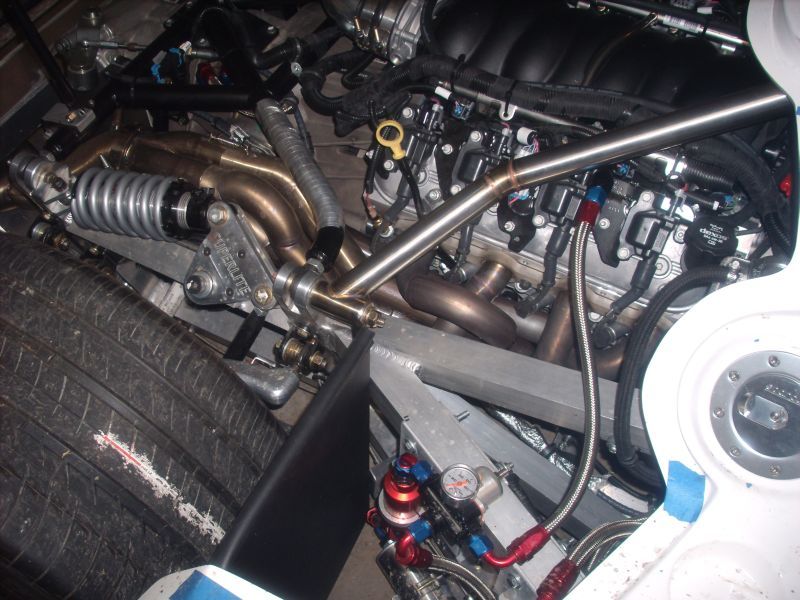
The "ears" of the new mount can be either drilled and bolted to the cross tubes, or fastened with hose clamps, like in the pictures. The hose clamps might not look as good, but they do the job. The sides of the mount are high enough that the tube can't bounce out (the rear clam lid is in the way) and in any case, the tube is stiff enough even without a mount that it won't move too much. The mount just keeps it from falling over time, and reduces the stress on the silicone coupler at the throttle body.
 

Attachments

  • IMG_20150224_163527620.jpg
    IMG_20150224_163527620.jpg
    155.2 KB · Views: 156
  • IMG_20150224_163348522.jpg
    IMG_20150224_163348522.jpg
    199.5 KB · Views: 165
  • IMG_20150224_163430428_HDR.jpg
    IMG_20150224_163430428_HDR.jpg
    183.5 KB · Views: 188
  • IMG_20150224_165610976_HDR.jpg
    IMG_20150224_165610976_HDR.jpg
    194.9 KB · Views: 172
  • IMG_20150224_163442111_HDR.jpg
    IMG_20150224_163442111_HDR.jpg
    163.3 KB · Views: 163
  • IMG_20150225_164940874.jpg
    IMG_20150225_164940874.jpg
    64.1 KB · Views: 164
  • IMG_20150225_164958022_HDR.jpg
    IMG_20150225_164958022_HDR.jpg
    216 KB · Views: 164
  • IMG_20150225_171233895.jpg
    IMG_20150225_171233895.jpg
    287.7 KB · Views: 188
  • IMG_20150225_171342369.jpg
    IMG_20150225_171342369.jpg
    213.5 KB · Views: 157
  • IMG_20150225_171400341.jpg
    IMG_20150225_171400341.jpg
    249 KB · Views: 192

Terry Oxandale

Skinny Man
I always like a "clean" look. Because the filter is only a few inches away from the mounting (saddle) location, I would consider installing a riv-nut in the frame tube, and then insert a 1/4" threaded stud into the riv-nut. Then fabricate a simple tubular spacer to slip over the stud, and then drill a hole in the intake tube (where the stud makes contact), slip this hole over the stud, and with the filter off, attach a screw onto the stud. It sure would look nice, even with a simple aluminum rod, rifle drilled and polished.

If ingesting a loose nut is a concern, use a long bolt (screw) inserted from the intake side, rather than a stud, and then lock-tight it in place in the riv-nut.
 

Attachments

  • ScreenShot1346.jpg
    ScreenShot1346.jpg
    29.3 KB · Views: 156
Last edited:
Back
Top