Walter's RCR40 Build

Hello:
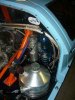
Very sadly and as many of you may know John Lowe passed away not too long after he passed IVA for his RCR GT40. I purchased the car from his widow Jill in September 2020 and have been working on making the car roadworthy ever since. This August I got the car street registered here in Austria (IVA in Austria) - neither entirely trivial nor inexpensive.
The car has impressed me from the start because of the high quality components chosen by John. However, as I learned upon its purchase the car was mostly put together by amateurs like myself and had never really seen the road. Needless to say, it has needed and still needs work - but this is what I enjoy for a hobby as much as driving vintage cars (with the driving being the reward :)

Time permitting I may post progress made in the Build section of this website. I also would like to thank Terry Hennebery for introducing me to the car and getting me going with it - both guiding me out of Maidstone towards the channel and technical information about the car.
Cheers for now
 
Work completed (Nov. 2020 to present, surely incomplete and not exactly in chronological order):

Replace and set up clutch rod (slave cylinder - original broke in Brussels on my way from England to Austria)

Seal off LHS rubber gaiter for the half shaft

replace magnetic switch for fuel return (and rewire to use both tanks at equal level)

modify fuel switch (so that only left or right scavenge pump is on)

install (proper Lucas) rear-view mirror

install speed sensor at the half shaft (rhs) to activate 8-pulse speedo; calibrate speedo

replace all auxiliary belt pulleys (originals failed probably because one pulley had been locked solid upon original installation; during an early test drive the car overheated - that's when I noticed - luckily no further damage)

fit air filters (ITG maximum size possible)

convert to European headlamps (NOS Marchal convex as per original)

straighten out turn signal and emergency flasher circuitry

hook up reverse lamp to ZFQ transaxle

remove front section of roll cage (mandatory for IVA in Austria and now I can drive without helmet :), front section can be refitted for track use if so desired

replace eared wheel nuts by hexagonals (IVA required and easier to remove/refit)

add a license plate holder and reposition plate lighting at the rear (I have an idea of how to fit a plate holder to the front without much modification - but as long as I get away putting it behind the windshield this is what I’ll do for now :)

convert from Schroth pull-down to pull-up harness (this eliminated the use of the heavy steel arms at the side of the seats as per original)

repair wiper circuit - now properly running low and high speed

repair leaks in clutch and brake circuit

install spot lights and covers (original Marchal model as per 68/69 LeMans JW cars; can be used off, as fog lamp or 2nd pair of high beam - depending on 3way switch position ; I used one of the unused circuits (power window) for main current supply to the relays)

re-attach ring gear to flywheel (time consuming but I learned a lot about the car along the way)

install baffle system to LS7 “dry sump” pan

install oil temp sender and gauge

install bake ducts to rear brakes (just simple hoses for cool air near the calipers/rotors, car will mostly be used on public roads)

install ducting to rout air from the side vents towards the engine (as per original for which these ducts target the oil cooler; the LS7 with cats and looped exhaust produces a lot of heat within the clam shell - may have to do more work here)

insulate throttle cable (heat protection, had one melt stuck on me - highly undesirable :)

add more insulation to the clam shell

remedy leaks in the fuel filler area (severe fuel loss under refueling caused by use of improper elbow pipe diameter; plus a loose connector in vent line lhs; I simply installed a fuel hose from the filler down to the fuel bladder - elbow pipes eliminated )

install fuel swirl pot: I use the two original external Walbro/Sytec pumps for supplying the pot and added a third high-pressure Bosch pump (D-8 inlet from pot, D-6 outlet)+ with extra switch and electric circuit (with pump relay) using the power antenna fuse/circuit), pressure valve (keeping the pot at ~5psi to suppress vapour formation) and bypass valve (to avoid excessive pressure in the pot - following recommendations by Brad from Kinsler)

tighten up some of the connections in the original fuel lines

repair and raise the water tank as high as possible

Work to do:

brake cooling to front.
route cool air into cockpit. (I plan to use the two nose openings for both tasks. Using the small NACA ducts for the latter would just increase the chance for more water getting into the cockpit.)
“waterproof“ RCR cockpit (door area, roll bar area at the firewall) - I’m open to suggestions here ;-)
upgrade Quaife ZFQ to current specs
install clam shell hinges as per original (sitting on the shelf)
install eyebrows (sitting on the shelf)
possibly add a rear-view camera (since electric circuit is already installed)
 
While testing the fuel system today I found a puddle of coolant under the front of the car. Most likely due to a slightly loose heater hose clamp. Hope this finally eliminates the hitherto miraculous loss of coolant ;-)

A while ago I installed a set of Granatelli ultra-high temp wires using an extra set of heat wraps. Before, the wires would get very hot and frequently slip from the sockets. Has worked sofar, however, the real test will have to wait till next summer...
 
Here are some pictures showing the fuel system into which I just plumbed a swirl pot, including a back pressure valve in the return line and a safety bypass valve to the pot. Space was very tight but everything worked out fine geometrically with relatively simple connections ("minimally invasive" as to existing plumbing). Unfortunately the Bosch secondary pump has to sit near the oil tank and the water header. Time for testing on the road.
 

Attachments

  • P1010584.jpeg
    P1010584.jpeg
    53.9 KB · Views: 328
  • P1010586.jpeg
    P1010586.jpeg
    93.7 KB · Views: 344
I inherited a FAST XFI version 1.340 with my GT40 (LS7 engine) and set myself up to modify the settings after failing to pass the emissions test on my annual inspection (“too rich”).

i had to overcome several obstacles: I’m a MAC OSX and Linux user only - no experience with Microsoft really, I don’t own a Microsoft based PC, and I needed to get a 9 pin serial to USB 2 adapter cable.

First I tried the MAC (High Sierra): I installed Wine and the FAST XFI 1.340 from my CD. I can run the FAST software within Wine. I can read and edit tables but I failed to establish connection to the ECU. It seems the MAC USB to Serial driver expects the use of a modem.

Next I borrowed a PC (Windows 7) from a friend and after several days of struggling I managed to connect to the ECU. Installation of the FAST software was no problem (I used the most recent 1.340 version from the FAST website). I learned how to set the COM port for the serial bridge and match it to that of the FAST software. However, the driver which the Microsoft system installed automatically when plugging in the cable was not able to communicate with the ECU (even when the ECU was hooked up prior to driver installation). At this point I did not know whether I had the wrong cable and/or the wrong driver. It turns out I had to make Microsoft install the MediaFire driver supplied by FAST (and waisted my money on ordering another serial cable from FAST). For this, I initiated a driver update for the bridge and directed Microsoft to the MediaFire USB folder downloaded from FAST. This worked. Previously I had tried to install the MediaFire driver by running the exe file - but I ended up with an error message.

Maybe this will save someone else a lot of time….

————

Here all in more detail (my Windows uses German - so my translations of icon names may not be perfect):

From

download (and install)

http://www.mediafire.com/file/3qv7dd3w2qfpc5m/USB.zip/file - driver from MediaFire

http://www.mediafire.com/file/5zb87sz74n70b0i/ccwp_setup_1340.exe/file. - FAST XFI version 1.340

1. Run the FAST exe file to install the FAST 1.340. (same for FAST version 2 if you need it),

2. Decompress the USB.zip file. (note: in my case, using Microsoft 7, I could not execute the exe file to install the driver for the DB9 to USB2 cable - so I found a different way to enforce the MediaFire driver as described below)


Setting up the connection using an RS 232 (DB9 9-pin ) to USB 2 converter cable:

1. Plug in the cable into one of the USB2 ports of the computer. (if you go to ``Hardware and Printer” there will now be an icon (~ ``USB to Serial Bridge”)

2. If you are online, the computer will look for a driver and install it - takes a few minutes. ( In my case this driver did not allow me to connect to the ECU even after matching the COM ports between driver and FAST software. So I carried on.)

3. Make the computer install the driver supplied by FAST: go to ``System Control “and from there to ``Hardware and Sound”.
Click on “Manager” for ``Devices and Printer” and find the item ``USB to Serial Bridge” and open it.

4. Now go to ``Connection Settings” and open ``Extended”. Now set the desired COM number (must be available and between 1 and 12). This COM number must be entered in the FAST communication system.

5. Now the decisive part: open ``Driver” and select ``Update”, then select “Search on the computer”. (i.e. not the automatic search!). Asked for the search location, select the folder “USB” containing the MediaFire software downloaded previously) and initiate the update.

This way I succeeded in installing the driver supplied by FAST (which fortunately is supported by Microsoft 7).

The icon for the USB to Serial bridge now is labeled “Tripp Lite USB to Serial Bridge (COM3)” in my case.


6. Finally, open the FAST software and go to Communications/Setup and select the proper COM port (3 in my case)

You should be ready to connect to the ECU when the latter is powered up (engine off or on).

First thing I did was to download all tables and stored them in a safe place.

For now I’ll learn to manipulate the data tables and graphs. In spring I plan to put the car on a test bed and, if necessary, come up with several data sets: optimal emission values and optimal performance....
 
A bunch of those serial to usb connectors have Chinese counterfeit FTI communication chips in them. Well, FTI got wise to it and updated the drivers to fail the counterfeit dongles. It's frustrating ass all hell getting coms up sometimes. Pissed me off enough that I bought a used laptop (windows 7) that still had a real RS232 connector, and no more problems for me.
 
Yes, I'm pretty sure, at a few Euros, my serial cable is Chinese made ;-) Anyway, an official FAST cable is on its way and the MediaFire driver accepts the ``Chinese" cable. Have been searching within family and friends for an old Microsoft PC myself. 14 years ago I set one up for my kids (dual boot Linux - MS, never dreaming I'd be using MS) which I'm now requesting back ;-)

Don't we do everything to keep our cars happy ???
 
Last edited:
I can report some progress made during the winter months:
* I familiarized myself with the FAST XFI system. Established and tested several sets of FAST XFI data sets in preparation of the annual inspection.
* Built a foot well cover with flanges for two 3" vent hoses.
* Added brake cooling to the front rotors (disk backing plates with oval flanges to optimize air flow into the ventilated rotor; my ducting entirely runs through the front clip, this gives a shorter path and less restriction - see Porsche 910 - ducting at the nose needs finalization/tinkering...I'd like to keep it removable. )
* Switched to Ferodo DS Uno pads (on Wilwood calipers) - now one sticker on the car is telling the thruth ...
* Installed rubber mats to the front wheel wells and some stiffer ones at the doors, preventing road grime to enter the driver compartment via the doors and, hopefully, keeping some of the water out when caught in the rain ;-)
* Replaced the front hubs/wheel bearings with SKFs (one of the former bearings had too much play - no wonder seems it's never have seen lube).

Today I took the car out for a first short test drive this year. I think the car accelerates and brakes better than before. But then again it may be just that I have not driven it for a while.... However, not a drop of any liquid after I parked the car - this is a first time and I hope will stay this way.
P1010592.jpeg
 
Last edited:

Brian Kissel

Staff member
Admin
Lifetime Supporter
Sounds like a successful outing to me Walter. Please keep us updated as you continue to enjoy it.

Regards Brian
 
Swapped my ITG JC55/S/65 filters for a special order of the same with stainless steel flame trap layers - may not be necessary with a Kinsler EFI but better safe than sorry.
P1010593.jpeg
 
not really part of this build but a good part of my inspiration:
my favorite u-tube video on the GT40, narrated by the most modest (and universally successful) race car drivers of all times:
 
lots of excitement, work and expenses lie ahead: the LS7 needs to come out: oil pressure too low - it does not go up with increasing rpm - hopefully just a bearing problem; along the way the valve train will be subjected to preventive measures and all upgrades be made for occasional track day use; the standard mistake made in the cooling system (water pump bypass not plugged up) will be corrected; the very early ZF-Q box will be sent to Quaife as recommended by them for an update - or exchanged for a current spec unit. I may go for a higher-quality flywheel and new clutch along the way. And it's probably time for starting my own build thread.
Work will be carried out by Coolchevy-Raceparts very near to my home. Good thing is I'm allowed to work along with them ;-)
 
Hello everyone:
In September 2020 I purchased an RCR GT40, formerly owned by John Lowe. His build log can be found here on this website:
Originally I was hoping that the car just needed a few finishing touches and a build log of my own seemed to be an exaggeration. But one thing has led to another and I changed my mind. Maybe some of the things I've learned may be useful to others as I've learned from the posts on this website.
 

Randy V

Moderator-Admin
Staff member
Admin
Lifetime Supporter
Glad to see this continuation log…. I think I may be able to merge the logs, or re-title John’s log if you like. The later would be easier..
 
Upcoming projects:
LS7 has to come out and the reason for low oil pressure has to be found and eliminated. Engine will be improved for track reliability.
The ZF-Q will go to Quaife for an upgrade to current specs. They promise 4-6 weeks for doing this job. Wait for a new unit would be several months.
 
Brief update (~ 1500km on car):
LS7: low oil pressure: drifted cam bearing (factory installation incompetence), also: two warped/oval piston liners. Overheating: water pump not modified for use without heater circuit.
Engine will receive a valve job (to remedy another manufacturing flaw), a Katech oil pump, CHE bronze lifter bearings, and of course all new bearings and piston rings.

Worn clutch: improperly modified flywheel (who knows why???). Repair flywheel and install new clutch: SPEC stage 2.

ZF-Q repair delayed due to problems with UK customs.

Engine reassembly will start next week.
 
Last edited:
A little progress report:
LS7 (very early crate engine) reassembly completed this morning: all new bearings and piston rings (we reused rods and pistons), ARP rod bolts, Katech's red pump installed, C.H.E rocker arm trunnion kit, head job: valve guides and seats, new exhaust valves (machine shop said guides were near failure - one head warped - ``worst LS7 heads we've seen") . I learned a lot from Heinz at Coolchevy - meticulous cleanliness for one!
Gearbox now is with Quaife (after some 5/6 weeks of odyssey through UK customs... and still no guarantee we'll get the import fees refunded upon return).
Turns out the flywheel had an offset of about 1mm between its steel friction plate and the aluminium face. The former will be milled down on its outer part so that the pressure plate gets to sit on a flat surface (and not on the step as before) and the pulldown of the SPEC stage 2 clutch will be ~3mm (3.2mm), as required.
While waiting for the gearbox I'll try to seal off the drivers compartment against the engine bay (there are gaps where the roll bar is mounted to the floor) and fabricate clam shell safety pins. Hope to be on the road again by the end of July (this year pretty please!).
 
Back
Top