Ford F3L and David Piper

Happy new year to all.
And Leopold, i wish a healthy and fruitful year for you and your family too...
We all looking forward to seeing the progress about your incredible project.
Regards,
M.Ali
 
Hi guys,

sorry for my late update, I was very busy.

attachment.php


attachment.php


attachment.php


Best regards from Austria
 

Attachments

  • DSCF0504.JPG
    DSCF0504.JPG
    83 KB · Views: 3,140
  • DSCF0505.JPG
    DSCF0505.JPG
    90.6 KB · Views: 3,156
  • DSCF0507.JPG
    DSCF0507.JPG
    92.7 KB · Views: 3,168
..and some more progress...

attachment.php


attachment.php


best regards from Austria
 

Attachments

  • front_uprights_assembled.JPG
    front_uprights_assembled.JPG
    207.2 KB · Views: 3,021
  • rear_uprights_assembled.JPG
    rear_uprights_assembled.JPG
    153.5 KB · Views: 3,152
"LEO"

it looks like you are going for a floating disc arrangement. I´m currently drawing very similar rotor hats to yours. I´m just not shure of the material to use.
my current rotor hats are of 6065 T6 aluminium and are 6mm thick and i realy think if the floating pins won´t work into the aluminum to strong. also i have not any free space between the "arms" like yours, mine are a full circle with just the slots for the floating pins. Yours appear to be thinner as well.
I thought of "hardcoating" mine to prevent working in.
My discs also have 8 mounting holes only like yours.
Of course your car will be much lighter than mine, but still if i check on modern cars. almost every floating disc setup has at least 10 if not 12 floating pins to diverse the load. Most of the times the rotor hat is either stainless or titanium.

As i´m quite shure that you have calculated and analysed this in depth, may be you can give me an idea if i´m on the safe side with the material i have or should redo it in either 7075, or stainless ( sorry titanium is just to bloddy expensiv in this dimensions)

ALso if you could post a drawing of your "floating pins" would be helpful, i´m just in the process to draw mine and have 100´s of them machined soon.

My setup will be a direct replacement for RCR cars based with the most premium willwood disc available ( still a bargain compared to other brake setups).

THanks for your help.
 
Those rotor hats require a braver man than I am! Not me no way ever!

my first feeling too, but knowing the "leo" is usualy calculating and doing thorough load analysis, it will be interesting to learn if we not only going to very save way by overdimensioning way to much.
But you are right looking at my full floating disc of my motorcycle and how the slots for the floatpins are widening in those aluminium rotorhats after time, i´m not sure either.

TOM
 
Hi guys,
thanks for your comments.

@ Olivier: it is just in the same stadium as here: http://www.gt40s.com/forum/wings-wheels-keels/12585-ford-f3l-david-piper-9.html#post329252

@ Tom: If you are concerned about the surface near plastic deformation ("working in") of the rotor hat in the gap between the hat and the drive peg, then check the surface pressure there. The surface pressure in this location as a measure for the equivalent stress is the only objective quantity to judge about if plastic deformation will take place there or not (but remember that the pressure will also depend on the fabrication tolerances you can achieve. If only a few of the pegs at the disc are tightly placed to the hat than initially only these ones will transfer the torsional moment via the gap pressure from the brake disc to the hub.).

@ RacerDave: Please keep in mind that the required size (wall thickness, polar area moment of inertia or whatever is governing) of the brake hat is not a constant, but scales with vehicle weight and deceleration (!) (and a few other variables of course).
A bicycle doesn't have the same brake component dimensions as a 60ton tank. No offense, but visual judgement is only applicable if you have all the other parameters fixed.

Sorry to be so technical here, but there is not much of an other way to be precise about these things. I hope it is rather helpful than confusing.

Best regards from Austria
 
Last edited:
Leo:

Please understand that I am not commenting only from a visual stand point but expierence also. So here goes (First point) your bobbin slots are going to want to spread open. (Second point) Then with the amount that you have cut away in between the bobbin slots is going to allow the the hat to flex. (Third point) Upon flexing your hat is going to put side load in the mounting tabs on the brake disc causing them to break which will cause brake failure.
I have had a disc fail on a brake dyno I was running because of a simular problem. Let me tell you it will make you a bit nervous. You would be surprised how much Calipers, brackets and Hats and discs move around under a 700 psi braking event at 90 miles an hour.
I would hate to see all your hard work wasted. My rule of thumb as far as brakes go better safe than sorry at 150mph
 
Hi guys, hi Dave,

Leo:
So here goes (First point) your bobbin slots are going to want to spread open. (Second point) Then with the amount that you have cut away in between the bobbin slots is going to allow the the hat to flex. (Third point) Upon flexing your hat is going to put side load in the mounting tabs on the brake disc causing them to break which will cause brake failure.

I agree that this is what most probably will happen if you load the brake disc, hub and spindle assembly up to failure. You might want to do this in order to determine wheter your designed component fulfills the design requirements or not.

If you can produce braking torques that high on the car (lets assume, the tires can produce unlimited tangential forces and the hydraulic pressure you can generate with your foot is also unlimited) and your rotor hat has very high safety from a structural point of view, then something else will fail before the hat will fail. E.g. the brake lines will burst, the drive pegs will fail in shear or a combined loading or the tire will slip on the wheel or the pivot of the break pedal will fail or the master cylinder rod will buckle or the balance bar will bend and so on. Some kind of failure (one is enough) in the system will cause the whole break system to fail. Oversizing the rotor hat does only help if the hat itself is the first component to fail, and it only helps up to the point where another component in the system fails.

People are always very emotional about this (and I think I undersand why), however design problems have to be tackled rationally.

As you say, safety is the first thing to worry about. I could not agree more.
But one has to see not only the single component in the system in order to take the proper saftey measures, unless the system is redundant.

Thanks for your input and kind regards,
Leo
 
Last edited:
Dear Leo

as said i took it as given that you have calculated the system properly, but it would be interesting to learn more about the dynamics applied. which would give an added value to all of us. Would be nice to learn which datas you applied for example for:
-Friction coeffecient before tire slip ( assume that is the point with the highest force
-tire load ( front and rear).
-vehicle weight
As all of that what you said is correct, allow me to say that we all know the tireslip will be the point with the maximum load on the brakesystem and it will be designed in all components to hold on beyond that point.So again it will be interesting to learn how you came up with that rotor hat dimensions.

Thanks
TOM
 
Have you taken into consideration how hot they'll get?

I'm sure you've worked everything out when cold but brake components get very very hot, especially in performance cars and the smaller the contact patch the lower the amount of heat transfer and the hotter things will get.

For example http://www.fourproducts.com/Images/Development_of_the_FSBC.pdf suggests over 800°C can be reached for brakes, hats will be a little cooler but still potentially in contact with an 800°C surface.

Just be sure that you've thought everything through, that's all.
 
Hi guys,
sorry for my late reply but I had a very busy weekend.

David: thanks for worrying so much.
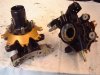
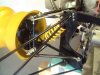
If you mention the 800°C however, you have to keep in mind that this is not what the rotor hat is subjected to. Just check the melting temperature of pure aluminium (alloys even melt at lower temperatures, except of intermetallics which we don't have here).
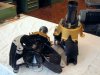
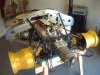
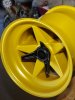
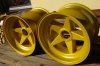
I agree that the hat will be exposed to elevated temperatures, which has been taken account for in my calculations, so don't worry. Besides, it is not the first time that somebody has made a rotor hat out of precipitation hardening aluminium.

Tom: There are different ways to compute the loads during deceleration. A very simple one which can be used without having telemetry data at hand is as follows:
Lets consider a car where we first of all neglect aerodynamic downforces (which is quite fair at low speeds and for cars without articulated aerodynamics, like from the 60s). Lets further assume it moves horizontally, so we do not encounter vertical accelerations.
We know from physics that the force for deceleration of a given mass m is:
F=m*a
As a further law from physics we know that a body with the mass m (on a horizontal plane) can be subjected to a maximum sideward acting force
Fr0=m*g*µ0
before it starts to slip. If we use this Fr0 as the maximum force for deceleration, we can compute the deceleration just before slip occurs as
a=g*µ0.
For cars/bikes/(objects) where the above assumptions apply, the vehicle weight cancels out. This is the reason why most of the sportscars have quite similar breaking distances, regardless of their weight.
This is just physics and holds for every object, bike or car (with the stated assumptions from above), regardless of tire types, suspension, wheel base and so on.
The µ0 from above however is not the friction coefficient at the tire, it is an averaged friction coefficient. Which tire has which is (as a first approach) a question of specific vertical load on the tire which is a function of wheel base, height and longitudinal coordinate of center of gravity. If you don't know these, you have to come up with a conservative assumption or gather measured values.
When you have derived the tangential force at the tire, determining the torque acting on the brake at one wheel is just a moment equilibrium equation.

Sorry for this crude summary, but I hope it helps.

Thank you for your comments
 
Hi Leo, interesting golden top-hats.

After you did your calculations and analysis what value did you apply as a factor of safety {Safety Factor} for determining the final dimensions?


Z.C.
 
After you did your calculations and analysis what value did you apply as a factor of safety {Safety Factor} for determining the final dimensions?

Hi Z.C.,

the thought behind the safety factor is to cover for effects that are not taken account for in the mechanical and mathematical representation of the design. Such as shock loads, etc., depending on the case. The safety factor therfore strongly depends on the sophistication and correctness of the model.

Just knowing a safety factor without knowing the model used to represent the design is of no use. Just like knowing a number and not knowing its unity.

Best,
Leo
 
Dear Leo

thanks for the explanation. won´t ask any more because it seems that you are only willing to post generic knowledge and not a deeper insight in your calculations

THanks
TOM
 
Hi Leopold

It is much too long since you posted how you are getting on with your fantastic Project.

I am sure I am not the only one who would love to hear how you are progressing with it.

Tom
 
Hi guys,

some more update pictures on the "F3L-revival":

attachment.php


attachment.php


attachment.php


attachment.php


attachment.php


attachment.php


attachment.php


attachment.php


attachment.php


With regards from Austria,
Leo
 

Attachments

  • 02_rear_overall.JPG
    02_rear_overall.JPG
    306.6 KB · Views: 1,912
  • 05_rear_suspension.JPG
    05_rear_suspension.JPG
    329.2 KB · Views: 1,856
  • 06_front_suspension.JPG
    06_front_suspension.JPG
    311.5 KB · Views: 1,890
  • 07_engine_semi_finished.JPG
    07_engine_semi_finished.JPG
    308 KB · Views: 1,862
  • 11_rear_wheel_installed.JPG
    11_rear_wheel_installed.JPG
    237.4 KB · Views: 1,842
  • 12_finished_wheels.JPG
    12_finished_wheels.JPG
    364.3 KB · Views: 1,787
  • 14_hollow_drive_shaft.JPG
    14_hollow_drive_shaft.JPG
    324.2 KB · Views: 1,785
  • 15_suspension_arms.JPG
    15_suspension_arms.JPG
    308.4 KB · Views: 1,777
  • 16_radiator_assy.JPG
    16_radiator_assy.JPG
    308.8 KB · Views: 1,775
Back
Top