Mounting of lower Le Mans style driving lights

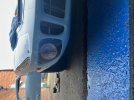
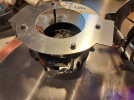
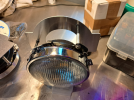
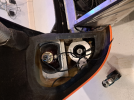
I have a set of lower Le Mans style driving lights (like P1075) with buckets that are 5.75 inch. I was wondering if anyone had any pics on how they mounted theirs? I think the best option is to mount the buckets behind the clam panel with a hole cut to just allow the headlamp and chrome rim to protrude through. Adjustment would be from behind probably on the mounting pillars. However, before reinventing the wheel here, I'm sure several of you have done this successfully before and might have a photo of the set up. Thanks
 
Here is a close up picture of 1075 that I shot at Laguna Seca

1708212551756.jpeg
 
thanks all - very helpful. I've decided to mount mine from behind with rear adjustment, so buckets mounted on adjustable screws with lens and rim protruding through a cut hole in the light apeture.
 
Just coming back on this in case it helps anyone else - here are the mounts I made for the lower P1075 style driving lights and how I fixed them inside the clam. C
 

Attachments

  • 20240221_154246.png
    20240221_154246.png
    465 KB · Views: 79
  • 20240221_154248.png
    20240221_154248.png
    471 KB · Views: 76
  • 20240225_143008.png
    20240225_143008.png
    455.5 KB · Views: 75

Randy Folsom

Supporter
I also like the 1075 driving lights. I am hoping to find units that look right but combine the blinkers like some headlights.

What are the dimensions of your mount. And which lights did you use?
 
Yes that was my plan. I bought the lights from Tornado including the buckets rims and units. The light units have a sidelight hole so I bought some bayonet mounts from ebay for the W16W type indicator bulbs and just filed a single keyway that allows the bayonet to fit in.
For the bulbs I put in some bright amber W16W LEDs and an LED compatible indicator relay. So you now have indicators in the lower light units.

The mounts are home made and I sawed off the back of the buckets and used 4 x M5 80mm long bolts with aluminium spacers and springs to allow adjustment. In the inboard side I bolted and L-bracket to the inside front clam wall. On the outboard side i bonded an L-bracket to the outer wall with PU adhesive. Cutting the back off the buckets and putting a central hole in the mount means the bulb can be changed withouf removing the lighr unit.
 

Randy Folsom

Supporter
Yes that was my plan. I bought the lights from Tornado including the buckets rims and units. The light units have a sidelight hole so I bought some bayonet mounts from ebay for the W16W type indicator bulbs and just filed a single keyway that allows the bayonet to fit in.
For the bulbs I put in some bright amber W16W LEDs and an LED compatible indicator relay. So you now have indicators in the lower light units.

The mounts are home made and I sawed off the back of the buckets and used 4 x M5 80mm long bolts with aluminium spacers and springs to allow adjustment. In the inboard side I bolted and L-bracket to the inside front clam wall. On the outboard side i bonded an L-bracket to the outer wall with PU adhesive. Cutting the back off the buckets and putting a central hole in the mount means the bulb can be changed withouf removing the lighr unit.
Thx much for the details. They say imitation is the sincerest form of flattery. Consider yourself flattered :)
 
Back
Top