Fresh air/brake ducts

Chet Schwer

Lifetime Supporter
While I have the rear covers off of the headlight compartment is there any way to route the fresh air ducts to the exit hole and duct in the main body? It would eliminate all of the dust that enters the headlight assemby. It looks like there should be a shroud that reduces the entryway to a round duct.
Chet
 

Rick Muck- Mark IV

GT40s Sponsor
Supporter
Chet,

If you ar etalking about routing the drains to the brake duct openings in the nose, I think the ducts will pressurize the drains and reverse the intended effect.

BTW,
Have you opened your brake ducts in the nose to be functional? The front clip is not drilled to allow the ducts on either side of the radiator intake to be functional. The tub has the openings, but the nose doe not. Trace through the tub holes and then remove the clip and cut on the lines. You now have ducting that can be routed to the brakes or just used to flood the front aft radiator area with ambient air.
 
Chet,

If you ar etalking about routing the drains to the brake duct openings in the nose, I think the ducts will pressurize the drains and reverse the intended effect.

I think it could work if the drain tubes were angled/ trimmed in a such a way that the airstream flowing past would create a slight vacuum and draw the air out
 

Chet Schwer

Lifetime Supporter
The drains are the rectangular openings on the top of the wheel well? I'm working in the compartment behind the headlights. I have the round hole in the tub that connects to the duct in the nose. I'm just looking for some way to keep the air moving thru the tub from entering the headlight enclosure. I'll probably just need to remove and clean the headllight covers every so often.
 
Chet

check this out

http://www.gt40s.com/forum/gt40-build-logs/24525-toms-rcr-40-trackracer-10.html#post247339

This is how i have done it on my RCR. It has an absolute original inner liner design, so should be similar to a SPF. I laminated a additional channel inside the headlight compartmentm, routing the air to an opening which adapts to the tub opening. If you look close in the second picture you can see this opening in the rear left side of the channel. With this solution you keep all the moisture and dirt/dust out of the headlight compartment plus you have an absolut originalstyle functional brake cooling duct.

TOM
 

Chet Schwer

Lifetime Supporter
Tom

That looks like what I want but with the amount of work involved that I can not do myself I think I will need to approach the problem by just trying to seal up the openings around the lights. Great fiberglass work!

Chet
 
If you can make it to your local hardware box , you can make the ducts yourself !
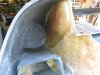
A sheet of foam insulation board , 1 gallon of resin , some mat , some cloth , a rasp file , adhesive (to hold sections of foam together ) , and duct tape (real men use duct tape for everything ) fiberglass doesn't stick to it .

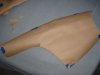
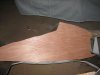
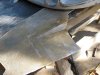
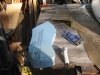
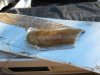
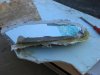
Using a knife , cut foam to ruff shape , glue sections together , get shape close with rasp , when your happy with the shape , cover with duct tape , cut mat into manageable strips ( about 3x6 ) enough to do 2 layers . Cover and leave about 1/2" edge around for a flange . Cut a sheet of cloth to cover entire part , and apply before resin cures .
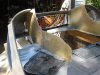
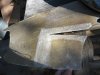
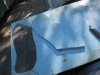
In a few hours it'll come apart .
Duct tape does leave it's mark , but it won't show , or can be sanded smooth .
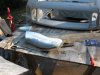
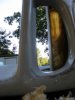
I made inner panels , and ducts in a weekend .

I would post pics but my photo shop doesn't work on my new MacBook , maybe I'll get a newer version for Christmas .
 
New Photo shop !
 

Attachments

  • IMG_4313-webcopy.jpg
    IMG_4313-webcopy.jpg
    37.9 KB · Views: 251
  • IMG_4314web.jpg
    IMG_4314web.jpg
    43.5 KB · Views: 241
  • IMG_4318web.jpg
    IMG_4318web.jpg
    68.8 KB · Views: 289
  • IMG_4340web.jpg
    IMG_4340web.jpg
    61.6 KB · Views: 252
  • IMG_4341web.jpg
    IMG_4341web.jpg
    68.4 KB · Views: 264
I enjoyed it anyway
 

Attachments

  • IMG_4342web.jpg
    IMG_4342web.jpg
    45.7 KB · Views: 224
  • IMG_4349web.jpg
    IMG_4349web.jpg
    68.3 KB · Views: 245
  • IMG_4354web.jpg
    IMG_4354web.jpg
    69.9 KB · Views: 257
  • IMG_4344web.jpg
    IMG_4344web.jpg
    60.1 KB · Views: 238
  • IMG_4351web.jpg
    IMG_4351web.jpg
    52.2 KB · Views: 247
Back
Top