

You are using an out of date browser. It may not display this or other websites correctly.
You should upgrade or use an alternative browser.
You should upgrade or use an alternative browser.
Chevron B16 Replica
- Thread starter A-tomic
- Start date
Terry Oxandale
Skinny Man
Any when you get through welding, you can do like I did...raise more funds by selling the welding wood to an antique dealer as"distressed" wood table tops!
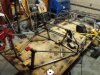
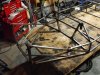
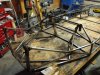
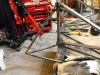
Thank's for your replies guys. I added two more square tubes so the basic floor of the chassis is complete. I also picked up a spherical joint to mount to the suspension points in the rear to make sure the placement of the lower shock tower lower brace (Big Tube) will not interfere with the control arm travel. There are so many friggin angles on this thing you have to grind the basic two angle cut to get a good tight fit. Darren I will e-mail you about the bearing carriers. Terry I am Jealous, I feel I'm dragging my feet compared to what you have done so far. As for the table I still have another set of uprights and the molds for this car. I may just skin it in steel and do one more. Hopefully I will have a bigger garage by then. I'll just keep plugging away.
Dave
Dave
Gent's,
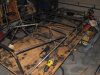
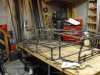
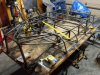
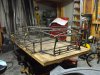
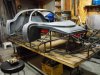
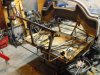
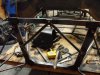
A few more pics of the progress so far. I have the upper and lower trailing link mounts to do. The two inner braces. I started fabing the cross member brace/motor mount brackets and have a bit more to do to them. They also tie in the rear side pods. I also have a whole wack of tabs to fab and add.
By doing rear shock mount member custom for my uprights it's changed a few measurements that I have to adjust for from the original Cad Drawings. It's slowed me down a bit.
Dave
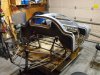
Attachments
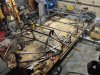
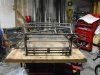
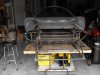
A few more pic's. I added a few more braces tonight. Two were OK and two were not. I may have to preheat if it gets any cooler. I will fix them tomorrow if it's warmer.
Dave
Dave
Attachments
Thank's Jack,
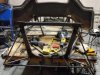
It's getting down to the wire welding wise. Today was a good day. Fixed the two braces and have to add two more diagonal braces where the rear side pods meet on the large tube. Hopfuly next week will be better and I will get most of it done. I'm getting to the kit car stage now.
Dave
It's getting down to the wire welding wise. Today was a good day. Fixed the two braces and have to add two more diagonal braces where the rear side pods meet on the large tube. Hopfuly next week will be better and I will get most of it done. I'm getting to the kit car stage now.
Dave
Attachments
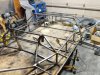
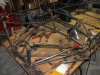
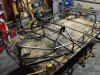
Did a bit more today and started cleaning up and making some room. Going to make up a cart and transfere the chassis to it when the rear floor is done. I can add the tabs later I don't need a layout table for that. Going to hit the wreckers for an Escort mastjacket and figure how I am going to do the pedal assembly.(Balance Bar or dual master cylinder. This chassis I lifted by myself just to give you an Idea how light it is. I will try and weigh it later.
Dave
Dave
Attachments
Last edited:
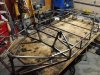
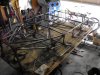
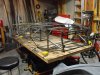
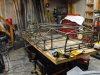
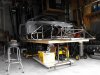
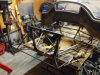
A few more pic's. It's getting down to the wire temperature wise. I picked up an industrial propane heater to see it can buy me more time so I can get a bit more done. I have roll hoop ,tabs, and two braces to fab in the back. I also have to do two jigs for the control arms. I have to order spot welder attachment for the welder from Eastwood Industries and get an open throated shear to do some of the paneling. I was hoping to have it media blasted and the spot welded paneling done and a coat of prime by now.
Dave
Dave
Attachments


It's looking great Dave. I love the B16s. Yours will be an awesome machine when you're done. You're making good progress!
I shudder to think about the temperatures in Canada in the winter! Quite apart from anything else, I always found it difficult to get into the workshop at night after being out in the cold all day. That despite having an excellent 50 Kw diesel heater in the workshop. God knows how you do it.....
I shudder to think about the temperatures in Canada in the winter! Quite apart from anything else, I always found it difficult to get into the workshop at night after being out in the cold all day. That despite having an excellent 50 Kw diesel heater in the workshop. God knows how you do it.....
Similar threads
- Replies
- 1
- Views
- 408
- Replies
- 13
- Views
- 1K