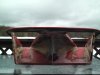
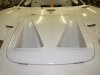
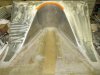
Virtually none of the dual nostril hoods I've seen that come from the mfgrs of our "kits" - are as deep as the originals.
Here is the difference between the single and double as I have both:


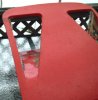
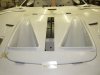
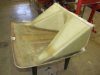
I wasn't happy with the thought of the double nostril hood either coming off due to high pressure under it, nor the lack of cooling airflow that some have talked about.. So I decided to take action..
These pics are a brief look into what I had started to do before I stopped working on the GT40 almost a year ago.
Maybe this will give some of you some ideas as to how you'd like to approach a project like this.


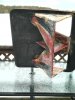
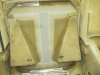
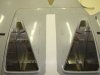
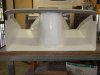
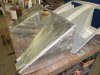
Pretty much as it sits today with some minor filler added here and there.
Almost the entire project was done wit West Systems Epoxy resin and 3M high strength repair filler. Not much bondo at all.
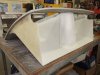
No it is not 100% correct, but it will work and when it gets completed someday, I don't think it will look too hideous.
Here is the difference between the single and double as I have both:
I wasn't happy with the thought of the double nostril hood either coming off due to high pressure under it, nor the lack of cooling airflow that some have talked about.. So I decided to take action..
These pics are a brief look into what I had started to do before I stopped working on the GT40 almost a year ago.
Maybe this will give some of you some ideas as to how you'd like to approach a project like this.
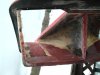
Pretty much as it sits today with some minor filler added here and there.
Almost the entire project was done wit West Systems Epoxy resin and 3M high strength repair filler. Not much bondo at all.
No it is not 100% correct, but it will work and when it gets completed someday, I don't think it will look too hideous.