Ken's SLC build thread

Ken Roberts

Supporter
Ken,
What did you use to hold the rear window in place while the adhesive was setting up?
Will the window adhesive tolerate the heat generated from the engine side?

Nice job!
Howard

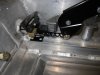
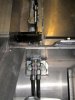
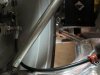
Hello Howard. The bulkhead panel was out of the car at the time lying horizontally on a table. The installer didn't think it would be a problem due to it's relatively small size/weight.
 

Ken Roberts

Supporter
Hi Ken,

Did you ever come up with a good way to install a defrost valve? (your post #168).

I'm still in the planning stage Dave. See post #360. I'm about to order the mentioned valves/gates in that post. The gate/valve will be operated by a choke type of cable to open or close off the heated air to the defrost outlets.

Right now I'm building the subwoofer enclosure and planning to mount the component speakers flush on the angled panel in front of the fuel tank.
 
Ken there's a shallow sub set up that has the amp, crossover and speaker all in one nice tight Alum box that will fit in the end of the passengers foot well it's the NVX QBUS8 its only $200.00 the reviews on it are good ?
 

Ken Roberts

Supporter
I've been collecting some wheel alignment items for the upcoming stage of the build. I try to buy used where possible. The picture shows a caster/camber gauge, tire scribe and a toe alignment bar.
 

Attachments

  • 001_zpsaa036442.jpg
    001_zpsaa036442.jpg
    55.1 KB · Views: 210
Last edited:

Ken Roberts

Supporter
I built my own subwoofer setup. This is a high end 8" sub that is simply installed in a cardboard sonotube (concrete form). This will be mounted in the passenger side foot well. I have previous experience with building these types of subwoofers for my home theater.
 

Attachments

  • 004_zps844ae783.jpg
    004_zps844ae783.jpg
    23.3 KB · Views: 199
Last edited:

Ken Roberts

Supporter
Most of the interior wiring has been fabricated. This picture shows the interior fuse panel, BCM and remote door lock receiver. The remote door lock receiver is used for the keyless start and receives the signals from the tire pressure monitors in the wheels.
 

Attachments

  • 005_zps647f8fd4.jpg
    005_zps647f8fd4.jpg
    57.9 KB · Views: 215
Last edited:

Ken Roberts

Supporter
I built a set of 1 1/2" stand offs for the door gas struts. These were made heavy duty on purpose. I've heard horror stories of the struts breaking at the ball stud. You don't want any flexing at this area. With the doors open (at car shows for example) the wind can really put stress on the door hinge hardware.
 

Attachments

  • 001_zps23391485.jpg
    001_zps23391485.jpg
    41.1 KB · Views: 229
Last edited:
I built my own subwoofer setup. This is a high end 8" sub that is simply installed in a cardboard sonotube (concrete form). This will be mounted in the passenger side foot well. I have previous experience with building these types of subwoofers for my home theater.


Wow! How did I not see this before?! :stunned:

Very cool Ken. I'd like to see it in the car...I'm working on something similar. I may even go with one of the JL shallow mount 10's...if I can get it situated.

I'd love to hear about your home theater some too. I'm quite the audio addict...
 

Ken Roberts

Supporter
Thanks Yos. It takes up most of the real estate in front of the passengers feet. It will only fit with careful planning. The down side to this sub is the size of the magnet. The speaker weighs 24lbs.

I built large sonotube subs for my home theater as well. The cardboard tubes are very cheap. You only need to construct the end caps. The end caps are made out of 3/4" MDF glued together in layers. A router with a circle cutting jig makes it easy. Jasper model 270 is the jig I use. I use a "Outlaw 970" pre/processor and 7 mono Marantz amplifiers.
 
Last edited:
What model number is the 8? I haven't heard of Sundown Audio until now. At 24lbs for an 8"...they must be ridiculous. The surround on those things looks like it's designed for major excursion. I'm gonna go do some research...

I just sold my faithful Marantz receiver...and moved into a Pioneer Elite. I run dual Outlaw LFM-1 EX subs in there. If I ever get my car done...I'll probably try my hand at building a sub too. Although the Outlaw's will be hard to beat.
 

Ken Roberts

Supporter
Sundown Audio SA-8 V2 D4 8" subwoofer. This will be powered by a ARC Audio XDI803 3 channel amplifier. Alpine component speakers will be mounted flush in the angled panel behind the seats. The ARC Audio amplifier was chosen due to it's "class D" design. The benefits to a class D design is it's small size, low heat and efficient design. The class D design is often by passed by the "competition crowd" due to it's not quite pure sound but is ideal in my application due to the fact the cabin will not be as quiet as a production car.

I like your choices Yos. Outlaw Audio always give you the best "bang for your buck".
 
Last edited:

Ken Roberts

Supporter
Here is a picture of the finished subwoofer. The component speakers will be mounted in the angled aluminum panel behind the seats.
 

Attachments

  • 002_zps06a2ab82.jpg
    002_zps06a2ab82.jpg
    48.2 KB · Views: 247
Last edited:

Ken Roberts

Supporter
Here is a picture of the standoffs and door shocks mounted in position. A friendly warning to "over build" the standoffs due to the forces put upon them in the door closed position. If they were to fail the door could drop on your hand/fingers.
 

Attachments

  • 001_zpsc0462c57.jpg
    001_zpsc0462c57.jpg
    30.5 KB · Views: 258
Last edited:
Hey Ken,

Is that sonotube strong enough as is or did you reinforce it somehow? Hard to believe cardboard can make for a good sub enclosure.
 

Ken Roberts

Supporter
Hey Ken,

Is that sonotube strong enough as is or did you reinforce it somehow? Hard to believe cardboard can make for a good sub enclosure.

My home theater subs are built the same way only on a larger scale. The trick in the design is the fact you are dealing with a circle for walls. The force/pressure on any section of the wall will be the same in a circle. A traditional box type of sub has walls that are flat and will flex in and out.

Search sonosub or sonotube subwoofer on the internet to see some examples.
 

Ken Roberts

Supporter
Here are some pictures of the almost finished handbrake setup.

The first pictures shows how I chose to mount the handle. I wanted everything exposed so inspection and maintenance would be easier. I also installed a momentary switch. This is required for the Corvette gauge cluster and for programming the BCM. I had to build my own clevis so that it would work with my design.
 

Attachments

  • 003_zps15d735c2.jpg
    003_zps15d735c2.jpg
    35.8 KB · Views: 219
  • 006_zpsdc46a0ec.jpg
    006_zpsdc46a0ec.jpg
    66.2 KB · Views: 219
Last edited:

Ken Roberts

Supporter
This picture shows the pen pointing to the handbrake caliper block that must be removed and tapped to 7/16x20.
This picture shows the cables going through the beam behind the seats. I used a 1 1/2" hole saw and then used a 1 1/2" aluminum tube tack welded in place after tapping it through the hole. A steel plate was mounted underneath the floor at the block for the cable adjustment.
 

Attachments

  • 002_zps3ebc0970.jpg
    002_zps3ebc0970.jpg
    35.6 KB · Views: 210
  • 008_zpsb49d3212.jpg
    008_zpsb49d3212.jpg
    37.8 KB · Views: 199
Last edited:

Ken Roberts

Supporter
This picture shows the cable installed at the wheel. The spring was cut to 3". The cable is secured to the lower control arm with a small aluminum cable clamp. The red cushion is silicon rubber for high heat. It's tapped to a #10-32 thread size. In the back ground you can see the cables traveling under the battery. Two inch square tubing was welded under the battery tray.
 

Attachments

  • 006_zps97429099.jpg
    006_zps97429099.jpg
    31.9 KB · Views: 210
Last edited:
Back
Top