
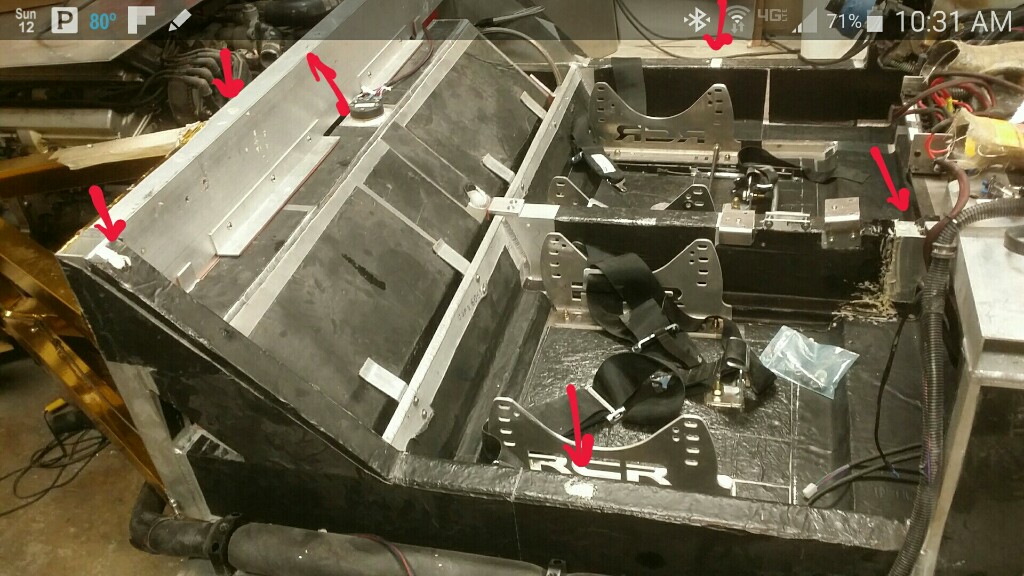
Birds eye view!

- Forums
- GT40 Replica Manufacturers' Corner
- RCR Forum - RCR40/SLC/917/Superlite Aero
- The SLC Clubhouse
You are using an out of date browser. It may not display this or other websites correctly.
You should upgrade or use an alternative browser.
You should upgrade or use an alternative browser.
A.J.'s SL-C build thread
- Thread starter Pow3r
- Start date
Ken Roberts
Supporter
Cool work on the custom lights AJ. Just a heads up though. Headlights, turn signals, DRLs and tailights must be DOT approved for road use. This is a Federal Law. Your State inspector may or may not enforce it. If you are involved in a accident and a statement is given saying they couldn't see your lights and then it was discovered by a police inspection you are using "home made" tail lights, turn signals or DRLs......well you can imagine the outcome. All DOT lighting is stamped/embossed right on the housings. Manufacturers spend big money to put their lights through this inspection.
I've been hard at work and have a huge back log of photos to share.
I mounted the oil cooler for the trans and engine oil:
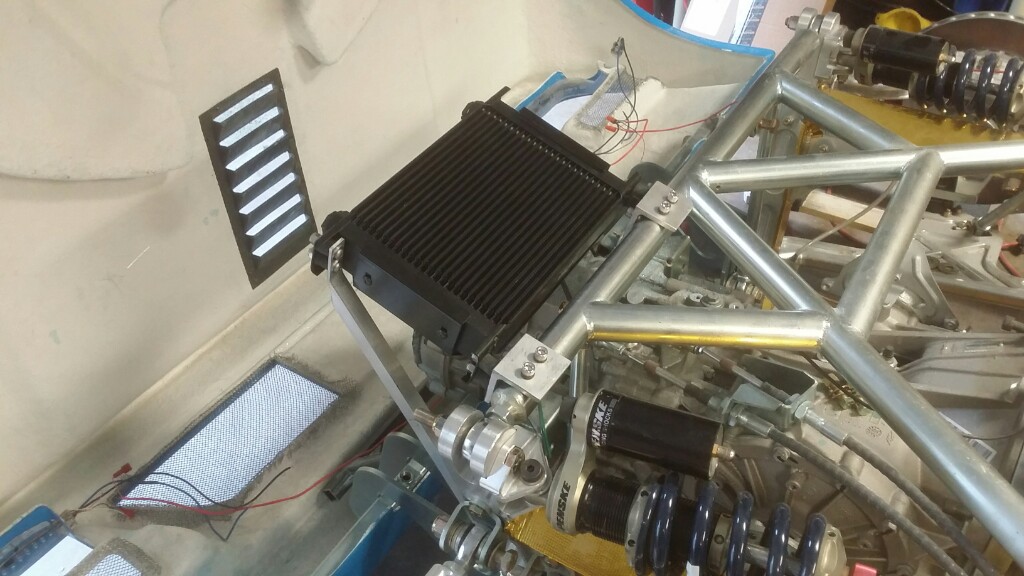
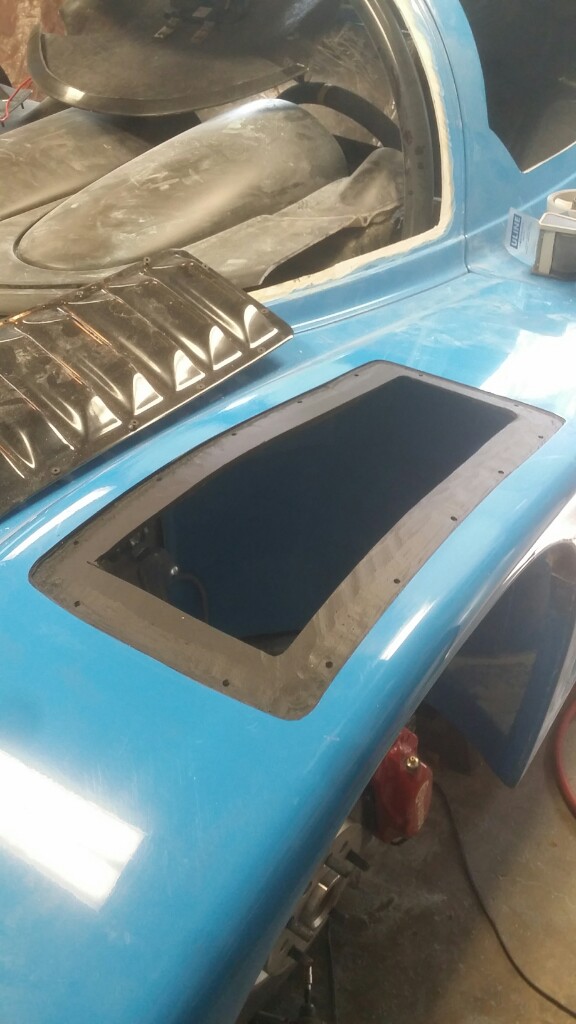
This view is the clearance from the engine bay. The deck openings are directly above the coolers, and I got the Setrabs with the fans on the back side to draw air through the coolers:
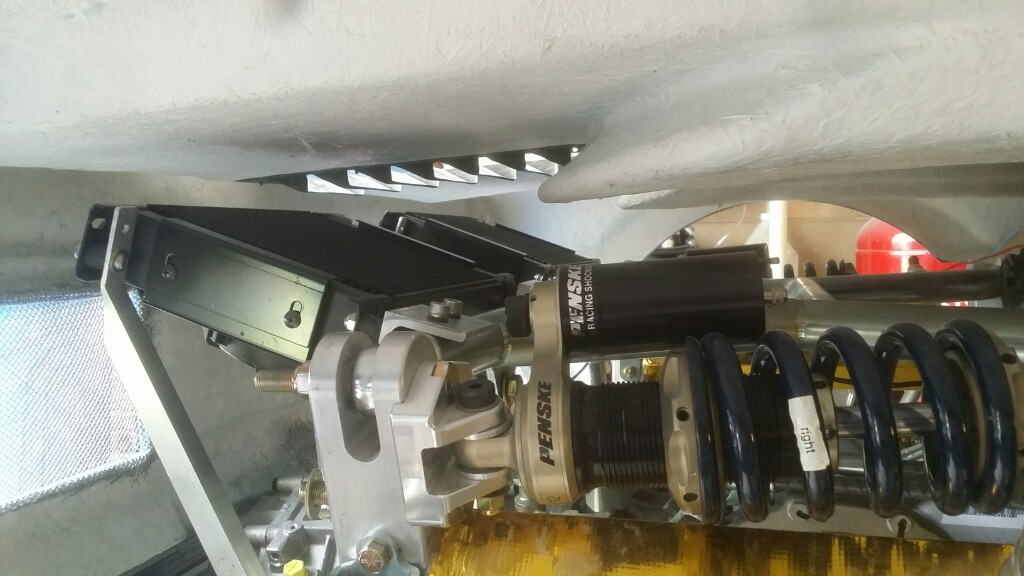
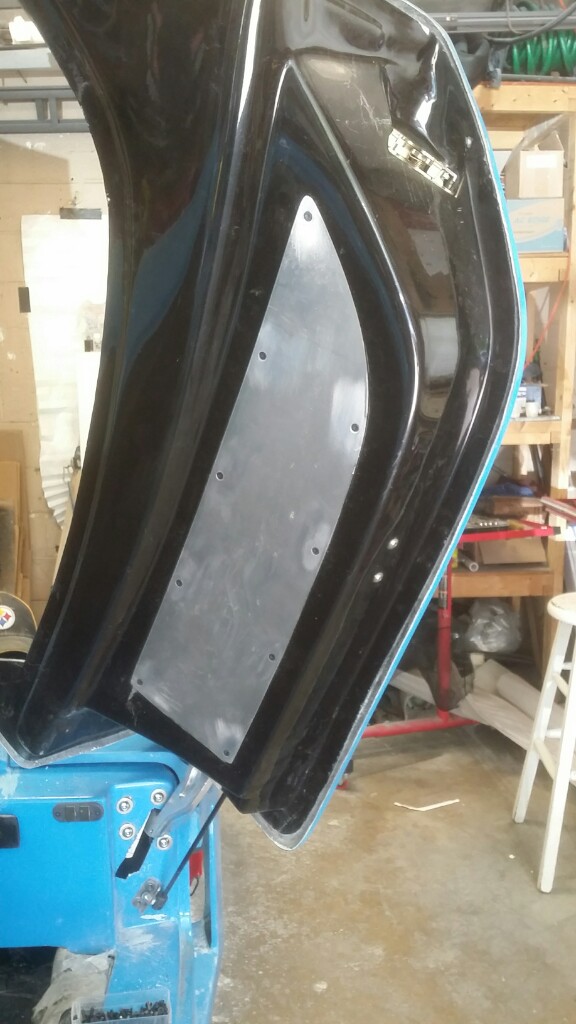
Then the fans exhaust the air right out the back:
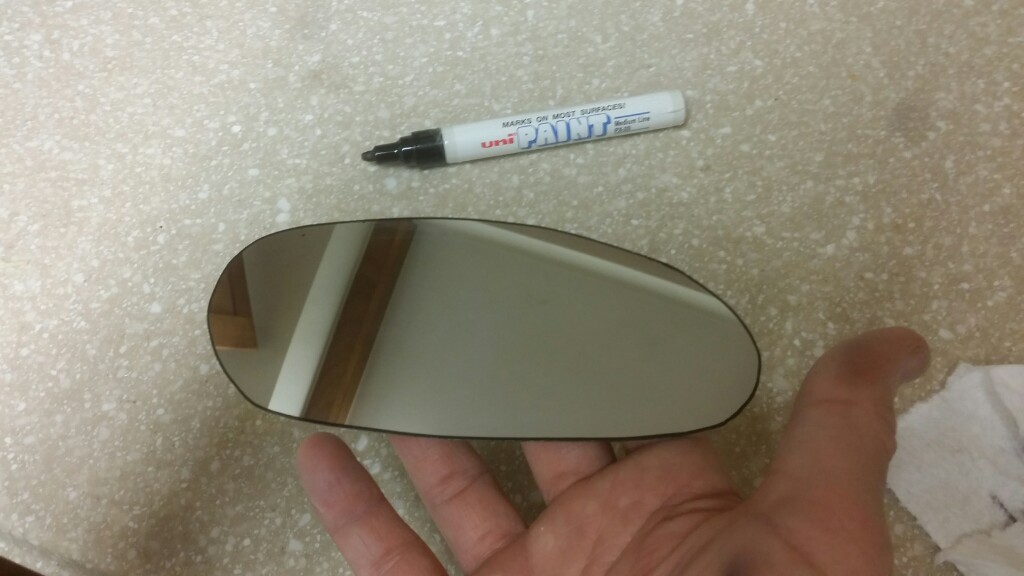
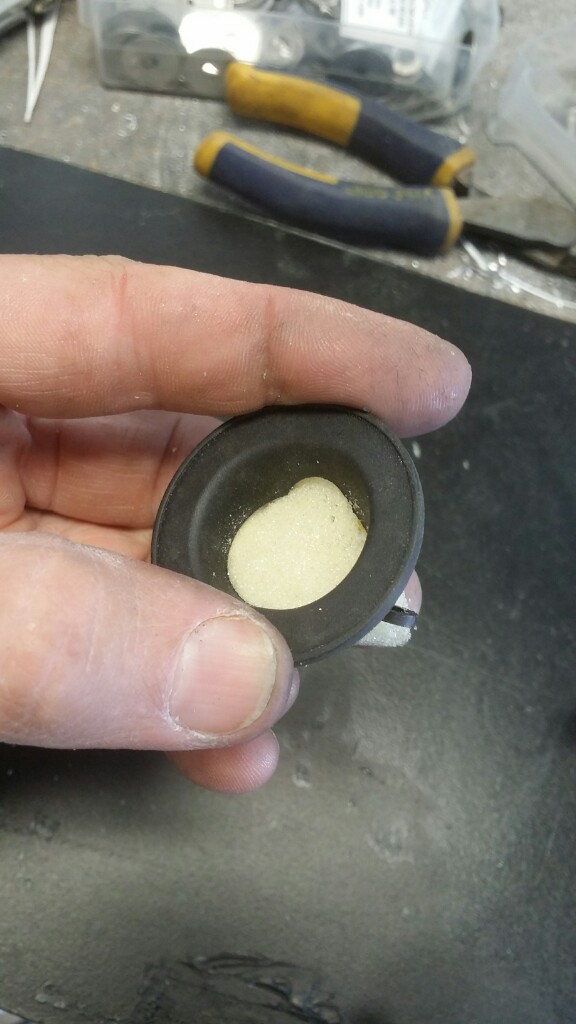
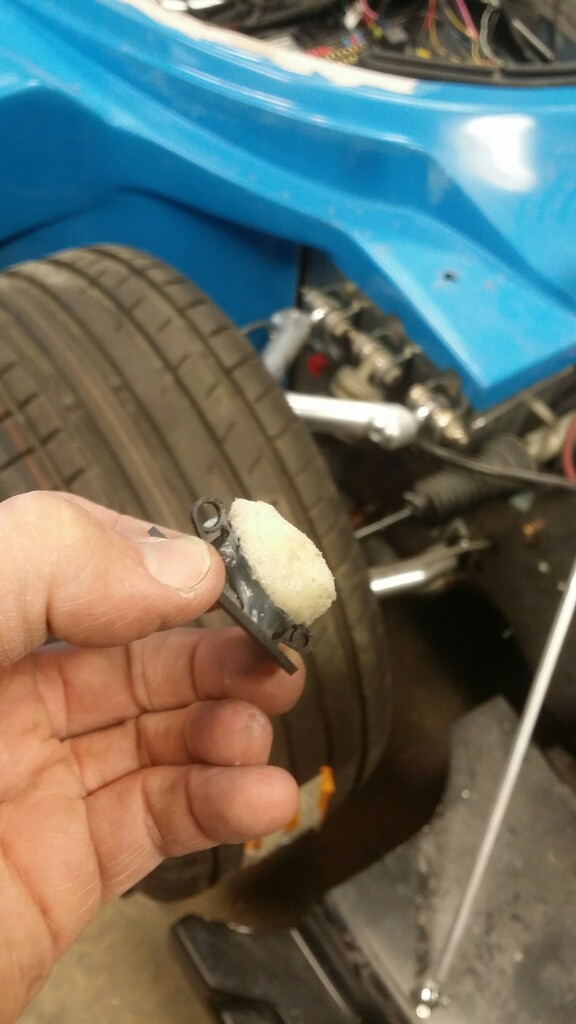
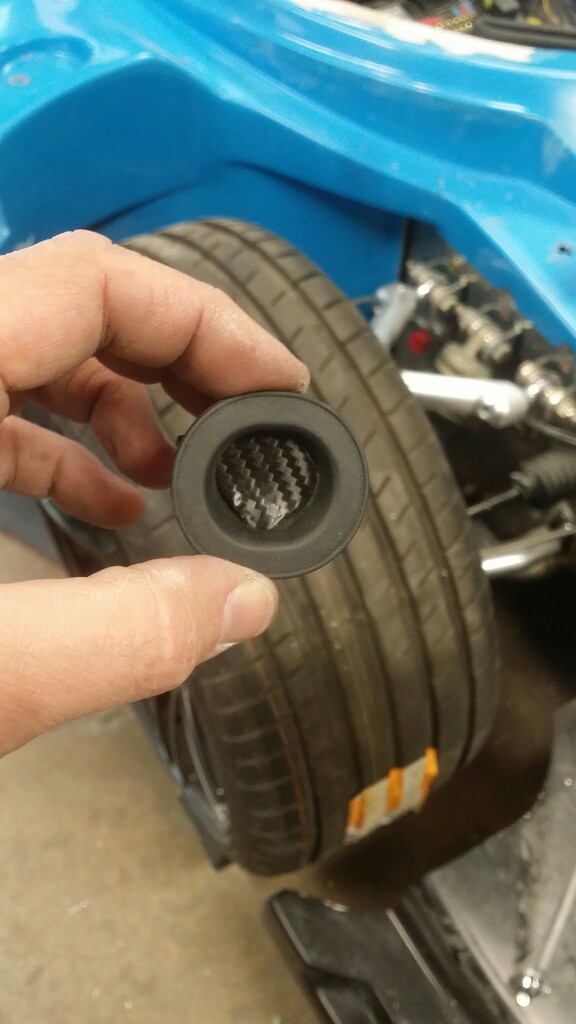
I read where it is recommended to have convex mirrors on both sides to improve visibility. So I bought some replacement glass at autozone and cut out the glass. You could get one piece of glass large enough for both slc mirrors, but since it's convex glass, the center of view would not be correct. So I bought a separate piece for each side and cut each right from the middle. The glass is cheap (but not inexpensive!) and very thin. It's not possible to cut on a flat surface because the glass is curved. I found a spot on the body that has the same curvature as the glass. Just behind the headlight was perfect. The edges were rough so I sanded them by hand using 120 grit. It became clear I wasn't going to get the edges perfect because the sliver reflective backing flaked around the perimeter. To hide this, I painted a border around the edges with a paint marker. Later, I painted the inside of the mirror housing black so you can't see the edge:
I cut a flange into the "fender" so the fender vents would be flush mounted, yet still be removable. I painted the recessed area black because my fiberglass is white and even the smallest gaps really stood out:
I fabricated an inner door panel:
...and installed the interior handle:
This is how I attached the handle to the panel:

This is my CHMSL (center high mount stop light):
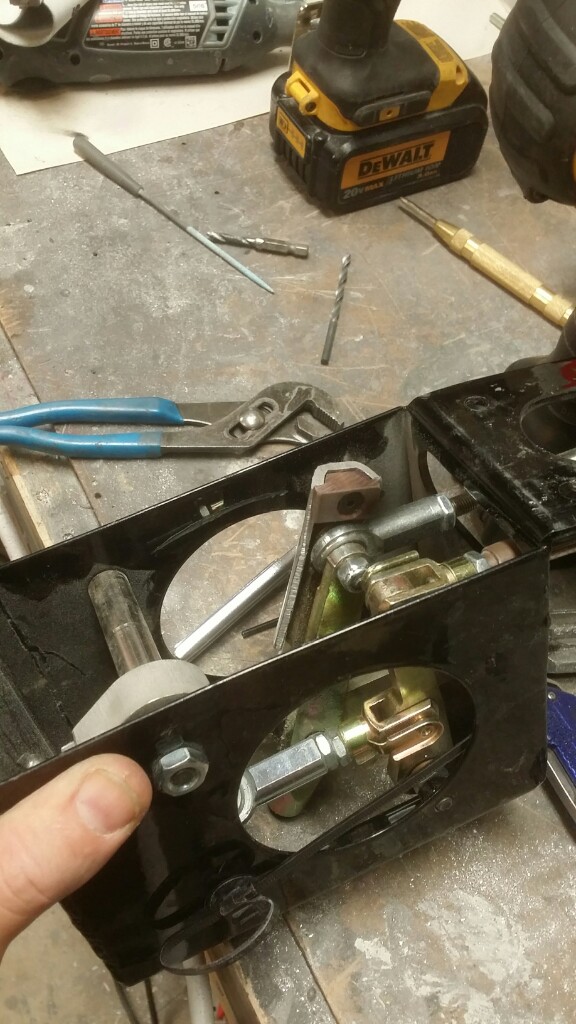
This is the bottom side of my shifter box. I put an extension on the shifter, and the brown material is a nylon material so it slides easier. It contacts a spring loaded bar that is mounted to the tunnel, under the shifter box. This is my reverse detent. It gives positive feedback when the shifter contacts the spring loaded bar. That is where the 1-2 gate is at. If you want reverse, you push harder and go into the reverse area. It is crude, so I added nylon to both contact surfaces to assist feel. This is a similar concept to what Allan showed on his GTR. His device fits on top of the shifter box. My center console sits on top of the shifter box and there's no room:
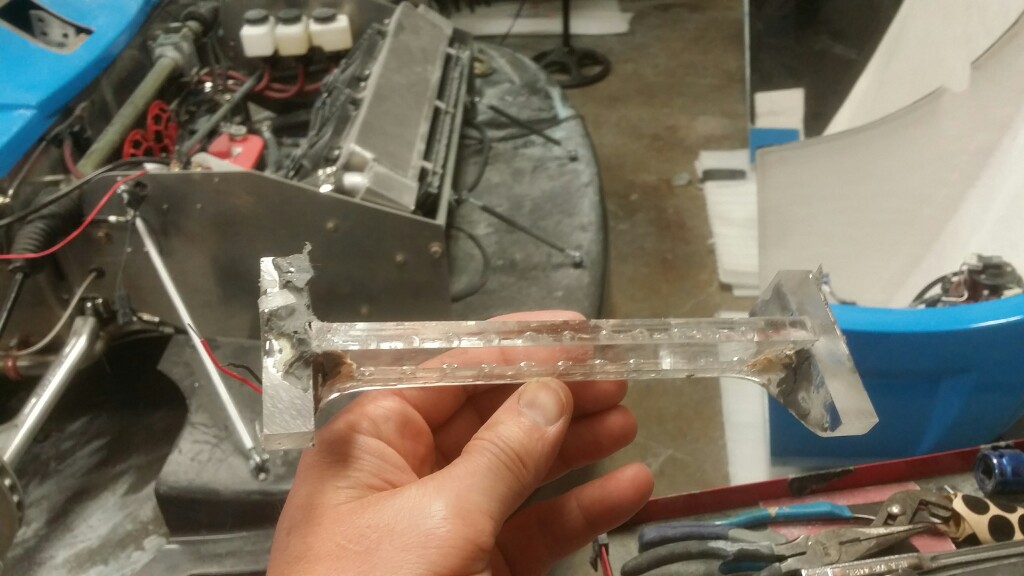
Battery hold down bar::
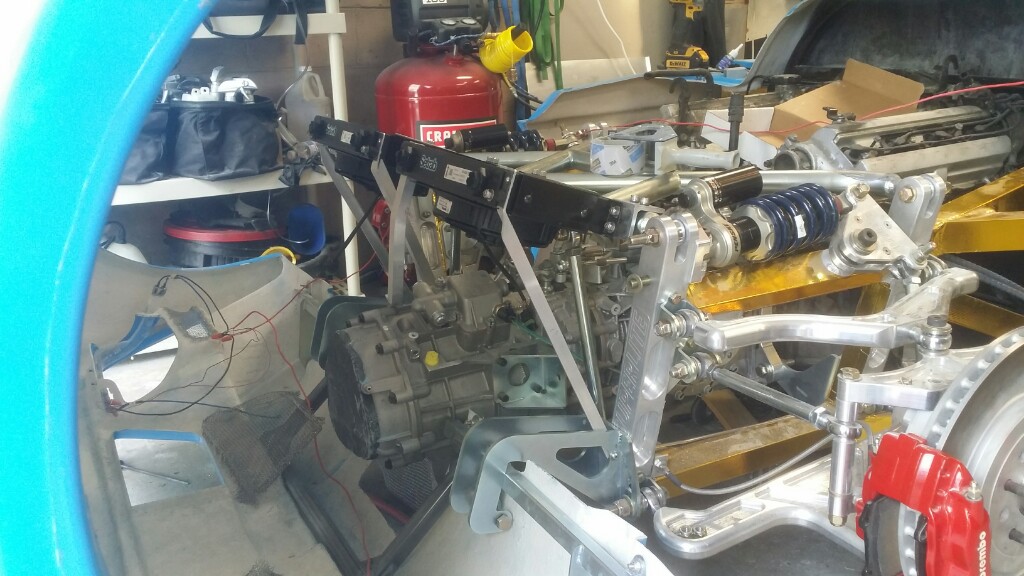
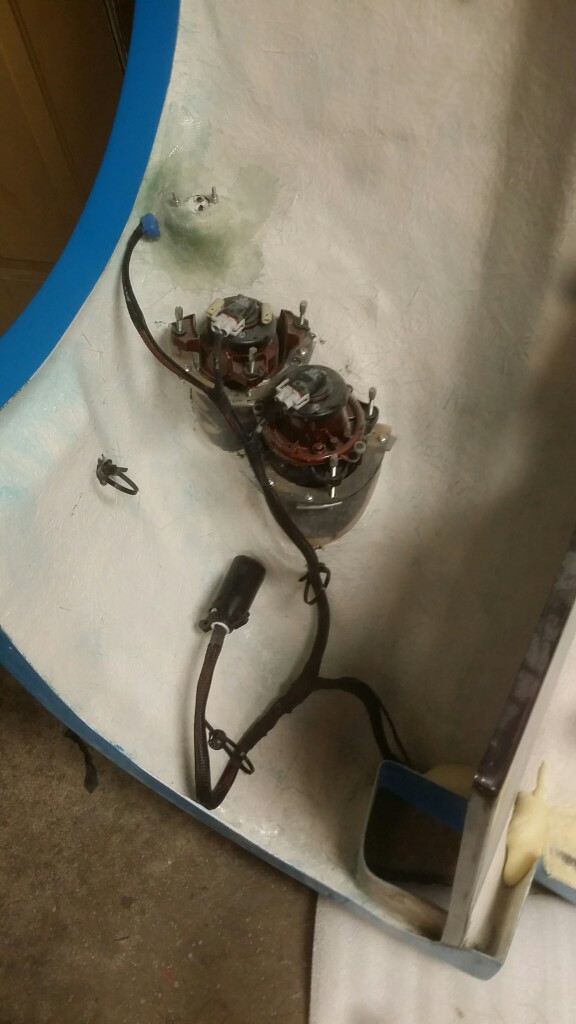
Fuel filters mounted to the back side of the engine compartment bulkhead:
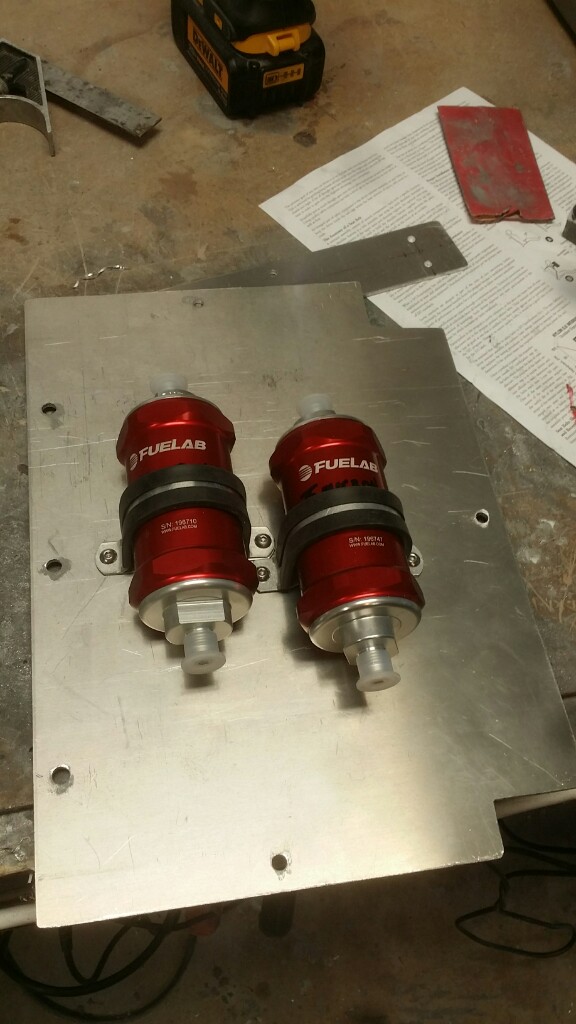
Fuel system in place. "Wow, there's a lot more room in here than I expected!"
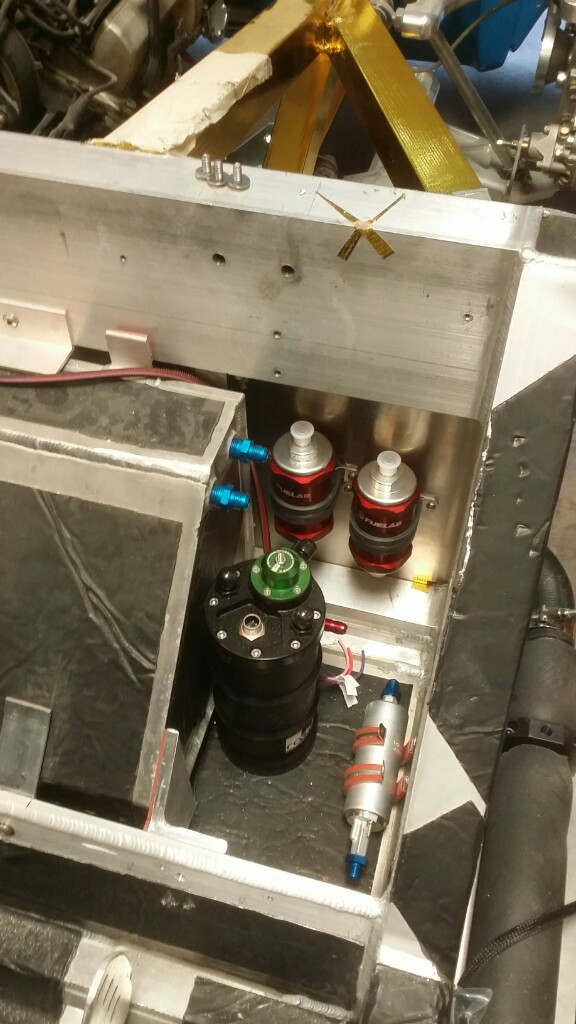
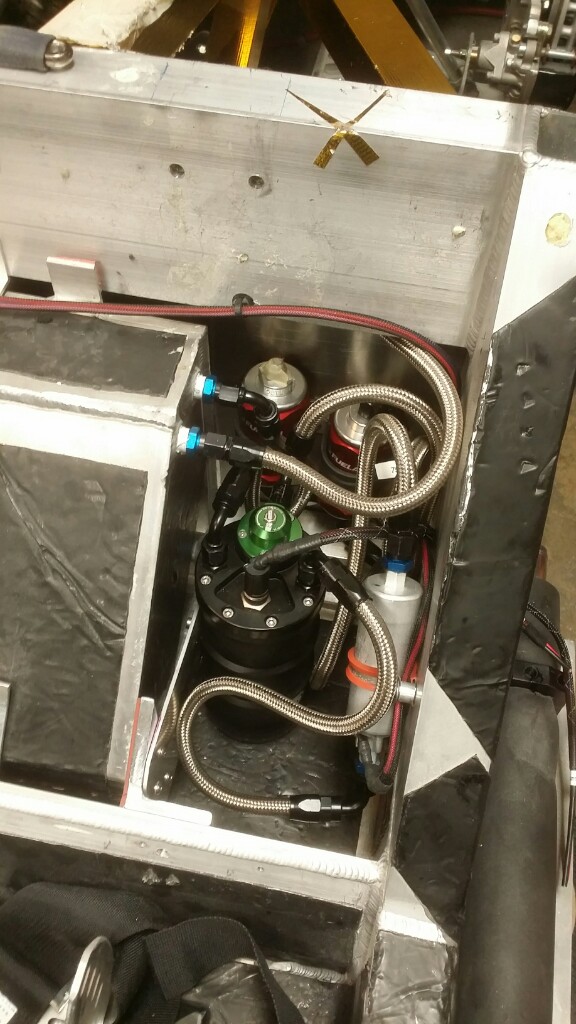
Fuel lines installed. "I guess there's not so much room in there...."
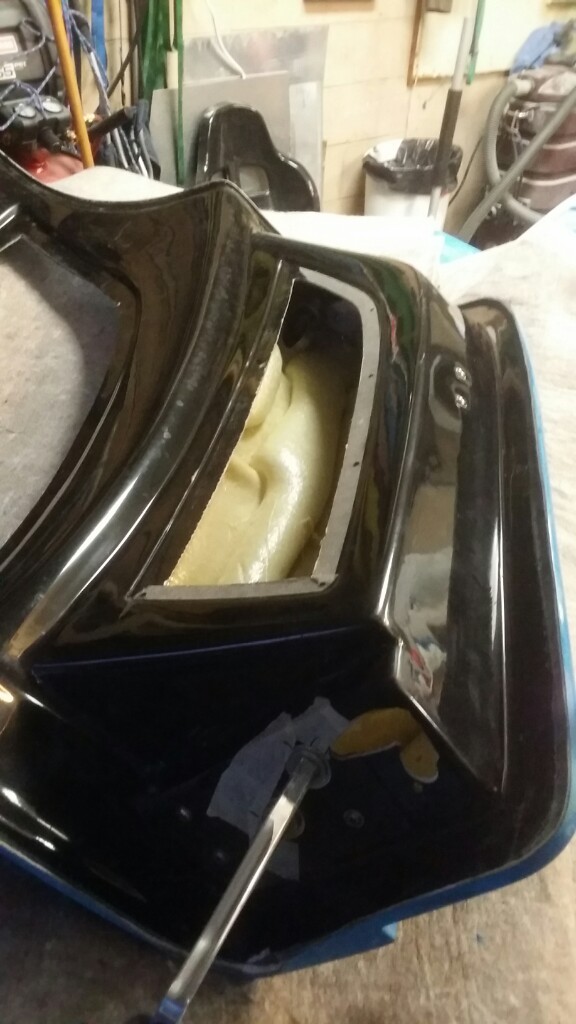
I filled the frame rails with expanding foam hoping to reduce NVH (noise vibration harshness):
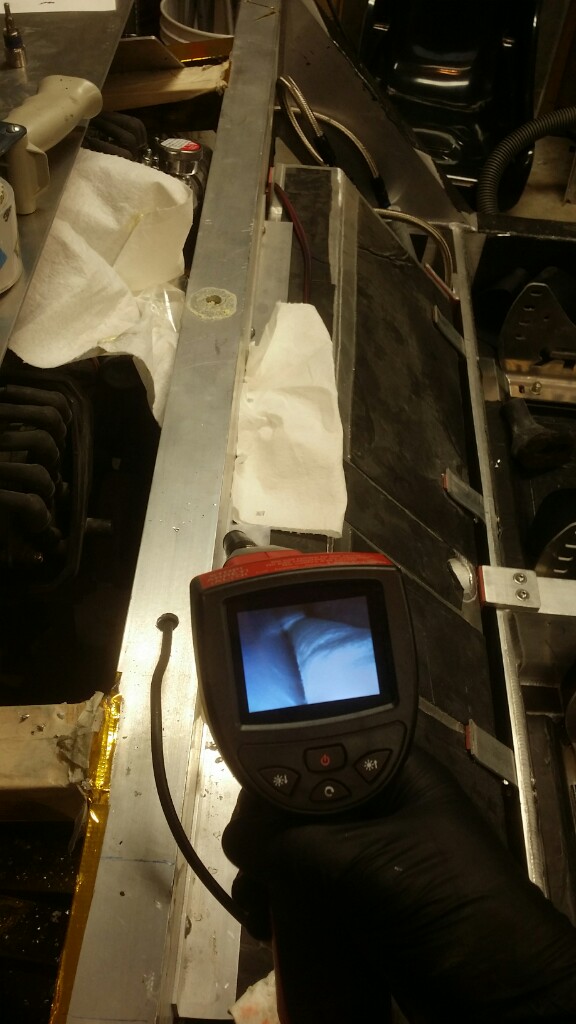
These are all the different locations that I drilled and filled up with foam:
I also put some expanding foam in the doors:
I found a great deal on amazon on heavy duty felt. 9'x12' 3/8" thick for $53, free shipping of course:
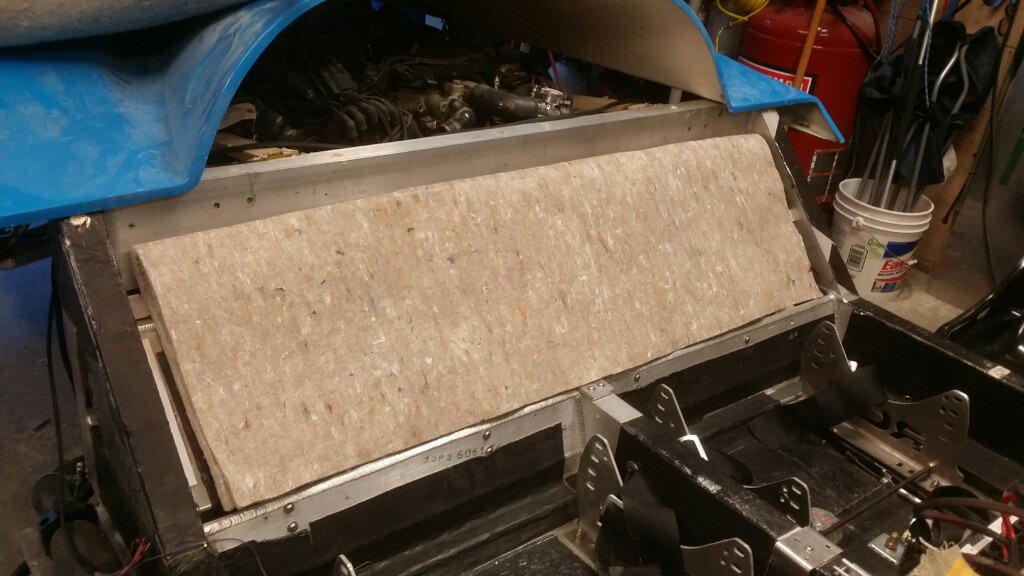
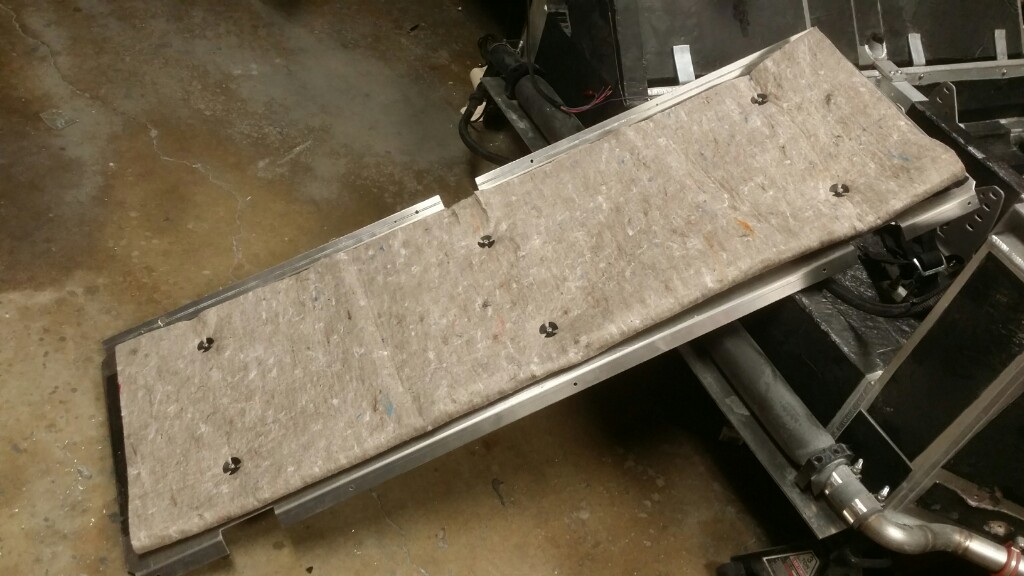
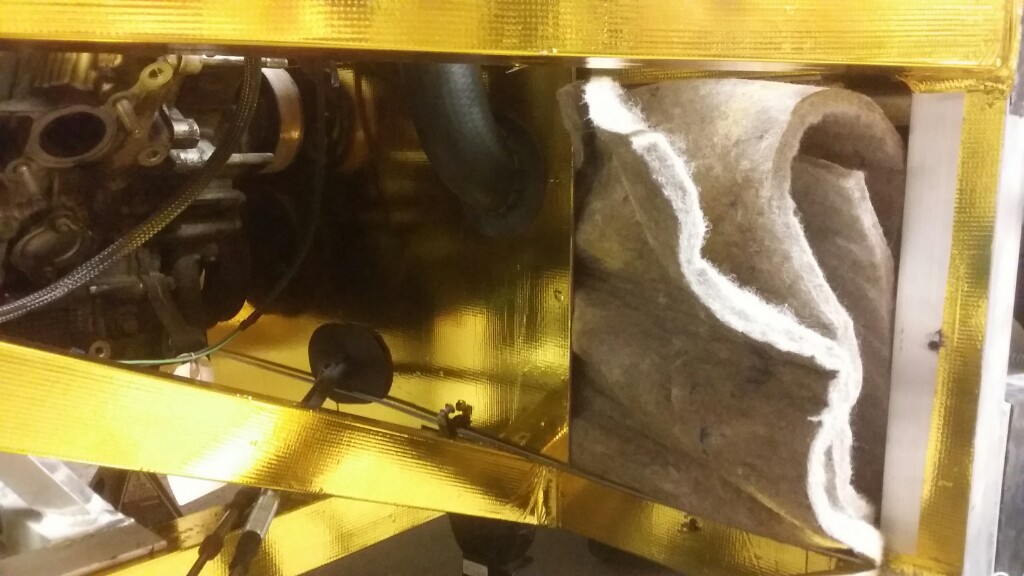
I filled the space between the bulkhead and fuel tank with insulation:
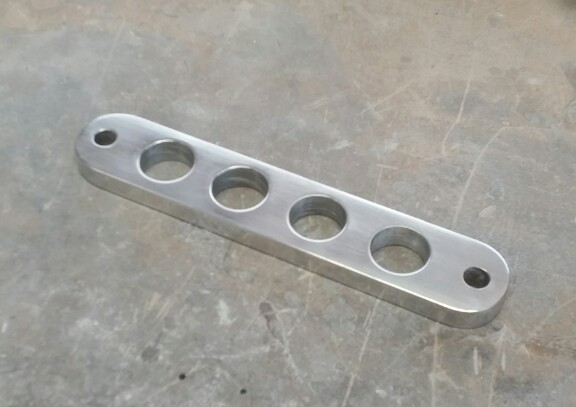
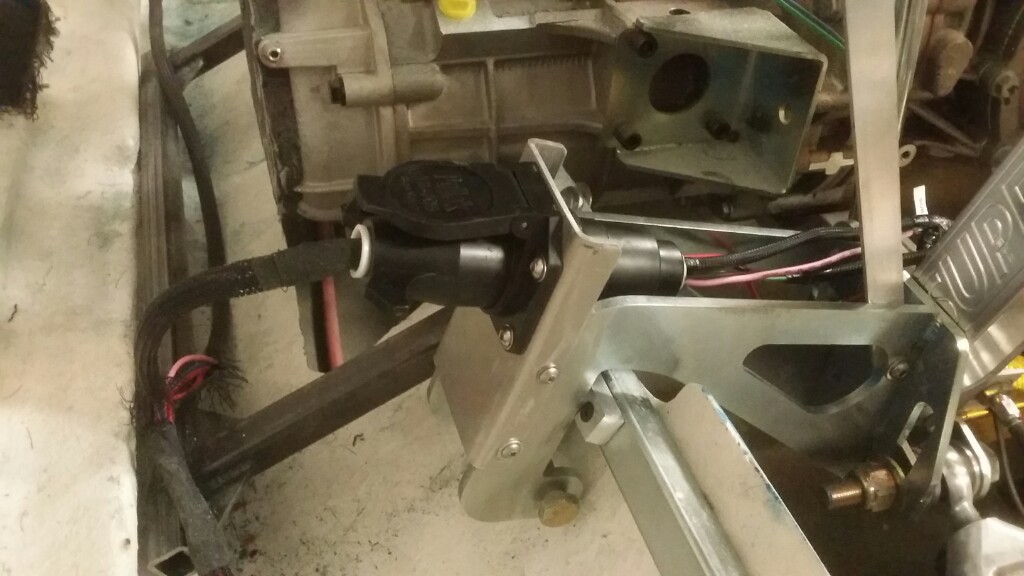
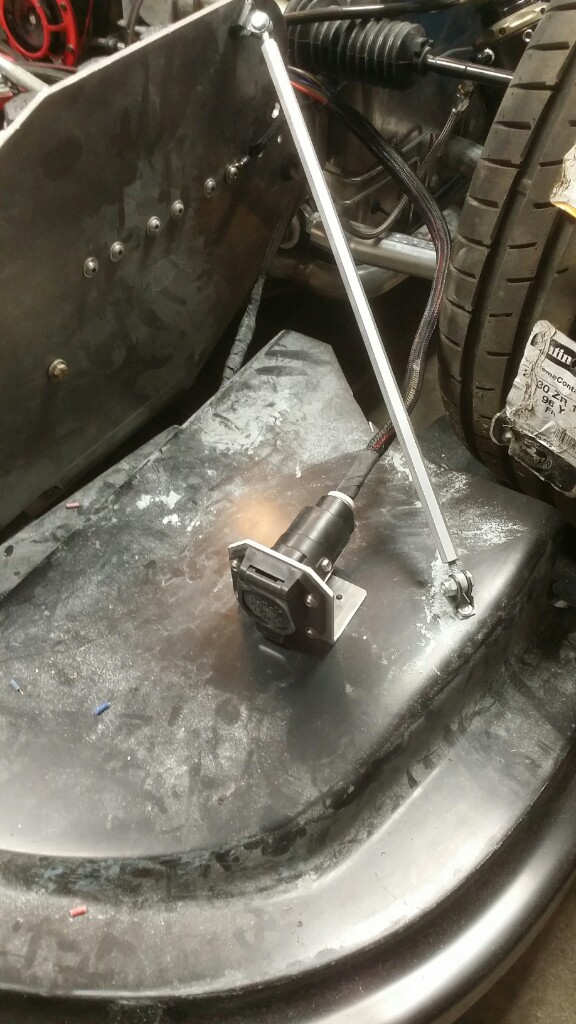
I used 7 pin trailer tow connectors for the wiring into the front and rear clams. This is the bracket that I made, which is mounted to the new style rear hinge:
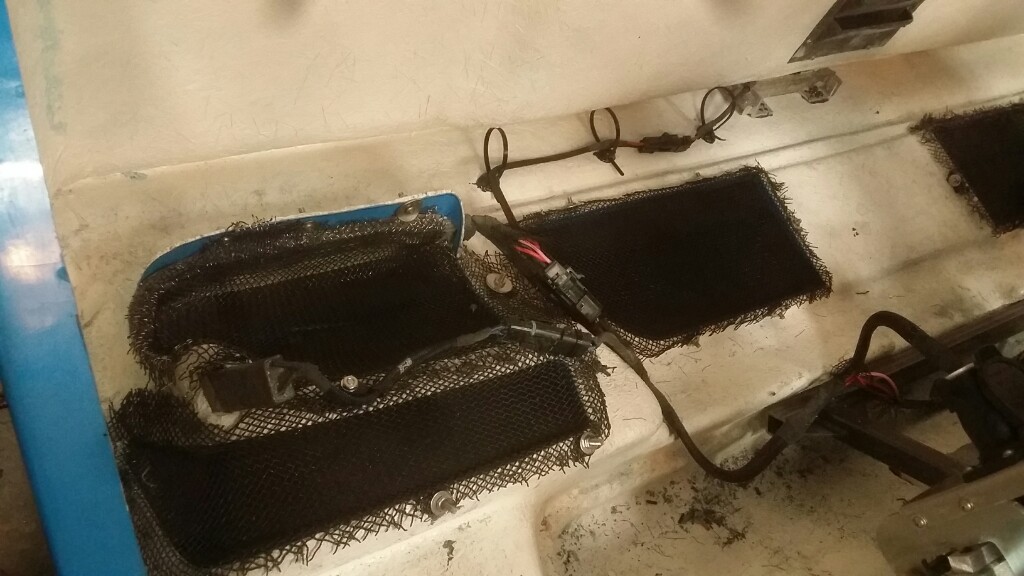
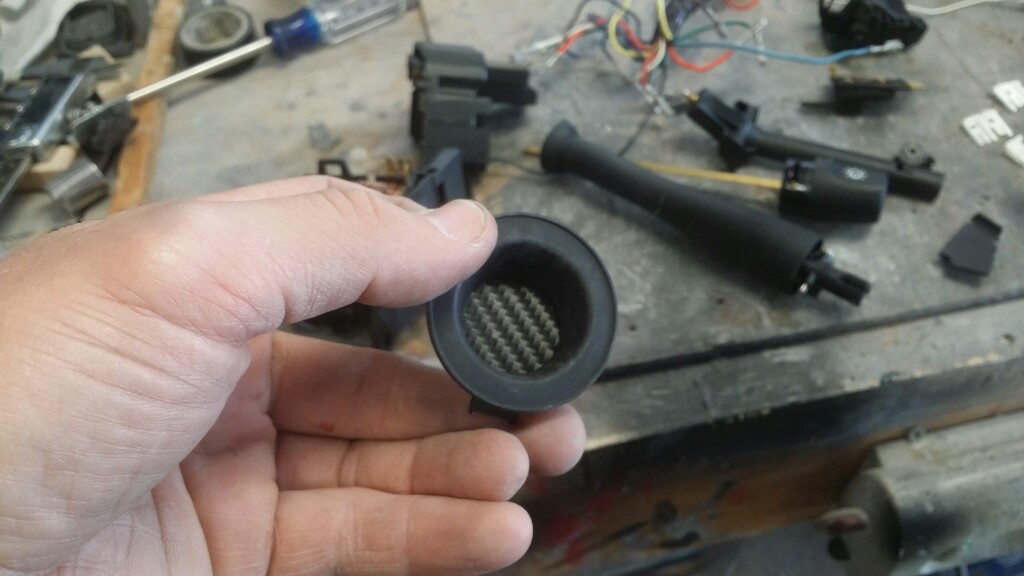
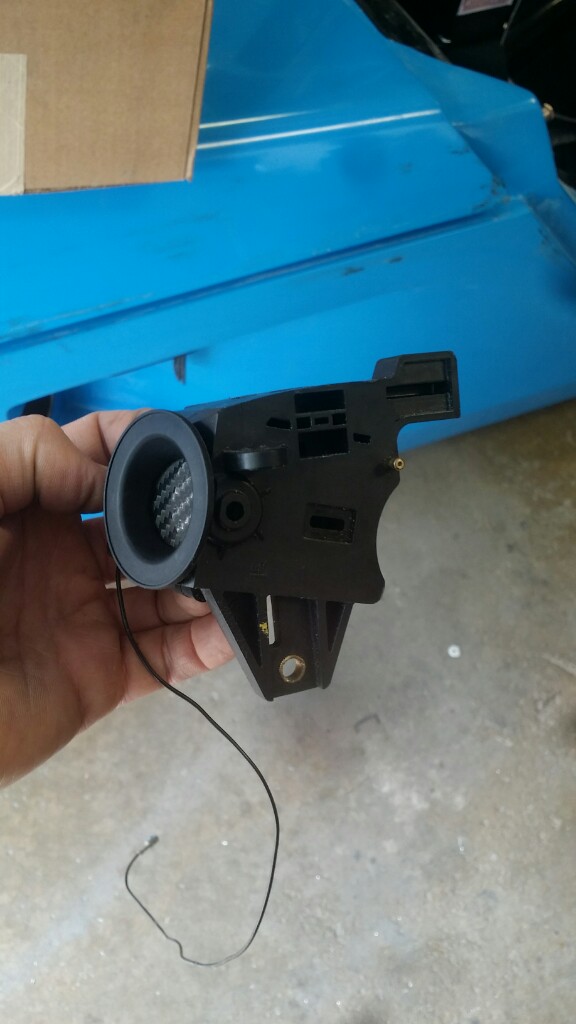
I made screens for the rear cutouts. I was intending on gluing them in place, but decided to secure them with studs so they're removable. This also shows the CHMSL from inside. The design was intended for the light to be removable, but once I bonded in the brackets that hold it, I realized I also trapped the light in place. It's not coming out unless I cut the brackets. Oh well:
The electrical connection to the front clam. This will change, though, because the hinge design that I'm going to use is like Mike Fling's where the splitter will be hinged with the body. The electrical connection will move to the side of the aluminum support, and hopefully I can make it a rigid connection that separates as the hood is opened:
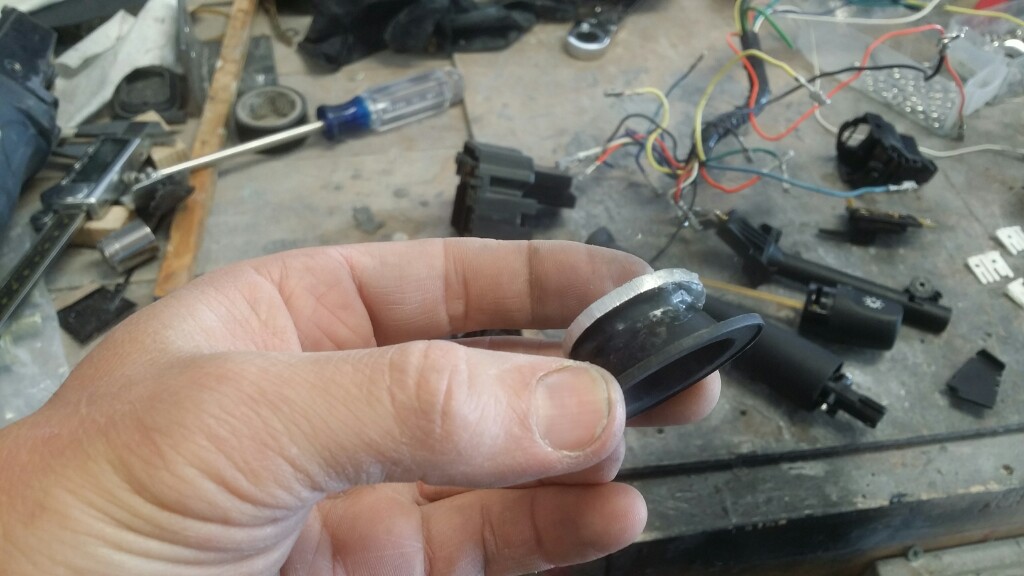
Since I'm not using the turn signal stalks, I need to cover the holes in the steering column cover. I wasn't going to use any part of the stalk or the base they're mounted to, but decided to integrate the base minus the stalks. This way I could also use the electrical connection that powers the horn, without the need for a clock spring. I don't need this to power my horn, but to power my wireless transmitter. The transmitter is battery powered, but will be far more reliable hard wired. And safer. Also on the base of the stalks is the round trim bezel that the stalks stick out of. I removed the stalks and all the wiring (except one power wire to the steering wheel) and fabricated covers and glued them to the back side of the round bezels:
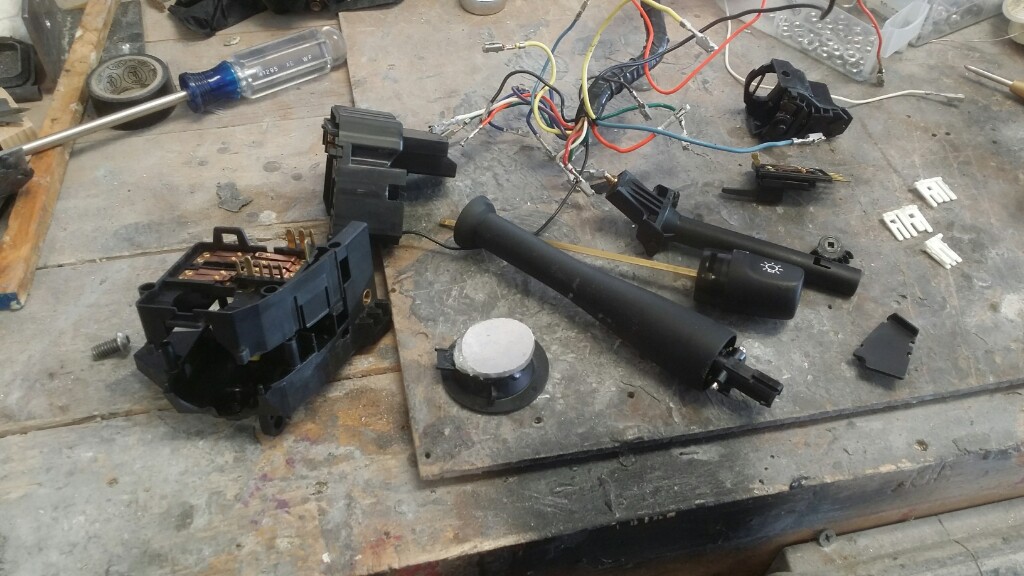
This shot shows the spring loaded terminal to the right side of the base. This is what contacts the back side of the ring on the column. As someone else recently posted, Jegs sells a $2.50 part that attaches through the back of the NRG quick release that makes getting power to the wheel a breeze:
Right side:
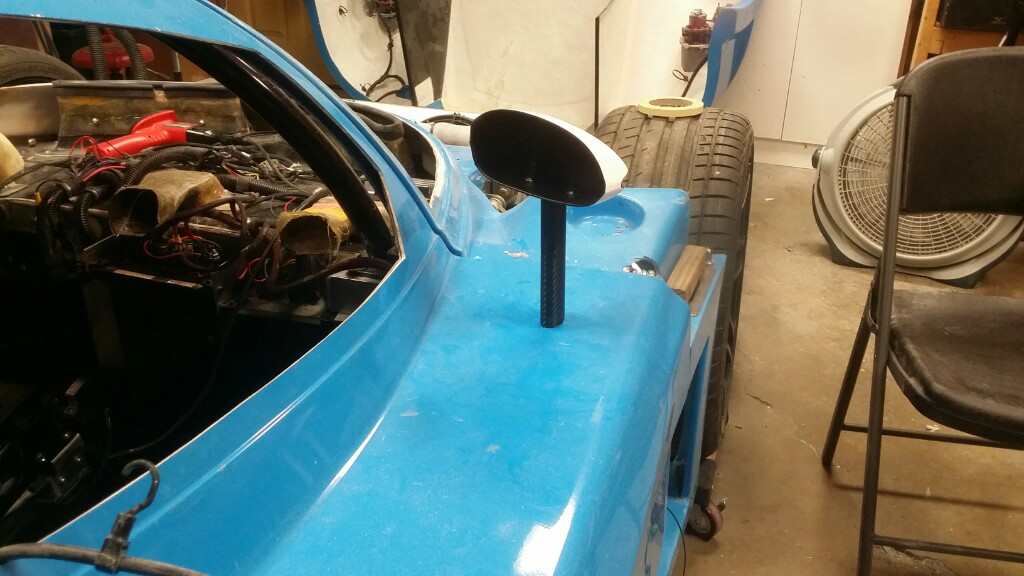
The mirror on the left hasn't been touched, the mirror on the right is the stock mirror after several passes through my band saw and belt sander:
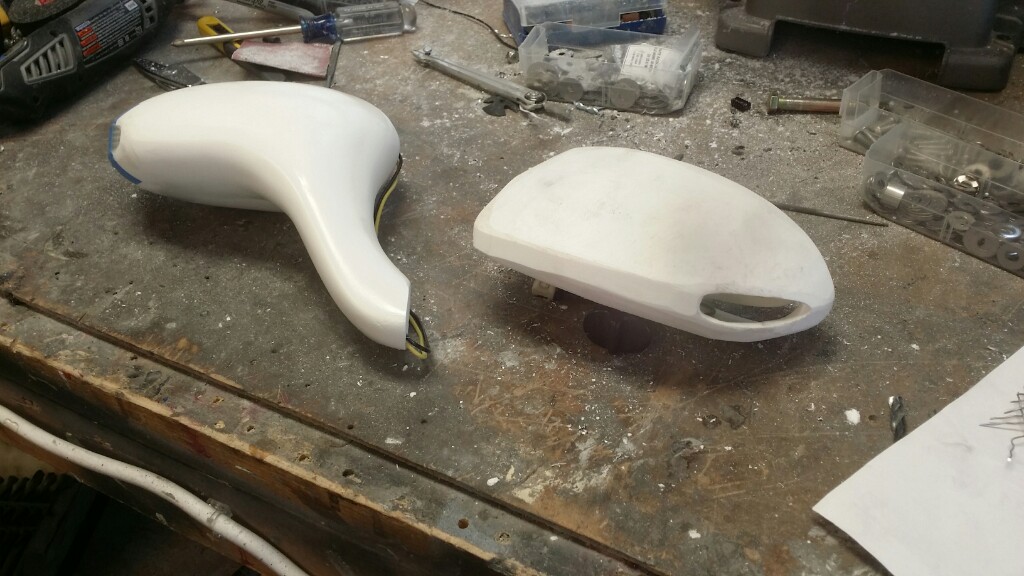
Eight cups was too high, 6 should be about right. I removed too much material on the mirror, and repaired with panel bond. That's the dark spot on the housing:
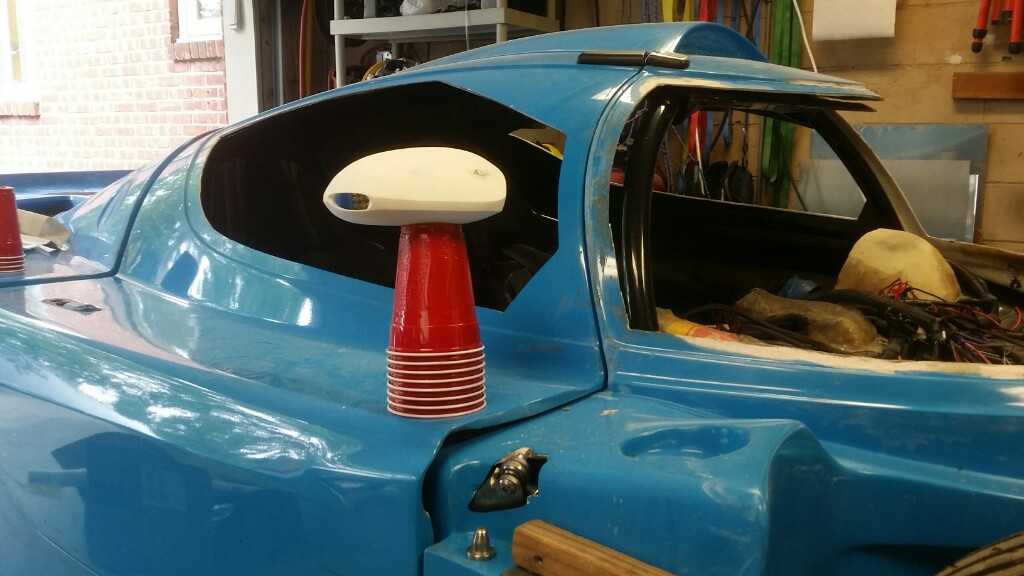
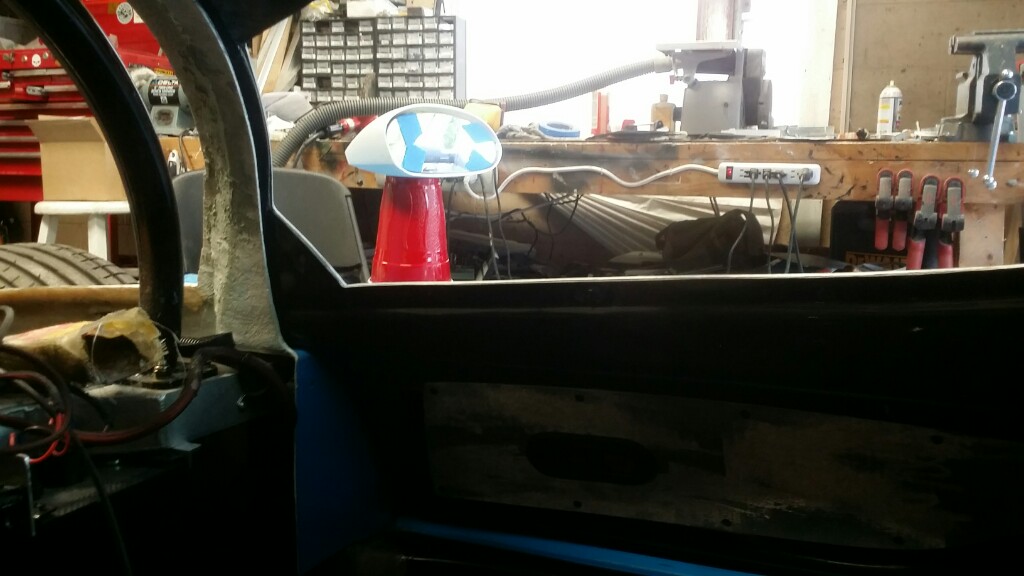
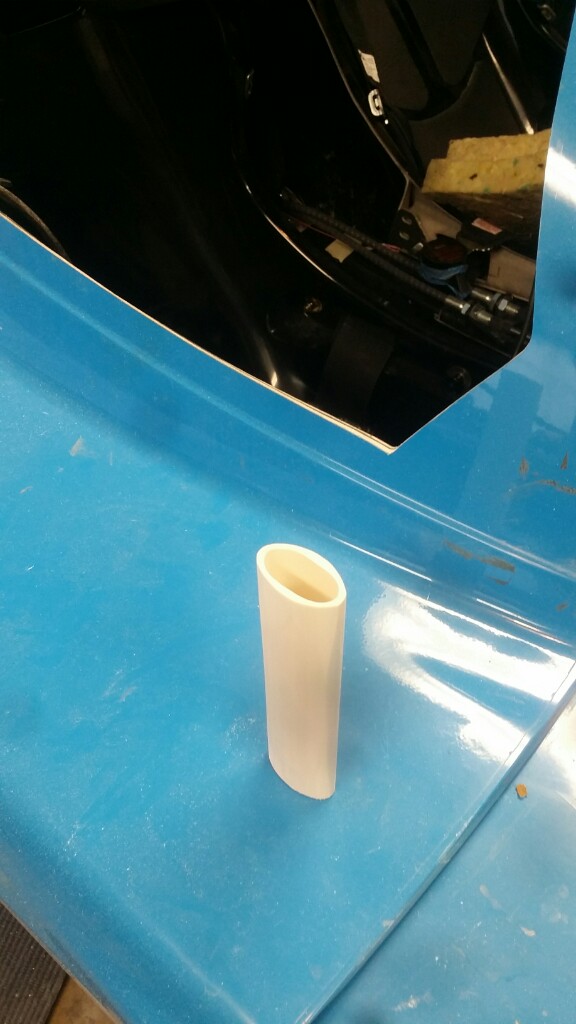
1" PVC which has been boiled and squished, then sanded into a more aerodynamic profile so it doesn't look like a 1" piece of PVC that has been boiled and squished:
The mirror is just balancing in place, but ultimately there will be threaded rod securing the mirror to the door:
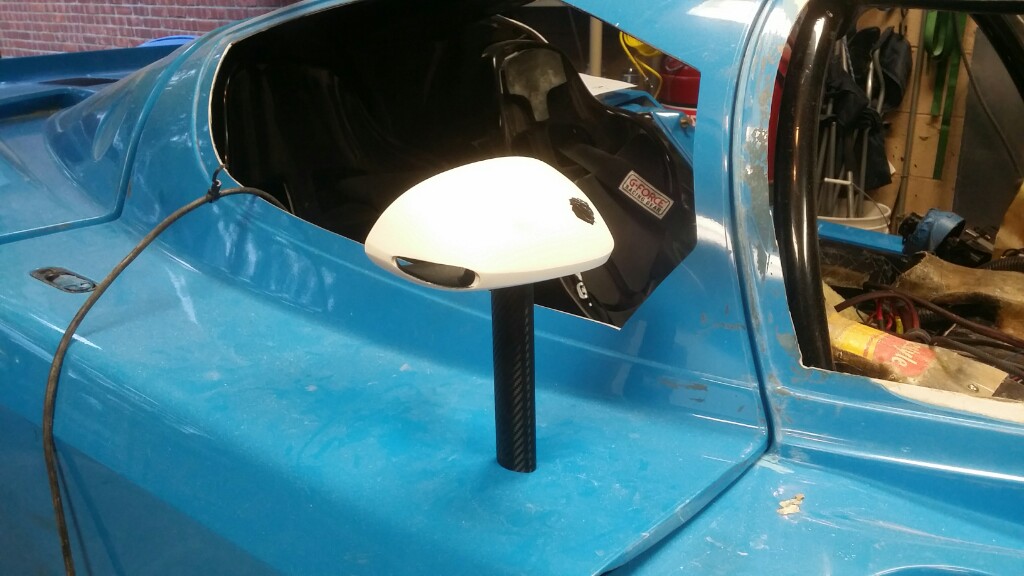
Inside of the mirror is painted black so hopefully the imperfect edges on the glass won't be noticeable:
I mounted the oil cooler for the trans and engine oil:
This view is the clearance from the engine bay. The deck openings are directly above the coolers, and I got the Setrabs with the fans on the back side to draw air through the coolers:
Then the fans exhaust the air right out the back:
I read where it is recommended to have convex mirrors on both sides to improve visibility. So I bought some replacement glass at autozone and cut out the glass. You could get one piece of glass large enough for both slc mirrors, but since it's convex glass, the center of view would not be correct. So I bought a separate piece for each side and cut each right from the middle. The glass is cheap (but not inexpensive!) and very thin. It's not possible to cut on a flat surface because the glass is curved. I found a spot on the body that has the same curvature as the glass. Just behind the headlight was perfect. The edges were rough so I sanded them by hand using 120 grit. It became clear I wasn't going to get the edges perfect because the sliver reflective backing flaked around the perimeter. To hide this, I painted a border around the edges with a paint marker. Later, I painted the inside of the mirror housing black so you can't see the edge:
I cut a flange into the "fender" so the fender vents would be flush mounted, yet still be removable. I painted the recessed area black because my fiberglass is white and even the smallest gaps really stood out:
I fabricated an inner door panel:
...and installed the interior handle:
This is how I attached the handle to the panel:
This is my CHMSL (center high mount stop light):
This is the bottom side of my shifter box. I put an extension on the shifter, and the brown material is a nylon material so it slides easier. It contacts a spring loaded bar that is mounted to the tunnel, under the shifter box. This is my reverse detent. It gives positive feedback when the shifter contacts the spring loaded bar. That is where the 1-2 gate is at. If you want reverse, you push harder and go into the reverse area. It is crude, so I added nylon to both contact surfaces to assist feel. This is a similar concept to what Allan showed on his GTR. His device fits on top of the shifter box. My center console sits on top of the shifter box and there's no room:
Battery hold down bar::
Fuel filters mounted to the back side of the engine compartment bulkhead:
Fuel system in place. "Wow, there's a lot more room in here than I expected!"
Fuel lines installed. "I guess there's not so much room in there...."
I filled the frame rails with expanding foam hoping to reduce NVH (noise vibration harshness):
These are all the different locations that I drilled and filled up with foam:
I also put some expanding foam in the doors:
I found a great deal on amazon on heavy duty felt. 9'x12' 3/8" thick for $53, free shipping of course:
I filled the space between the bulkhead and fuel tank with insulation:
I used 7 pin trailer tow connectors for the wiring into the front and rear clams. This is the bracket that I made, which is mounted to the new style rear hinge:
I made screens for the rear cutouts. I was intending on gluing them in place, but decided to secure them with studs so they're removable. This also shows the CHMSL from inside. The design was intended for the light to be removable, but once I bonded in the brackets that hold it, I realized I also trapped the light in place. It's not coming out unless I cut the brackets. Oh well:
The electrical connection to the front clam. This will change, though, because the hinge design that I'm going to use is like Mike Fling's where the splitter will be hinged with the body. The electrical connection will move to the side of the aluminum support, and hopefully I can make it a rigid connection that separates as the hood is opened:
Since I'm not using the turn signal stalks, I need to cover the holes in the steering column cover. I wasn't going to use any part of the stalk or the base they're mounted to, but decided to integrate the base minus the stalks. This way I could also use the electrical connection that powers the horn, without the need for a clock spring. I don't need this to power my horn, but to power my wireless transmitter. The transmitter is battery powered, but will be far more reliable hard wired. And safer. Also on the base of the stalks is the round trim bezel that the stalks stick out of. I removed the stalks and all the wiring (except one power wire to the steering wheel) and fabricated covers and glued them to the back side of the round bezels:
This shot shows the spring loaded terminal to the right side of the base. This is what contacts the back side of the ring on the column. As someone else recently posted, Jegs sells a $2.50 part that attaches through the back of the NRG quick release that makes getting power to the wheel a breeze:
Right side:
The mirror on the left hasn't been touched, the mirror on the right is the stock mirror after several passes through my band saw and belt sander:
Eight cups was too high, 6 should be about right. I removed too much material on the mirror, and repaired with panel bond. That's the dark spot on the housing:
1" PVC which has been boiled and squished, then sanded into a more aerodynamic profile so it doesn't look like a 1" piece of PVC that has been boiled and squished:
The mirror is just balancing in place, but ultimately there will be threaded rod securing the mirror to the door:
Inside of the mirror is painted black so hopefully the imperfect edges on the glass won't be noticeable:
Looking good A.J.! Just a little tip from experience, You are fine with the spray foam in the frame, but, the poly foam has a very big shrinkage and expansion rate. So it will expand and contract your door skins depending on temp. I would make a cut through the material so that no 2 sides are connected and allow room for this movement. It will make it nearly impossible to get the panel flat. Sand in morning when cold, then find out you have a low spot in the middle in the afternoon. Lol.
Your build is looking great! Lots of good ideas and good craftsmanship.
I like the way your steering wheel controls turned out. I looked back thru your thread for information on the wireless system you used, but could not find it. What wireless system did you use?
I also painted the edges of my mirrors black, but for a different reason. There is a fair amount of light that comes in thru the edges and it muddys the reflection you want. So blocking off the light coming in from the edges improves the overall clarity of your mirror. Sometimes you will see that the edges of thick prescription glasses are darkened or hazed for the same reason.
Your build is looking great! Lots of good ideas and good craftsmanship.
I like the way your steering wheel controls turned out. I looked back thru your thread for information on the wireless system you used, but could not find it. What wireless system did you use?
I also painted the edges of my mirrors black, but for a different reason. There is a fair amount of light that comes in thru the edges and it muddys the reflection you want. So blocking off the light coming in from the edges improves the overall clarity of your mirror. Sometimes you will see that the edges of thick prescription glasses are darkened or hazed for the same reason.
Thanks for the compliments Pete, Scott & Bill. Interesting about the glass. Maybe I got 2 birds with one stone!
I got the wireless system for the steering wheel from eBay. Looks like this one isn't available anymore, but there are many like it. Buyer beware, this product is straight from China and I'm not 100% confident it will survive the rigors of track duty. That's why I have hard wired redundant controls. I had issues when I first started trying to wire up the receiver, months after I bought it. Part of it was my own ignorance of relays, and worse still, my ignorance of reversing polarity for motors. But this company was responsive to my emails, and their version of Google translate seemed reasonably good. Over the course of a week I realized what I was doing wrong, and their device also wasn't functioning properly. So they sent me a new one.
I almost gave up on the wireless idea again last week, and if I could have found a cat5 coiled cable I would have gone with exposed cables wrapped around the steering column. Problem is, even with cat5 I would have needed 2 cables. Luckily I didn't find any. Through perseverance and dumb luck, a few fuses and a burned up relay later I realized my errors.
Looking good A.J.! Just a little tip from experience, You are fine with the spray foam in the frame, but, the poly foam has a very big shrinkage and expansion rate. So it will expand and contract your door skins depending on temp. I would make a cut through the material so that no 2 sides are connected and allow room for this movement. It will make it nearly impossible to get the panel flat. Sand in morning when cold, then find out you have a low spot in the middle in the afternoon. Lol.
Wow, thank you for the tip!! Fortunately, I tried to only put a layer a few inches thick, on the outer panel only. I really had to be careful not to clog up the mechanisms for the handles and latch, and I had to leave room for access to the hinge bolts. Along the same lines, I'm not going to paint the car for a while to let issues like this rise to the surface....literally. Way back when I used to browse the GTM forums I remember a guy who paid for an expensive paint job, and the excessive heat in the engine compartment blistered the paint. Pete's experimentation with the plasti-dip has me leaning in that direction. I really want to do some exterior body mods, but was really trying to stay with the polished gel coat for a while. I have dabbled with the rattle can plasti-dip on my motorcycle and have been impressed with the results...but the best results were with Rustoleum's version of the product. I'm not convinced I can make plasti-dip look appropriate for a supercar. I already have a spray system like they use in the tutorials, but I have a differect brand. Last week I bought a finer nozzle. I will redo the motorcycle and see if it's worth proceeding with the car.
A.J.
PeteB
GT40s Supporter
A.J. - On the Plasti Dip, the results you get using pearls and the DipPearl Topcoat are totally different than anything you can do with the standard rattle cans. DipYourCar.com just came out with some pearls in rattle cans (https://www.dipyourcar.com/collections/dip-pearl-aerosols) - you might give those a try before you make a decision.
Oh I know, Pete! I never would have taken it seriously until I saw what you have done with your vehicles. I'm going to redo the motorcycle in matte black, using the base coat. I want to see if I can get it to lay down as well as the Rustoleum (I'm going to peel that off first, of course). I have a Night Rod Special with the exposed frame. I am thinking of doing the frame in the metallic copper. Maybe even the Harley graphics in copper. It will be a good trial. I'm glad I already have the spray machine.
They must have a new way of applying it or a different type of plastidip. Anytime I have tried it, the part looked like it was furry! Lol. I was getting horrible orange peel.
Scott - orange peel seems to be minimized if you go with the top coat. You can also minimize the rubber feel by applying their post coat treatment, forget what it's called right now. Supposed to make the surface feel like plastic and not rubbery. I'm really intrigued by everything I've watched, think I've burned through almost every video now.
Low cost entry into a temporary paint job. Quality will probably be a 5foot deal, great at 5 feet but up close not super car level. I'm ok with that, especially while I'm shaking the car down.
Low cost entry into a temporary paint job. Quality will probably be a 5foot deal, great at 5 feet but up close not super car level. I'm ok with that, especially while I'm shaking the car down.
Scott, I painted the wheels on my Dart. I started with plasti-dip rattle can and ran out, so I grabbed the Rustoleum version. I liked it better. The Plasti-Dip had texture to it, like bedliner, not orange peel. There was not a hint of orange peel or texture to the Rustoleum. I liked it so much I did my Harley in it. It's definitely what you would call "nose up close" good. I ran a detailing company for 10 years so I have a pretty good eye. The Dart was a lease car, so I peeled the Rustoleum off the wheels before I turned it in after 2 years. It was difficult to get off, I figure due to the high heat.
Applying Plasti-Dip, or any paint, with what is essentially a Wagner Power Painter is what concerns me. I used my Graco twice painting furniture that I made and wasn't satisfied with the results. That was years ago. I've now decided to get it back out. Apparently the needle is key, the one I have is the general purpose (2mm). I talked to the tech support for Graco (now called Earlex) and they are very familiar with spraying Plasti-Dip. I'm sure it has been a boom for their business. I read about the needle on forums and verified with Earlex, and got the correct part number. I'd be surprised if the unit that Plasti-Dip sells isn't made by the same company.
So as I said before, I'm going to wade back into the waters with a gallon of black on my Harley and go from there. The "tank" (airbox) on the Harley needs to be redone due to wear, not surface appearance.
One other word of warning, Plasti-Dip is not impervious to gas. Gas doesn't immediately dissolve Plasti-Dip, but a few drops will discolor the flat black. The nice thing is, with the rattle can you can spot repair flat black and it's indistinguishable. Going to color (not to mention metallics and pearls) and the other spray method, not a chance in hell of spot repairing it.
A.J.
A. J. Two points of interest. Any solvent will affect the finish. It is one of the repairs for Plastiidip if you get a nick in it. They have a video on that one. Also if you get a lot of texture in the finish, spray a layer of pure solvent. allow to dry some(it won't ever dry completely) and then add a layer or two of the regular spray and it should lay flat. Be sure you are not too far away from the panel while spraying if you have gotten texture in the past. These solvents dry rather quickly as the wait time between coats is only about 20 minutes.
The second is that these finishes are not immune to brake fluid as well. I had my entire undercarriage done with a commercial bed liner. It did a great job and is tough as nails with a textured finish. This was early on in the construction and when I installed the master cylinders one fitting was not quite tight enough and dripped onto a cross frame member. It broke the bond with the frame. Had to come back with a rattle can of bed liner to cover it when peeled off and allowed to dry.
Bill
It just seems like you are going through nearly the same trouble to paint a full car (wheels and small parts I can see) to do plastidip, as you would regular paint that will far outlive and out shine the plastidip. Not to mention the time it takes to get it off when you do decide to paint, and then have to still get your body work perfect. Paint and materials cost is very close between the two. If you get a flaw in the paint clear while spraying, you can simply sand it smooth.
Painting is far easier than a lot of people imagine I think. Get a $100 gun, $200 in a high build clear, $150 in base color, and you just need to rough up the gel coat. If fully cured, no need for primers or sealers, just sand in 400 grit and go. If a guy could spray the plastidip with good results, real paint would be a snap.
Painting is far easier than a lot of people imagine I think. Get a $100 gun, $200 in a high build clear, $150 in base color, and you just need to rough up the gel coat. If fully cured, no need for primers or sealers, just sand in 400 grit and go. If a guy could spray the plastidip with good results, real paint would be a snap.
I have to agree with Scott .... It's a $100K Super Car ! Not a 2005 Honda Civic .. LOL
PAINT IT !
PAINT IT !
I agree, that's part of my hesitation. When I started pricing it and discovered that it was going to cost over $300 (at least double that for the color flip pearls), I said "no way". Later, I realized I was going to need to enlarge the side vents for intercoolers. I was faced with the choice of driving the car for a year or two with exposed bondo on the body, or try to make the Plasti-Dip work to hold me over until I'm ready to paint. That's where the value comes in for me.
A.J.
A.J.
Seems there's some obvious stigma attached to plastidip. A $300 paint job is not one I would want on my daily let alone my SLC, if we're being honest here. However, as a temporary solution I think it fits the bill exceptionally well. It may not meet the standards of a real paint job - but those of us who are going out and doing it right are assuredly paying more than $1000 for a semi-decent paint job. To do it right DIY you need to setup a paint booth and invest a fair amount of time in prep and finishing.
Here's a solution that gets you something halfway decent while you're shaking the car down and waiting for the body to get seasoned. Also a good way to test out multiple paint schemes/colors before committing a fair bit more money.
I would encourage folks unfamiliar with plastidip to watch a few videos online, the product has come a lot further than you may realize.
Just as with anything, there are great examples and there are crappy examples. If you want to take your SLC to Maaco I'd bet you can do better yourself with plastidip as a first time user. And if you muck it up, peel and try again.
If someone has never sprayed a regular automotive paint, then they might feel the plasidip to be easier. It isn't. My only point being, that if someone was to spend the money for the plastidip (which would come very close to the cost of normal paint) and go through nearly the same prep process, and the same masking and make shift paint booth process. Paint seems like the clear choice. Not to mention the time it would take to remove the plastidip when it comes time for paint, where you will be doing the entire process over that you did to prep for the plastidip.
If you get flaws or runs in your clear, they sand off. Yes, you sand the clear down, it is called color sanding and that is the only way you can get a super smooth paint job. Not even the best painters in the world can get a flawless, no orange peel finish. Show cars get color sanded.
Just trying to show that the best money spent is in going with paint. It is cheap! $150 will get you 2 sprayable gallons of U-Pol super clear. A new water borne paint that is super hard to run and crystal clear to like 3" thick! It is far above a production clear on a production car and a high solids paint. I use Omni for the base color. It is cheaper and you are putting clear over it. The base will cost you $100-300 a gallon depending heavily on color chosen. Buy a $100 gun and I assume most have a compressor.
In the end, you are really not saving much money at all, but losing 100's more hours in time. I also think the biggest part that effects the whole community, is if the car gets sold before the final plan of paint can be executed. Your sale price will be effected heavily, and it will pull the market value of the car down for the rest of us.
A race car, sure. But you have some nice work going on here AJ, and painting is easy and nearly the same cost.
I have painted nearly every car I have owned. Even the very first one, which had orange peel badly, and bugs that had landed in it, all sanded out perfectly and won many trophies and peoples choice awards with it.
Ofcourse, it is your car and what you choose for it is best for your situation, but if the choice to go plastidip is based on price and ease, real paint will be right there with it, but less labor since you dont have to remove it in future.
Once you learn how to paint, you can save yourself tons of money!
Making a paint booth-
put up plastic around perimeter of garage, sweep floor 3-4 times, leave garage door partially open, wet floor if desired (but it can raise the humidity) and get a cheap $10 tyvek paint suit from Home Depot. (80% of foreign objects come off the person spraying) Or rent a paint booth for $100 a day locally. Since all of the body can be removed from the car, almost no masking needs to happen. Just set on saw horses and go.
Just trying to shed some light onto the paint side of things if they havn't been considered in a side by side comparison of work vs. money involved vs. end product. And, it is easier to do than 95% of people think it is.
You could probably match the gel coat color. Then, you could literally roll it on with a roller, and sand smooth and buff.