Harrison's Garage's RCR 40 Build

Hi all,

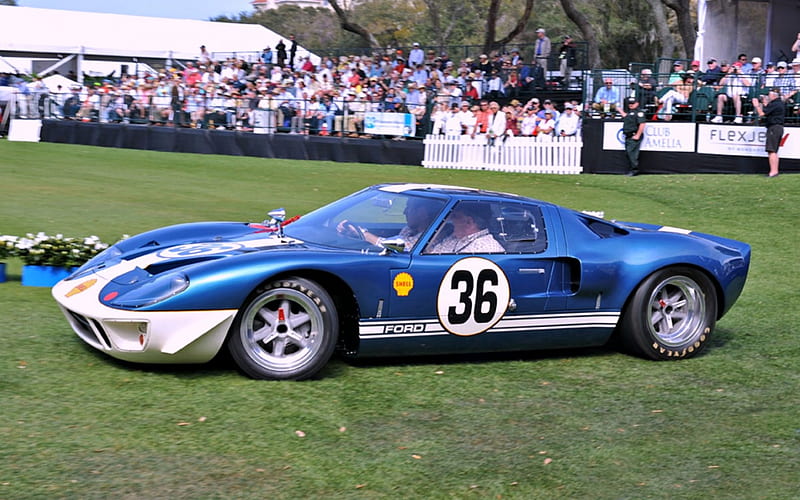
I've been a member on this forum for a little over a year and a half getting ideas and researching. I initially decided I wanted to try and build a kit car (either a FFR cobra or a GT40) when I found out the price of the kit was within my means. I've always liked car shows and vintage cars but have had a soft spot for the cobra and the 40 since I was a kid. I recall having a wall poster of the cobra in Middle school while also playing Gran Turismo 3 as a kid and being able to blast around in the Gulf version of the 40 in game. I went back and forth for quite a while creating renders of both cars in configurations I thought I'd enjoy and ultimately decided on the 40 after paying RCR a visit in May of 2023. I was quite impressed with there set up; they have also been far more responsive, helpful, and passionate than I ever would have expected - Fran is truly a man who loves what he does.

I officially placed my order with them on 8/28/23 - and so the wait begins. It is my intention to post regular updates here for everything I do along the way along with more in-depth videos of the build on my YouTube channel, Harrison's Garage. It's my intention for the car to be driven 80% on the street and 20% on track so it needs to be quite capable. The setup I've gone with is:
  • RCR Deluxe Plus Kit LHD
  • 6 point track day cage
  • Single nostril (go nose)
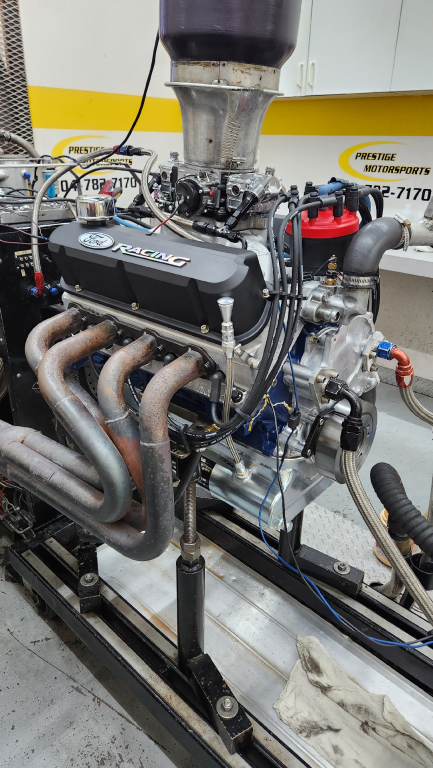
  • Engine will be from Prestige Motorsports and is a Ford OEM block 347 with 500hp and 450 lb/ft of torque revving to 6,500rpm
  • Stainless steel headers to be supplied by RCR
  • Transaxle will be a G96/01 refurbished gearbox provided by Fran
  • Front Wheels will be 15x8 BRMs wrapped in Pirelli Pzero Asimmetrico 225/50r15s
  • Rear Wheels will be 15x12 BRMs wrapped in Pirelli Pzero Asimmetrico 345/35r15s
  • I plan to have the RCR +2 suspension and the +4 gulf flares mounted by RCR and customized to cover the shorter 24.5" diameter rear tire
  • Front air lift kit
  • Panel/body fit done by RCR to install the body panels and doors
All comments, suggestions and advice will be welcomed. This is my first full kit car build though I have enjoyed working on cars and trucks on my channel for the past several years. My current guesstimate as to when the car might be finished is somewhere in the 5 year range given that my wife and I have just had our first child.

-Harrison
 
While we wait, I thought I would take this opportunity to ask for your opinion. The biggest internal debate since I began fact finding a year and a half ago was what color scheme to go with. I've since put a few renders together of the two paint schemes I've narrowed it down to. One is the iconic gulf livery and the other is a little less so (Guardsman blue with a singular white stripe) -- Let me know your thoughts!!

Gulf Perfection.png
Guardsman Perfection.png
Gulf 10.png
Guardsman 10.png
Both Desert.png
 
The Guardsman Blue. ANYTHING but Gulf colors. That scheme is so over used I now see people painting Camaros and just about everything some variant of it. Paint the BRMs black centers and polish the lips. Black headlight, driving light and NACA duct areas. When done, call me to come pick it up. Best of luck on your build!!! p.s. I have 345 Pzeros on my Pantera but just switched to 285 P7s for the fronts. Check the 345 in that tread pattern as well. Lucas tire in Long Beach has them in stock.
 
My 50 cents.. anything but Gulf also.
People ask me what it is all the time (mk2 in gold H&M livery) and when I say GT40 the won't believe me cause it ain't light bleu & orange...
When I ask did you see "the" movie, they all apply yes.. then I ask did you see a light blue and orange GT40 with gulf livery.... Yeah Ken Miles...
Nope it didn't have the orange stripe...

Old Skool, Guardsman blue. It gives you way more contrast (bodylines) in the sun.
 

Chris Kouba

Supporter
While we wait, I thought I would take this opportunity to ask for your opinion. The biggest internal debate since I began fact finding a year and a half ago was what color scheme to go with.

This was probably the hardest decision of the build. My answer for you: go with the one you like. It's your car....

That said, I do agree the Gulf is quite common. I don't think anyone on this forum would look down on you if you did though. I was going to go the 1036 route (Guardsman Blue with White) but there were a few builds concurrent with mine and I wanted something a little different. I liked the Gulf mustache layout and I liked the Essex colors, so I combined them as white with red stripe/mustache. Figure out what works for you.

GT40/P1036:
HD-wallpaper-1965-ford-gt40-prototype-1965-ford-cars-gt40.jpg


I think "in period" that the dividing stripe was actually yellow.
 
Thank you all for your responses. Lee - I wasn't aware of Lucas Classic tire; I reached out to them and unfortunately the 345/35R15s are also out of stock there but they did place me on a call list.

I've also surveyed family and friends (who are very much not as into the 40 as those on this forum) and they all were leaning heavily into the gulf. I've seen an '05 ford GT painted in Gulf livery and it looked very at home on the car. I think my final decision will ultimately come down to how the car looks/sits unpainted in my garage as I see it in person. That said, I've put together a few more render's of the Guardsman blue rendered with the wheels powder coated black with polished knock-offs for your viewing pleasure - I have to say it does look quite mean :D

Chris, I love the ride height of your car and am planning on having mine sit similarly.

6.jpg

8.jpg

9.jpg
4.jpg
 

Chris Kouba

Supporter
Chris, I love the ride height of your car and am planning on having mine sit similarly.

Thanks Harrison. I love the stance of it too.

I was very specific when I set my flares (check my build- I did it twice, so I guess I wasn't as specific as I thought the first time). Pick your ride height, cut some wood scraps to block it up, remove your springs so the chassis rests on the blocks, then set your gaps to the spec you desire. I should mention that you should have the suspension squared up (track and wheelbase properly set) and fully aligned before this exercise as well. It's all a giant learning process, and this forum is a fantastic resource. Use it. I probably wouldn't have succeeded without it.

Thanks for the tips Chris. I’m having RCR fit the fenders. They have a copy is the renders so they can reference for the look I’m going for. I’m also having them take care of fitting the panels and door latches which should help. With a newborn, I’m trying to minimize the number of tasks outside my wheelhouse.
 
** Engine Update **

I know I mentioned in the very first post that the engine would be from Prestige Motorsports. I thought I'd provide more detail on this; why I went with Prestige, what I've spec'd and my experience with them so far.

I found Prestige online rather quickly given their built out website and was genuinely pleased with their offering for Ford crate motors and the prices they came in at. After reading through many horror stories from other engine builders either going under, not responding, or ghosting clients (won't name names), I've since found my interactions with Prestige to be excellent. I ultimately decided to move forward with them after considering their ample 3 year unlimited mile warranty.

After putting my deposit down on 9/1/23 (not more than 6 days ago) I've already been sent this photo of the block on the stand with the valve covers and distributor mounted. Although I was initially quoted a 5 to 6 week lead time, I've since been told given their stock it will likely be closer to 2 to 4 weeks!

Long Block.png


**The Specs**
-Targeting peak power and torque at 500hp and 450 lb-ft
-Compression ratio of 10.5 to 1 so it can run on pump gas (ideal for blasting up and down the coast).
-It starts as a Ford factory 302 block bored and stroked to 4.1"/3.4" respectively
-Eagle/Scat/Liberty Cast Crank depending on availability
-5140 forged I-beam connecting rods w/ ARP bolts
-28oz harmonic external balancer
-Prestige Motorsports forged 4032 aluminum pistons
-Prestige Motorsport Cam hydraulic roller cam 235-249 .556-.542, 108 and hydraulic roller lifters
-Prestige Motorsport CNC Aluminum Heads 200cc intake runner, 59cc chamber, 2.02/1.60 valves
-Aviad front sump oil pan
-MSD Distributor
-Holley 650 Brawler Carb
-Edelbrock dual plane intake manifold with air gap
 

Randy Folsom

Supporter
While we wait, I thought I would take this opportunity to ask for your opinion. The biggest internal debate since I began fact finding a year and a half ago was what color scheme to go with. I've since put a few renders together of the two paint schemes I've narrowed it down to. One is the iconic gulf livery and the other is a little less so (Guardsman blue with a singular white stripe) -- Let me know your thoughts!!

View attachment 132140View attachment 132143View attachment 132145View attachment 132144View attachment 132146
Nice renders. I am struggling with same decision. I think I will initially do vinyl wrap to see how I like it. My current plan is to go with a slightly metallic navy blue, with metallic pewter accents. The wheels will match the accents and recessed areas will be probably be black along with the wheel lips. I also think I might like red with silver accents, so that’s why I will wrap. Cheers, Randy
 
Nice renders. I am struggling with same decision. I think I will initially do vinyl wrap to see how I like it. My current plan is to go with a slightly metallic navy blue, with metallic pewter accents. The wheels will match the accents and recessed areas will be probably be black along with the wheel lips. I also think I might like red with silver accents, so that’s why I will wrap. Cheers, Randy

The wrap is certainly one way to make sure you like it before you commit - though it isn't exactly free. I'm hoping by the time I have the roller in front of me, it will be easier for me to lean towards one paint scheme vs the other.
 

Randy Folsom

Supporter
I agree having the car up close and personal will make choices easier. I think I can DIY wrap for around $1,000. Lots less than a nice paint job, but just like everything in life, you get what you pay for. I just don’t want to regret an expensive paint job. After painting I may still use wrap for a nose bra, rondels, strips, etc. It will be nice to have be able to completely change the look of the car by changing the colors of those elements. And vinyl wrap will protect the paint, especially a nose bra.
 

Neil

Supporter
Today was exciting! I received the dyno photo and video from Prestige. The link to the dyno pull is here. Needless to say I'm quite pleased with how things turned out :). The motor produced 503.6hp at 6,500 rpm and 450 lb-ft of torque at 4,700 rpm. These numbers should put the car right around 440 hp/ton or 370.4kw/tonne which is McLaren 720S territory.

I love the dull red glow of the headers. Obviously the engine is not just sitting there idle on that dyno!
 
Big update - the engine came in from Prestige last week and looks every bit as great as I'd hoped. Busy weeks at work meant I've only gotten around to posting these photos now. I very much enjoyed the spooky touch to the shipping box as well. I have an air cleaner on order from Holley and plan to get the carb mounted as soon as it arrives this week.


IMG_3063.jpg


IMG_3062.png
 
Now that my engine is unpacked and tucked away pending the front end from RCR (along with the rest of the car). I've taken the time to get the rest of my garage ready to go. I've decided on a 4 post lift to assist in building and storing the car. When I'm not working on it, the kit will live near the ceiling so my wife can walk around underneath without being too terribly inconvenienced.

When I'm working on it, I intend to have it lowered to a comfortable height. If I need to droop the wheels, I plan on placing jack stands underneath it and dropping the lift to the floor. The setup should hopefully really speed things up. I've pasted a link to part 1 of my install video below. Part two should be posted in a couple weeks for those interested.


I had a pretty severe wobble issue with the lift with it just sat on my floor unbolted so I decided to bolt it down using concrete epoxy (Red Head CP6+) and grade 5 threaded rod. It seems to be rock steady now - though I have yet to test it with a car. I chose to sandwich the floor plates of the lift between two washers furred up from the ground by nuts. These furring nuts allowed me to get the lift perfectly level despite the slope on my garage floor.

IMG_4341.jpg
 

PaulProe

Supporter
I chose to sandwich the floor plates of the lift between two washers furred up from the ground by nuts. These furring nuts allowed me to get the lift perfectly level despite the slope on my garage floor.
Harrison,
A little off the topic of GT40's but your note caught my attention.

In my past life, I was an automobile lift guy - Engineering, Service, Warranty, Product Liability, Manufacturing, Marketing and Sales. Did everything except accounting. My career spanned 45 years in the industry with two of the market leaders. I state this as my qualifications to offer some advice.

The base of the column is designed to sit flat on a surface, not by supports in the four corners. It was always recommended that when a column needed to be shimmed to make it plumb, the area under the column be filled with non-shrinking grout. Right now, you aren't seeing any issues since you don't have any weight on the unit. But once you start to lift a load, the baseplates will begin to bend. The unit will become unstable. Recommend you pack some machine grout under those bases, unless you want the thing to eventually break.

I personally, never liked the concept of un-anchored four-post lifts. They rely on the baseplates deforming until the column itself transmits the load to the concrete surface. The lift wouldn't fall over but in my opinion, wasn't very stable. Anchoring is the right thing to do, but you need to do it correctly or you will create problems for yourself.

Paul
 

Devin

Supporter
Now that my engine is unpacked and tucked away pending the front end from RCR (along with the rest of the car). I've taken the time to get the rest of my garage ready to go. I've decided on a 4 post lift to assist in building and storing the car. When I'm not working on it, the kit will live near the ceiling so my wife can walk around underneath without being too terribly inconvenienced.

When I'm working on it, I intend to have it lowered to a comfortable height. If I need to droop the wheels, I plan on placing jack stands underneath it and dropping the lift to the floor. The setup should hopefully really speed things up. I've pasted a link to part 1 of my install video below. Part two should be posted in a couple weeks for those interested.


I had a pretty severe wobble issue with the lift with it just sat on my floor unbolted so I decided to bolt it down using concrete epoxy (Red Head CP6+) and grade 5 threaded rod. It seems to be rock steady now - though I have yet to test it with a car. I chose to sandwich the floor plates of the lift between two washers furred up from the ground by nuts. These furring nuts allowed me to get the lift perfectly level despite the slope on my garage floor.

View attachment 137177
Harrison,
Just my 2 cents having 8yrs of experience in installing 4 post lifts (and other Shop equipment) and working around the 2 post Rotary lift guys as well.

I like your ingenuity but haven’t seen that technique of leveling & anchoring before. The primary way to level the posts is usually by an appropriate number of shims (to make level) sitting directly on the concrete or ceramic tile surface…any other matting or man-made floor covering may have an irregular or compressible surface and may be why you were experiencing the wobbly anchoring. I would suggest cutting the floor covering away with enough room to set the posts directly on the surface and use steel washers or shims between the concrete and metal post to make it level and tighten it with the top nut to the manufacturers torque specs.

I’ve seen the results of weak concrete anchoring (too thin or wrong psi) as well as improper lift use/miss timed locks causing severe damage to lifts & vehicles (luckily no personal injuries) even with the best installed lifts by industry standards. Remember, most of these lifts are made in China with imported steel so those are usually enough risks to deal with on their own (I personally own two myself).

As Paul suggests, the best method is a full plate shim of appropriate thickness or even as we would do is shim and push special bonding concrete under the post to give it a full pad to sit on.

Devin
 
Back
Top