Graham's RCR GT40 Build...

Hi Graham

That looks like Andy Topping's car - I know he sold it recently on Pistonheads.

Yes, You're right (if it's the same Andy that I'm thinking of).

Cracking on slowly with the build (although it's in reverse at the moment as I'm stripping it all down to paint the chassis Satin Black :( )

Cheers,

Graham.
 
The Christmas holidays brought me a well earned (IMHO :) ) week off. I stripped down the suspension and finaly got rid of the batteship grey coloured chassis that the previuos owner had painted. Nowt wrong with it, but it wasn't my cup of tea.

Now I have nice satin black chassis that looks moocho better. I also painted the suspension joints and roll bar for good measure. The satin black is Hammerite so it will withstand sme punishmnent

My new fuel tanks will be here this week courtesy of Mick Sollis, who I must say is a top bloke all round. Once these are installed I will be putting a rubberised paint around the areas that will get the most road battering.

Enjoy the piccies and watch this space :thumbsup:

Graham.
 

Attachments

  • DSC00613.JPG
    DSC00613.JPG
    141.5 KB · Views: 737
  • DSC00614.JPG
    DSC00614.JPG
    139.7 KB · Views: 638
  • DSC00617.JPG
    DSC00617.JPG
    136.8 KB · Views: 639
I received my new fuel tanks near the start of January, so the fun part of fitting them begain in earnest. They are of a really high quality. See the piccies below.

Graham
 

Attachments

  • DSC00623.JPG
    DSC00623.JPG
    143.8 KB · Views: 512
  • DSC00625.jpg
    DSC00625.jpg
    20.3 KB · Views: 495
  • DSC00629.JPG
    DSC00629.JPG
    123.5 KB · Views: 460
  • DSC00632.jpg
    DSC00632.jpg
    17.7 KB · Views: 485
  • DSC00634.jpg
    DSC00634.jpg
    17.7 KB · Views: 464
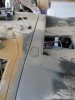
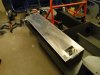
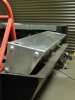
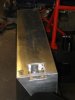
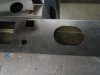
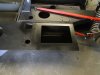
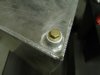
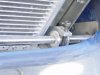
First I had to line up all my holes etc... I had these made with a 5/8" BSP opening at the bottom side to the rear of the tanks to allow for joining the tanks together. They also have a 1/4" BSP at the bottom rear for a fuel pickup, or a drain valve depending on your preference.

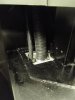
I will be joining the tanks together with Goodrich braided hose and Ally connectors to give it a tad of bling. Because I am doing this, I will pick up the fuel from a T piece between the tanks, reducing from -10 braided hose to -6, which will be easily sufficient for the fuel pumps.

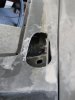
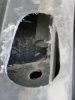
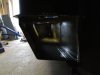
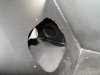
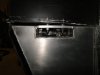
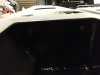
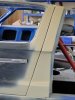
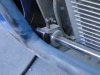
I have had to butcher a large opening in the top front of the sponsons where the fuel filler and breather were in order to have a large enough opening for the pipes to pass through into the new tanks.

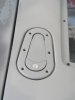
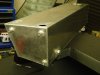
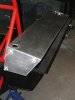
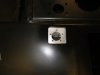
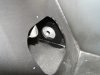
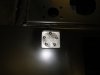
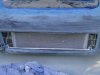
Also, as I am joining the tanks, I have made a blank for one of the sender holes, as I will only need one fuel sender.

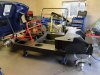
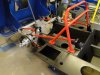
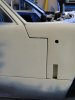
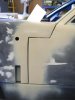
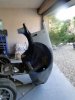
Now that these are (hopefully) permanently mounted, I can make the covers for the front wheel well and the covers for the filler / breather area in the cabin, which are a requirement for IVA testing.

The design has been well thought out by Mick Sollis at SouthernGT with mounting points and accessibility being well thought out.

Enjoy the piccies.

Graham.
 

Attachments

  • DSC00638.JPG
    DSC00638.JPG
    126.5 KB · Views: 425
  • DSC00639.JPG
    DSC00639.JPG
    130.4 KB · Views: 406
  • DSC00640.JPG
    DSC00640.JPG
    134.4 KB · Views: 457
  • DSC00643.JPG
    DSC00643.JPG
    136.7 KB · Views: 410
  • DSC00645.jpg
    DSC00645.jpg
    16.8 KB · Views: 421
  • DSC00649.JPG
    DSC00649.JPG
    126.1 KB · Views: 391
  • DSC00653.JPG
    DSC00653.JPG
    139.3 KB · Views: 385
  • DSC00655.JPG
    DSC00655.JPG
    122.2 KB · Views: 412
  • DSC00657.JPG
    DSC00657.JPG
    127.7 KB · Views: 403
  • DSC00659.JPG
    DSC00659.JPG
    128.4 KB · Views: 418
  • DSC00661.jpg
    DSC00661.jpg
    18.8 KB · Views: 406
  • DSC00665.JPG
    DSC00665.JPG
    118.8 KB · Views: 417
The grass hasn't been growing under my feet. I decided to take a break from mechanicals and fabrication, so I decided, after setting up the suspension, to tackle the body fit.

After a lot of sanding, filling. prepping, sanding filling etc, my shut lines are nearly there. I have one more pass with a fine filler to go, and I think I'll have all the shut lines sorted.

This is not a small job, and I'm pleased with where I am so far. here's some piccies:-

Cheers,

Graham.
 

Attachments

  • DSC01238.jpg
    DSC01238.jpg
    16.1 KB · Views: 499
  • DSC01239.jpg
    DSC01239.jpg
    23.5 KB · Views: 521
  • DSC01240.jpg
    DSC01240.jpg
    19 KB · Views: 475
  • DSC01242.jpg
    DSC01242.jpg
    23.4 KB · Views: 505

Ian Anderson

Lifetime Supporter
Hi Graham

Yes they were in by Stoneleigh
A couple more slight mods and they are now really comfortable

Thanks again
Ian
 
Tom,

Coming from you, that is high praise indeed! Your build log is a huge inspiration to me, and your skills and ways of tackling issues have helped me a lot so far...

Graham.
 
Plenty of bodywork going on these last two months. First up though, I asked Mick Sollis of Southern GT to make me a *something* that would allow me to hinge the front clip, as I find working on the car much easier. he came through for me with a very simple solution. As long as the body is dialled in pretty well (which mine is now :) ), then these have worked brilliantly.

Here a couple of piccies: -
 

Attachments

  • DSC01378.JPG
    DSC01378.JPG
    140.5 KB · Views: 454
  • DSC01379.JPG
    DSC01379.JPG
    141.8 KB · Views: 435
  • DSC01381.JPG
    DSC01381.JPG
    141.8 KB · Views: 452
  • DSC01380.jpg
    DSC01380.jpg
    26.3 KB · Views: 455
Next up....Aerocatches....

I have read about a few horror stories from the guys on here about forgetting to close the rear clip properly as someone is chattering away to you about how AWESOME your car is, and then BOOOMF, at 40 MPH, the rear clip decides to make a bid for freedom.

To counter this, i thought Aerocatches would be the right way to go, as when they aren't closed, it is quite obvious, as the closing mechanisn sticks up, which is quite noticeable.

Unfortunately, these have as lip on, which is not very attractive (see picces), so I painstakingly filled the lip, and then countersunk the holes ready for flush mounted screws.

Theres more coming in a minute... :)
 

Attachments

  • aerocatch2[1].jpg
    aerocatch2[1].jpg
    53.3 KB · Views: 393
  • DSC01388.JPG
    DSC01388.JPG
    126.3 KB · Views: 368
  • DSC01389.JPG
    DSC01389.JPG
    139.8 KB · Views: 388
Because my car will mostly be a "street" car, then I wanted to flush mount the Aerocatches, to look a part of the car, not an aftermarket add-on. First up, to make the holes ready for the catches.
This is a PITA, but it will be worth it in the end.

I cut the holes, the used fibreglass matt to close of the area so that I didn't lose a bucket of fibreglasss paste int the rear clip :), then with a filler fibreglass, I strengthened the area to allow for the aerocatch screws.

See piccies :thumbsup:
 

Attachments

  • DSC01385.jpg
    DSC01385.jpg
    21.9 KB · Views: 369
  • DSC01386.jpg
    DSC01386.jpg
    18.8 KB · Views: 342
  • DSC01390.jpg
    DSC01390.jpg
    20.4 KB · Views: 368
  • DSC01391.jpg
    DSC01391.jpg
    16.6 KB · Views: 367
Finally finished the Aerocatches...

After sanding, filling, sanding filling etc... I have the Aerocatches at the right height. There is still a small amount of sanding and tidying up to do, but they are 85% there. I have left a reasonable gap around the clip and the aerocatches to allow for a rubber to go around the catch which will show level with the bodywork.

Enjoy the piccies. This has been a PITA, but a labour of love as well, just like every other job on my '40 :):):)

Graham.
 

Attachments

  • DSC01404.jpg
    DSC01404.jpg
    9.7 KB · Views: 367
  • DSC01400.JPG
    DSC01400.JPG
    134.7 KB · Views: 390
  • DSC01394.jpg
    DSC01394.jpg
    12.9 KB · Views: 367
  • DSC01396.jpg
    DSC01396.jpg
    22.8 KB · Views: 365
And finally for my posts for today, I decided to open up the NACA ducts. Once again, this is a major PITA, as it is really hard to get in there for sanding filling and finishing etc... These are nearly done (to add to my list of nearly done things....)

here ya go!

Cheers,

Graham.
 

Attachments

  • DSC01383.jpg
    DSC01383.jpg
    9.5 KB · Views: 317
  • DSC01382.jpg
    DSC01382.jpg
    12.2 KB · Views: 314
Back
Top