Frank's folly

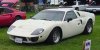
Back in '89 this would have been a fairly new kit , and I can't find anyone who took the approach I'm taking . But I have found pictures of earlier cars .
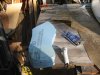
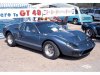
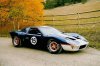
The blue one is part of ASPP's display .
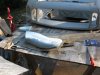
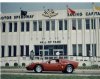
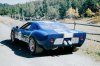
The red one was a local car , and was used in NAF's displays .
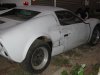
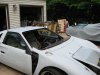
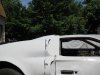
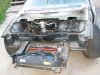
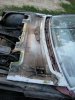
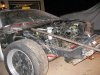
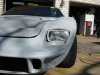
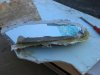
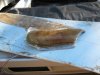
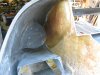
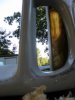
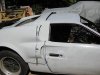
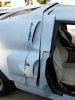
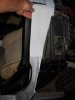
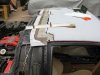
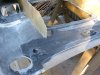
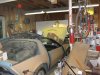
The primer white car is the same car as the red one ,only 20 years later . It has been lowered , and the V6 has been replaced with a Northstar V8 .

And I can understand how some purist might receive this car , but I think most people that know what it takes to build a replica , which most GT40s here are , understand the desire to have the best representation that one can afford , and the pride one feels in such a project .

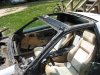
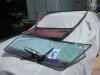
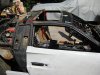
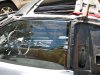
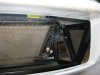
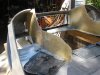
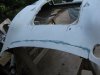
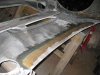
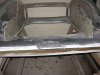
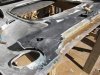
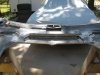
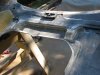
Now this kit does strain the experienced eye , as the cockpit is about 6" back , which shortens the rear clip .
Also the roof line has really bothered me , looks like the hunch back of motor dame .The fender flairs don't work for me either , SO.........
 

Attachments

  • 0809kc_17_z+ford_gt40+fiero_based_gt.jpg
    0809kc_17_z+ford_gt40+fiero_based_gt.jpg
    97.8 KB · Views: 284
  • GT40_at_Indy.jpg
    GT40_at_Indy.jpg
    47 KB · Views: 284
  • 2002-05_GT40_rebody.jpg
    2002-05_GT40_rebody.jpg
    26.3 KB · Views: 271
In July I decided to do something about the roof line .
I removed the windshield , roof panel and rear glass .
And got out the saws-all .
I removed 1 1/2" at the front edge of the B pillar in an angle chop .
 

Attachments

  • IMG_4169web.jpg
    IMG_4169web.jpg
    48.4 KB · Views: 272
  • IMG_4155web.jpg
    IMG_4155web.jpg
    57.1 KB · Views: 259
  • IMG_4158web.jpg
    IMG_4158web.jpg
    90.5 KB · Views: 270
  • IMG_4162web.jpg
    IMG_4162web.jpg
    55.2 KB · Views: 245
  • IMG_4172web.jpg
    IMG_4172web.jpg
    29.5 KB · Views: 282
  • IMG_4174web.jpg
    IMG_4174web.jpg
    72 KB · Views: 241
  • IMG_4178web.jpg
    IMG_4178web.jpg
    69 KB · Views: 251
  • IMG_4179web.jpg
    IMG_4179web.jpg
    70.7 KB · Views: 245
  • IMG_4180web.jpg
    IMG_4180web.jpg
    60.4 KB · Views: 247
  • IMG_4185web.jpg
    IMG_4185web.jpg
    33.8 KB · Views: 249
  • IMG_4191web.jpg
    IMG_4191web.jpg
    66.4 KB · Views: 253
  • IMG_4193web.jpg
    IMG_4193web.jpg
    74.3 KB · Views: 249
  • IMG_4196web.jpg
    IMG_4196web.jpg
    62.4 KB · Views: 263

Terry Oxandale

Skinny Man
Just a guess, but I'm of the opinion that a MKI type of rear would be less 'bulbous' in regards to your comment about the "hunchback" appearance of the rear.

Regardless, I think the roof-line modification you've done will work well for you.
 
Now with the roof heading in the right direction , the next thing I wanted to change was that the doors have to be open to raise the rear clip . So I trimmed the front edge of the clip , and grafted apart to the roof panel . The sides will be attached so to look like the spider of an actual GT40 . Well something like it anyway
 

Attachments

  • IMG_4195we-b.jpg
    IMG_4195we-b.jpg
    47.8 KB · Views: 267
  • IMG_4207web.jpg
    IMG_4207web.jpg
    21.2 KB · Views: 288
  • IMG_4208web.jpg
    IMG_4208web.jpg
    53.8 KB · Views: 242
  • IMG_4209web.jpg
    IMG_4209web.jpg
    19.6 KB · Views: 251
  • IMG_4221web.jpg
    IMG_4221web.jpg
    56.4 KB · Views: 250
  • IMG_4226web.jpg
    IMG_4226web.jpg
    19.6 KB · Views: 243
Frank, Purists or not the work you're doing is beyond belief. Keep at it and I look forward to seeing the finished product. Like my good friend Jack said....you're moving along at light speed....can't wait to see it. Sometimes I get frustrated with work I have to perfrom on my 40 but when I see this project of yours I re-think my frustrations and realize whatever the issue is it can be covercome with time and patience.
 
Well sais Jimmy! I would only add forsight (much thought) to your time and patience.
Frank is really doing a remarkable job given what he is working with. I am confident that his build will be very successful.
 
Thanks for the compliments , the vote of confidence , and thanks for viewing .
Working on , or building cars was my profession for about 20 years , and was always rushed , or I wasn't allowed to do things the way I thought or knew they should be done . And I understood the reasons , I have to make some of the same allowances . But this being my hobby now that I've change professions , it doesn't bother me . Its a stress relief . Most of my frustrations are financial .
And about the speed of the build....... I'm playing catch-up from over the last 2 years , although most of the work has happened in the last year . I took the first year to assess the mess I bought while tinkering . And when I don't have a clue , I go to the other end of the car .
 
So I moved to the front .
I was thinking about getting to things like the clutch master cylinder , or washer reservoir . Which if I attached the front clip as designed , I'de have to unbolt the front end , fight it over the wheels ..... not what I wanted , so after lots of research , mostly here , I figured that tilting the clip was the answer . And using the hood latch from the original hood would work . I also would take care of the way the radiator is remounted , which I don't like , by making a frame work that allows the use of quick jacking brackets and a GT40 radiator .
So out come the sawz-all and hot metal glue gun
 

Attachments

  • IMG_4260web.jpg
    IMG_4260web.jpg
    77.8 KB · Views: 259
  • IMG_4261web.jpg
    IMG_4261web.jpg
    32.3 KB · Views: 269
  • IMG_4271web.jpg
    IMG_4271web.jpg
    86.7 KB · Views: 251
  • IMG_4278web.jpg
    IMG_4278web.jpg
    79.1 KB · Views: 278
  • IMG_4280web.jpg
    IMG_4280web.jpg
    84 KB · Views: 259
  • IMG_4286web.jpg
    IMG_4286web.jpg
    73.6 KB · Views: 244
  • IMG_4293web.jpg
    IMG_4293web.jpg
    41.8 KB · Views: 250
  • IMG_4297web.jpg
    IMG_4297web.jpg
    79.3 KB · Views: 283
  • IMG_4300web.jpg
    IMG_4300web.jpg
    58.6 KB · Views: 265
  • IMG_4304web.jpg
    IMG_4304web.jpg
    55.9 KB · Views: 253
Frank, this is a very clever conversion. You are working very hard, but I think enjoying it as it gets better and better, thanks to foresight and good planning by you.
 
I really don't like winter , I have this week off , my wife just started a new job Monday , I'm at home with the kids , and well , snow sucks !
But I haven't finished catching up on the build yet , so I'll work on that some more .
 

Attachments

  • IMG_3871web.jpg
    IMG_3871web.jpg
    57.9 KB · Views: 264
Still working on the front . I need a GT40 radiator , and an a/c condenser . Also need to figure out which driving lights I'll mount , but I did pick-up some headlights from Jimbo earlier this year , so moving in a good direction .
So i looked around for the inner panels for the front clip , but I got the feeling I was being a bother , so I made my own . Made a paper mold , transferred to plywood , coated in my special mold release ( duct tape ) , and laid down some glass . Then I cut out a space for the brake ducting .
Then I built up a foam plug for the duct from the front of the clip . I shaped it with a rasp , and then secured to the inner panel with duct tape ( I am building ducts after all ) laid down more glass .
 

Attachments

  • IMG_3873web.jpg
    IMG_3873web.jpg
    51.3 KB · Views: 243
  • IMG_3882web.jpg
    IMG_3882web.jpg
    50.3 KB · Views: 240
  • IMG_4313-webcopy.jpg
    IMG_4313-webcopy.jpg
    37.9 KB · Views: 217
  • IMG_4314web.jpg
    IMG_4314web.jpg
    43.5 KB · Views: 220
  • IMG_4318web.jpg
    IMG_4318web.jpg
    68.8 KB · Views: 235
  • IMG_4340web.jpg
    IMG_4340web.jpg
    61.6 KB · Views: 236
  • IMG_4341web.jpg
    IMG_4341web.jpg
    68.4 KB · Views: 236
  • IMG_4342web.jpg
    IMG_4342web.jpg
    45.7 KB · Views: 229
  • IMG_4349web.jpg
    IMG_4349web.jpg
    68.3 KB · Views: 226
  • IMG_4354web.jpg
    IMG_4354web.jpg
    69.9 KB · Views: 238
  • IMG_4351web.jpg
    IMG_4351web.jpg
    52.2 KB · Views: 219
  • IMG_4344web.jpg
    IMG_4344web.jpg
    60.1 KB · Views: 267
  • IMG_4360web.jpg
    IMG_4360web.jpg
    74.1 KB · Views: 220
  • IMG_4359web.jpg
    IMG_4359web.jpg
    23.1 KB · Views: 256
Looking good Frank! Try a plastic trash bag in place of the duct tape. You know how much of a pain the duct tape is..

Good work and making excellent progress despite the cold weather! Keep it up.
 
One last thing I got done before the snow , I figured out where the hood latch panel would go . But first I had to bond the wiper arm access cover in place since it wouldn't be necessary when I tilt the clip .
As soon as it gets warm I'll be able to put the inner panels in , mount the lights , build the panels behind the lights , and the hinges . All these ideas in my head , and its too cold to do anything .... come on global warming !
 

Attachments

  • IMG_4320.jpg
    IMG_4320.jpg
    67.4 KB · Views: 208
  • IMG_4321.jpg
    IMG_4321.jpg
    79.2 KB · Views: 203
  • IMG_4323web.jpg
    IMG_4323web.jpg
    40.9 KB · Views: 219
  • IMG_4325web.jpg
    IMG_4325web.jpg
    60.7 KB · Views: 230
  • IMG_4326web.jpg
    IMG_4326web.jpg
    54.1 KB · Views: 197
  • IMG_4333web.jpg
    IMG_4333web.jpg
    74.9 KB · Views: 225
  • IMG_4337web.jpg
    IMG_4337web.jpg
    54.5 KB · Views: 209
  • IMG_4339web.jpg
    IMG_4339web.jpg
    66 KB · Views: 232

Terry Oxandale

Skinny Man
Frank, I admire your where-with-all on this project and your drive. The methods you've used here (foam) are very close to methods I used to build an entire (sans the roof) fiberglass 240Z body (with improvments for wider tires). BTW, "wet" floral foam (the real soft stuff that almost crumbles in your hand) is none-reactive to resin and does not need tape to protect if from desolving under the resin. This stuff is great for creating fiberglass brackets, odd shapes, light openings, and even scoops of various sizes.

A suggestion on the flat panels. I use a large sheet of 1/8" aluminum that I keep up against the wall in the garage just for flat fiberglass panels that must be fabricated. Lay out the glass on the aluminum, roll it out to get all the bubbles out, and then after it "kicks", simply wedge a small screwdriver between the aluminum and the glass panel, and the aluminum will pop off. On older aluminum, or really big panels, I mist and wipe down a bit of WD-40 on the plate prior to the glass lay-out. It can be used over and over as long as you make sure none of the previous resin remains on the aluminum. Sweeping curved panels or similar smooth curves work as well, but thinner gauge aluminum is used for them.

After the foam was removed and rough panels attached:
standard.jpg


Years later (the radiator outlet box use the aluminum sheet method):
standard.jpg
 
Last edited:
blueovalz , That thing is beautiful !

I appreciate the tip . I learn as I go , with good tips like yours I can only get better . Although it might take awhile as space and time are limited .

I'd like to see a build up of that car , or another like it , as I've got a Camaro sitting in my garage that I haven't moved forward on in 10 years or so because I want to put fenders on it like you made for the Z .
I like making parts , but I really hate doing the finish body work , I have to push myself to get it done . I guess I haven't learned the proper method yet .
So I'm always grateful for any guidance !
 

Attachments

  • IMG_4216web.jpg
    IMG_4216web.jpg
    75.7 KB · Views: 211

Terry Oxandale

Skinny Man
Just click on the BlueOvalZ photo documentation link to see the complete build plus a lot of the fiberglass bodywork stuff in it as well. The Mirage project is taking over the upper albums, but scoll down on the left margin to view the Z build.

Really enjoying watching a your project progress. Very inspiring.
 
i'm loving this commitment, it's great!
sometimes, you need to build what you can't afford. simple!
i'm doing the same....only slower!
 
Back
Top