Hi Molleur,
You are a friend of my friend Will, true? Well nice to meet you.
Thanks for your kind words.
Here's my next installment.
Tools:
½ in. drill bit
Jig saw
½ in. sanding drum
Pencil
Dry erase marker
Electric variable speed hand drill
Quick lock flexible shaft drill extension ($9, Sears Craftsman off the shelf)
Quick lock drill bits 13/64 and 3/8 (Sears Craftsman, small one on sale $2 and $3.99 for the 3/8 in.)
Standard rasp file flat on one side round on the other
Quick lock counter sink bits (also Sears Craftsman, $5 for four)
Measure-ometer.
Comments:
I followed instructions in the RCR manual and checked out other sites. I will probably revisit the door handles and mechanisms after I have completed the build. I did try to keep it really simple.
Supplies:
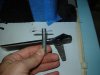
Two 3/8 X 2 in. clevis pins ($1.80 ea.) at the local hardware store
Two clevis pin clips (22 cents a piece)
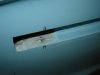
One ½ od X ½ in. nylon washers, with a 3/8 inch id.
Door handles (from RCR)
Procedure:
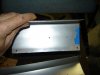
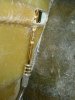
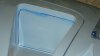
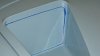
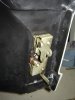
1. Cut the handle hole. Start with the ½ in. drill bit and take out as much material as possible. Similar to all other instructions.
2. Use the jig saw to cut out the sides of the hole and fashion corners in the hole.
3. Use the small drum sander and file to widen the hole to allow the handle to fit and swing easily. File out the corners square.
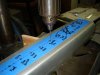
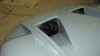
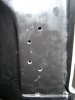
4. Mark the center line on pivot hole on both sides of the handle with the dry erase marker.
5. Set the handle in the door to the approximate final location.
6. Mark the door with the pencil to match the center lines on the handle, one mark on the top and bottom each.
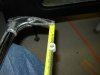
7. Measure the distance from the center of the holes in the handle and where the handle aligns with the edge of the handle recess in the door.
8. Measure and mark that distance in the inside of handle recess in the door from the pencil marks you made in the door.
9. Mark and “X” with the crossing point where you marked the center of the hole.
10. Draw the line all the way to the back of the handle hole inside the door.
11. Measure the distance from the middle of the “X” to the back of the handle hole.
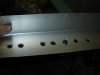
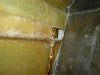
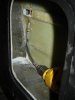
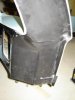
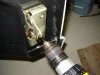
12. Using the flexible quick lock driver shaft and counter sink drill bit to start the hole for the handle pin, place the drill inside the door and drill from the bottom up. There isn’t enough space to drill from the top side.
13. From inside as closely as you can move the counter sink bit the distance you measured to start the hole.
14. Drill upwards with the small bit and hopefully you will come out at the center of the “X”. You should not start to counter sink the hole if you are off. If you are off, move the bit and drill again. The small bit allows for some error. When you hit the mark press the drill further in to counter sink the hole and center your starting point for the next larger bits. This allows you to miss and recover. The difference between a good carpenter and a bad one is the good one recovers nicely from mistakes.
15. Next you use the longer narrow bit to enlarge the hole, starting in the counter sunk hole. Drill slowly so the action doesn’t get away from you. When you have completed the lower hole, do not remove the bit from the hole. You carefully set the point of the stopped bit at the center of the upper hole, then squeeze the trigger and continue slowly upwards to start the opening of the upper hole. I had to press the flexible shaft hard to the inside of the door to keep it centered and true to start the second hole.
16. Repeat step 15 increasing the bit size all the way to 3/8 in.
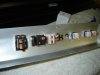
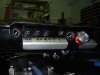
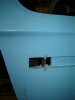
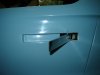
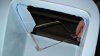
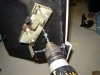
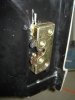
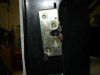
17. Test fit the handle to the door using the clevis pin as the pivot for the handle.
18. To keep friction off the fiber glass above and below where the clevis pin enters and exists the door I measured the distance between the bottom of the fiber glass below the handle and where the clip fits in the clevis pin. The pin was in without any washer(s) and laying flat at the top. I divided the distance by 2 (1/5 in./2) and cut two nylon washers 1/10 in. each.
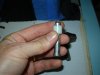
19. I placed one washer at the top of the clevis pin above the fiber glass and the other below between the bottom of the fiber glass and clip. I then inserted the clip. Minor sanding was required inside the door for the second washer to fit.
20. Repeat for the other door.
Time required: 5 hours for the first one (includes thinking time and getting parts) and 2 1/2 hours for the second one. Frogging around time 3 hour.
Total: 10 ½ hours