Sean's RCR GT40 build

Sean S.

Supporter
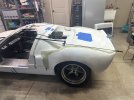
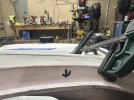
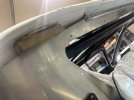
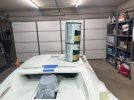
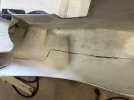
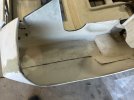
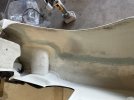
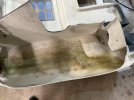
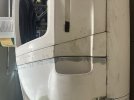
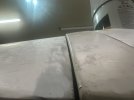
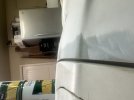
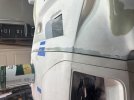
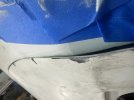
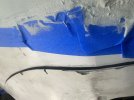
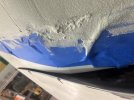
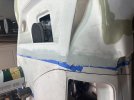
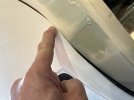
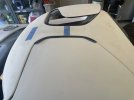
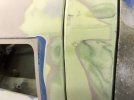
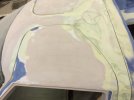
I put the windshield back in to measure. Centered up it’s ~1/4” top and bottom and closer to 1/32” on the sides in the middle of the A pillars, top and bottom of the A pillars are closer to 1/4”

I will see if anything can be done on the A pillars first, I f not I’ll take it to a glass shop to have it shaved down slightly on the sides.
 
I had to sand (by hand) the sides of my windshield from RCR. The bottom corners and about 1/4 the distance up the sides needed a “wedge” of glass removed. I used 80g very lightly and then 320g wet sanding. It took many hours, but I was told a new windshield would cost $2,000 USD - So I just made the time. I had 1/8” clearance top and bottom. The sides I had as little as 1/16” In the areas I sanded.

Wow…. Thanks for the heads up…. Idk if I would have thought I could just simply sand the windshield to fit. Thanks for the tip. This gives me confidence we can make things work now.
 

Vinny P

Supporter
What did he do to shave it? Do you know? Any alternative to just using sandpaper?
He used a belt sander; I don't remember which grit paper he used I can find out. It's easy enough now that I watched him do it. You have to follow the direction of the edge of the glass moving the sander up and down the edge, not in one spot.
 

Sean S.

Supporter
I decided to go ahead and get the parts I don’t want to do out of the way.

I started manipulating the spider to fit everything better. Used a lot of clamps a lot of weights and a lot of heat. I now have things moving in the right direction and the doors are getting close to fitting. The clamshell lines up pretty good with the spider now. I needed the back edge of the spider to go up to match the clamshell, so I made an aluminum bracket to hold it up that bolts to the firewall. This seems to be doing the job very well. I will plan to glass it in when I remove the spider.

I decided to go ahead and fix the horrible lines from where the fender flares were glued in. This has been bugging me from the day I received the kit. I used some body filler to smooth out the lines then 2 layers of fiberglass mat to reinforce the whole thing. This should blend right into the panel once it’s painted.

Did I mention I love fiberglass? I think my wife is ready to move out due to the fumes.
 

Attachments

  • IMG_2984.jpeg
    IMG_2984.jpeg
    381.7 KB · Views: 143
  • IMG_2987.jpeg
    IMG_2987.jpeg
    350 KB · Views: 123
  • IMG_2989.jpeg
    IMG_2989.jpeg
    303.4 KB · Views: 99
  • IMG_2990.jpeg
    IMG_2990.jpeg
    373.5 KB · Views: 95
  • IMG_2991.jpeg
    IMG_2991.jpeg
    349.1 KB · Views: 91
  • IMG_2992.jpeg
    IMG_2992.jpeg
    346.4 KB · Views: 89
  • IMG_2993.jpeg
    IMG_2993.jpeg
    202 KB · Views: 86
  • IMG_2994.jpeg
    IMG_2994.jpeg
    427.6 KB · Views: 85
  • IMG_2999.jpeg
    IMG_2999.jpeg
    486.7 KB · Views: 95

Sean S.

Supporter
I think I’m finally at a point of alignment that I can start adjusting the gaps. I’m pretty impressed of how things have lined up thus far. The only gap I have sanded at this point is the front of the doors as they were a 1/2” too long. Nothing else has been touched yet
 

Attachments

  • IMG_3020.jpeg
    IMG_3020.jpeg
    209.6 KB · Views: 80
  • IMG_3022.jpeg
    IMG_3022.jpeg
    266.9 KB · Views: 74
  • IMG_3021.jpeg
    IMG_3021.jpeg
    210.9 KB · Views: 77
  • IMG_3026.jpeg
    IMG_3026.jpeg
    264.9 KB · Views: 76
  • IMG_3024.jpeg
    IMG_3024.jpeg
    273 KB · Views: 96

Sean S.

Supporter
Working on body gaps today. I built up the clamshell with fiberglass then smoothed it out with body filler to make the gap touch the spider. My plan is to sand down the gap to 1/8”, having it built up this way gave me a good surface the whole way around and should only need to take material away now.


I do have a question about door fitment. I’ve got the door where I want it and the gap is 1/8” all the way around it, but the door touches the spider when opening and closing. I’ve heard others had this issue as well. Any suggestions on a fix for this? I’ve already undercut the the bottom of the door where it touches and that helped a lot but still not enough. I don’t want to open that gap up anymore and was thinking that it might be possible to roll that lip on the spider a bit to clear, but not sure how that would look after paint.
 

Attachments

  • IMG_3029.jpeg
    IMG_3029.jpeg
    364.6 KB · Views: 73
  • IMG_3031.jpeg
    IMG_3031.jpeg
    416.6 KB · Views: 70
  • IMG_3030.jpeg
    IMG_3030.jpeg
    427.9 KB · Views: 72
  • IMG_3032.jpeg
    IMG_3032.jpeg
    294.6 KB · Views: 84

Ian Anderson

Lifetime Supporter
Are you fitting eyebrows on the outside of the spider? If so will they cover them part of the spider that needs fettling?

if so it will not be seen after paint

Ian
 

Mark Turner

Supporter
Are you fitting eyebrows on the outside of the spider? If so will they cover them part of the spider that needs fettling?

if so it will not be seen after paint

Ian
Are you fitting eyebrows on the outside of the spider? If so will they cover them part of the spider that needs fettling?

if so it will not be seen after paint

Ian
Working on body gaps today. I built up the clamshell with fiberglass then smoothed it out with body filler to make the gap touch the spider. My plan is to sand down the gap to 1/8”, having it built up this way gave me a good surface the whole way around and should only need to take material away now.


I do have a question about door fitment. I’ve got the door where I want it and the gap is 1/8” all the way around it, but the door touches the spider when opening and closing. I’ve heard others had this issue as well. Any suggestions on a fix for this? I’ve already undercut the the bottom of the door where it touches and that helped a lot but still not enough. I don’t want to open that gap up anymore and was thinking that it might be possible to roll that lip on the spider a bit to clear, but not sure how that would look after paint.
Are you sure that 1/8 is enough? Add in paint and primer thickness x2 and you won’t be left with much gap.
I made this mistake on an aircraft project,
The designer called for 1/4 and I thought 1/8 was better I wish I would have listened
 

Sean S.

Supporter
Are you fitting eyebrows on the outside of the spider? If so will they cover them part of the spider that needs fettling?

if so it will not be seen after paint

Ian
I’m still on the fence with the eyebrows. I have a set but not sure if I really like how they look. Unfortunately they don’t cover the area of the door that’s rubbing. I’m debating something that ties into the roll bar to hold the doors in place as I have seen others do.

The part that hits is the corner where it starts to transition from the roof to the side of the car. Both sides hit in the same spot pointed out in the picture
 

Attachments

  • image.jpg
    image.jpg
    278.7 KB · Views: 68
  • image.jpg
    image.jpg
    208.5 KB · Views: 83

Sean S.

Supporter
Are you sure that 1/8 is enough? Add in paint and primer thickness x2 and you won’t be left with much gap.
I made this mistake on an aircraft project,
The designer called for 1/4 and I thought 1/8 was better I wish I would have listened
I’m actually thinking 1/8” is on the large side of what’s needed. Guess I can make a more educated decision if the need to be bigger when I get to the primer stage. I feel 1/4” might be a bit big for the doors and clamshell though.
 
I couldn’t get a gap like that to work on mine. Maybe have the door sweep in high and have the striker drag it down into position.
 
I’m still on the fence with the eyebrows. I have a set but not sure if I really like how they look. Unfortunately they don’t cover the area of the door that’s rubbing. I’m debating something that ties into the roll bar to hold the doors in place as I have seen others do.

The part that hits is the corner where it starts to transition from the roof to the side of the car. Both sides hit in the same spot pointed out in the picture
I was on the fence with the door eyebrows as well... but I haven't seen people use something that ties into the roll bar, and searching the forums didn't yield any results. Could you point me to an example?

BTW, I have no problems at 3/16" gaps as well around the doors. I had the same problem with the doors dragging during opening until I opened them up slightly. 3/16" is my target everywhere but I had to take a break from the fiberglass work... lots to circle back to in the future.

You're flying through this body work!!!!! keep up the great work.
 

Randy V

Moderator-Admin
Staff member
Admin
Lifetime Supporter
Sean, take a look at how I addressed the interference problem. The part of the door (rear roof corner) gets chamfered from the bottom and that leaves the corner with a relatively sharp edge, but that chamfer clears the spider. Once it’s painted, you’re not going to notice the bevel in the spider. I’ll see if I can find another pic and upload it.
 

Attachments

  • IMG_5400.jpeg
    IMG_5400.jpeg
    253.5 KB · Views: 59
  • IMG_5399.jpeg
    IMG_5399.jpeg
    262.2 KB · Views: 58
  • IMG_5397.jpeg
    IMG_5397.jpeg
    188.4 KB · Views: 65
Back
Top