
Your project is coming together nicely. I have had the same issue during my mockup fit. I have not tried to tackle that problem yet, (it's really a slight amount of rub) My thought was to adjust the door slightly higher than the spider (just enough to clear the spider) and then have the final adjustment in the latch and striker to tie the alignment together. It should work in theory. Also take as much material off the inside edge of the corner of the door as you can. I hope to be working on my fitment sometime next week, I will keep you posted.I’m still on the fence with the eyebrows. I have a set but not sure if I really like how they look. Unfortunately they don’t cover the area of the door that’s rubbing. I’m debating something that ties into the roll bar to hold the doors in place as I have seen others do.
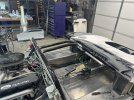
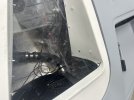
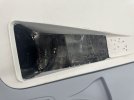
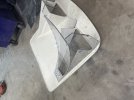
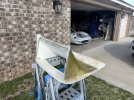
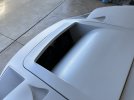
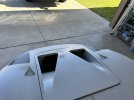
The part that hits is the corner where it starts to transition from the roof to the side of the car. Both sides hit in the same spot pointed out in the picture

You are using an out of date browser. It may not display this or other websites correctly.
You should upgrade or use an alternative browser.
You should upgrade or use an alternative browser.
Sean S.
Supporter
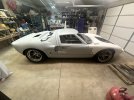
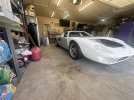
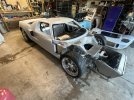
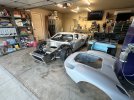
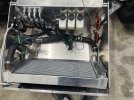
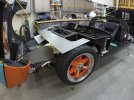
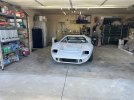
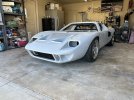
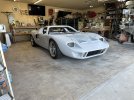
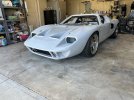
I was able to get a lot done the last few days. Welded out the roll cage, got the spider, doors, and front clip sprayed with high build primer. I’m glad to see all the body lines are still were they need to be with only minimal effort to realign. The car is definitely looking good now that it’s all one color. I feel like I’m finally getting to the downhill side of this build.
She also got her first Carwash yesterday, just over 2 years of dust and filth had it looking pretty bad.
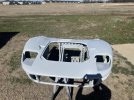
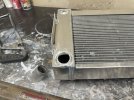
Going to leave the front clip off for a bit to make some radiator modifications. Going to move the passenger side piping to the bottom to help clear the nostrils. I also plan to install a bung on the top to have a line attached to help keep the air bleed out of the system.
She also got her first Carwash yesterday, just over 2 years of dust and filth had it looking pretty bad.
Going to leave the front clip off for a bit to make some radiator modifications. Going to move the passenger side piping to the bottom to help clear the nostrils. I also plan to install a bung on the top to have a line attached to help keep the air bleed out of the system.
Attachments

Sean S.
Supporter
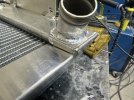
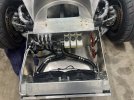
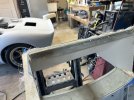
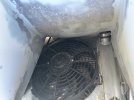
I’m getting a little better with the aluminum welding. Got the pipe moved to the bottom of the radiator. This definitely got things cleaned up in the front. I will have no issues with the modifications I want to make on the nostrils now. I will plan to make a line to come out of the top of the radiator to help keep the air bled out of it while the car is running.
Attachments
Sean S.
Supporter
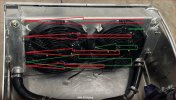
Good observation, I might be wrong in my thinking. But my thoughts are that the flow of the pump should cause a pressure drop between the 2 tanks across the fins. If so, it should flow throughout the entire radiator. As of now it seems to be heating the entire radiator and cooling the engine well. Although it is only 50 deg outside today.Isnt that an aweful flow, NOT to have diagonal flow accross entire radiator. But to only have flow accross the bottom?
(trying to depict flow RED versus Green)
Last edited:
Bill Kearley
Supporter
Sean S.
Supporter
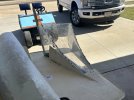
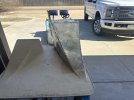
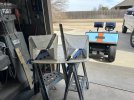
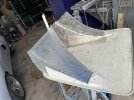
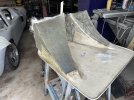
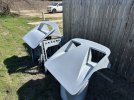
That moment you realize you just built the mold for your new dual nostril setup backwards….. Guess I’ll be taking this apart to make it the right way tomorrow 
Attachments
One step forward, two steps back. Know it all too well.
On a positive note you are making amazing headway on your build. And it is turning out awesome!
On a positive note you are making amazing headway on your build. And it is turning out awesome!
Sean S.
Supporter
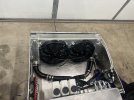
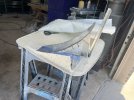
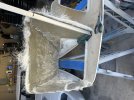
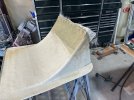
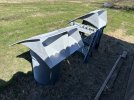
After making the mold the correct way, I was able to get the dual snorkel completed. I made it using plexiglass, this allowed me to make an identical mold on the other side by flipping each pice and using the same screw holes.
Attachments
Sean S.
Supporter
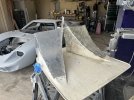
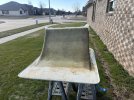
Got the single nostril lined out as well. The main issue with it was they didn’t lay enough glass on it to keep it straight. I ended up putting 4 layers of glass on it to help it hold its shape.
Attachments
Sean S.
Supporter
Got everything sanded down and primered so that I can start blocking it. Car is definitely coming together now. I really like how the dual nostril turned out and it should get all the air from the radiator out of the front end.
Attachments
-
 IMG_3383.jpeg335.9 KB · Views: 82
 -
 IMG_3385.jpeg737.1 KB · Views: 86
 -
 IMG_3386.jpeg690.5 KB · Views: 84
 -
 IMG_3387.jpeg253.2 KB · Views: 81
 -
 IMG_3388.jpeg224.7 KB · Views: 81
 -
 IMG_3389.jpeg530.4 KB · Views: 79
 -
 IMG_3391.jpeg324.6 KB · Views: 81
 -
 IMG_3392.jpeg521.4 KB · Views: 75
 -
 IMG_3394.jpeg534.8 KB · Views: 80
 -
 IMG_3393.jpeg534.2 KB · Views: 91
Sean S.
Supporter
Thanks Randy.Very nice work Sean… I had both hood panels for my car as well. I glassed in an aluminum tube to “split” the air between left and right nostrils and to strengthen them.
View attachment 136913
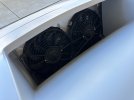
I took a good bit of inspiration from your nostril setup. I really liked how you set it up. I wanted to make mine more rounded like yours, but I didn’t have the room behind the fans to make it work and keep the look I was going for by extending the original openings and keeping the same angles.
Looks great! Factory fresh!Got everything sanded down and primered so that I can start blocking it. Car is definitely coming together now. I really like how the dual nostril turned out and it should get all the air from the radiator out of the front end.
Davidmgbv8
Supporter
I am still trying to figure out how this radiator is going to effectively cool with out being a dual pass design? Now I am questioning my Serck original style radiator and wondering what is it's flow path??Isnt that an aweful flow, NOT to have diagonal flow accross entire radiator. But to only have flow accross the bottom?
(trying to depict flow RED versus Green)
Davidmgbv8
Supporter
So I had a brain fart... My tank is divided at the bottom, flows bottom up due to the baffle in the middle of the bottom tank, then down to theI am still trying to figure out how this radiator is going to effectively cool with out being a dual pass design? Now I am questioning my Serck original style radiator and wondering what is it's flow path??
right side.
Randy Folsom
Supporter
Sean, sorry I neglected to respond. My 2007 Mk3 basket of parts Cobra is not a good reference for FFR build quality. On the forums, I see that the Mk4 is an improvement over the Mk3. FFR cars are easier in some ways, and definitely less expensive. Easier mostly because the body is simple. Less expensive because of the kit cost and the transaxle, exhaust, etc. When built using new parts, they go together nicely. Donor parts save money but cost time and aggravation. Most modifications / upgrades are bolt on rather than fabricated. It is easy to get carried away with these cars. Mine has a 351w/427 with about 500 HP. It could easily be 550 with decent heads and better exhaust. In any case 500 is about 150 more than I will ever use. Hope this helps.Its mostly life getting in the way these days, job has me traveling alot now. Also doesnt help I decided to learn how be a machinist... although I have a very long way to go before I can call myself one.
I plan to build a Cobra next, the wife is really wanting one. Ive been looking at the FFR ones, they seem like they have a nice product. What are your thoughts on that kit?
The wife really wants me to get the Superformance one vs a kit.
Randy Folsom
Supporter
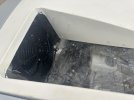
Might be too late to help, but Tom's build log shows how he used opposing SS tabs on the spider and door edge that ensures the door tops align with the roof.Working on body gaps today. I built up the clamshell with fiberglass then smoothed it out with body filler to make the gap touch the spider. My plan is to sand down the gap to 1/8”, having it built up this way gave me a good surface the whole way around and should only need to take material away now.
I do have a question about door fitment. I’ve got the door where I want it and the gap is 1/8” all the way around it, but the door touches the spider when opening and closing. I’ve heard others had this issue as well. Any suggestions on a fix for this? I’ve already undercut the the bottom of the door where it touches and that helped a lot but still not enough. I don’t want to open that gap up anymore and was thinking that it might be possible to roll that lip on the spider a bit to clear, but not sure how that would look after paint.
Toms RCR 40 Trackracer
Tom, this is very nice craftsmanship,your car looks more and more the one to have
www.gt40s.com
Similar threads
- Replies
- 24
- Views
- 3K