

You are using an out of date browser. It may not display this or other websites correctly.
You should upgrade or use an alternative browser.
You should upgrade or use an alternative browser.
Toms RCR 40 Trackracer
- Thread starter EGLITOM
- Start date
- Status
- Not open for further replies.
very nice Tom, those black striping gives it a finishing look, also very nice are the black surroundings around the head-glazes :thumbsup:
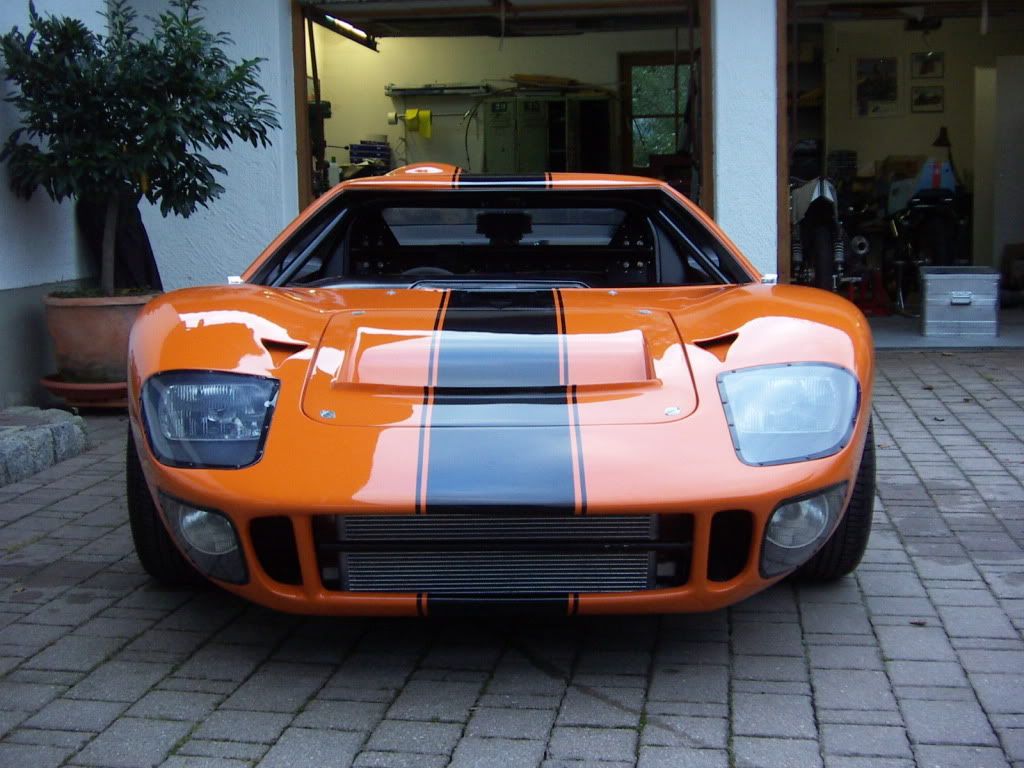
Not completely sure about the 2 black vent holes on the rear, though better then the alu look on the orange car.
maybe because you now have the nice black striping that brakes the full orange nicely, you can also have those vent-holes in that orange color? wonder how that looks like....I'm not such picture shop guy otherwise I tried it to see how that would look.
but maybe the black looks best, anyway very nice car.
Ian Anderson
Lifetime Supporter
Tom
Really beautiful - I so nearly did my car orange and black - in honour of my "hero" John Love and his Team Gunston Toasted colour scheme from the same period.
Ian
Really beautiful - I so nearly did my car orange and black - in honour of my "hero" John Love and his Team Gunston Toasted colour scheme from the same period.
Ian
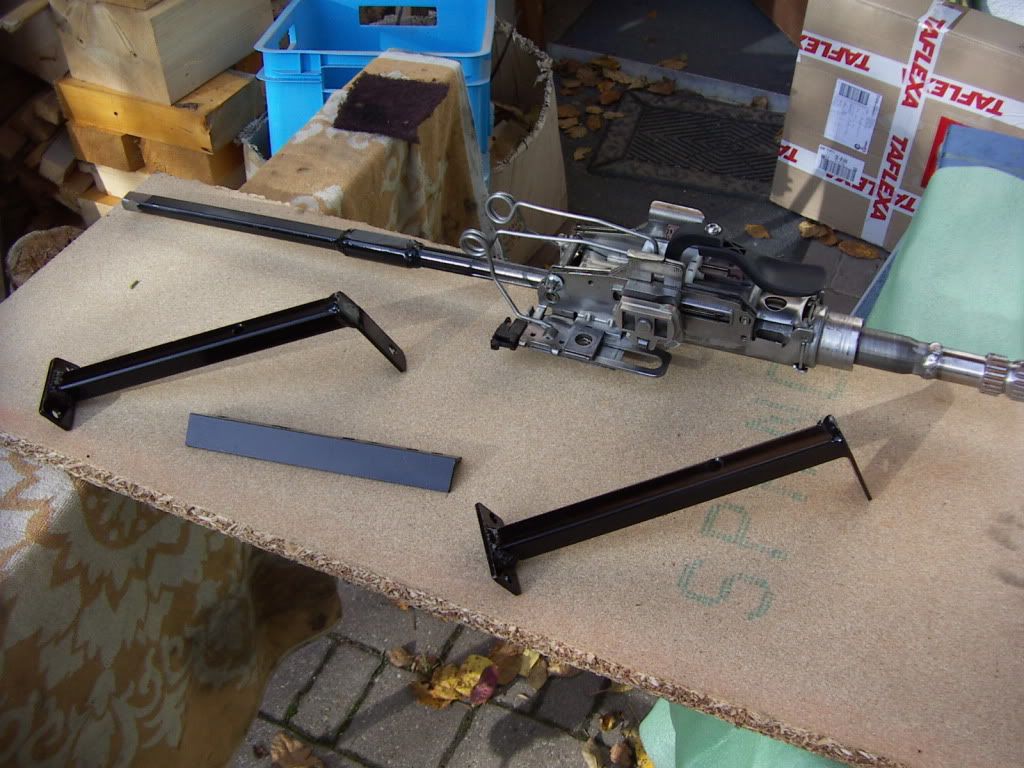
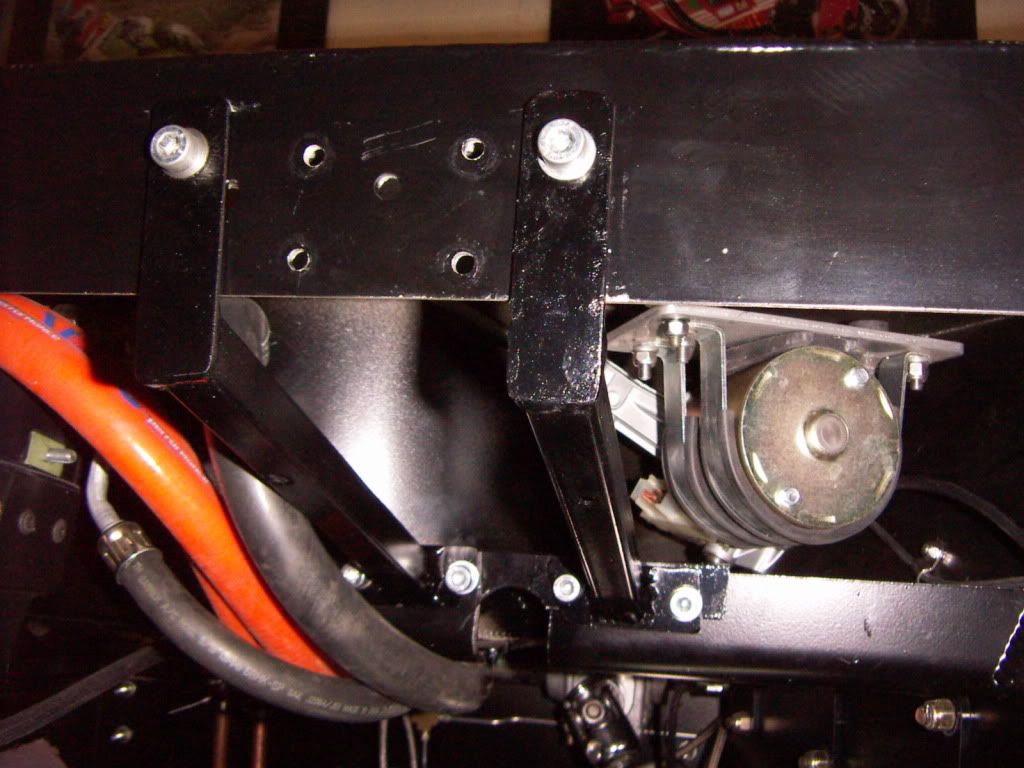
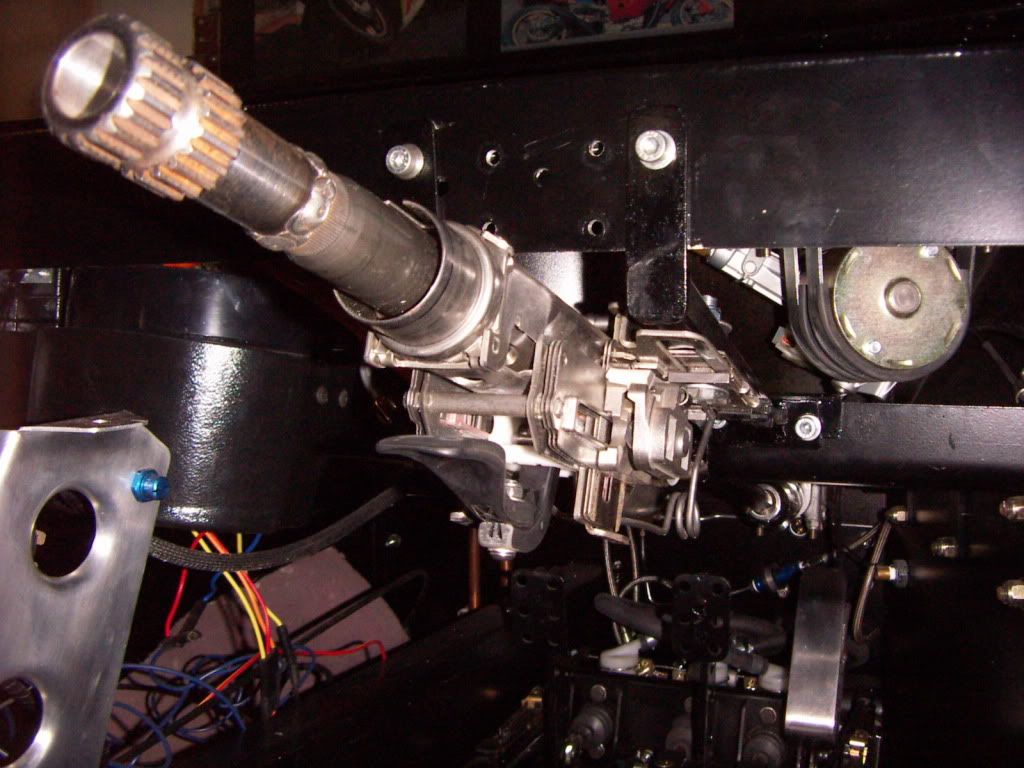
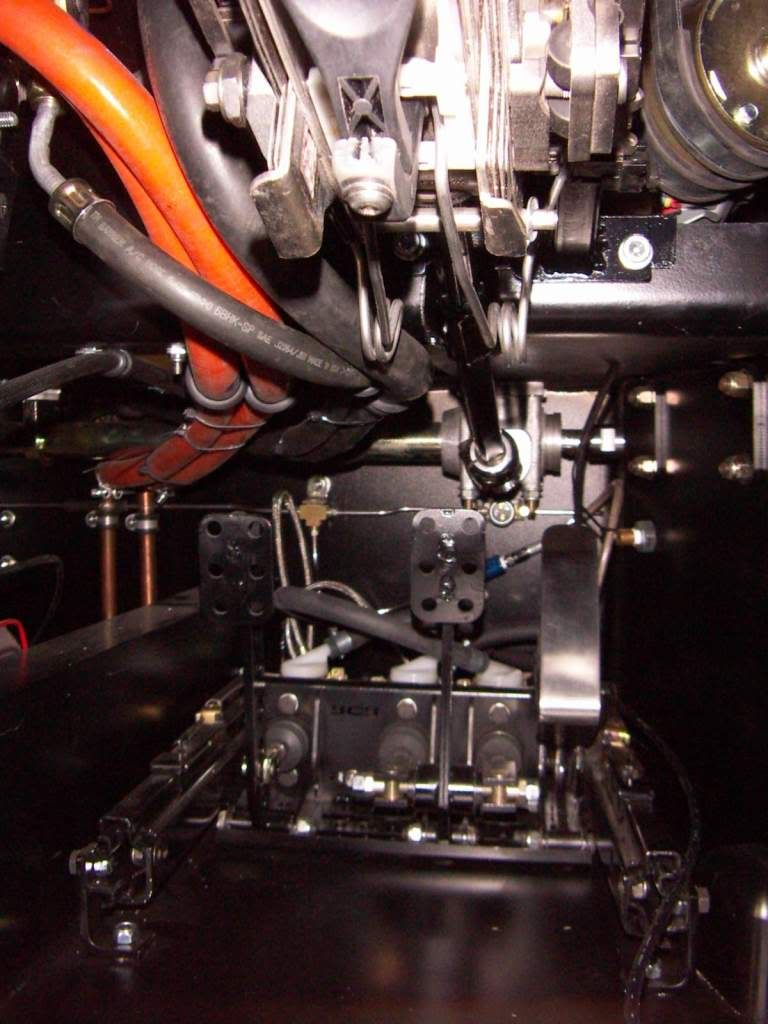
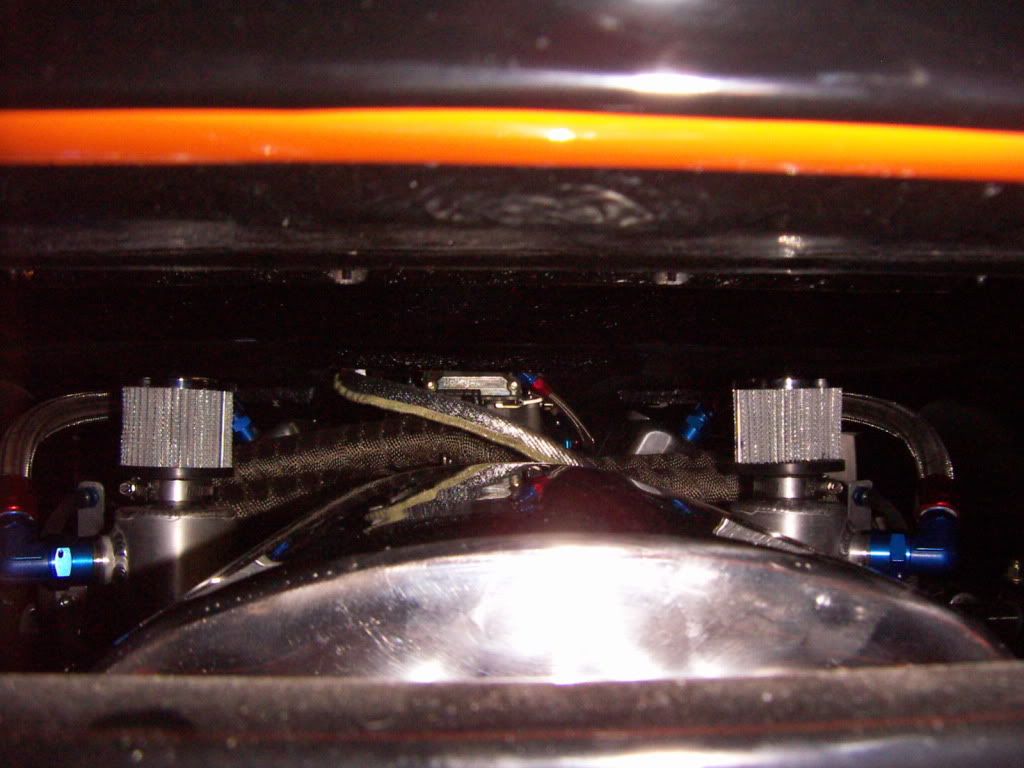
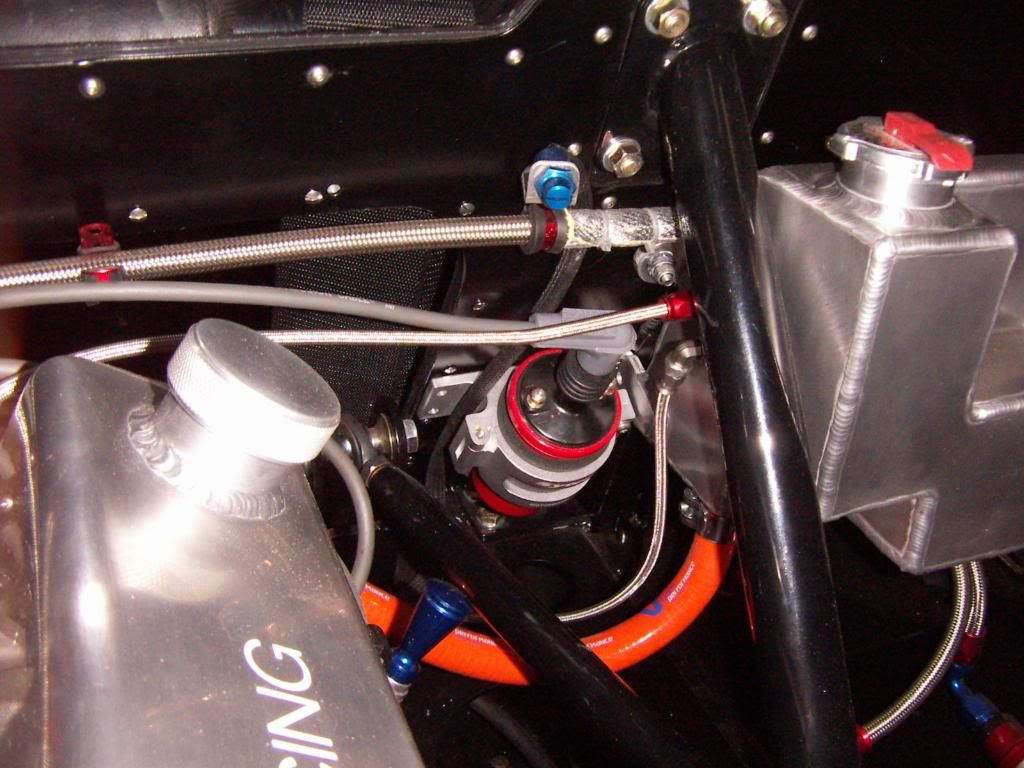
Finished the installation of my crankcase breather system. I used two CANTON breather cans and AN 12 lines. I have some AN12 bungs welded into the valvecovers with splashguards welded to the inside of the covers.
Cans where installed to either side of the transaxle. On one of the cans i additionaly fitted a AN 6 bung and connected it to the transaxle breating line ( AN 6). The cans where fixed on brackets made out of 1/4" Aluminium stock.
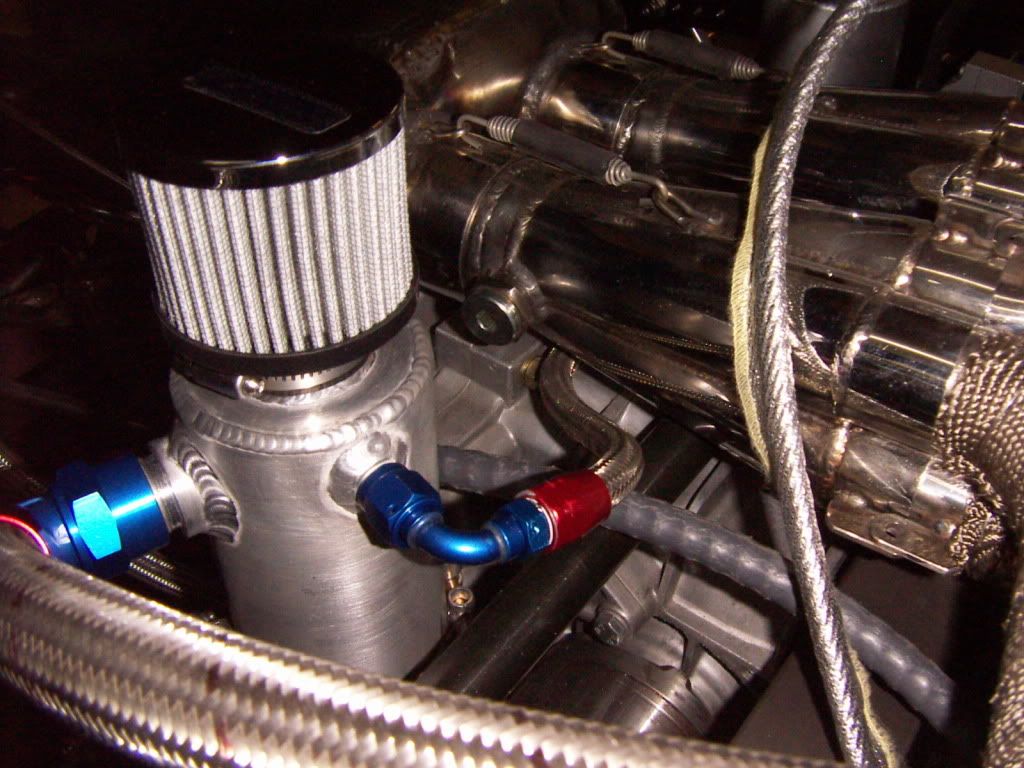
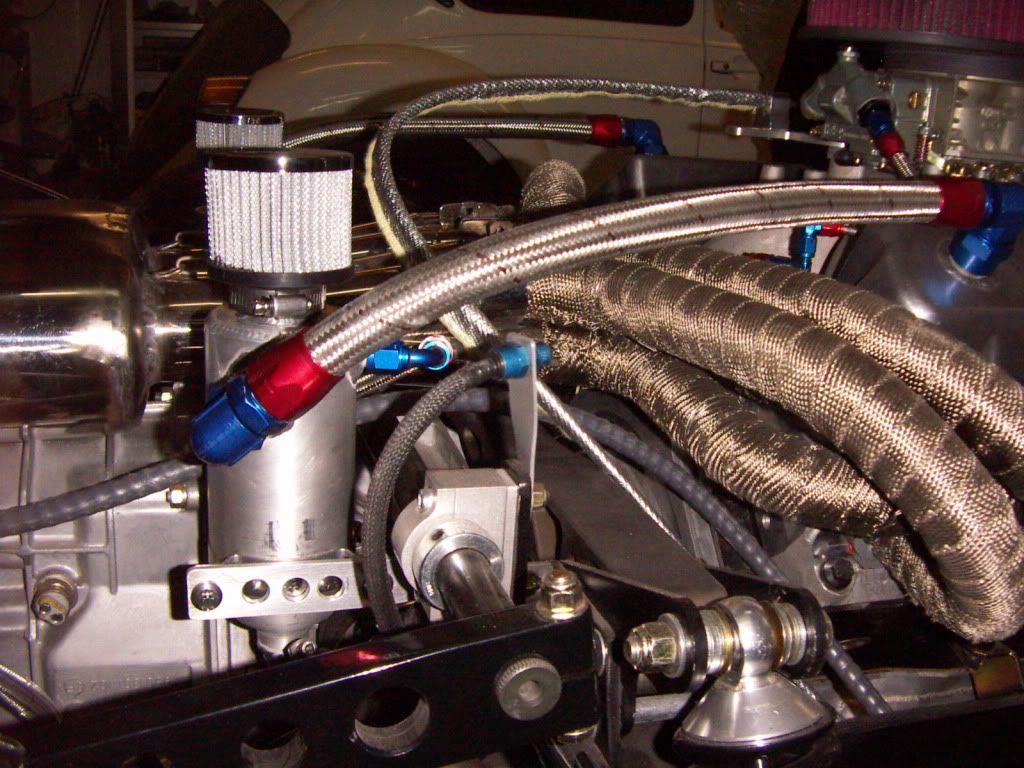
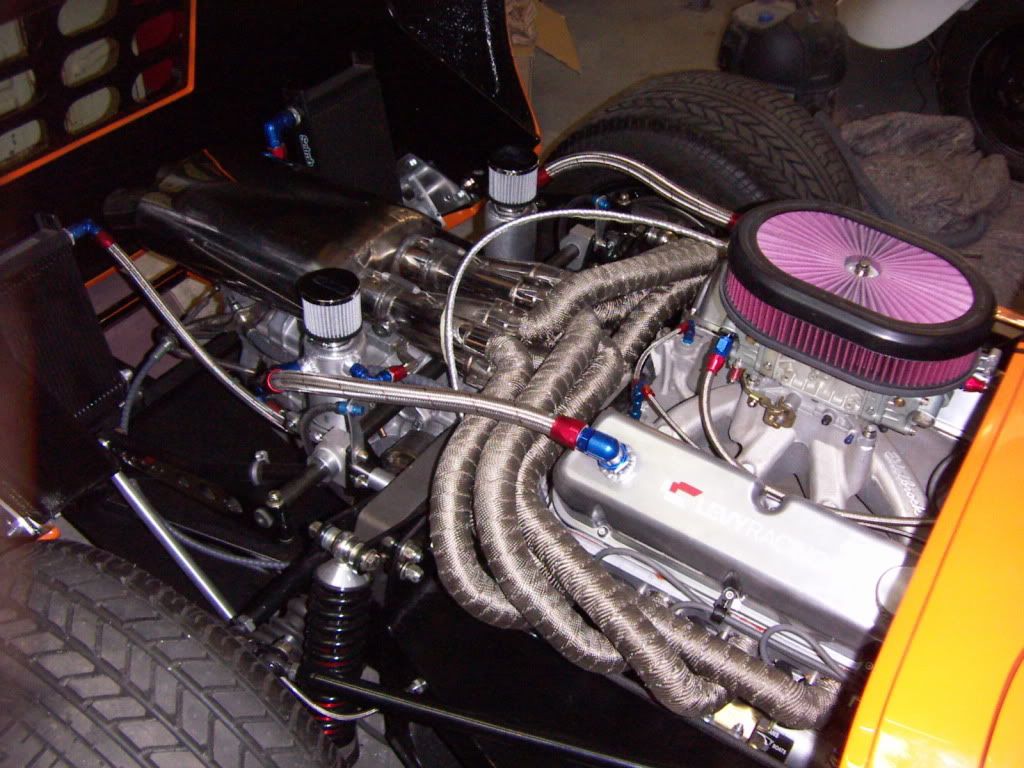
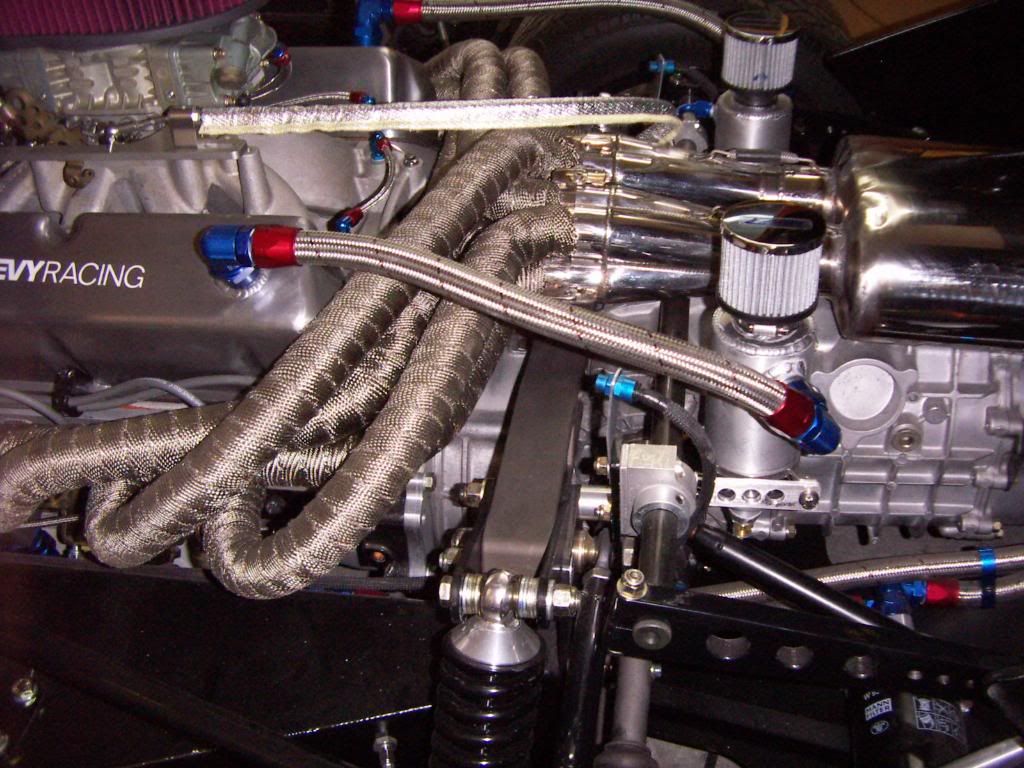
everthing clears quite nice
Also finished the engine and rad ventlines for the cooling system, both are AN3 size and go into the expansion tank. you also can see the feedline to the waterpump connected now.
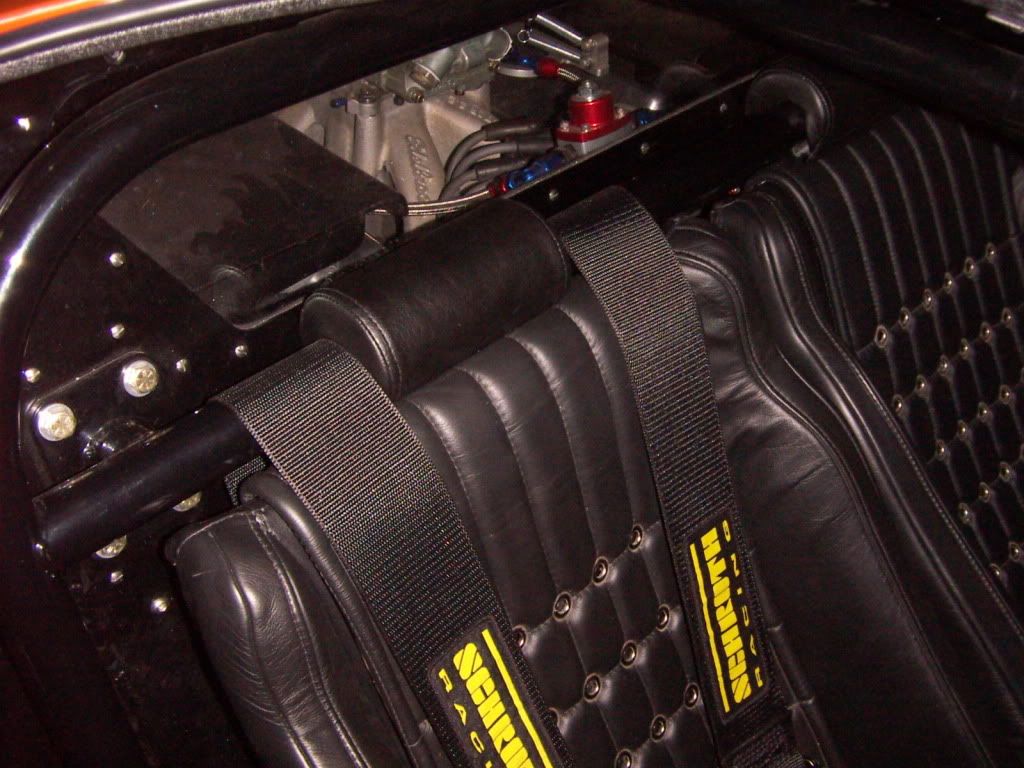
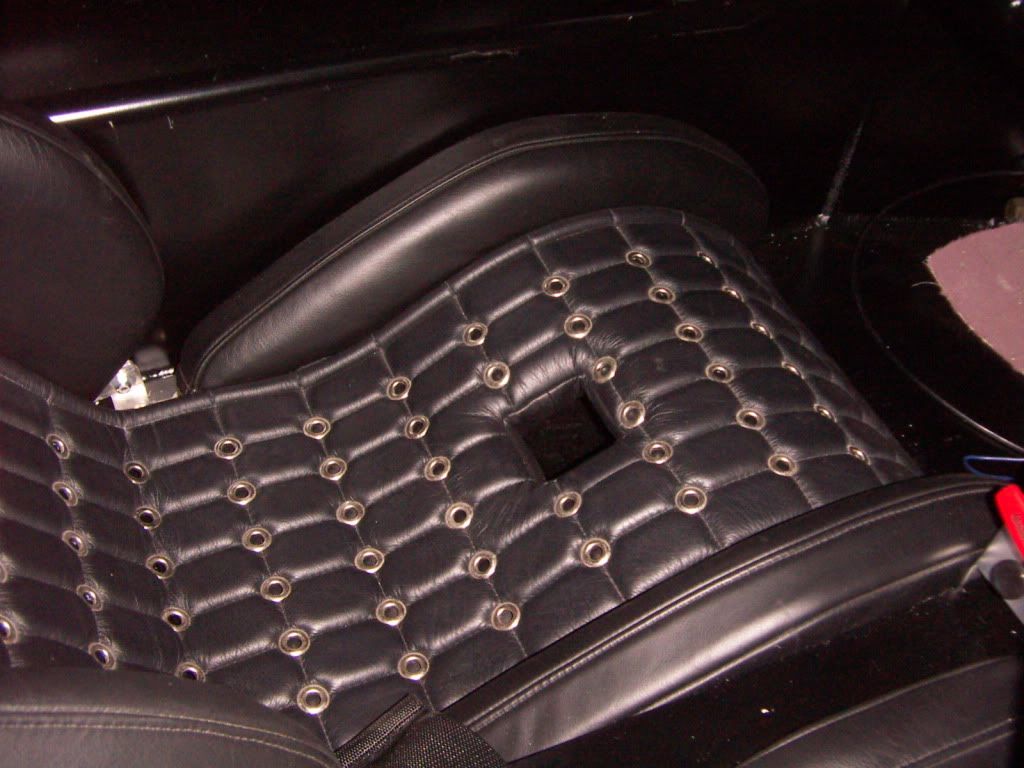
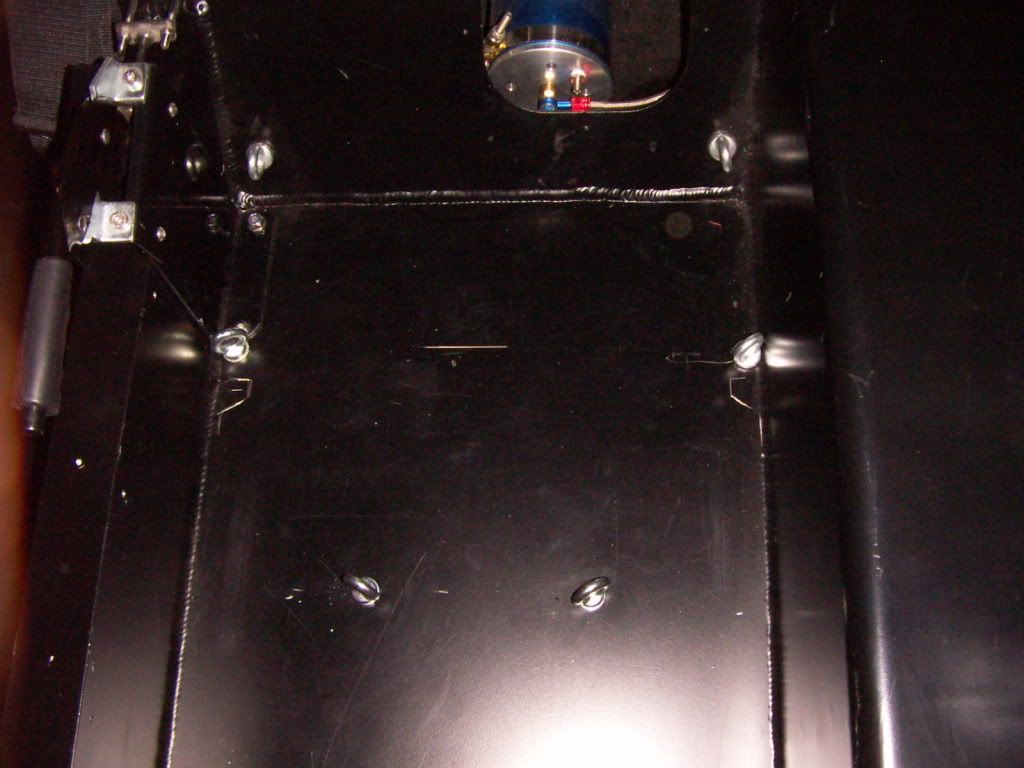
I have finished the installation of all my 6 point harness mounting points
here a pic of the passenger side.
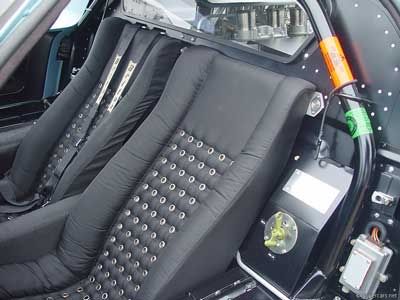
Seats are out to be further modified for shoulder belt openings.
TOM
AWH: 851 h
Cans where installed to either side of the transaxle. On one of the cans i additionaly fitted a AN 6 bung and connected it to the transaxle breating line ( AN 6). The cans where fixed on brackets made out of 1/4" Aluminium stock.
everthing clears quite nice
Also finished the engine and rad ventlines for the cooling system, both are AN3 size and go into the expansion tank. you also can see the feedline to the waterpump connected now.
I have finished the installation of all my 6 point harness mounting points
here a pic of the passenger side.
Seats are out to be further modified for shoulder belt openings.
TOM
AWH: 851 h
Last edited:
Thanks Chuck
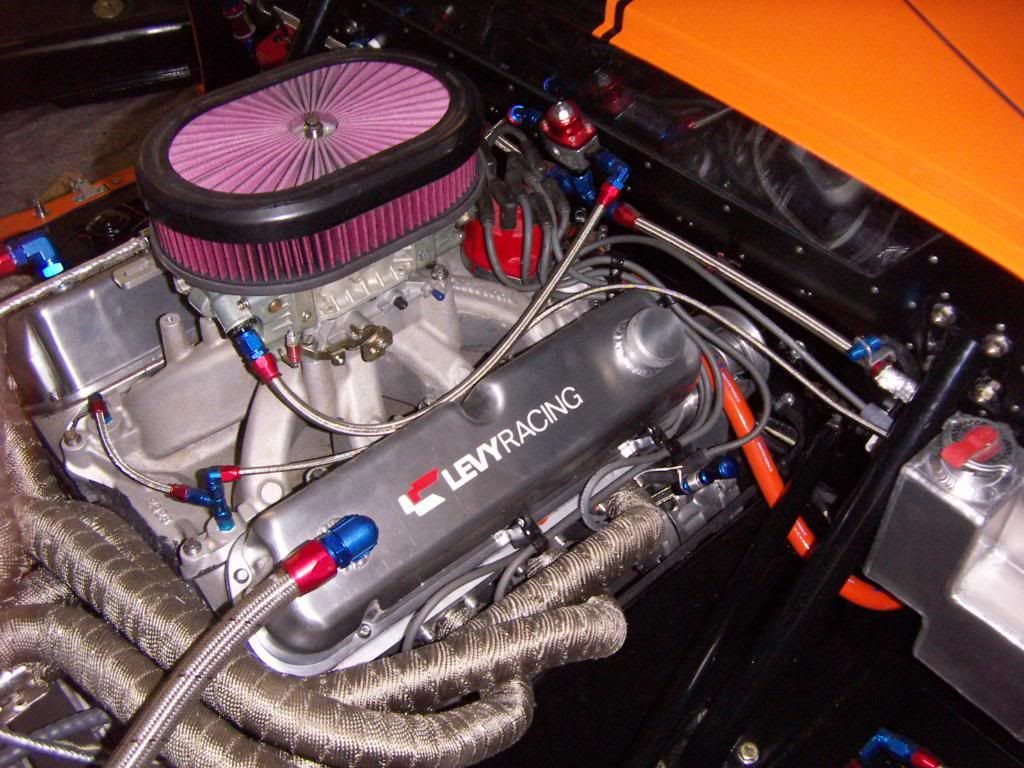
Wrapping the headers took one afternoon together with Reinhard. We used up app 2,5 roles(50 feet roles) of the 2" DEI titanium wrap. It is very soft and pliable no need to wet it before application. secured it with stainless steel safety wire.
Of course we had the headers of to do it.
We started at the cylinder head portion of the headers. Next time i would do it the other direction ( starting to wrap at the collectors end), because if gives the better overlapping direction. Overlap was app 1/3rd of width.
You should where long sleeves and thin silicon gloves to do it.
THanks
TOM
Last edited:
Very nice.
Still waiting on a driving report. Does not look like there is anything standing in the way that a fill up with high octane won't solve. . . . .
Tom:
Thanks for the info re the pipe wrap. Buy you failed to respond to the foregoing inquiry . . . . . . an oversight I am sure. . . . .
Cans where installed to either side of the transaxle. On one of the cans i additionaly fitted a AN 6 bung and connected it to the transaxle breating line ( AN 6). The cans where fixed on brackets made out of 1/4" Aluminium stock.
AWH: 851 h
Tom:
Question: Any issues venting the tranny and the valve covers to the same tank? Wondering if the changes in crank case pressure / vacuum could have an adverse affect on the transmission vent.
Just wondering. I have no idea . . . .
Tom:
Question: Any issues venting the tranny and the valve covers to the same tank? Wondering if the changes in crank case pressure / vacuum could have an adverse affect on the transmission vent.
Just wondering. I have no idea . . . .
me neither, but i figure the breather tank opening is big engough to balance this out.
Besides that, a additional tank would have disturbed the symetry and clean look i try to achieve in the engine compartment.
THanks
TOM
Tom:
Thanks for the info re the pipe wrap. Buy you failed to respond to the foregoing inquiry . . . . . . an oversight I am sure. . . . .
There is something in the way now, it s about 1 foot high an cold and white.
Besides that, i still have not yet started wiring the car. Will be starting this weekend.
TOM
Tom
I have just finished reading all of your thread, It took me weeks.
My hat is off to you, very informative and inspiring.
Thank you for your input and you time
Woody
Thanks Woody, that´s part of the fun to me and my pleasure
TOM
Besides that, i still have not yet started wiring the car. Will be starting this weekend.
TOM
Sort of like the icing on the cake or the whipped cream on the pumpkin pie. You save the best part for last . . . . That will be a good winter project as you gaze out those large bay windows upon the snow covered yard.
many pictures of original cars , show the shoulder belts coming in from the top of the seats, like here on P 1074.
COnsidering the seating position in GT40 this is a not optimal belt routing for track or race use.
For good positioning of the shoulder belts the belt suppliers recommand a angle of 0° or max -10° declined ( not upwards). To achieve this i welded in an additional bar into my rollcage and modified the seats to be able to rout the belts according to this reco.
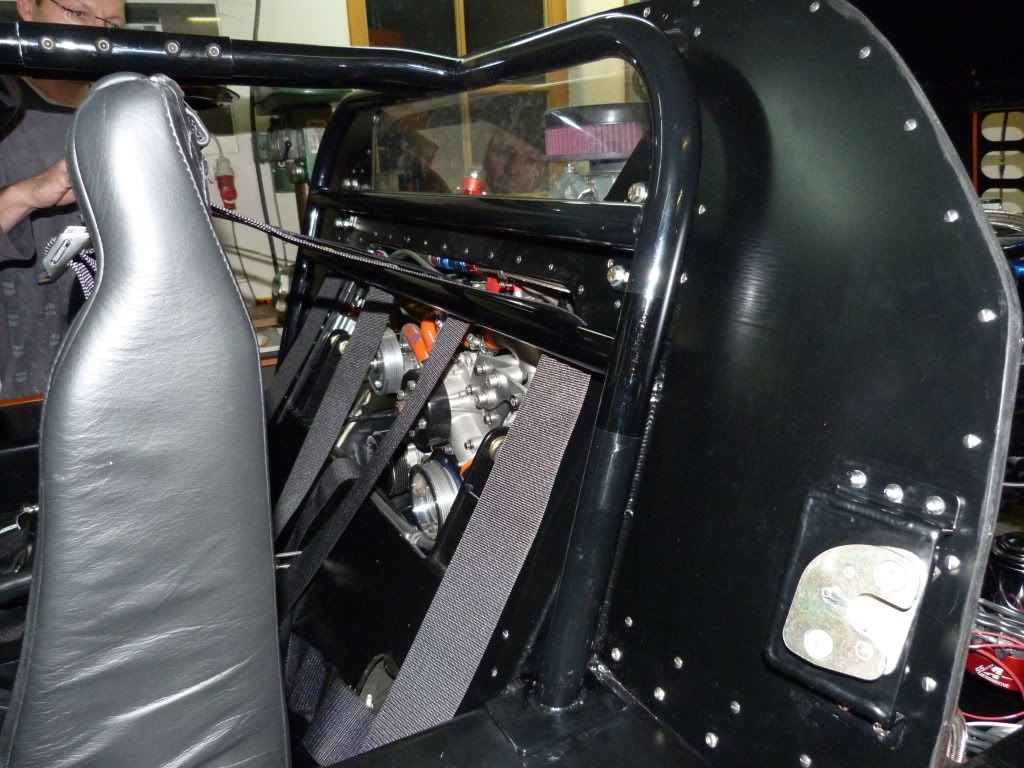
Modified seats from rear view
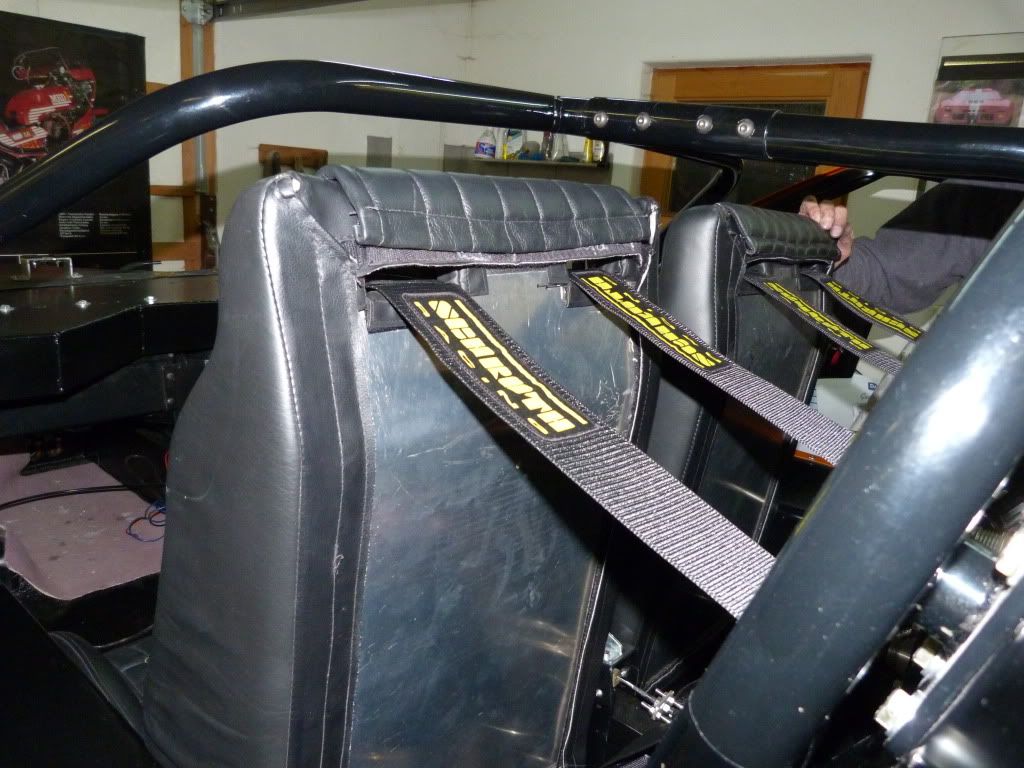
From front
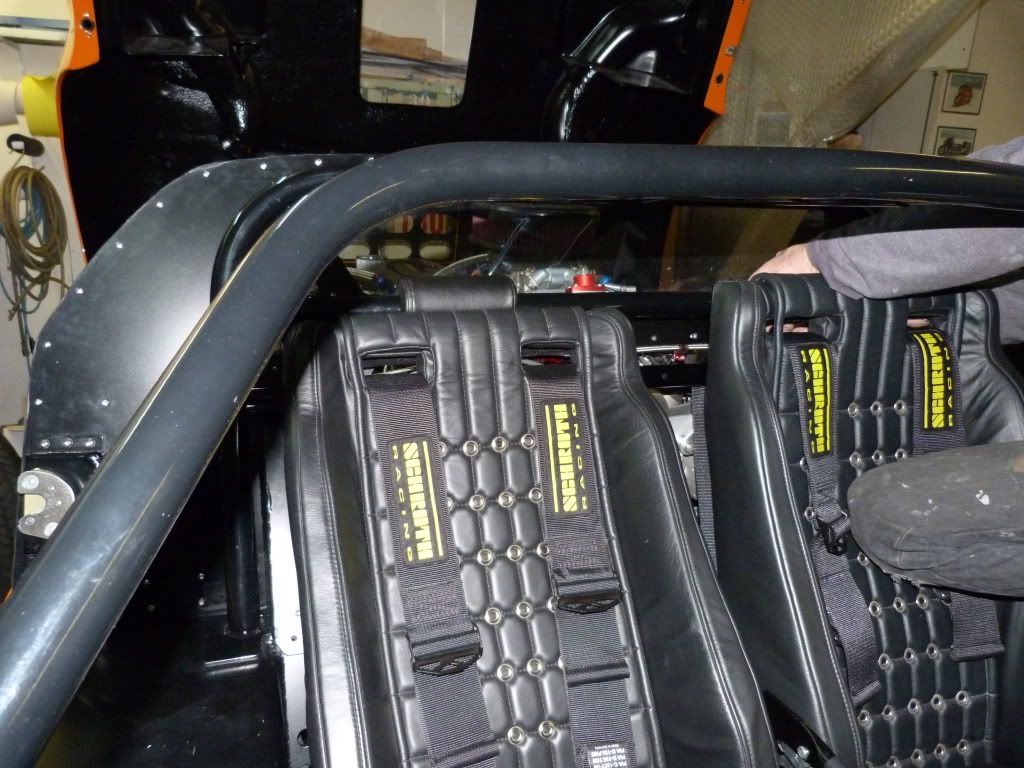

I had to take the spider of again to be able to weld and paint that bar. THe result is a very snug and tight fit of the belts.
TOM
AWH: 860 h
COnsidering the seating position in GT40 this is a not optimal belt routing for track or race use.
For good positioning of the shoulder belts the belt suppliers recommand a angle of 0° or max -10° declined ( not upwards). To achieve this i welded in an additional bar into my rollcage and modified the seats to be able to rout the belts according to this reco.
Modified seats from rear view
From front
I had to take the spider of again to be able to weld and paint that bar. THe result is a very snug and tight fit of the belts.
TOM
AWH: 860 h
Nice job..
The belt positioning is a personal situation depending upon the size and shape of the driver and the seat position relative to driver comfort.
There is obviously not a one size fits all solution...You are pretty tall and need to recline in the car quite a long way, my two piece aluminum pan seat allows this without problem...but me being a short a*s can sit more upright and the original position of the crossbar works well for me...
Last edited:
- Status
- Not open for further replies.
Similar threads
- Replies
- 25
- Views
- 3K
- Replies
- 23
- Views
- 3K