Chuck's Jaguar D Type Build

Chuck

Supporter
D Type Build Blog. The Question.

I have a question.

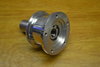
I just took delivery of an RCR Jaguar D Type kit. A detailed build blog will be forthcoming that will likely continue for a couple of years or longer, similar to the blog for the RCR GT40 started more than a decade ago. https://www.gt40s.com/threads/chuck-and-ryans-rcr-build.22083/

But where should that blog be?

I would like to keep it right here on GT40s.com even though a Jag D Type and a GT40 do not facially have much in common. But look a bit deeper and there is indeed some common ground.

First, those that patronize this site include some of the most knowledgeable car guys I know. The help and feedback provided on the GT40 project was invaluable. Hopefully many of those that visit this blog on the GT40s forum might find this Jag project interesting.

Second, the details and techniques posted will in many instances be transferable to building a GT40.

Third, the Jaguar D Type shares a common heritage with the GT40. A decade before the GT40 won at Lemans four consecutive years in the late sixties, the D Type won at Lemans for three consecutive years starting in the late fifties.

So here is the question, for those that visit this forum and for those that administer it. Would it be appropriate to continue this blog on our construction of a D Type reproduction on the GT40s forum? Or should I take my toy and go somewhere else to play?


IMG_1525.jpg
 

Chris Kouba

Supporter
My gravity racers have nothing to do with GT40's (except their livery matches my GT), yet they were welcomed in the wings, wheels, and keels forum. Please do post it. We all have stuff to learn and share. Would love to see what you guys do with it!
 
Chuck, please post it here.
Really enjoyed your GT40 build log and it helped me a lot when I was installing Webers.
Looking forward to following your next build.
 
  • Like
Reactions: lgs
I was amazed when I stood next to the D at Fran's of just how small they are. Very cool and look forward to following along. If my XKE is ever done, I'd love to do one of these.
 
You might find Jaglovers forum quite friendly to your D type build>I used it while restoring a 62 Etype ots.There were several people on there either owning or building D types. I think you would like it. DJ
 

Chuck

Supporter
Delivery

DSC_0205.JPG

The Jag arrived on an unseasonably warm day in early October, 2018. The first project was to unpack the boxes and inspect everything.


We learned that several key components including the door hinges, aluminum front clip vents and header tank are not yet available. But the hardware needed to seriously begin construction is there, so let the project begin!

A detailed list of contents was prepared and compared to the RCR list. The slight discrepancies were brought to RCR’s attention. Preparing a list is good policy if for no other reason than it forces one to familiarize himself with everything that came with the kit.

Photos, photos, photos. Photos were taken of virtually every part. You never know when you will need to revisit the original appearance of something, particular assembled chassis components.

DSC_0198.JPG


The fact the body is blue, fin white and fuel filler lid green is of no significance. It will all eventually be the same color.

Details are noteworthy. The tail lights are actual Lucas components. The headlight has a small signal light within the housing, which will be useful, since the original small signal light was mounted just below the headlight likely was of little practical effect. I suspect we will wire both the internal and the small external light if for no other reason than to enhance its visibility.

DSC_0214.JPG

DSC_0216.JPG

We requested our kit without the aluminum panels installed, so they were also laid out and examined. The panels are like a big puzzle. One has to study the notations written on them and figure out where they will go. The aluminum panels will finish off the cockpit, front clip and rear clip, adding significantly to the aesthetics of the final product.


The panels shown in the picture are for one side of the front fender area only; a fraction of the total. Trimming and installing these panels will be a significant and time consuming project.

DSC_0209.JPG
 

Attachments

  • DSC_0222.JPG
    DSC_0222.JPG
    204.8 KB · Views: 539

Chuck

Supporter
The Engine Builder

Bill Terry has been building Jaguar engines since the sixties. Before that he raced and worked on Triumph motorcycles. If you see an XKE competing in vintage races at Sebring, Road America, or other road courses there is a good chance it has an engine built by Bill. For many years he ran a Jaguar parts business know as Terry’s Jags. He sold that business about a decade ago and since that time his focus has been on one thing: building Jag engines. He presently operates under the name TT Engines, www.TTEngines.com, 618-513-0385. In his shop are pictures of some of the winning cars powered by his engines, including a MK2 that won the Touring Car competition in Japan in 2015, and E Types raced by Heritage Motorsports and Predator Performance.

The engine is the heart of the D Type, so my goal was to build an engine that would look as close to the original as possible. I did some searching for a good engine builder before discovering that Bill Terry was only thirty miles away.

Bill and his wife live in an old warehouse in Benton, Illinois. The top two floors have been converted into the living quarters and the ground floor is the engine shop. The actual engine building takes place in a small section of the first floor with a high ceiling, original hardwood floors, an antique roll top desk, and walls covered with pictures of winning race cars. Along the outside wall is a full-length work bench with drawers filled with tools. Typically, there are a couple of engines being built; an idyllic setting for building Jag power plants.


TerryJag1.jpg


On one of my visits to Bill’s shop there were three engines lined up in various stages of completion. One looked a bit odd. The spacing of the cylinder heads seemed a bit off. It had a shallow oil pan with various attachments not seen on other Jag six cylinders. Noting my interest Bill commented in an off-hand manner that this particular engine was a D Type engine that was going into the 1956 Lemans winner. Now put this in perspective. There were only 84 original D Type race cars built. D Types won Lemans four years in a row in the late 1950’s. This engine was going into one of those four Lemans winners! By way of further explanation, that car was much too valuable to risk harming the original engine, so Bill was building a clone engine that could be swapped so it could actually be driven.


DTypeOriginal1.JPG


There are obviously an abundance of differences between an original D Type racing engine and the one that will go into our reproduction, even though they will look similar to all but the most knowledgeable. The most obvious difference is the spacing of the heads and the dry sump. But another detail was intriguing.

The pulley on the water pump has a unique means of adjusting the belt tension. The pulley is in two halves that thread together. How tight or loose it is set determines whether the belt rides deep or near the outer edge, which in turn will loosen or tighten the belt. Once the tension is right, a set screw it tightened down to secure it. Bill commented that many less knowledgeable mechanics did not realize that there were detents in the threaded section where the set screw should be placed and they would often damage the threads making it difficult for the next guy to adjust the tension. This set up was unique to the D Type


IMG_1158.JPG


Long story short: after seeing what was going on in this shop only thirty miles from my garage I had no doubt that Bill Terry could build an excellent engine for my RCR Jag.

 
Chuck,
That's my kind of engine shop. Knowledgeable builder and a comfortable shop. I don’t even see a stain on the floor.
Will you be adding a “cup holder” like your 40? Space looks more limited in the D-type.
Good to see you building again by the way. I will be following along.
Take care,
Tony
 

Chuck

Supporter
The Engine Build

Our engine had to have the cast aluminum valve covers, similar in appearance to the original. I found a set on E Bay for a good price, but they were in need of polishing. The valve covers went along with me on a week-long summer vacation where many hours were spent polishing them while sitting at a picnic table overlooking Kentucky Lake. When the shine looked good to me I took them to Bill for an inspection. After carefully looking over my hard work he said “Well . . . that’s a good start”. So back to the polishing.


IMG_9304.JPG


I wanted to have a little involvement with the engine build, so I offered to polish the intake runners for the Weber side draft carburetors. Bill said that would be fine, as he pulled off the shelf a series of templates he had come up with over many years of building these engines. The templates defined the exact dimensions of the intake runners at various points to maximize efficient air flow. It was immediately obvious that I would be deferring to Bill to complete that task.

A comprehensive build log was prepared by Bill, complete with detailed parts list, specifications, and progress photographs. After the engine was built it was taken to a race shop a half block away, R & R Motorsports, where it was dyno tested and the Webers adjusted. Engine complete.


Dyno1Comp.jpg


Chuck

Supporter
Engine Details

The Jag six cylinder was in production for some sixty years and came in three primary displacements: 3.4, 3.8 and 4.2. They look about the same but there are differences. The D Type originally had a 3.4 and later a 3.8 liter engine (with a wide angle head and dry sump) but we opted to go with a 4.2 block. It is the most recent version, is readily available, and obviously has a larger displacement. Here are some construction progress photos.


Block3Comp.jpg


Crank1Comp.jpg


IMG_2548Comp.JPG


Heads1Comp.jpg
 
Back
Top