Cheers Dave

You are using an out of date browser. It may not display this or other websites correctly.
You should upgrade or use an alternative browser.
You should upgrade or use an alternative browser.
KCC Restoration
- Thread starter Willy81
- Start date
I also want to ask, if it's possible, for you to send me the specs of the wheels the car had on when you got it? The wheels mine currently has on is no way near correct. It was just put on to get it rolling on & off a trailer.
I'm specifically wondering about the offsets on the front & rears. We've worked out the rear to be a 0 offset at the back, but haven't looked at the front yet.
Hi Marc,
I finally got around to measuring the wheels for you. Sorry it took me so long. I kept forgetting.
Front wheels:
* 15" diameter
* 200mm width outer edge to outer edge (apparently the true reading should be from within the bead (where the tyre contacts).
* 0mm offset
* 67mm between adjacent bolt centres = 114mm? Odd size, Google suggests it's 5x112. I didn't measure the rears. I thought they were the same, I could be wrong.
Rear wheels:
* 15" diameter
* 229mm width outer edge to outer edge.
* -4.5mm offset (110mm to inside lip of wheel). Just check I've got this one right. Hub face is set inwards from centreline.
Ah, thank you so much for the info! I will compare the data with what I have and get back to you. I remember the rear offsets being 0mm on the back, but it might be that our chassis aren't 100% the same.
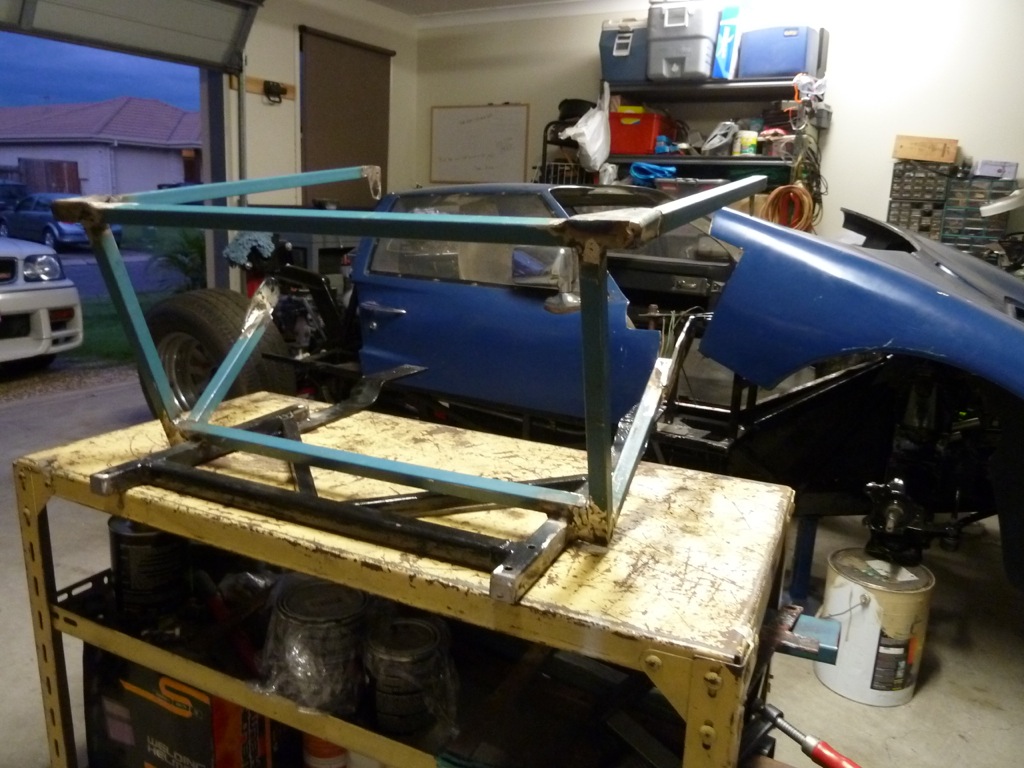
Sorry it's been a while since my last update. Things have been quite busy for us all and we've missed a few weekends recently, but work has still been progressing when we get a chance. The most exciting thing to happen over the last few weeks was the reinstallation of the body. OK, it was only temporary (to check out chassis clearance), but it was very motivational and brought back memories of how this thing looked about a year ago. Check it out...
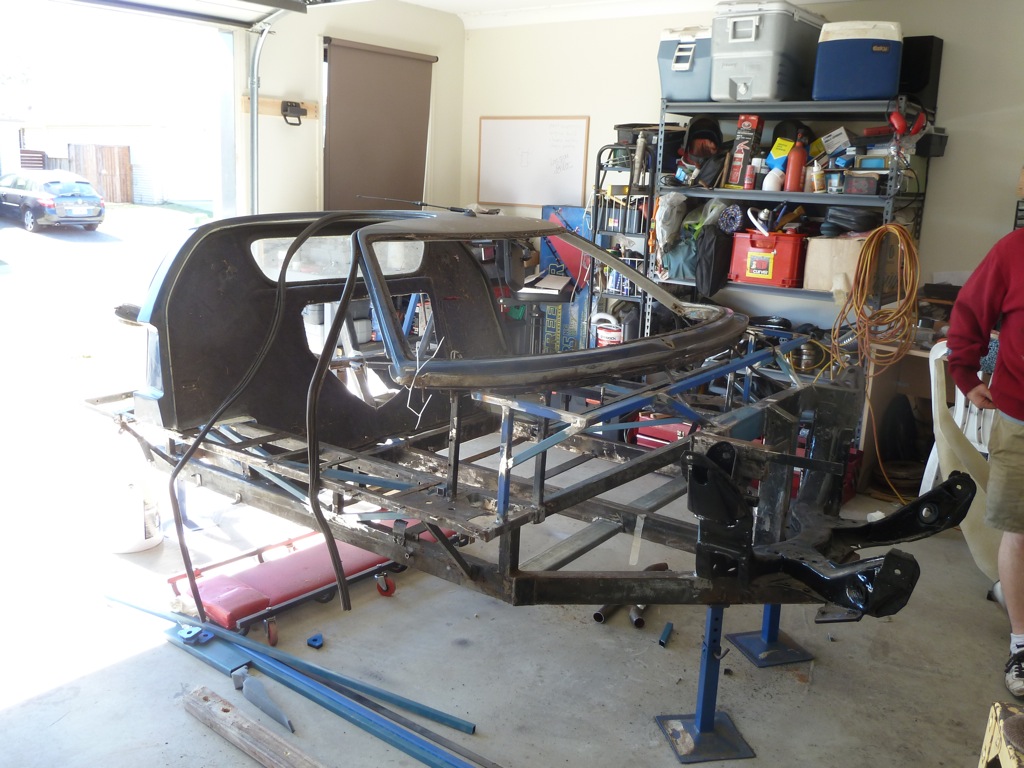

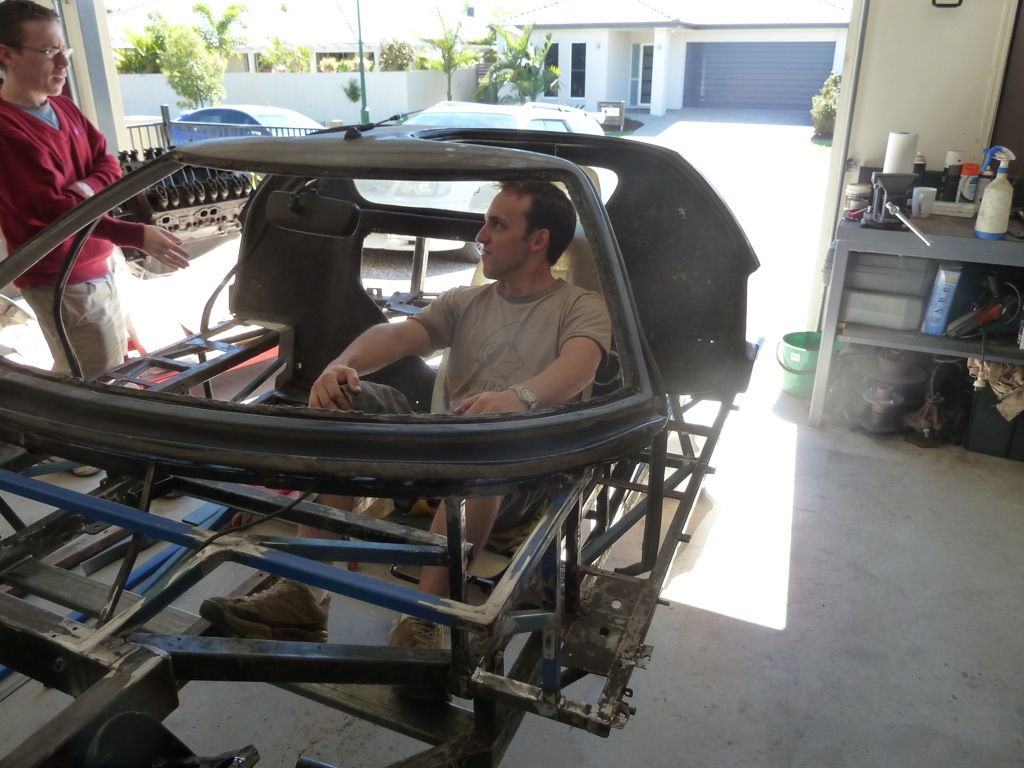
I couldn't help myself, but climb in.
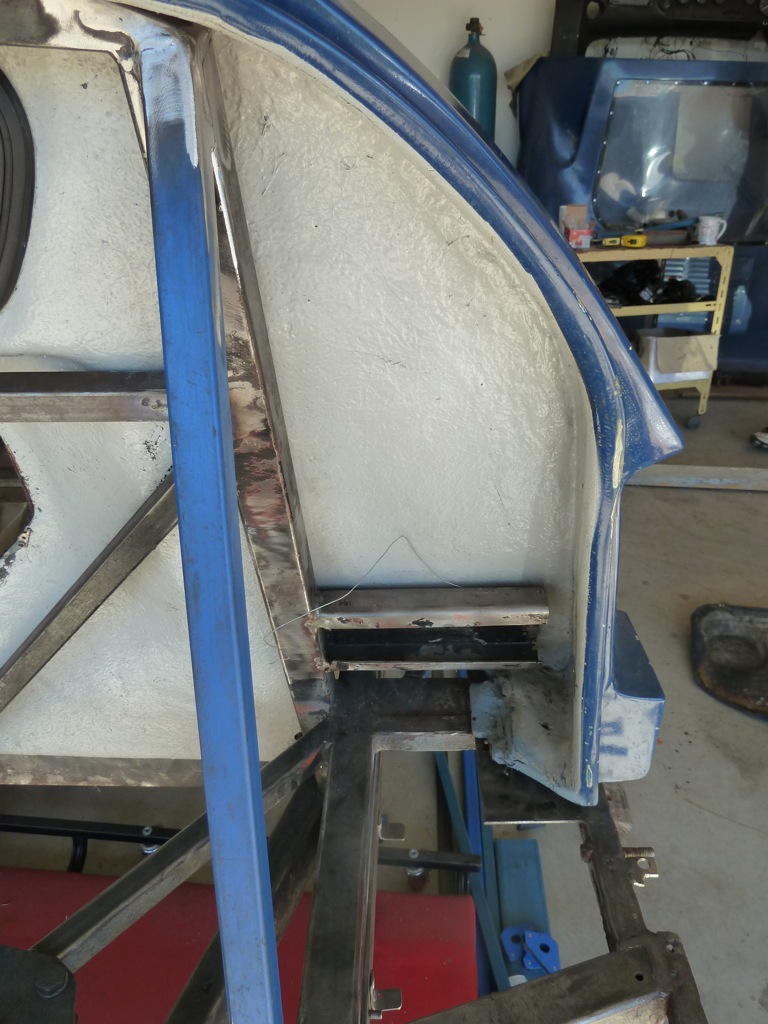
It looks way better now that the chassis has the extra bracing. The main reason for putting the body back on was to measure the clearance behind the bulkhead. We're planning to replace the C-section for the door locks with some 25mm box section that follows the shape of the body.
More Welding
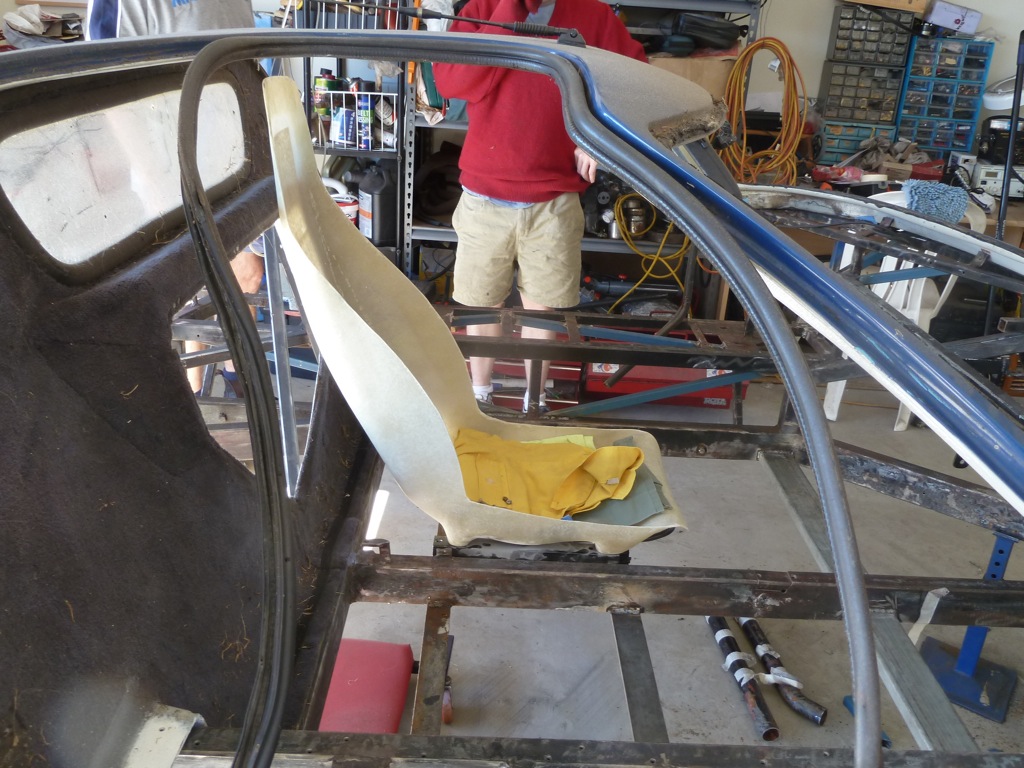
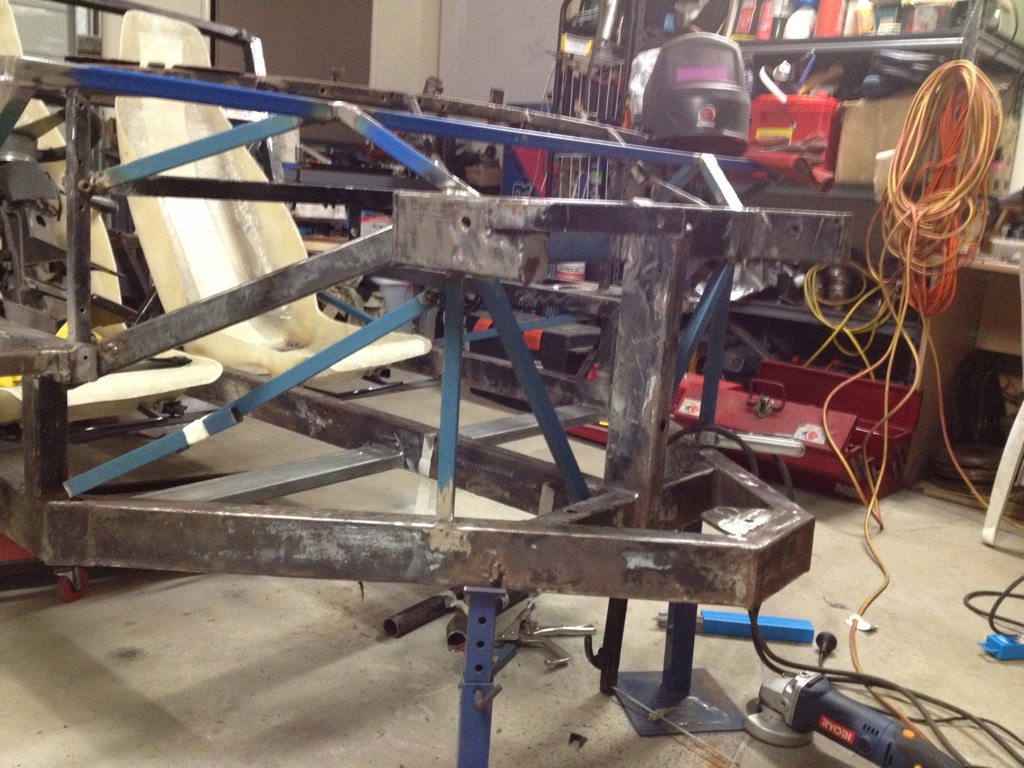
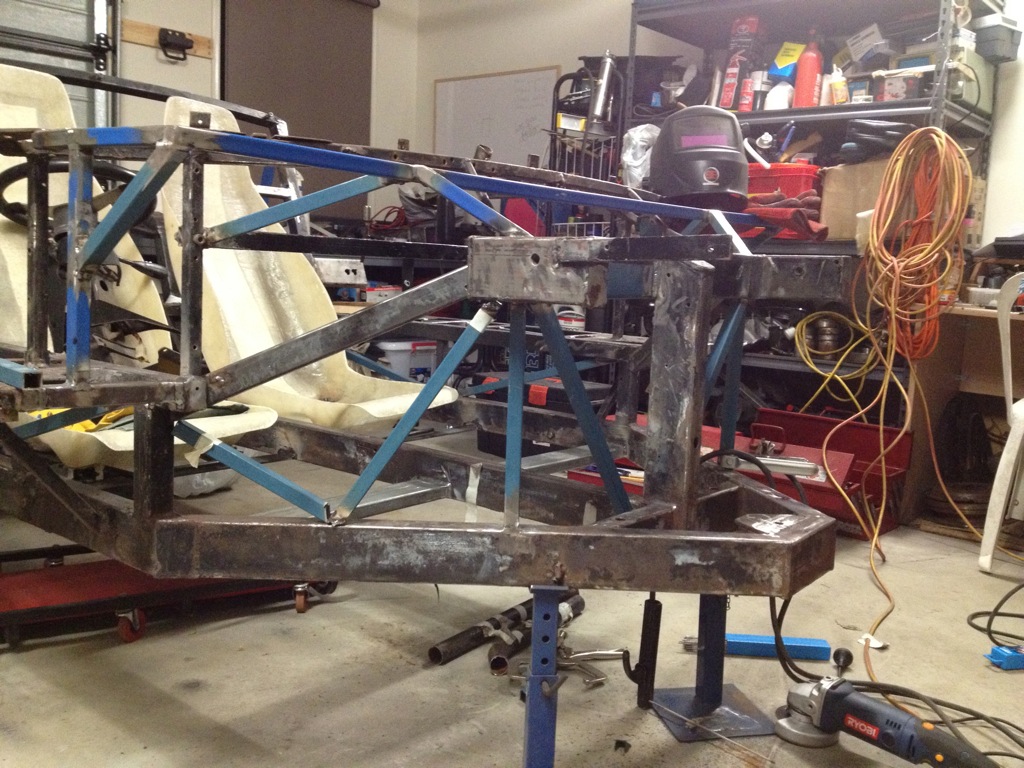
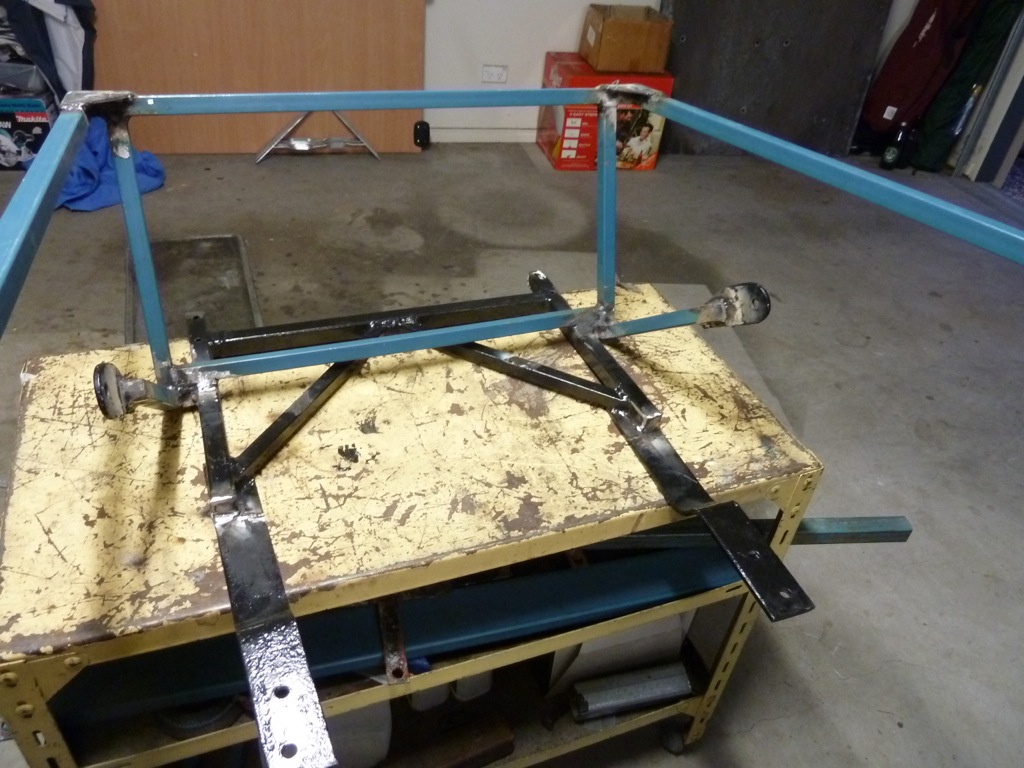
We've also done a bit more welding recently. First up, added new seat rails that line up with the new seat rails, then added some cross bracing in the front.
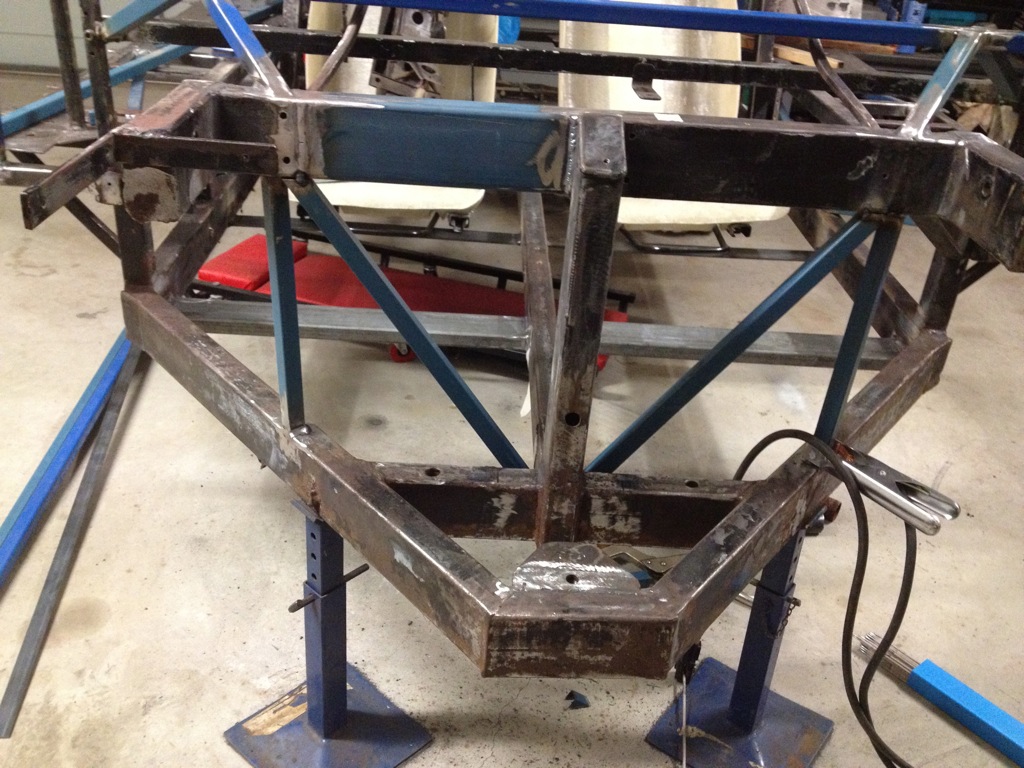
I'm also contemplating if to add bracing in the front sides. Here are the two options. I think the 2nd option is going to add more strength. The first option won't really do much for bracing.
So welding is nearly complete. Tim has a week off soon, so we're hoping we'll have the chassis ready for painting during that week.
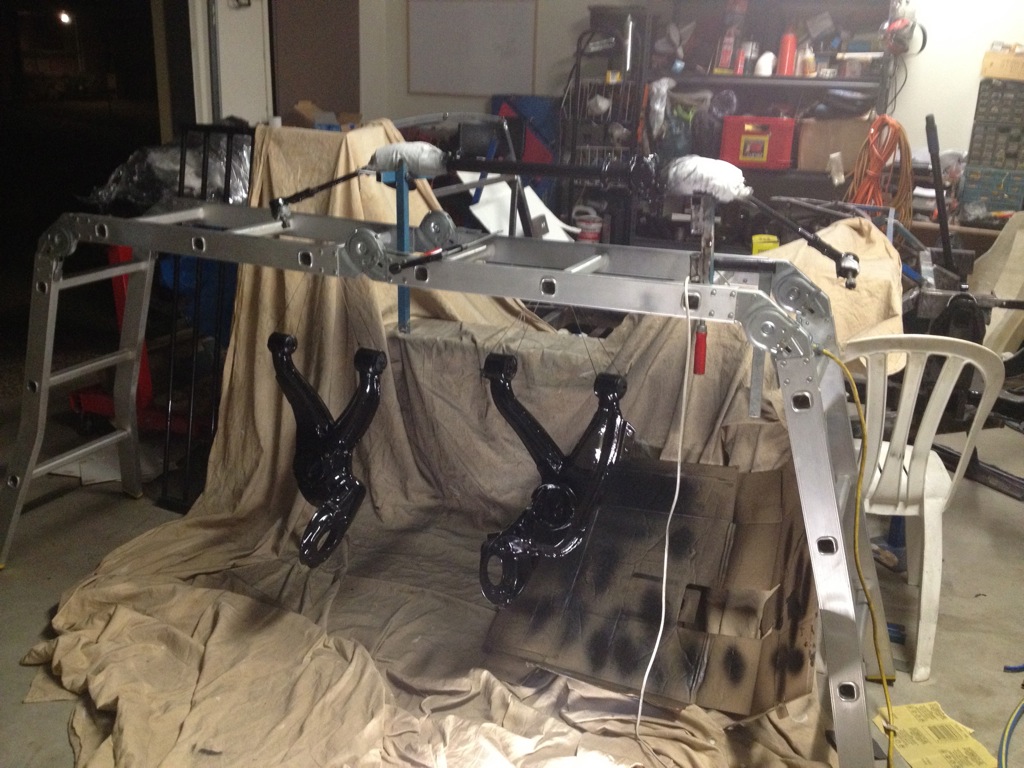
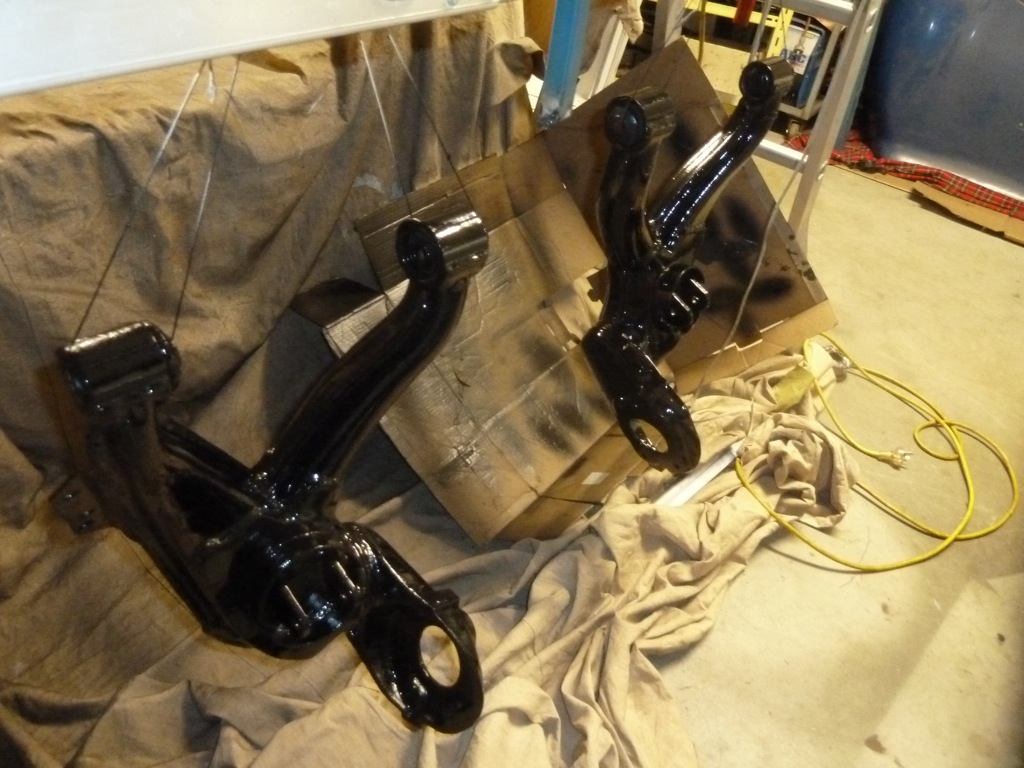
Suspension Painting
Whilst Dad has been working on the engine and I've been welding, Tim has been getting on with painting the rest of the suspension parts. The latest is the rear trailing arms and steering rack. The beauty with the KBS paint is that it's self-levelling and can be brush painted. Tim did a coat of Rust Seal on Saturday and asked me to do a coat of KBS Black Top (UV blocker) on Sunday. I thought it was a perfect opportunity to get some practice on my spray gun. Unfortunately, this was a bad idea, I ended up with bad orange peal (rippled surface). I put this down to the fact that I had no idea what each of the knobs on the gun do.
So after some Googling, I learnt how these guns work and headed back to the garage. I gave the parts a light sanding, then hit them with a coat of Rust Seal. This time, I took the time to test the gun on a piece of cardboard and to set up it up properly. I don't think I was getting good atomisation before. Possibly because I didn't use enough thinner. So 2 things, I can recommend to newby painters like me:
Test the gun on cardboard before spraying. There are lots of good sites on the web that show what the test patterns should look like and how to identify problems. Play with each of the knobs and understand what each one does.
Use the correct amount of thinner as directed by the paint manufacturer.
After all that, here is how it turned out. It could always be better, but at the end of the day it's just suspension parts and we're not building a show-quality car. As long as they are rust free and sealed. Despite the time spent sanding and repainting, this has been a great opportunity for me to learn how to use the spray gun. No doubt these skills will prove handy again.

The Engine
On Saturday I went out for an hour or two and left Tim and Dad at home. I came home and was greeted by this (pretend it doesn't have plastic on it, I forgot to take a photo)...
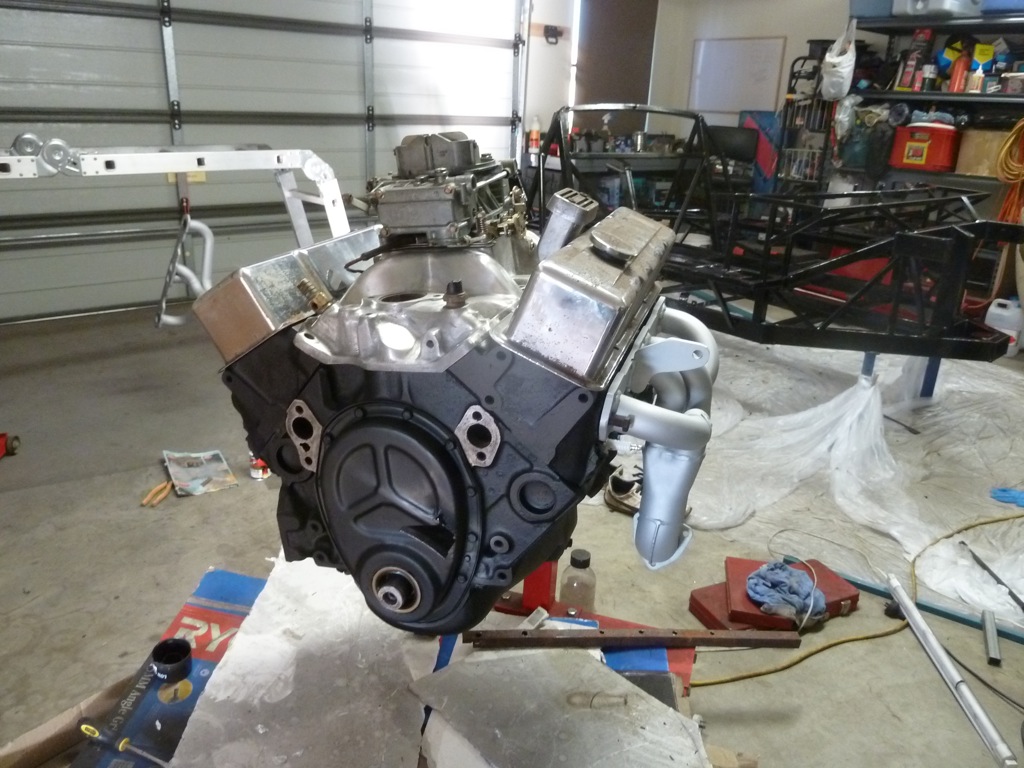
Yep, the inlet manifold and carby are on now. It looks mean! Can't wait to hear it running. Tim's ordered the rest of the parts to finish it off. We'll give it a coat of paint soon, too.
I couldn't help myself, but climb in.
It looks way better now that the chassis has the extra bracing. The main reason for putting the body back on was to measure the clearance behind the bulkhead. We're planning to replace the C-section for the door locks with some 25mm box section that follows the shape of the body.
More Welding
We've also done a bit more welding recently. First up, added new seat rails that line up with the new seat rails, then added some cross bracing in the front.
I'm also contemplating if to add bracing in the front sides. Here are the two options. I think the 2nd option is going to add more strength. The first option won't really do much for bracing.
So welding is nearly complete. Tim has a week off soon, so we're hoping we'll have the chassis ready for painting during that week.
Suspension Painting
Whilst Dad has been working on the engine and I've been welding, Tim has been getting on with painting the rest of the suspension parts. The latest is the rear trailing arms and steering rack. The beauty with the KBS paint is that it's self-levelling and can be brush painted. Tim did a coat of Rust Seal on Saturday and asked me to do a coat of KBS Black Top (UV blocker) on Sunday. I thought it was a perfect opportunity to get some practice on my spray gun. Unfortunately, this was a bad idea, I ended up with bad orange peal (rippled surface). I put this down to the fact that I had no idea what each of the knobs on the gun do.
So after some Googling, I learnt how these guns work and headed back to the garage. I gave the parts a light sanding, then hit them with a coat of Rust Seal. This time, I took the time to test the gun on a piece of cardboard and to set up it up properly. I don't think I was getting good atomisation before. Possibly because I didn't use enough thinner. So 2 things, I can recommend to newby painters like me:
Test the gun on cardboard before spraying. There are lots of good sites on the web that show what the test patterns should look like and how to identify problems. Play with each of the knobs and understand what each one does.
Use the correct amount of thinner as directed by the paint manufacturer.
After all that, here is how it turned out. It could always be better, but at the end of the day it's just suspension parts and we're not building a show-quality car. As long as they are rust free and sealed. Despite the time spent sanding and repainting, this has been a great opportunity for me to learn how to use the spray gun. No doubt these skills will prove handy again.
The Engine
On Saturday I went out for an hour or two and left Tim and Dad at home. I came home and was greeted by this (pretend it doesn't have plastic on it, I forgot to take a photo)...
Yep, the inlet manifold and carby are on now. It looks mean! Can't wait to hear it running. Tim's ordered the rest of the parts to finish it off. We'll give it a coat of paint soon, too.
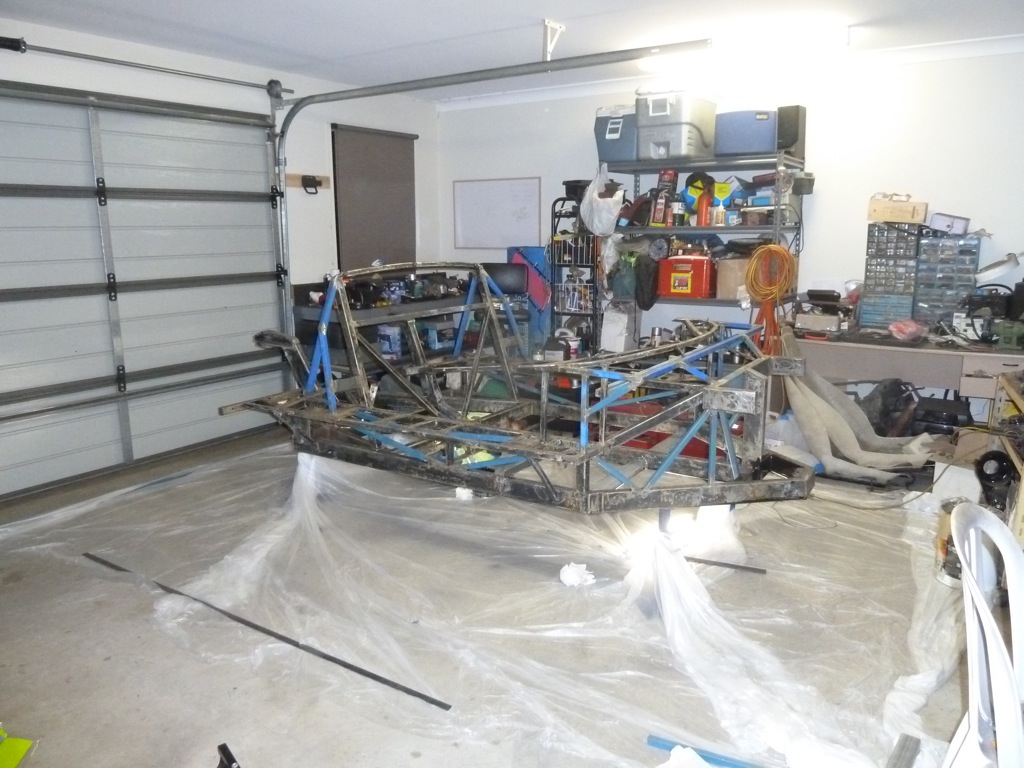
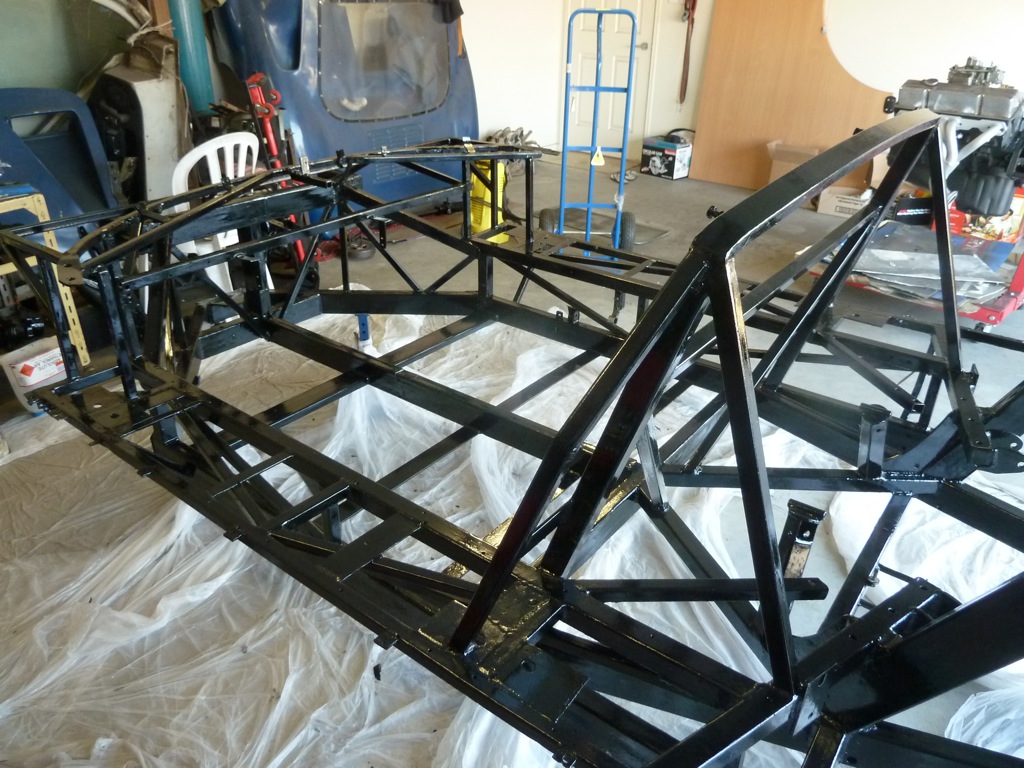
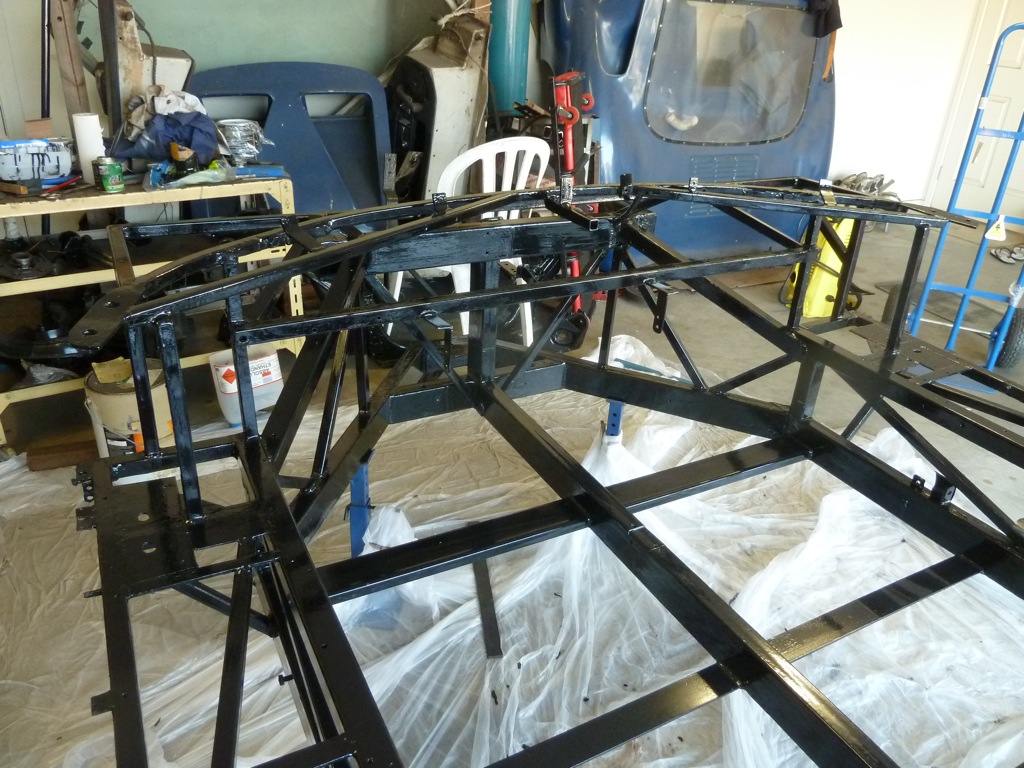
Well last weekend we reached a major milestone! Yep, we finally painted the chassis. Tim had the week off Uni and he devoted most of that week to working on the GT40.
Painting the chassis has been something we've wanted to get over and done with for a long time. Now we can finally move forward and start installing things. Here are a few pics of the process...
Here's how it looked in November last year.
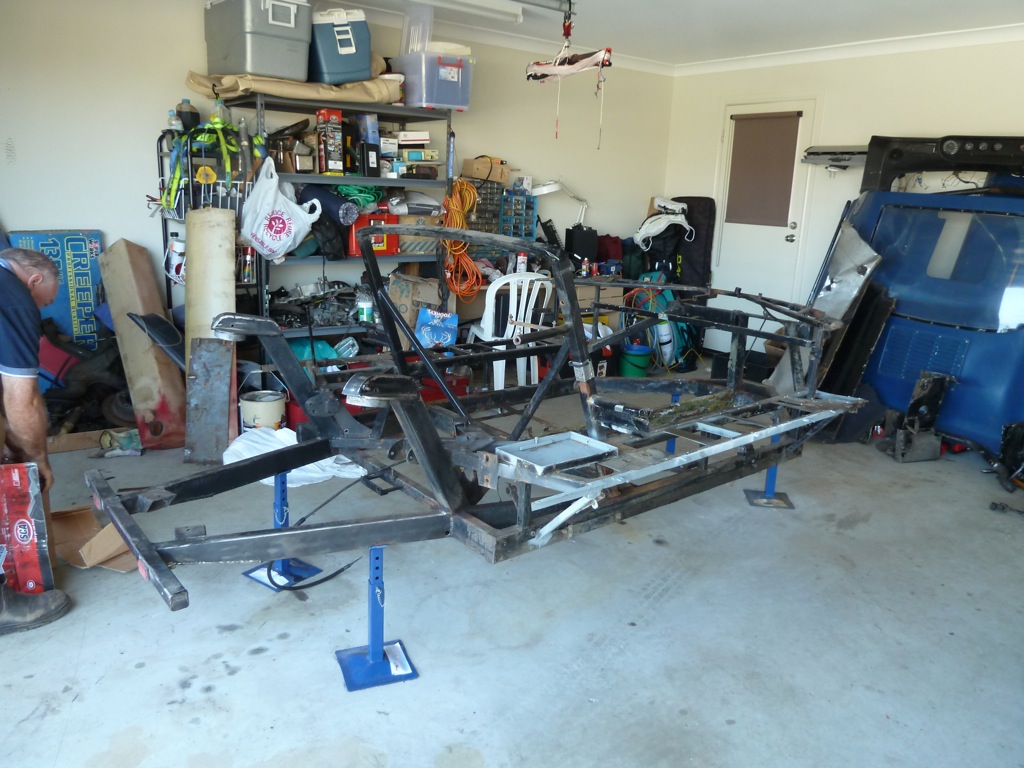
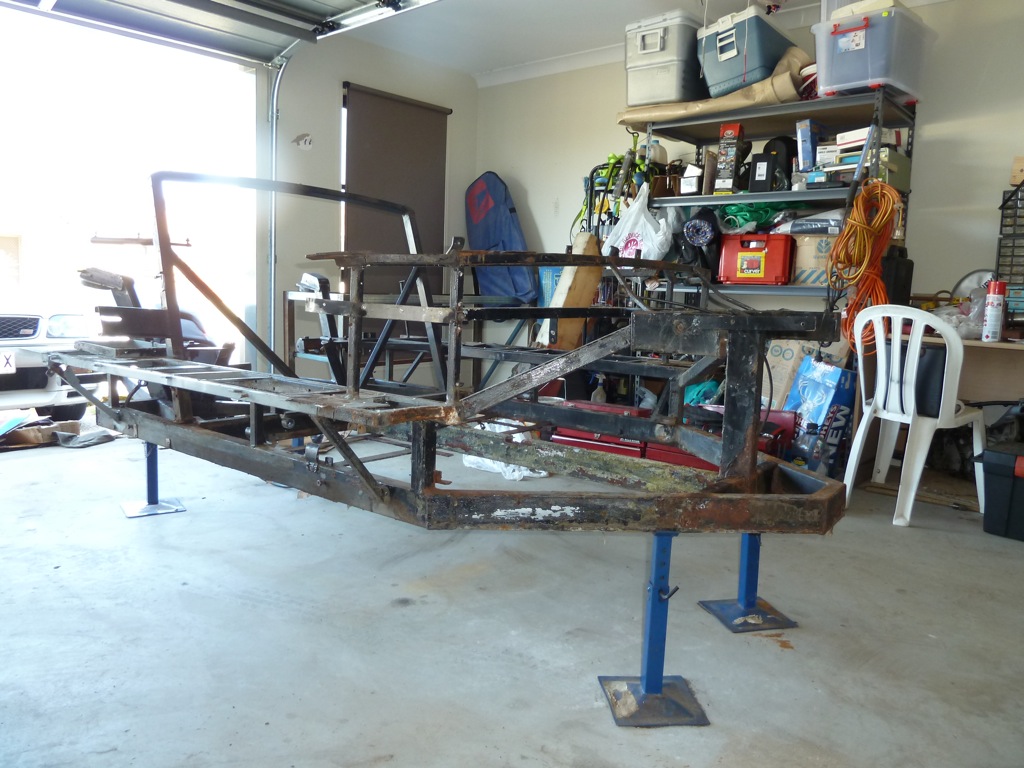
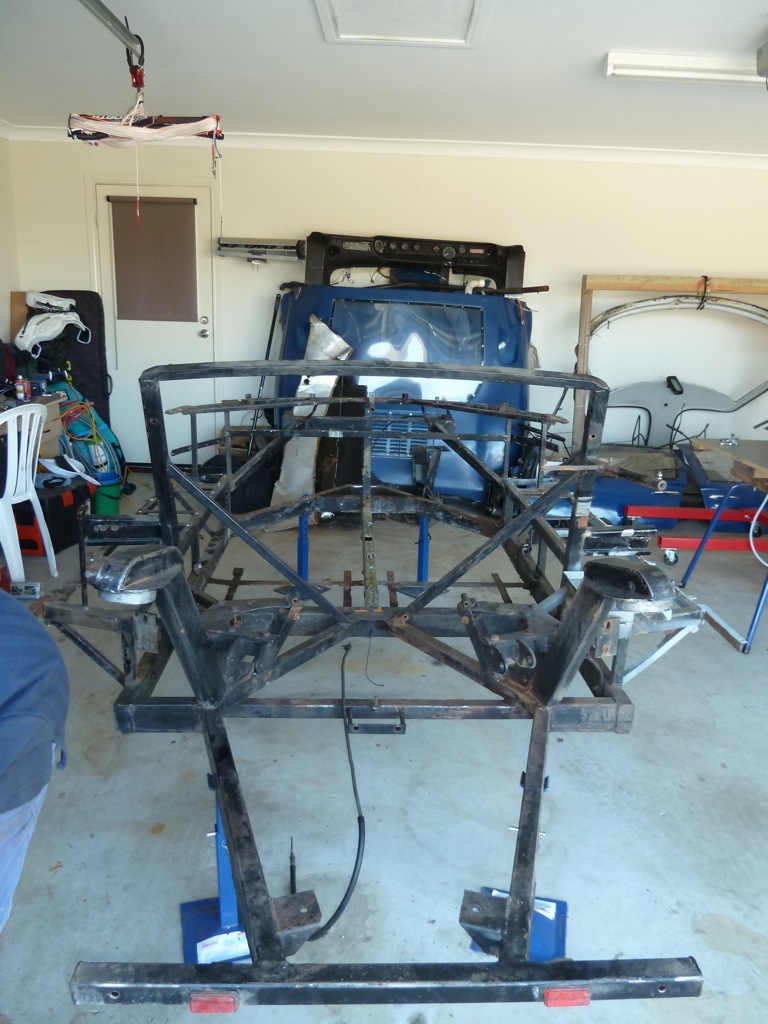
Tim spent a few days cleaning it up. My wife Kristen mentioned a few times about the amount of angle grinder dust blowing into the house. I promise, this is the last of the dust...
Tim even put it on dolly wheels and pushed the car down to the lawn so he could hit it with the Gurney. Apparently a young kid and his Mum walked past. The boy made the comment "Look Mum, they're building a boat". Hehehe
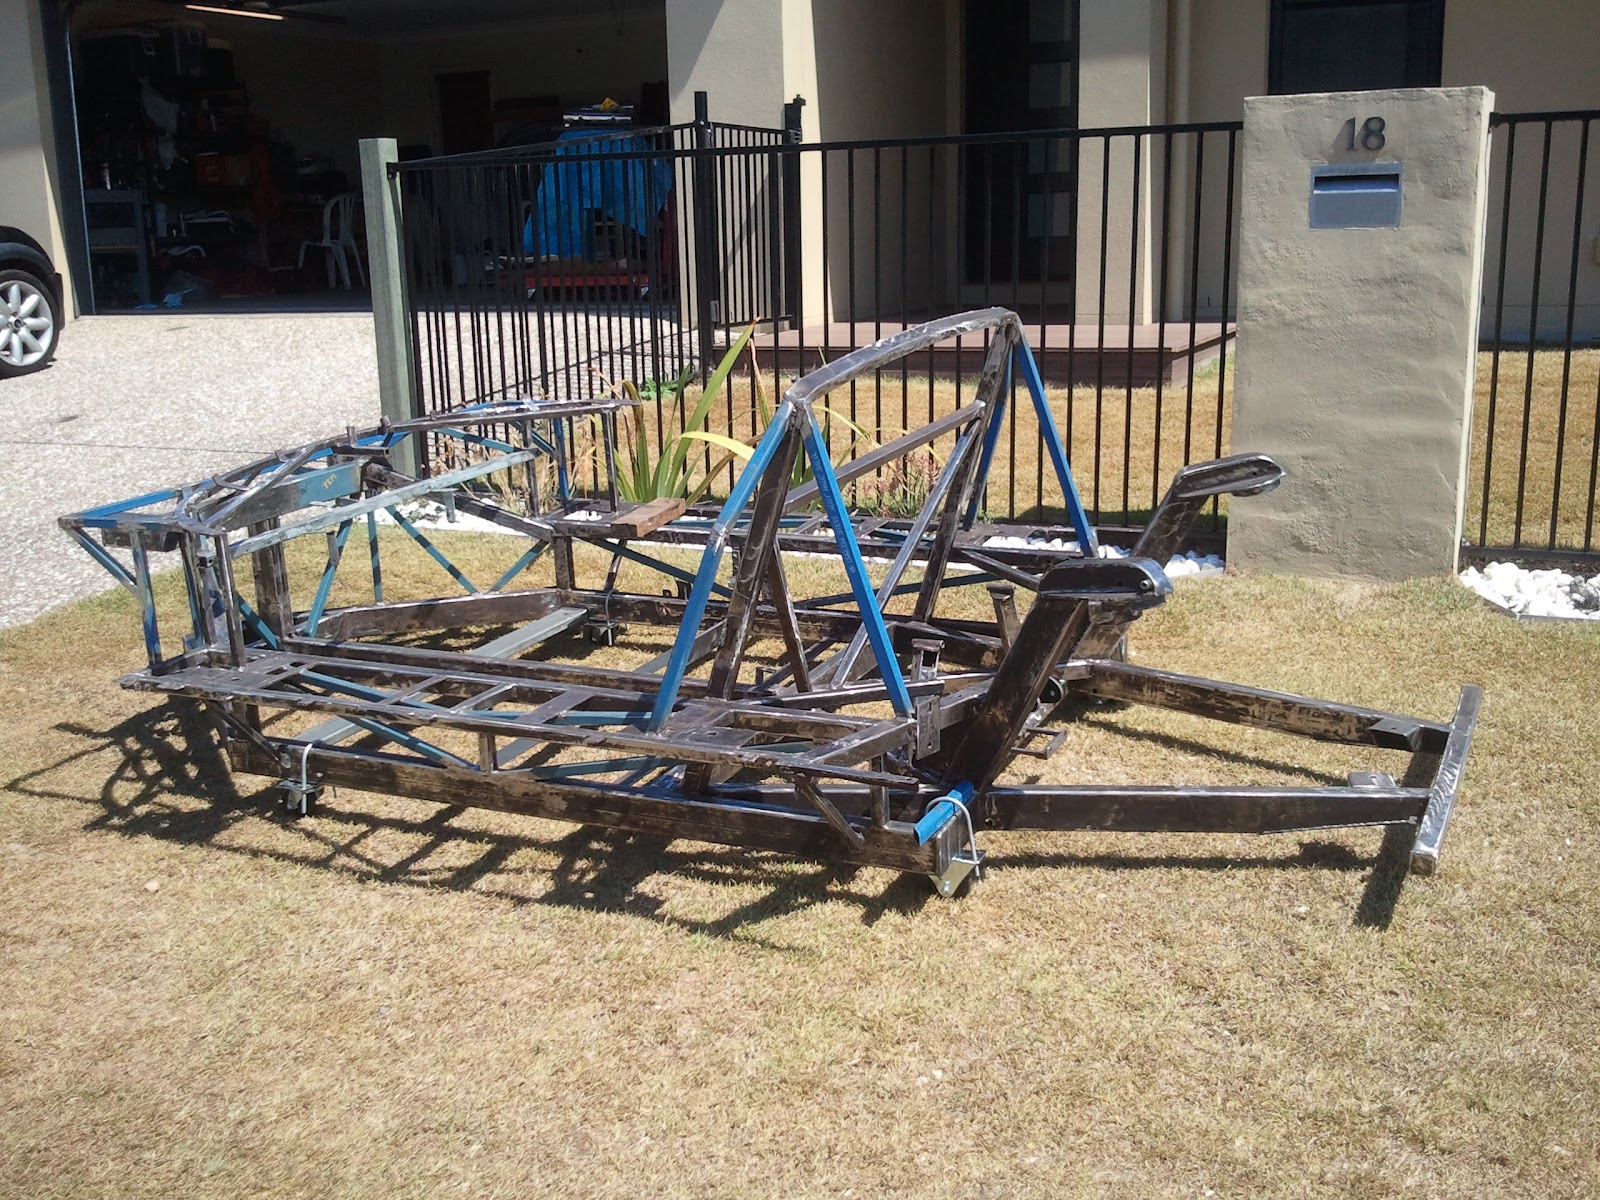
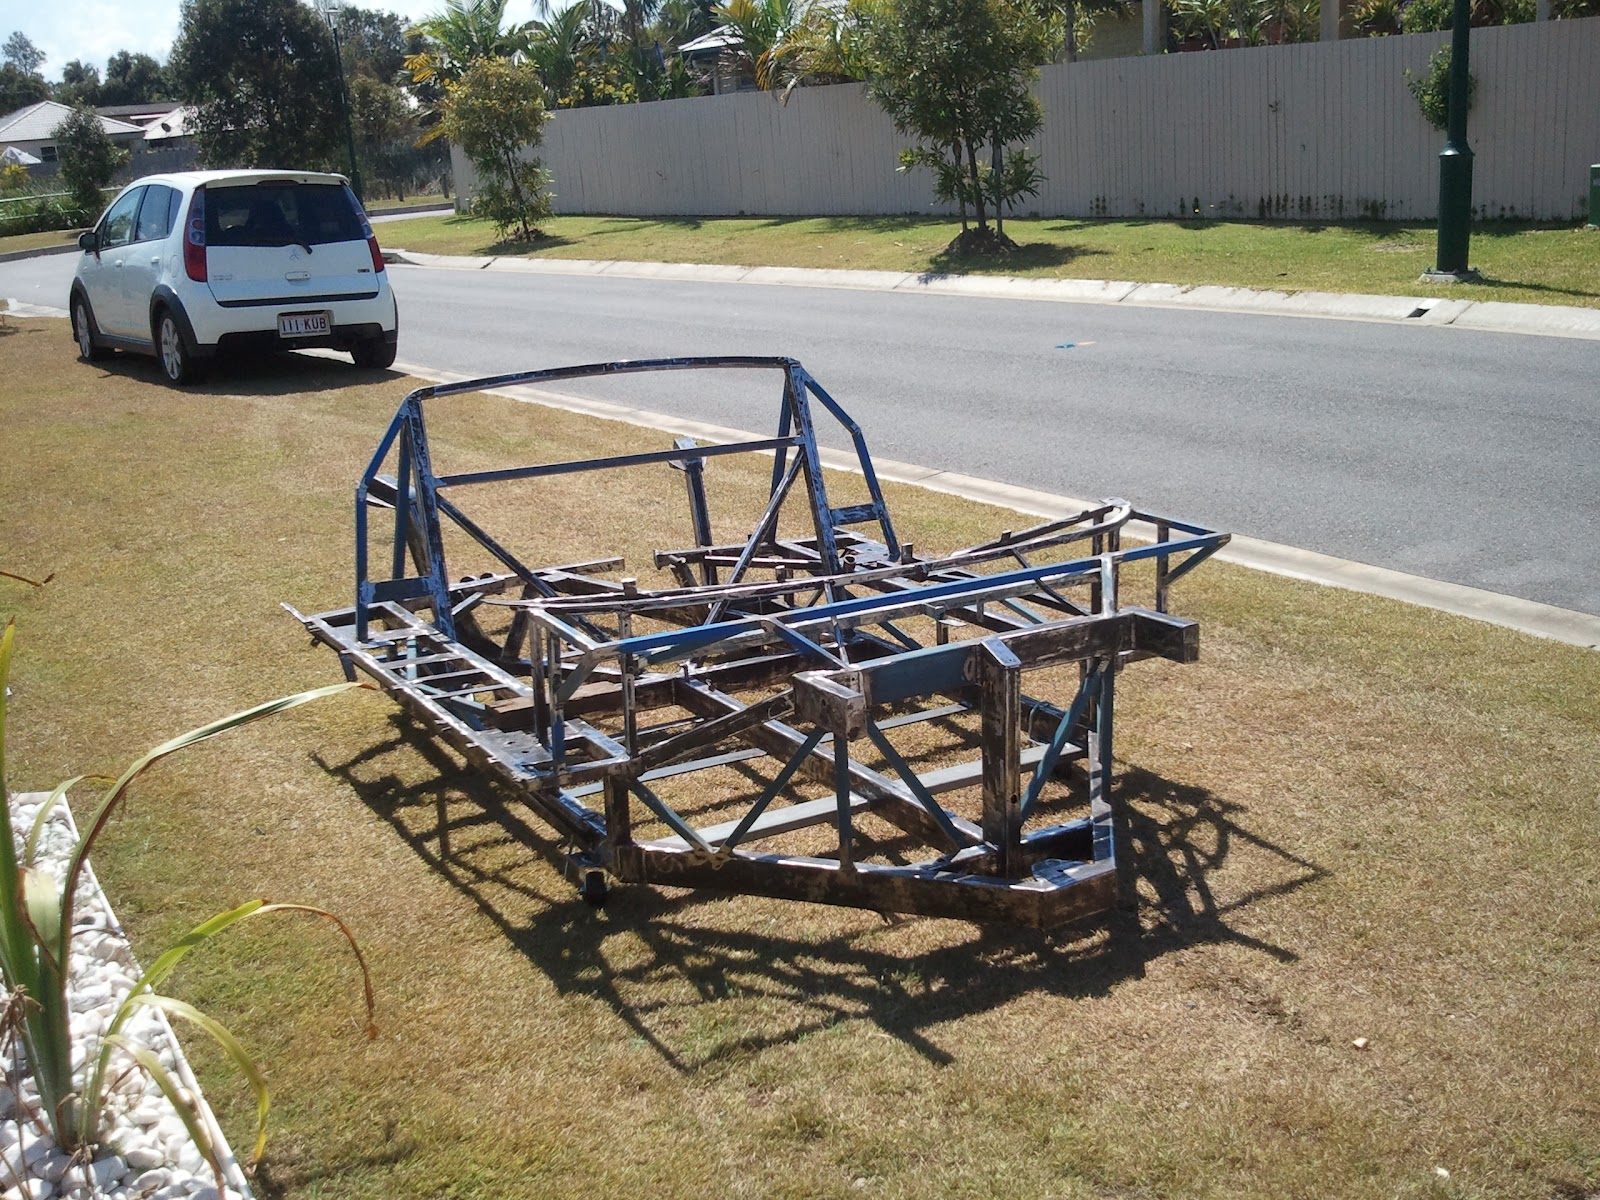
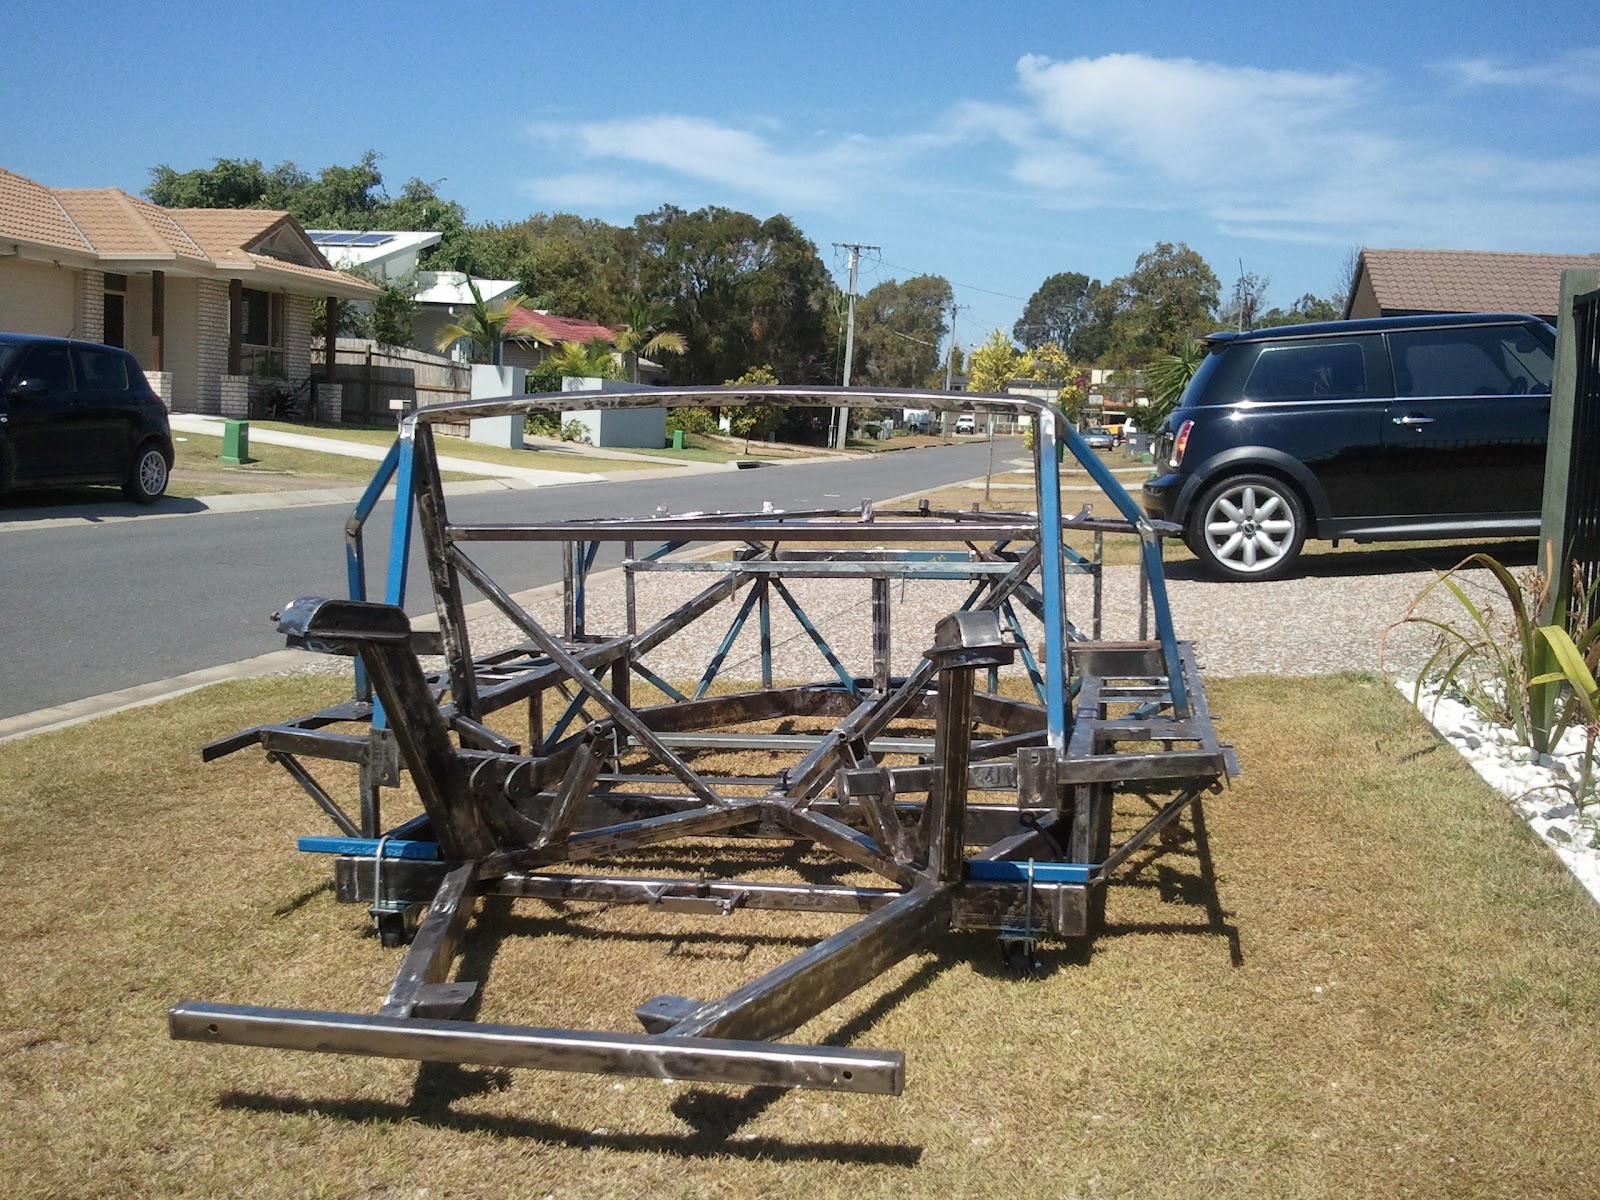
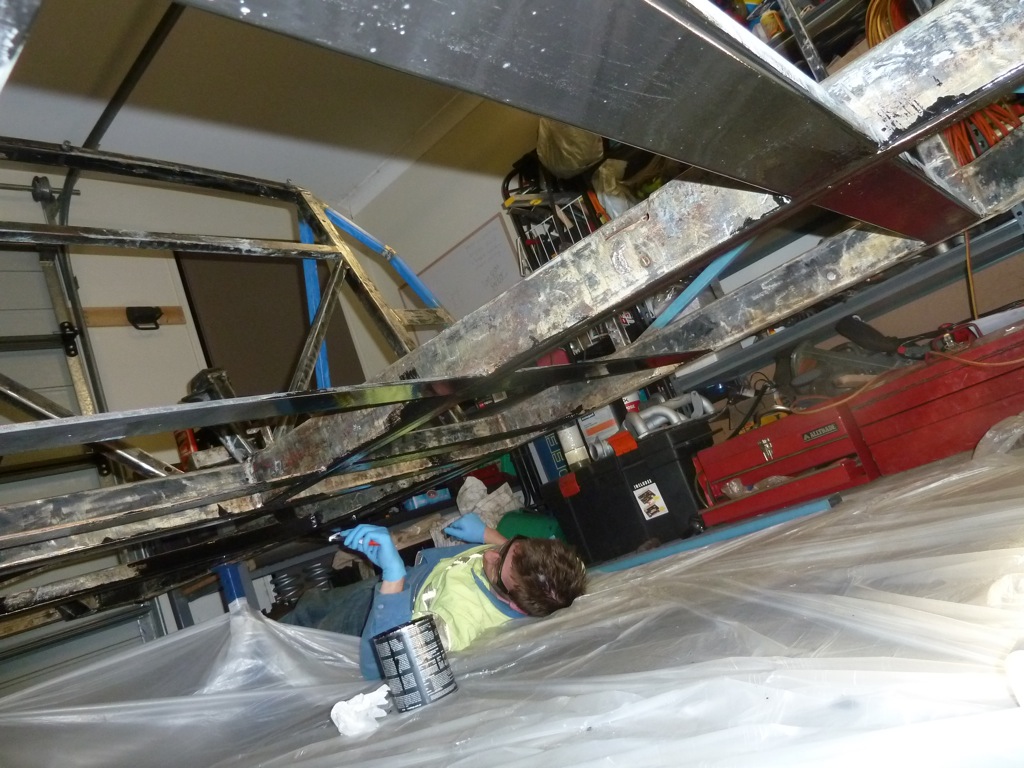
After cleaning Tim got stuck into the underside. Not a fun job...
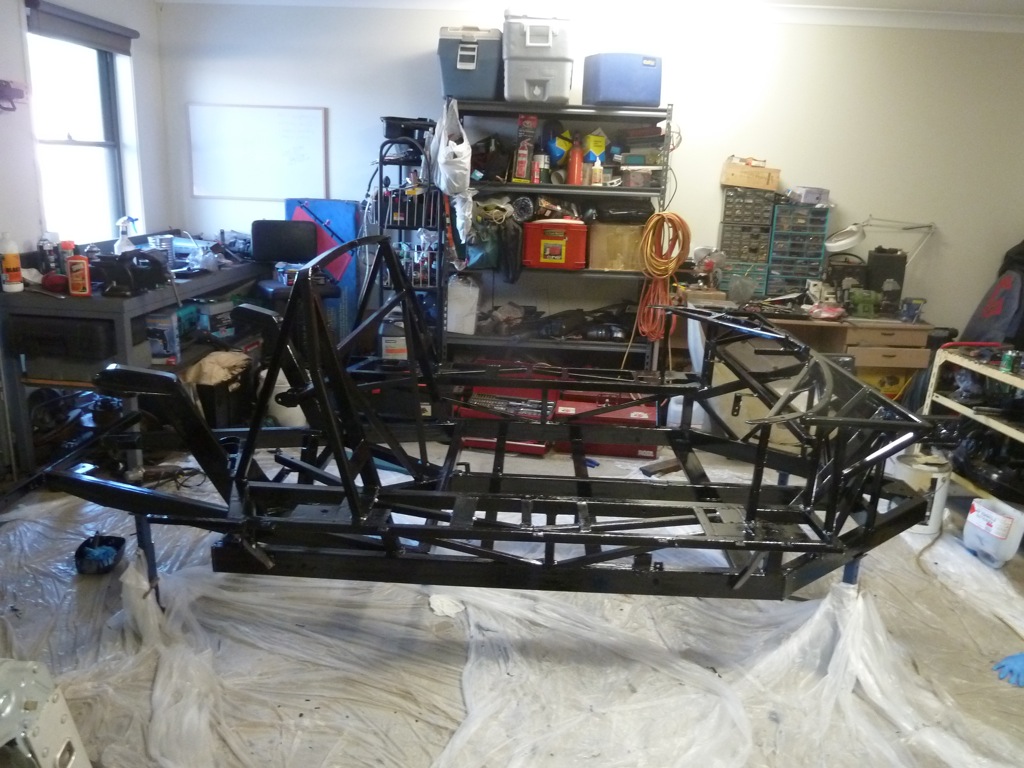
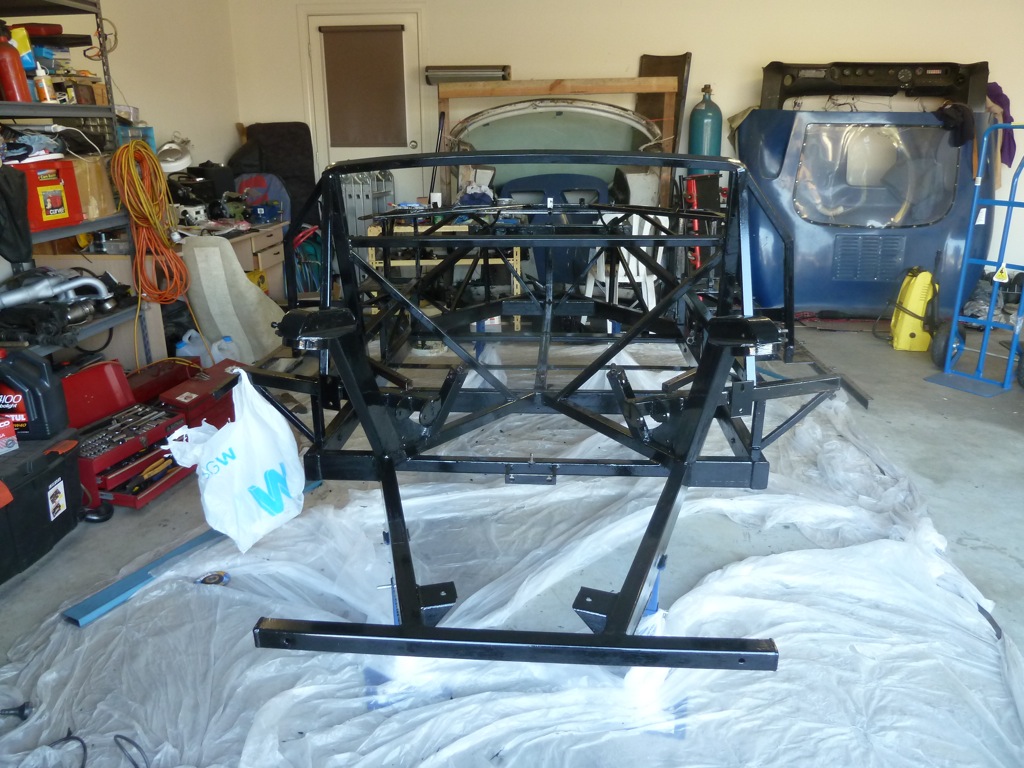
And here's the finished product... It looks fantastic. The new bracing makes the chassis look much more substantial.

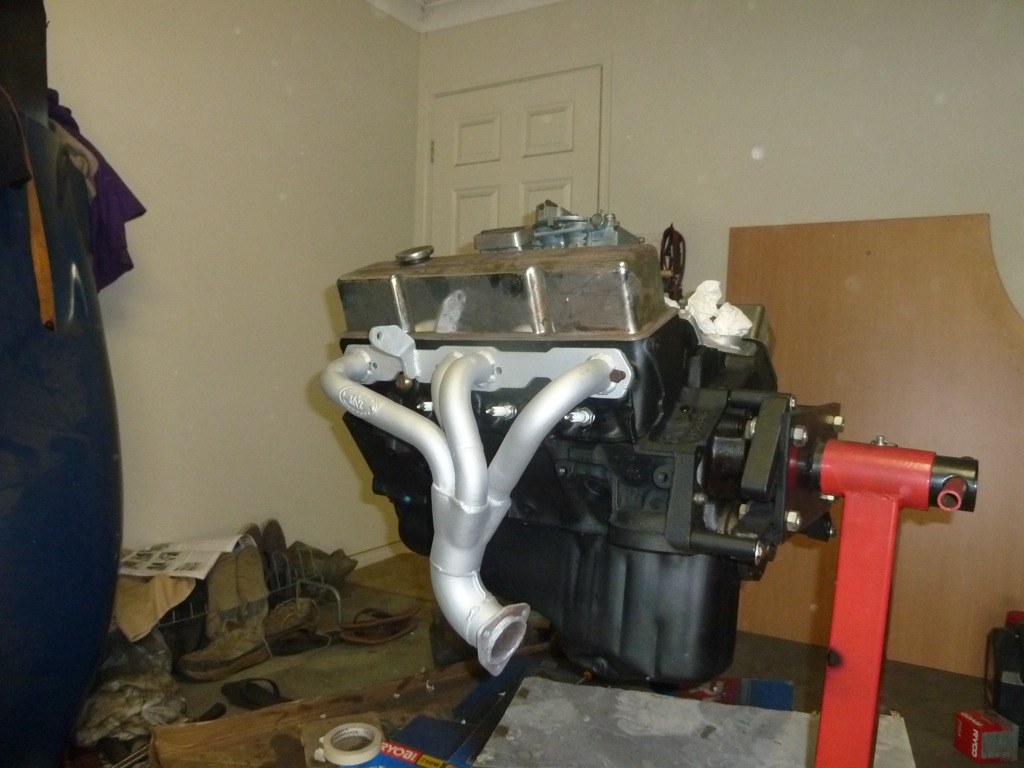
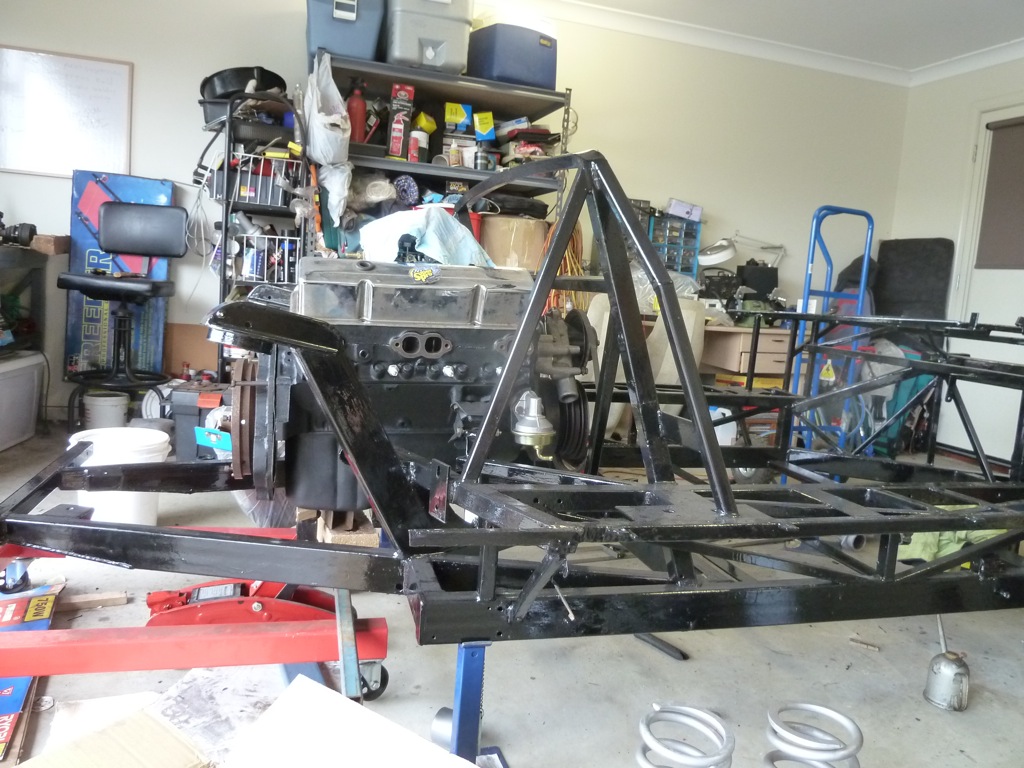
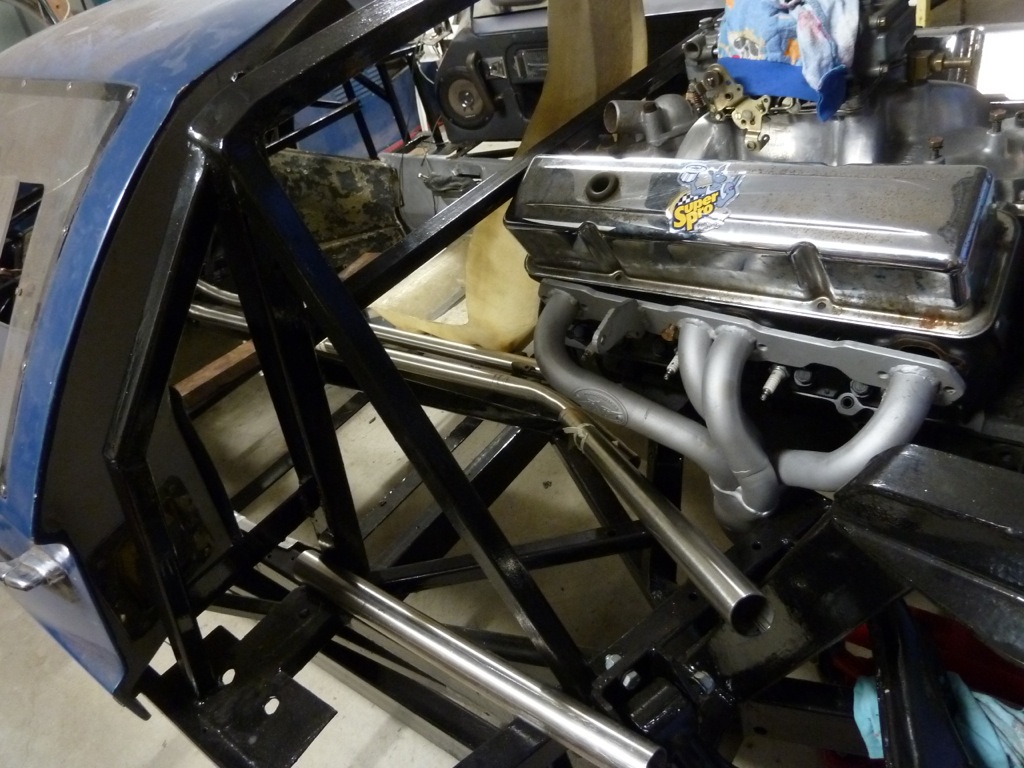
Meanwhile, we also painted the engine. We ended up deciding to paint it black with aluminium parts for exhaust manifold, intake, carb and rocker covers. Pretty happy with how it's turned out. I just chucked an exhaust manifold on to see how it looks.

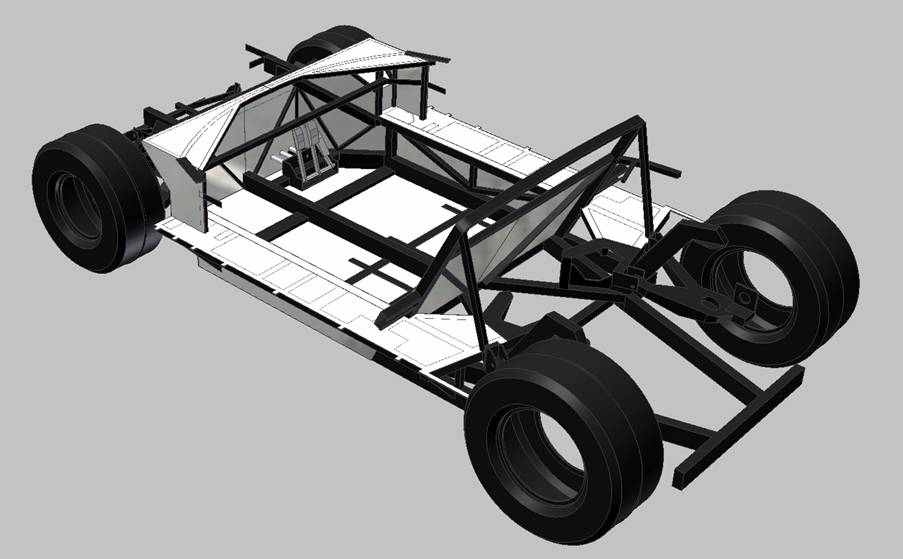
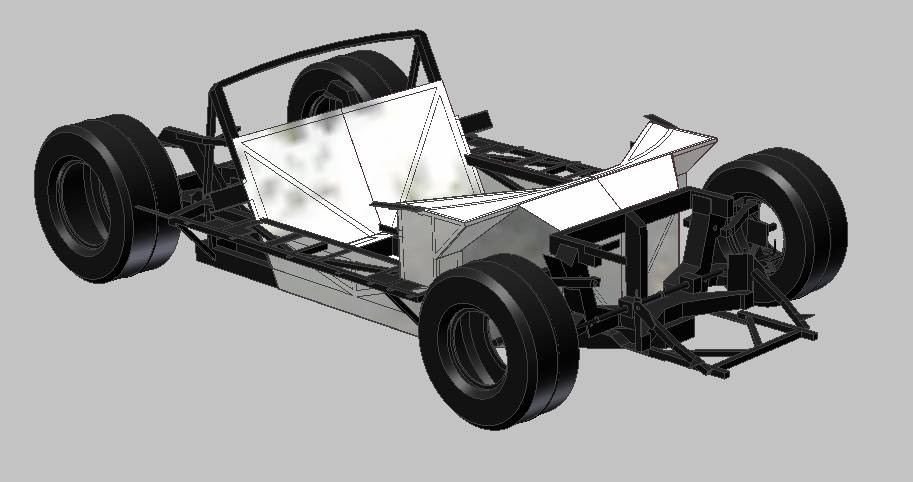
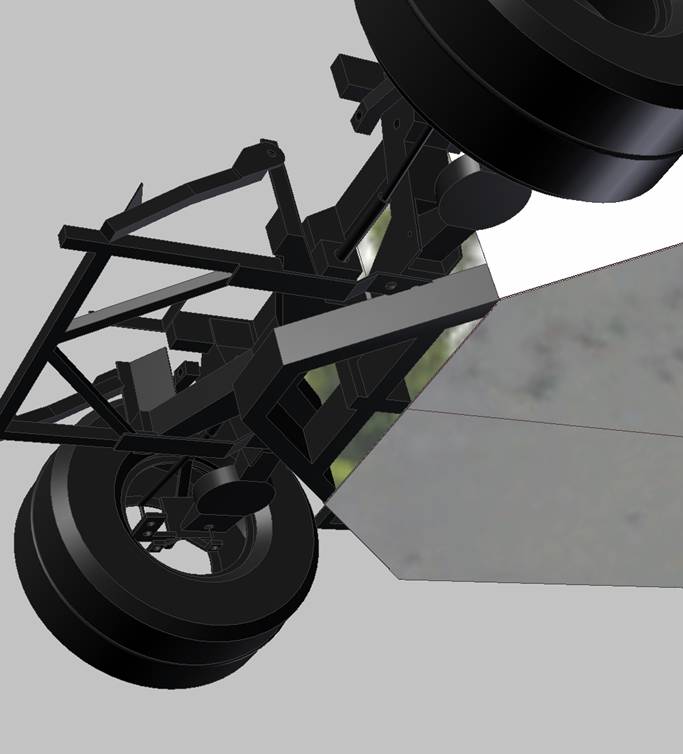
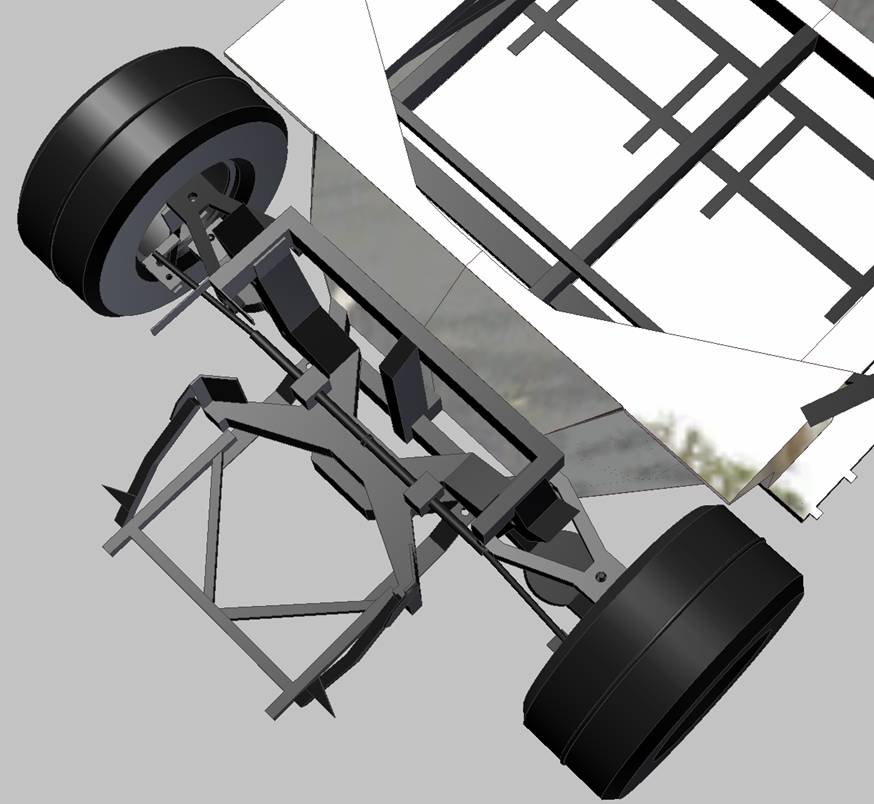
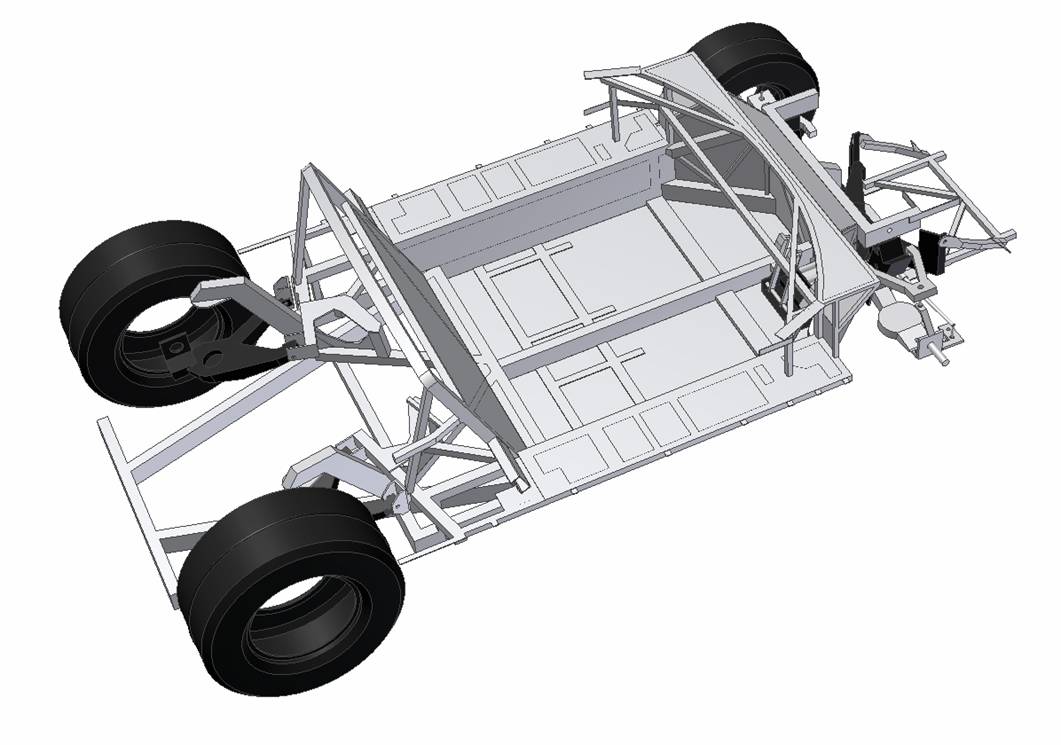
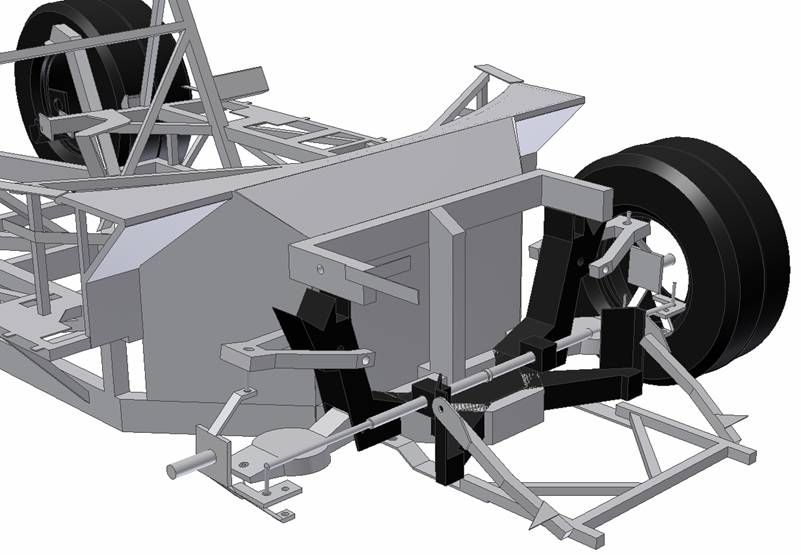
Jim has also updated the 3D model to match our new chassis changes and to show the panelling plans. I think it'll work out great.

So next up, is to get the engine back in place and start sorting out things like coolant lines and fitting new suspension. All good fun.
Unfortunately, this will be my last update in a while. I've got to head away with work. I'm sure Dad and Tim will continue work while I'm gone.
Painting the chassis has been something we've wanted to get over and done with for a long time. Now we can finally move forward and start installing things. Here are a few pics of the process...
Here's how it looked in November last year.
Tim spent a few days cleaning it up. My wife Kristen mentioned a few times about the amount of angle grinder dust blowing into the house. I promise, this is the last of the dust...
Tim even put it on dolly wheels and pushed the car down to the lawn so he could hit it with the Gurney. Apparently a young kid and his Mum walked past. The boy made the comment "Look Mum, they're building a boat". Hehehe
After cleaning Tim got stuck into the underside. Not a fun job...
And here's the finished product... It looks fantastic. The new bracing makes the chassis look much more substantial.
Meanwhile, we also painted the engine. We ended up deciding to paint it black with aluminium parts for exhaust manifold, intake, carb and rocker covers. Pretty happy with how it's turned out. I just chucked an exhaust manifold on to see how it looks.
Jim has also updated the 3D model to match our new chassis changes and to show the panelling plans. I think it'll work out great.
So next up, is to get the engine back in place and start sorting out things like coolant lines and fitting new suspension. All good fun.
Unfortunately, this will be my last update in a while. I've got to head away with work.
I'm sure Dad and Tim will continue work while I'm gone.Engine In!
This post comes to you from the departure lounch of the Brisbane Airport. I spent most of October on an offshore drilling rig in Thailand, had about 10 hectic days at home and then it's time to head back. We have made some progress, so I thought I'd give you all a quick update before I disappear into the internet black hole for a few weeks.
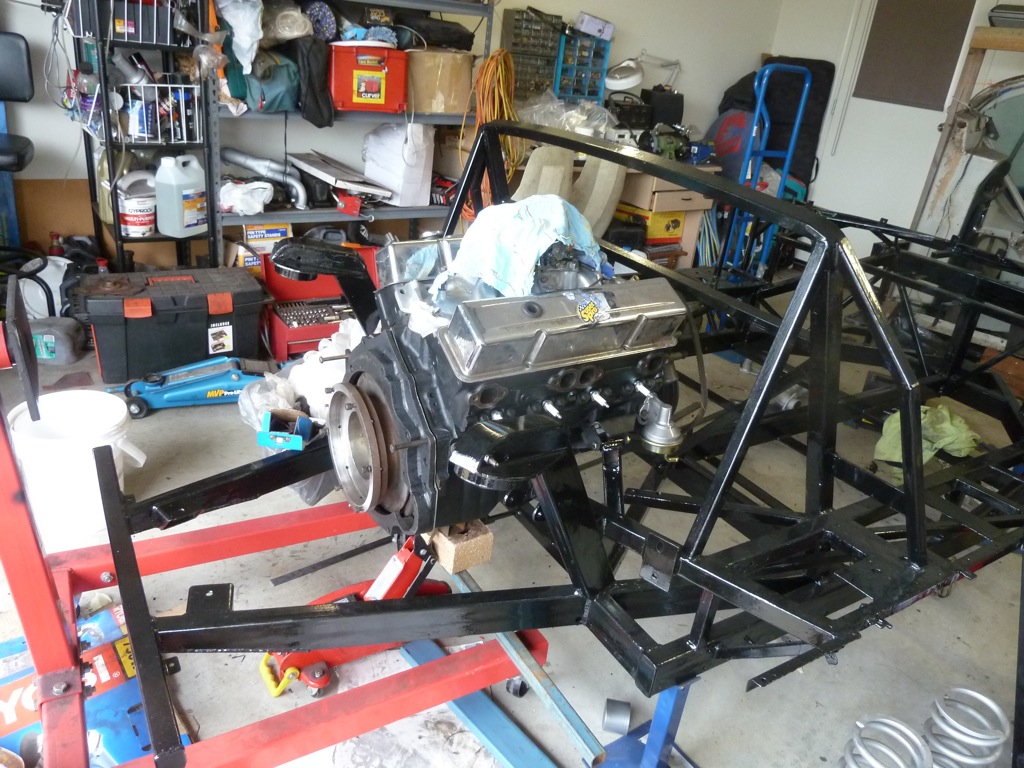
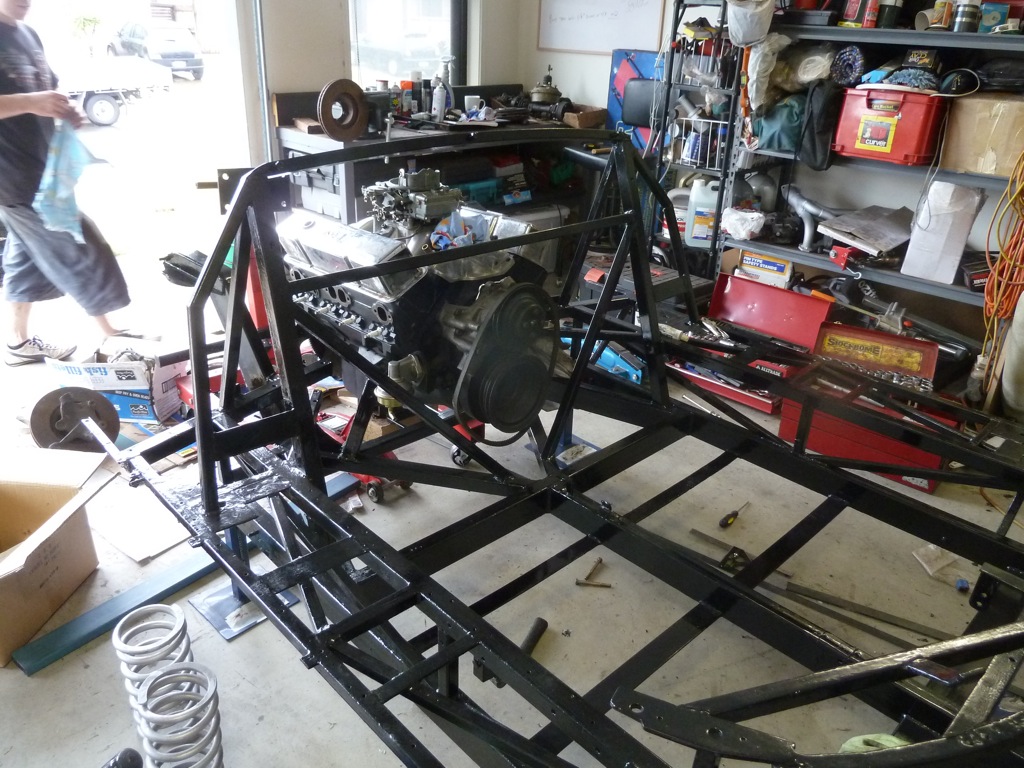
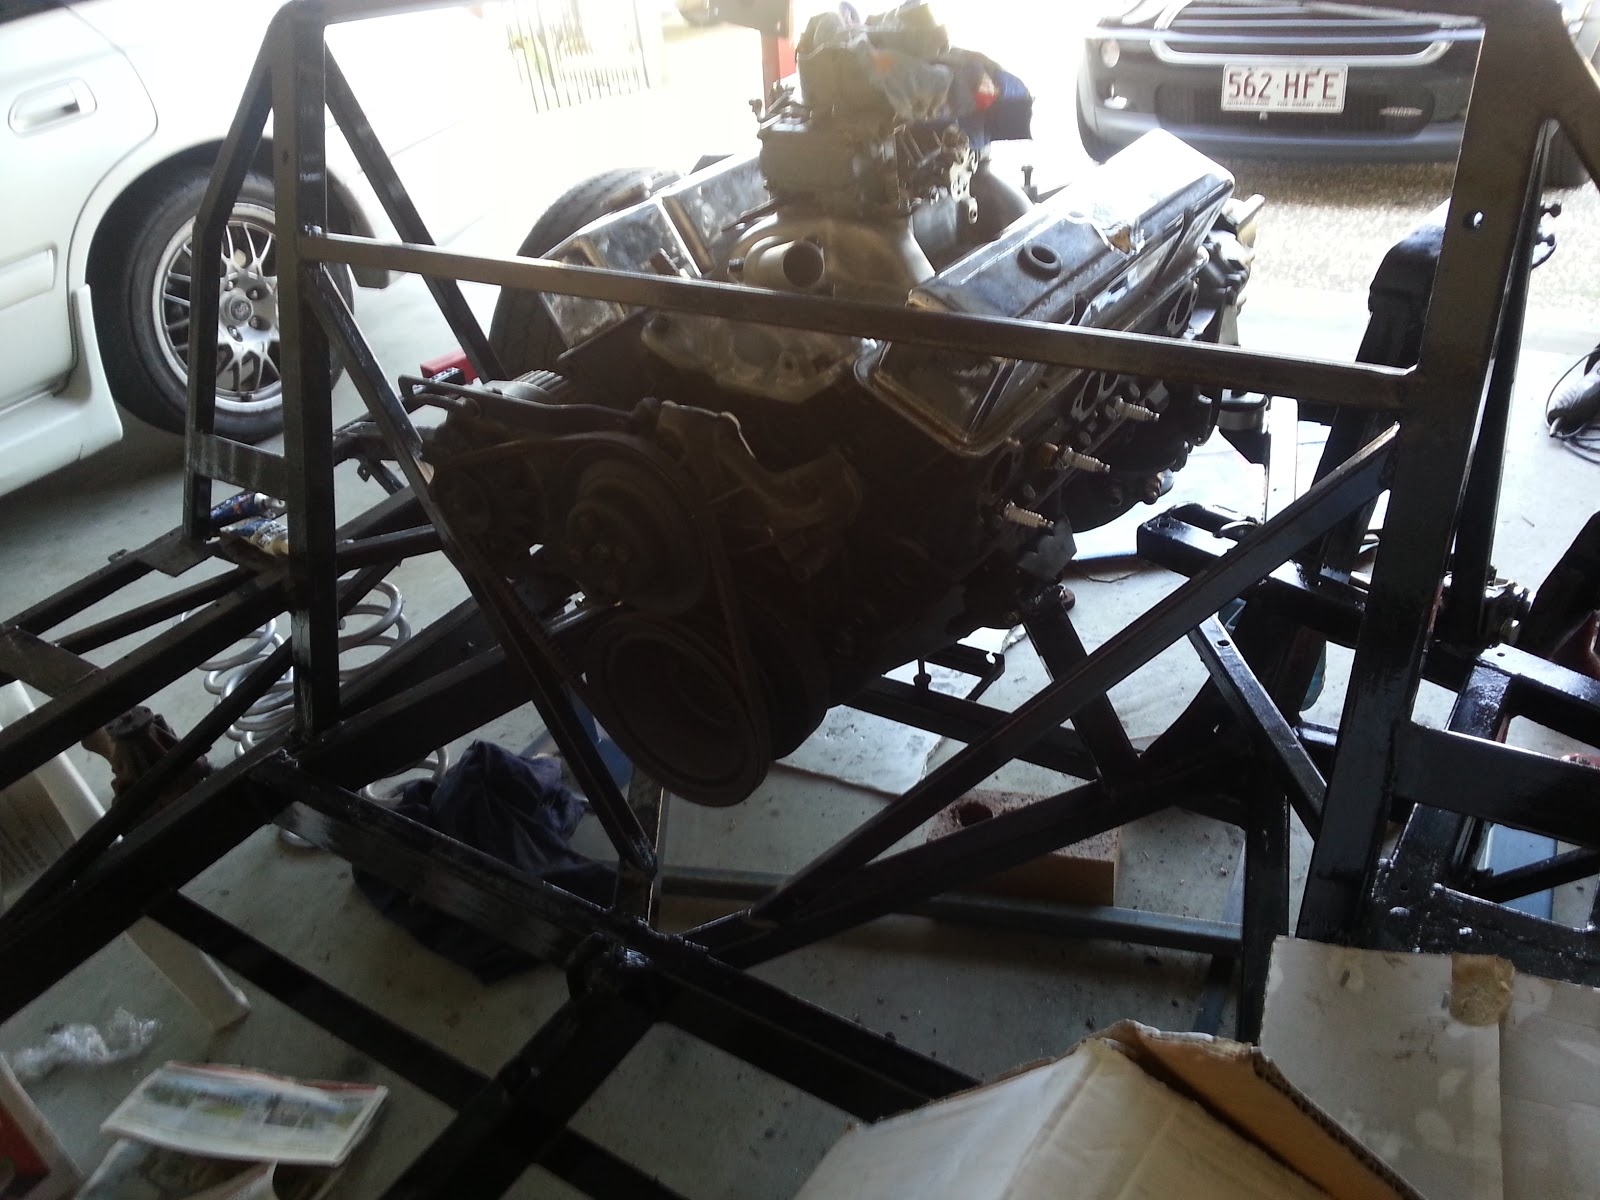
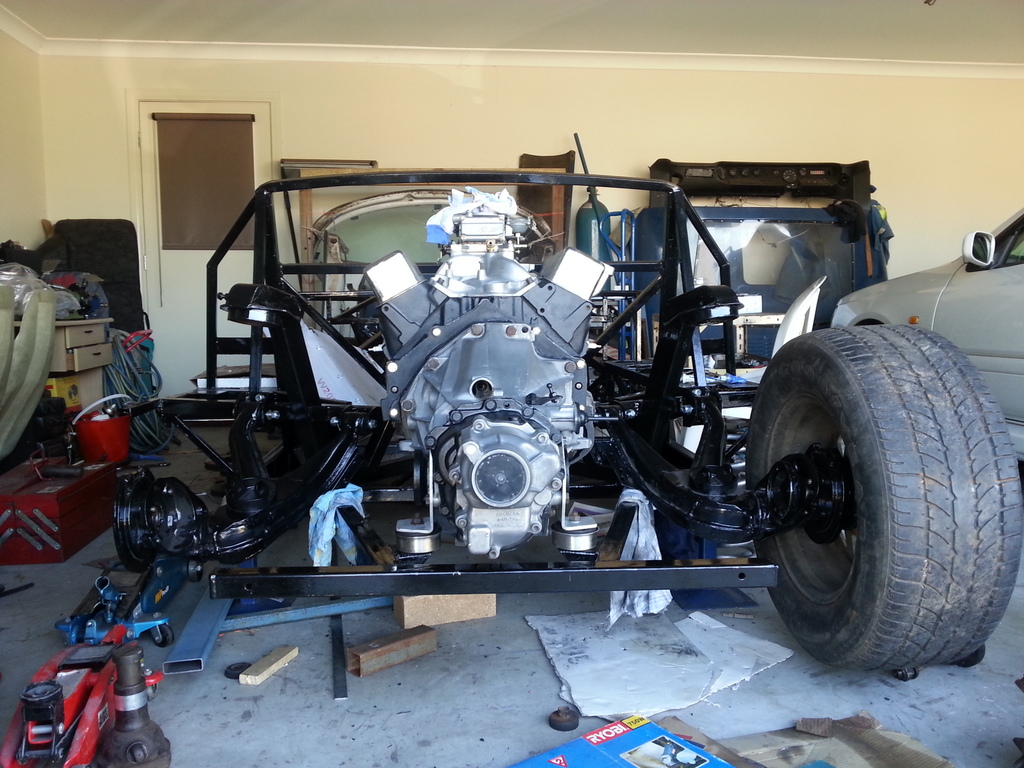
This is what I came home to. Oh yeah! Dad and Tim dropped the engine in. It took them all of an hour and a half apparently. They picked up an engine crane from the rental shop, drove home, assembled in, dropped in the engine, disassembled the crane and returned to the rental shop in an hour and a half. The guy at the shop asked if they had changed their mind. Haha. "Nope, it's done mate"
The flywheel machining was done on my driveway thanks to Mobile Flywheel Grinding. He reckons the flywheel was in pretty good nick, but he said he'd never seen a flywheel setup like ours before. Hehe.
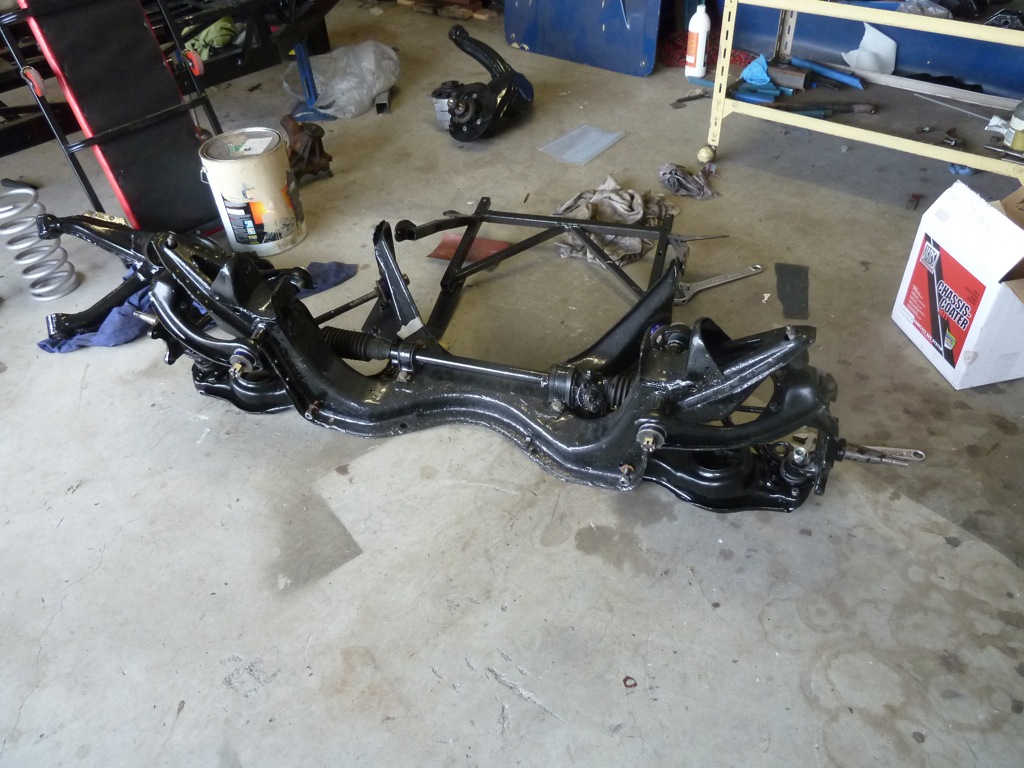
The front suspension arms are finally back from Fulcrum Suspension Stafford. I left them there for the 4 weeks I was in Thailand. Here's the front suspension partly assembled.
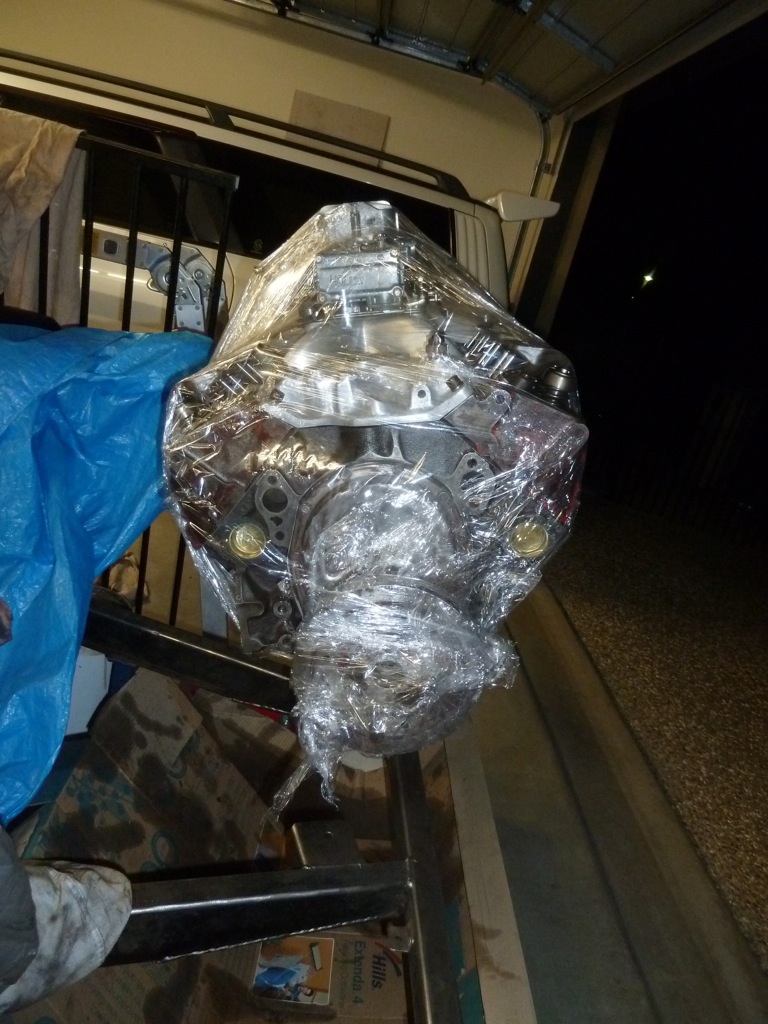
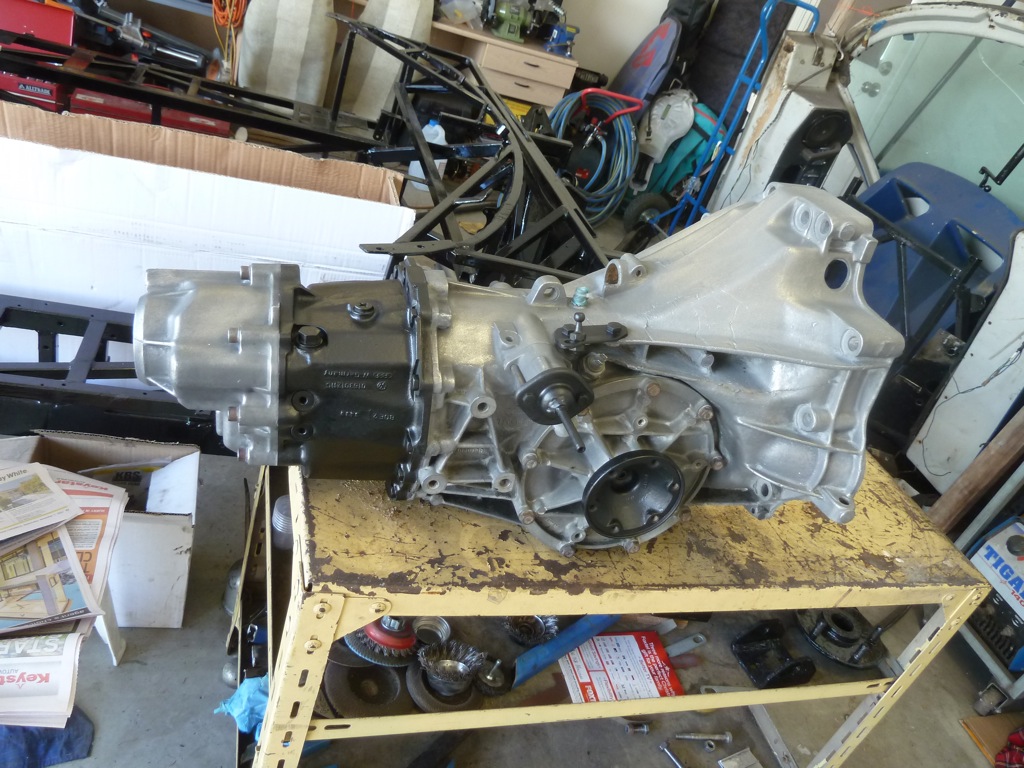
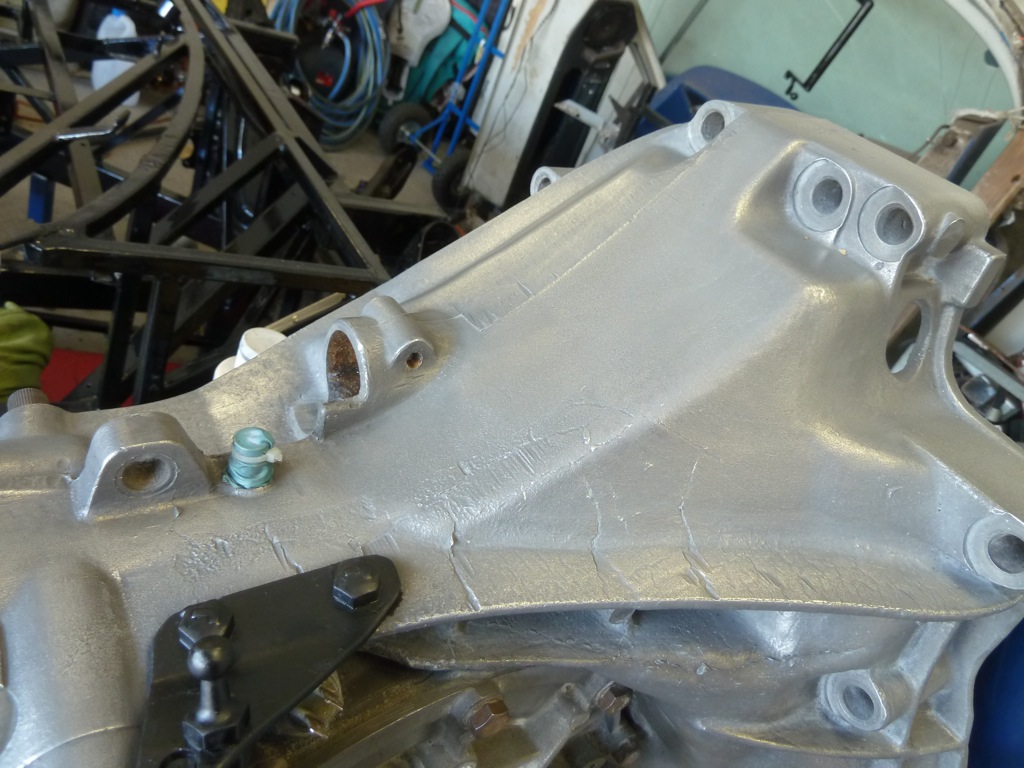
I seem to have spent a large amount of time cleaning the gearbox. Anyone who tells you that dilute Hydrochloric acid is a good alloy cleaner, ignore them... I tried dilute acid and whilst it looks like it's doing a great job, it just seems to leach a dark grey liquid out of the metal that leaves grey stains all over it. I ended up going for a metal polish (Bowden's Own) and using elbow grease. I'm pretty happy with how it's come up.
Anyway, that's my boarding call. Gotta go
This post comes to you from the departure lounch of the Brisbane Airport. I spent most of October on an offshore drilling rig in Thailand, had about 10 hectic days at home and then it's time to head back. We have made some progress, so I thought I'd give you all a quick update before I disappear into the internet black hole for a few weeks.
This is what I came home to. Oh yeah! Dad and Tim dropped the engine in. It took them all of an hour and a half apparently. They picked up an engine crane from the rental shop, drove home, assembled in, dropped in the engine, disassembled the crane and returned to the rental shop in an hour and a half. The guy at the shop asked if they had changed their mind. Haha. "Nope, it's done mate"
The flywheel machining was done on my driveway thanks to Mobile Flywheel Grinding. He reckons the flywheel was in pretty good nick, but he said he'd never seen a flywheel setup like ours before. Hehe.
The front suspension arms are finally back from Fulcrum Suspension Stafford. I left them there for the 4 weeks I was in Thailand. Here's the front suspension partly assembled.
I seem to have spent a large amount of time cleaning the gearbox. Anyone who tells you that dilute Hydrochloric acid is a good alloy cleaner, ignore them... I tried dilute acid and whilst it looks like it's doing a great job, it just seems to leach a dark grey liquid out of the metal that leaves grey stains all over it. I ended up going for a metal polish (Bowden's Own) and using elbow grease. I'm pretty happy with how it's come up.
Anyway, that's my boarding call. Gotta go
Blog Update - FORD GT40 RESTORATION PROJECT
So it's been a while since the last blog update, mostly because Simon has been on an oil rig somewhere off the coast of Thailand for the last few months. I thought that perhaps I should switch things up once in a while and make an entry. Without further introduction, I bring you: 'Tim's first GT40 blog'. I could use this as an opportunity to sledge Simon (Like he often does to me in previous entries) but instead I am going to get on with the progress. I haven't done a great deal due graduation and associated celebrations but this is where we are up to.
In the last entry the engine was in. Glad to report not a lot has changed and its still there. I added some ancillaries and finished putting it back together. Inlet manifold, water pump, alternator, fuel pump and starter should all be permanent fixtures now.
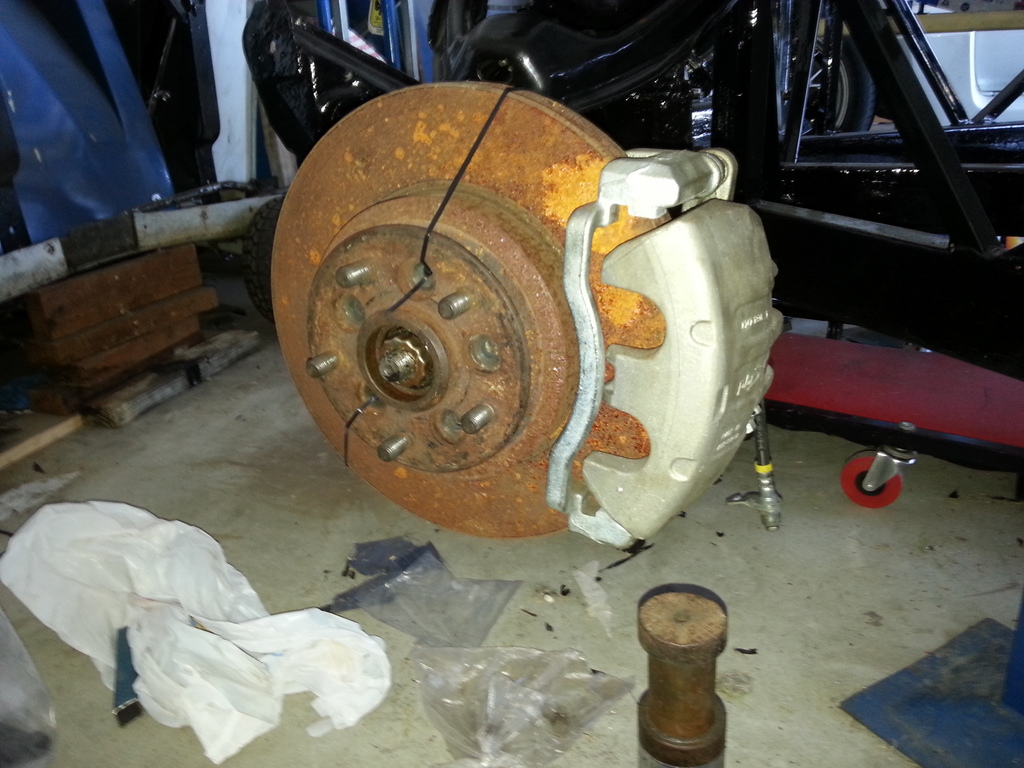
After getting a bit fed up with that end of the car it was back to the front to start thinking about things down that end. I have been silently been putting together an interim brake upgrade which will be minimal hassle, adequate for rego and pretty cheap. My plans are thus far consist of a 2 spot BA falcon caliper with 295mm x 28mm discs. Pictured is a BA disc but that probably wont be final due to the centre bore being a little large and not locating on the hub properly. Fortunately I have found a good solution from a c180 merc which has a smaller centrebore that we can machine to suit. The granada / cortina front end is a little tricky in that the disc sits behind the hub instead of over the top like most modern things.
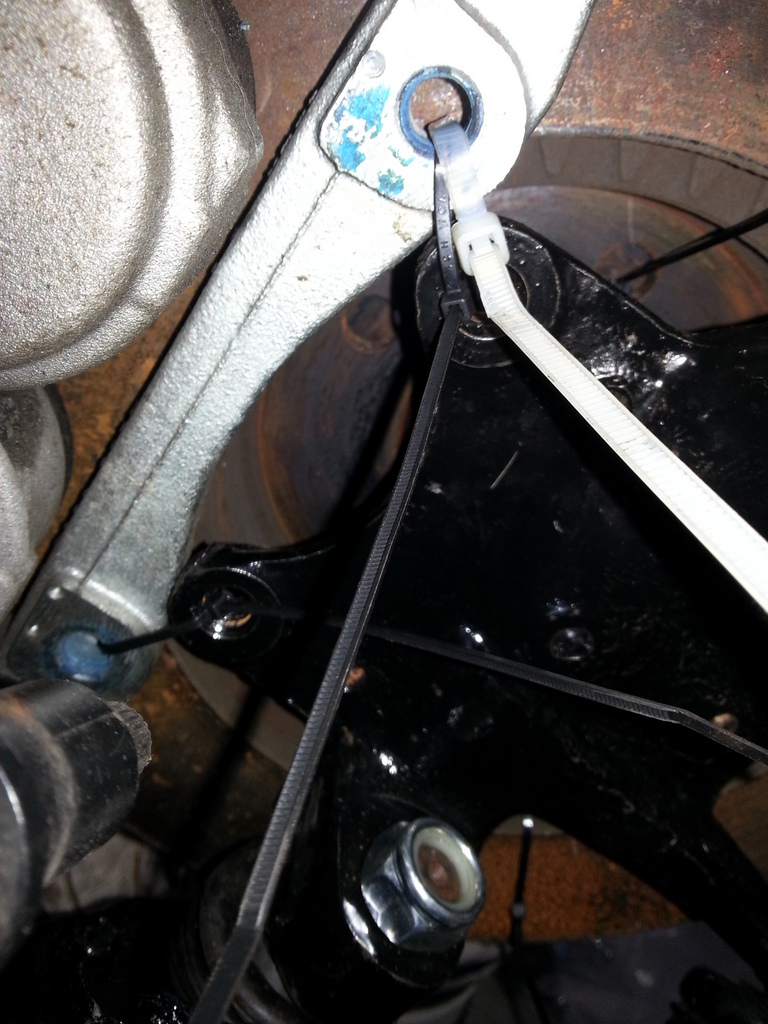
Nothing but the finest cable ties when measuring this up.
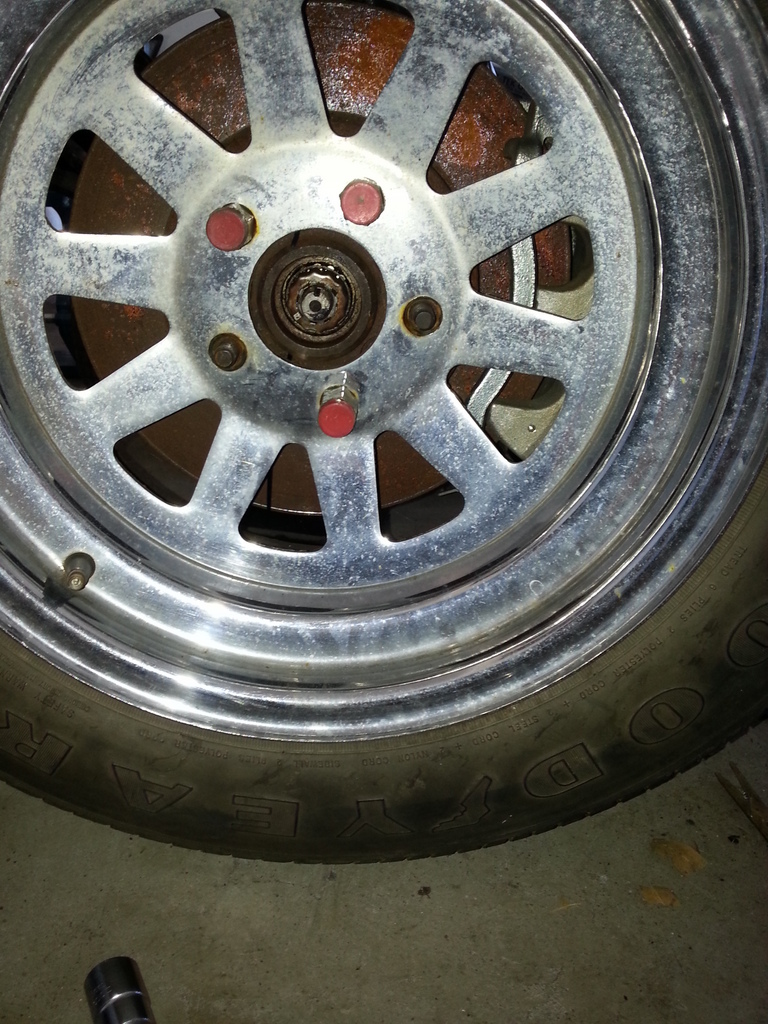
Looks like its going to fill out the original 15's pretty well. Hopefully about 3mm between the caliper and rim!
Adapter for the caliper should hopefully be a straight forward affair.
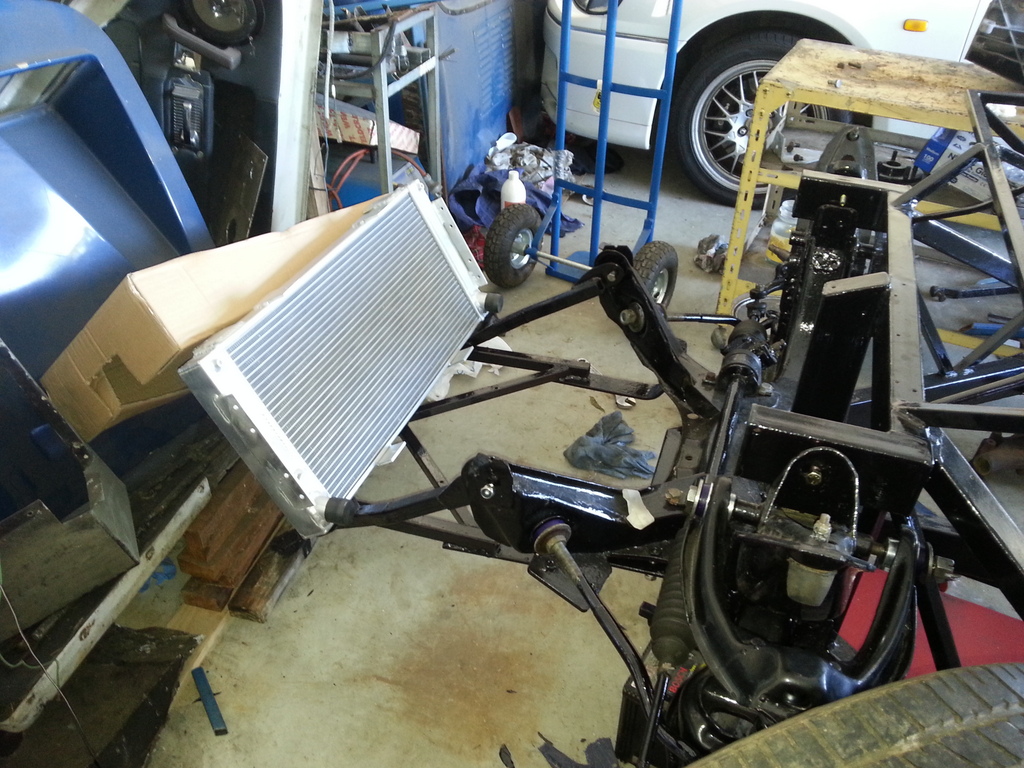
Whilst mucking around down the front I felt it was time to mock up the new radiator. Simon picked this up shortly before he left. Looking forward to doing some modifications to the front frame work (cow catcher as we call it) to give a bit more support. I think we are going to need to put the front body work on soon just to mock it all up properly. Hopefully this radiator should be a bit more adequate that the VW golf one residing there before!
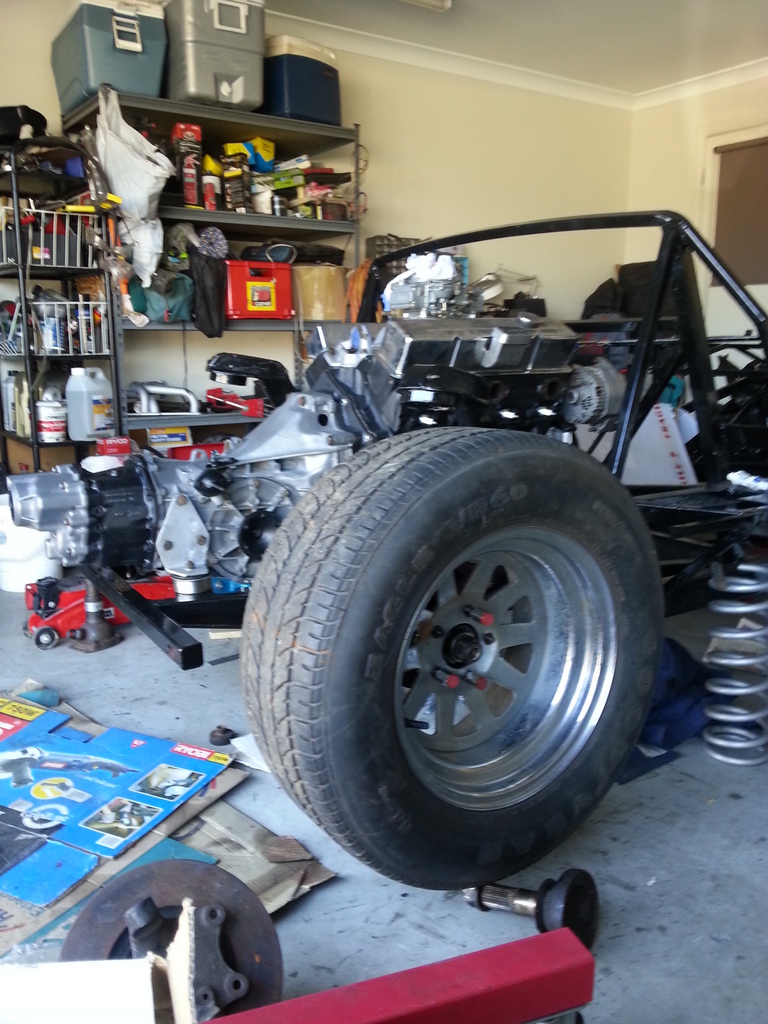
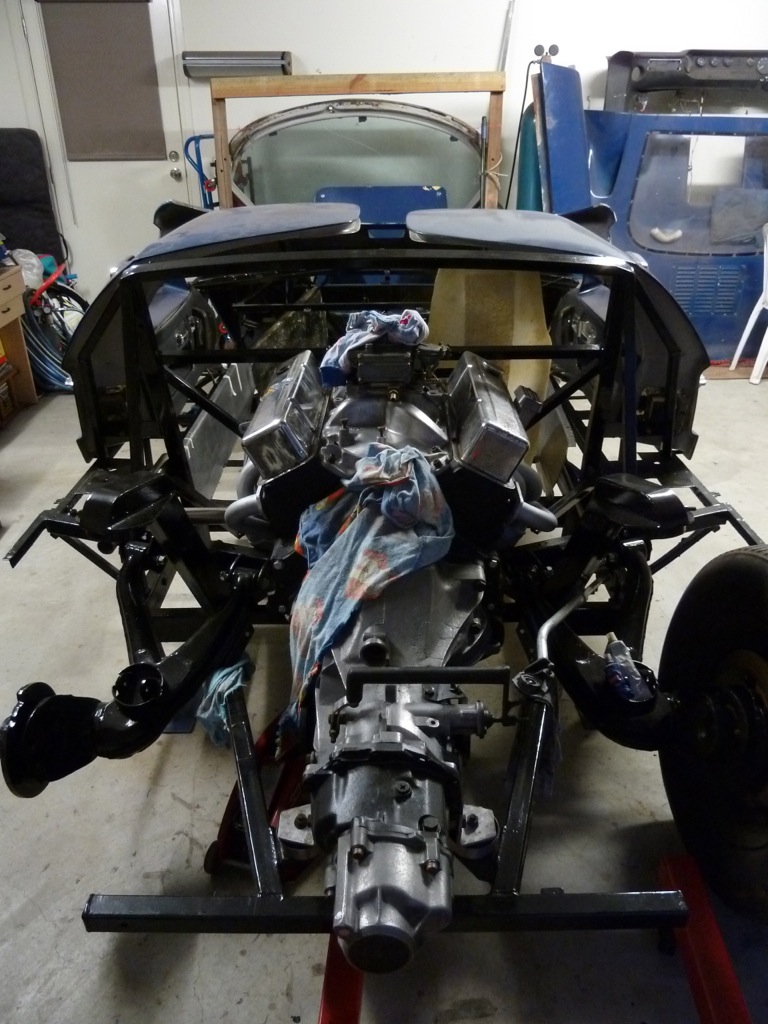
I figured after all this playing around it was time to get some real work done so back to the rear of the car.
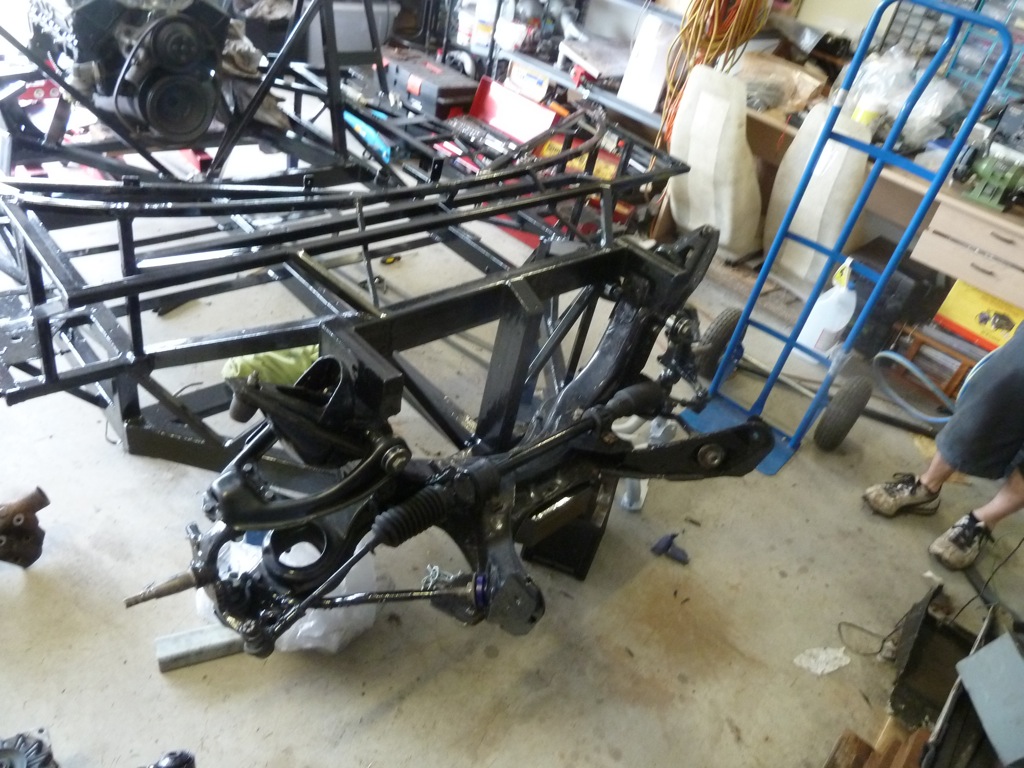
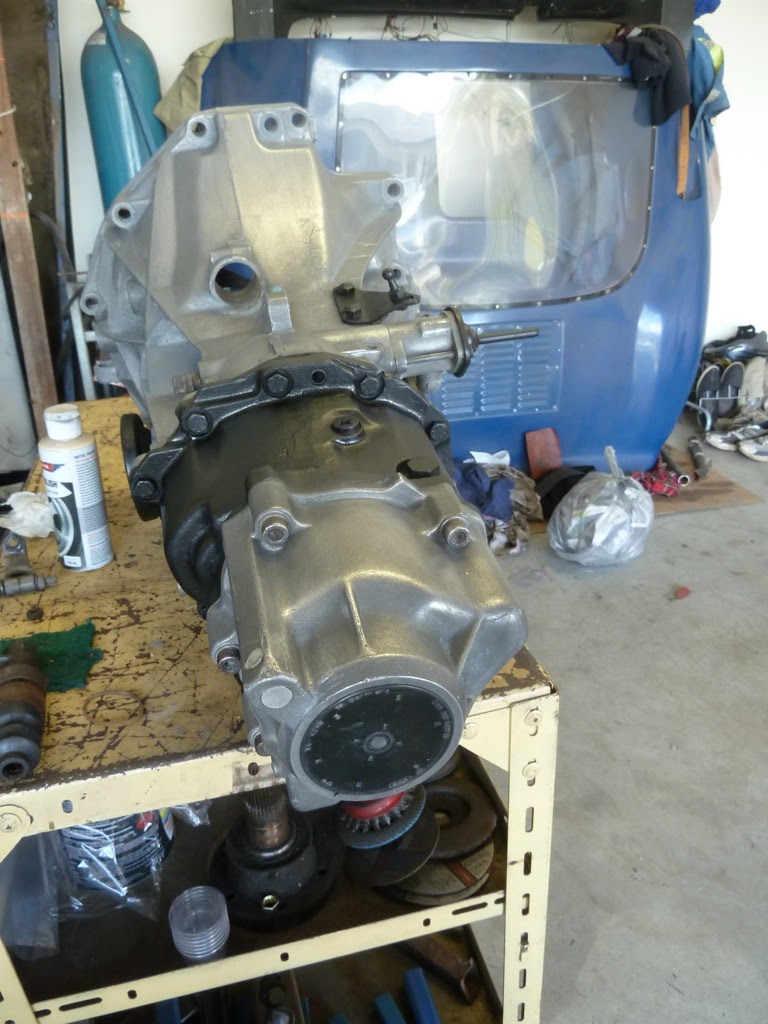
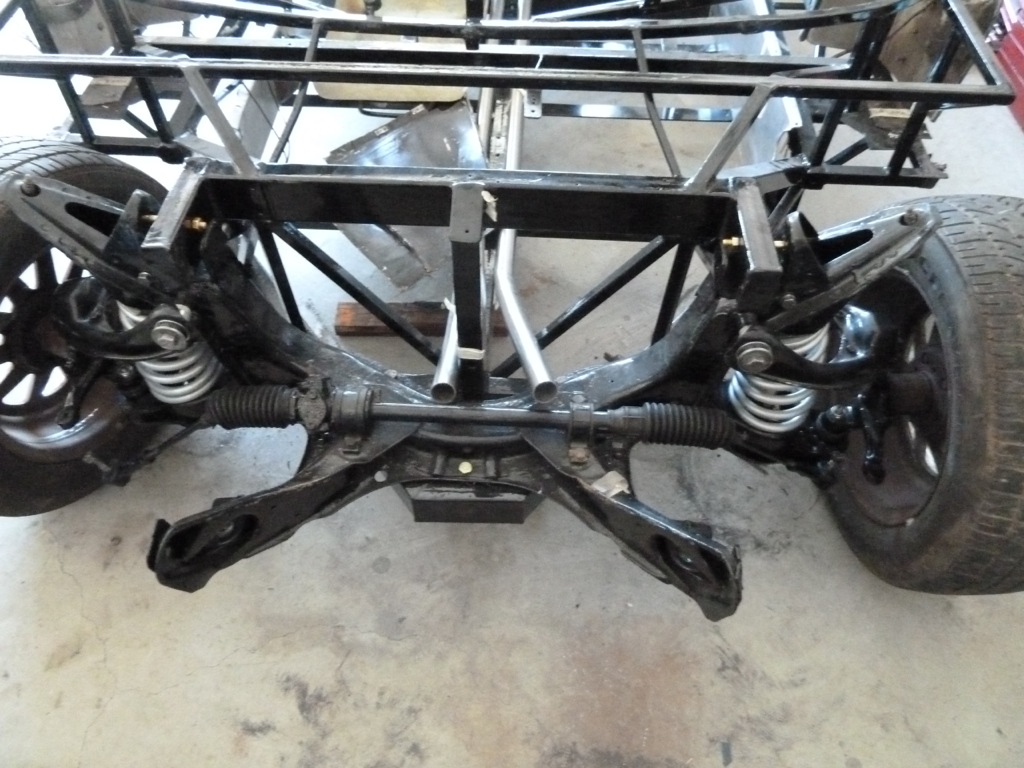
Rear suspension arms are back on but are a little limited by the need for some new shocks before it can all be finished off. I pulled out a rear wheel to see how it all looked.
The keen observers will also notice the gearbox has made a re-appearance in this shot. I felt it was time to get the engine off the trolley jack and the only way to do that was put the gearbox back in.
Well that's it for my first (/last?) blog update. Hopefully we can crack on and get a bit more done in the New Year!
Merry Xmas and Happy New Year all!
So it's been a while since the last blog update, mostly because Simon has been on an oil rig somewhere off the coast of Thailand for the last few months. I thought that perhaps I should switch things up once in a while and make an entry. Without further introduction, I bring you: 'Tim's first GT40 blog'. I could use this as an opportunity to sledge Simon (Like he often does to me in previous entries) but instead I am going to get on with the progress. I haven't done a great deal due graduation and associated celebrations but this is where we are up to.
In the last entry the engine was in. Glad to report not a lot has changed and its still there. I added some ancillaries and finished putting it back together. Inlet manifold, water pump, alternator, fuel pump and starter should all be permanent fixtures now.
After getting a bit fed up with that end of the car it was back to the front to start thinking about things down that end. I have been silently been putting together an interim brake upgrade which will be minimal hassle, adequate for rego and pretty cheap. My plans are thus far consist of a 2 spot BA falcon caliper with 295mm x 28mm discs. Pictured is a BA disc but that probably wont be final due to the centre bore being a little large and not locating on the hub properly. Fortunately I have found a good solution from a c180 merc which has a smaller centrebore that we can machine to suit. The granada / cortina front end is a little tricky in that the disc sits behind the hub instead of over the top like most modern things.
Nothing but the finest cable ties when measuring this up.
Looks like its going to fill out the original 15's pretty well. Hopefully about 3mm between the caliper and rim!
Adapter for the caliper should hopefully be a straight forward affair.
Whilst mucking around down the front I felt it was time to mock up the new radiator. Simon picked this up shortly before he left. Looking forward to doing some modifications to the front frame work (cow catcher as we call it) to give a bit more support. I think we are going to need to put the front body work on soon just to mock it all up properly. Hopefully this radiator should be a bit more adequate that the VW golf one residing there before!
I figured after all this playing around it was time to get some real work done so back to the rear of the car.
Rear suspension arms are back on but are a little limited by the need for some new shocks before it can all be finished off. I pulled out a rear wheel to see how it all looked.
The keen observers will also notice the gearbox has made a re-appearance in this shot. I felt it was time to get the engine off the trolley jack and the only way to do that was put the gearbox back in.
Well that's it for my first (/last?) blog update. Hopefully we can crack on and get a bit more done in the New Year!
Merry Xmas and Happy New Year all!
Tim - Thanks for the update! Looks like you're doing well there...
BTW, don't let the diminutive size of the black zip-ties fool you.. While they are significantly smaller than the white zip-ties, they are easily 3x stronger.. I'd say that you'd be fine for circuit work with those in place!!! :shocked::drunk::shocked:
(Just jesting of course)
Soldier on!
BTW, don't let the diminutive size of the black zip-ties fool you.. While they are significantly smaller than the white zip-ties, they are easily 3x stronger.. I'd say that you'd be fine for circuit work with those in place!!! :shocked::drunk::shocked:
(Just jesting of course)
Soldier on!
Well this update comes from my couch where I've been parked for the last 3 days straight. I just had a hernia operation, which means I can't do much for a while. Fortunately it's Melbourne Grand Prix weekend. Unfortunately this operation means that GT40 work is out of the picture.
So, it's been 3 months since an update, what the hell has been going on? Well, personally, lots has been going on. My wife now has a baby on the way, I've spent about 2 out of the past 3 months on a drilling rig in Thailand, Tim has finished studying Medicine and is now working full-time and Dad's been busy in and out of India and working on the house. Unfortunately, this means that not much has happened on the car.
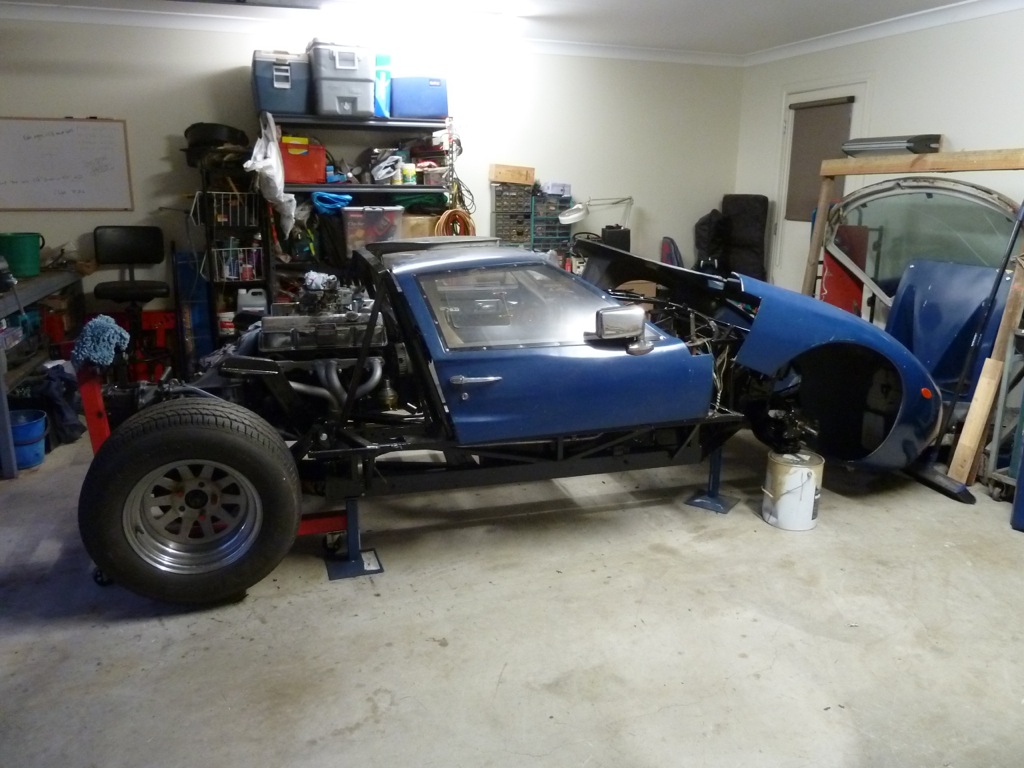
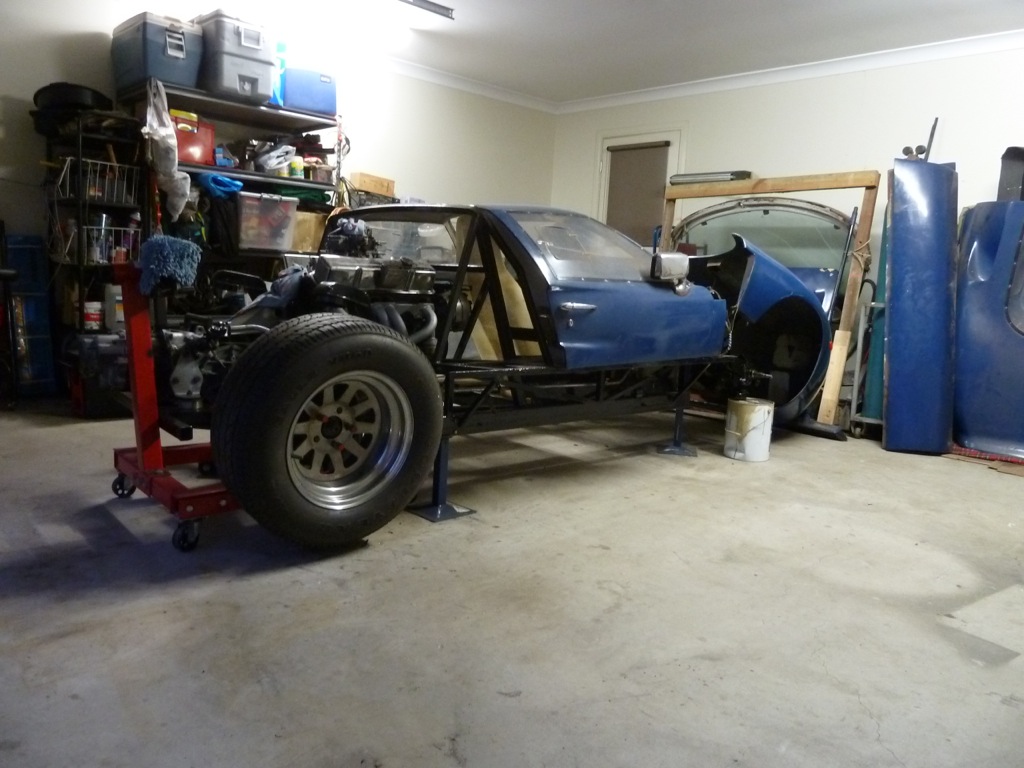
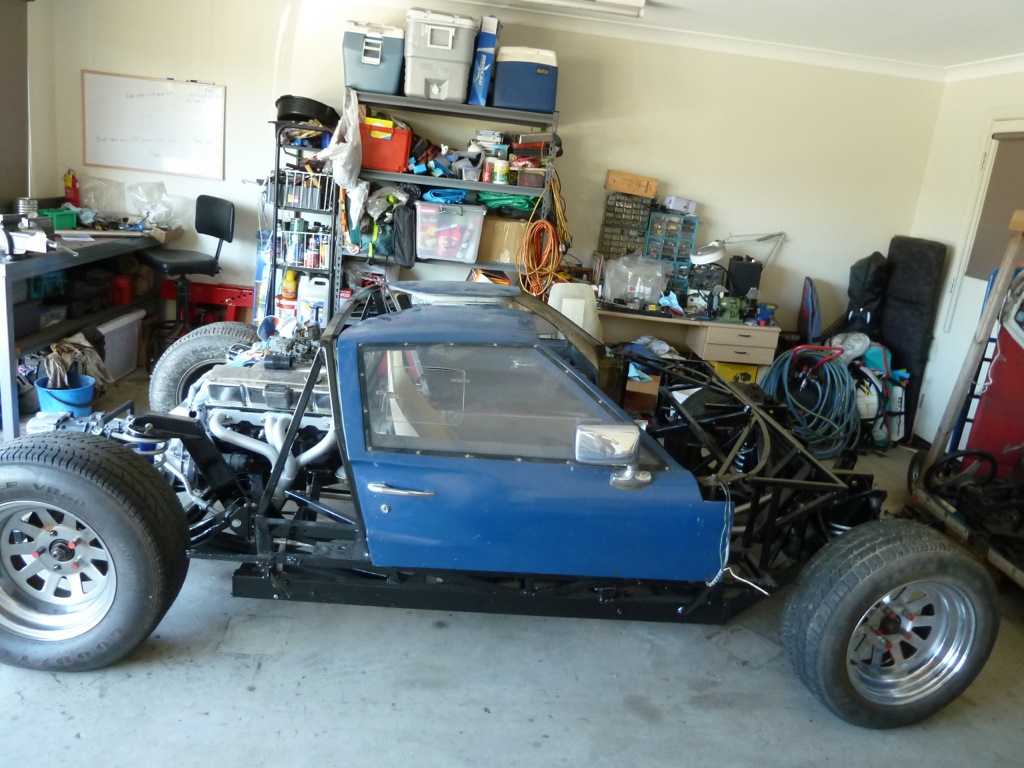
Anyway, enough excuses, with this much time off the car, we are all itching to get back into it. For the last 2 weekends Tim and I have finally managed to squeeze some GT40 time in. We've decided to focus on getting the radiator in and mounted and to run the coolant lines. In order to mount the radiator correctly we needed to reinstall the front bodywork. This was seriously an exciting and motivating moment. It really makes the car look like a GT40 again and damn it looks good")
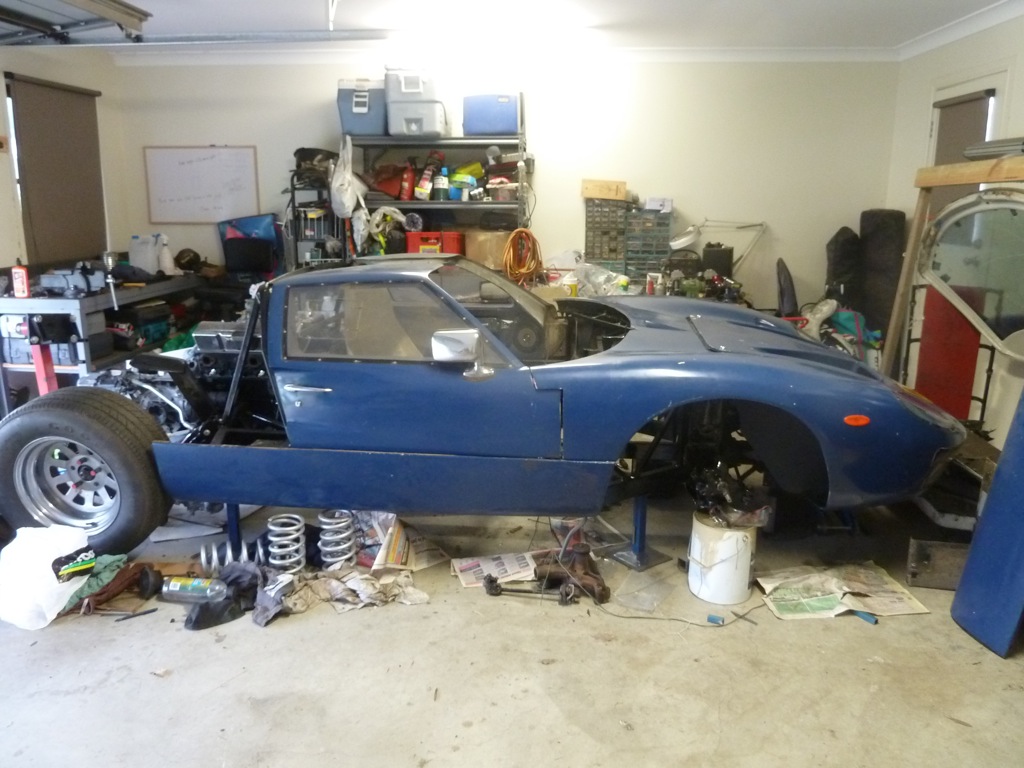
This photo really doesn't do it justice (plus it shows that we badly need to reorganise the garage). We decided to throw the doors back on since we don't have anywhere better to store them. In order to get the body work to fully close we had to remove some of the fibreglass as it was fouling on some of the new chassis bracing we've added.
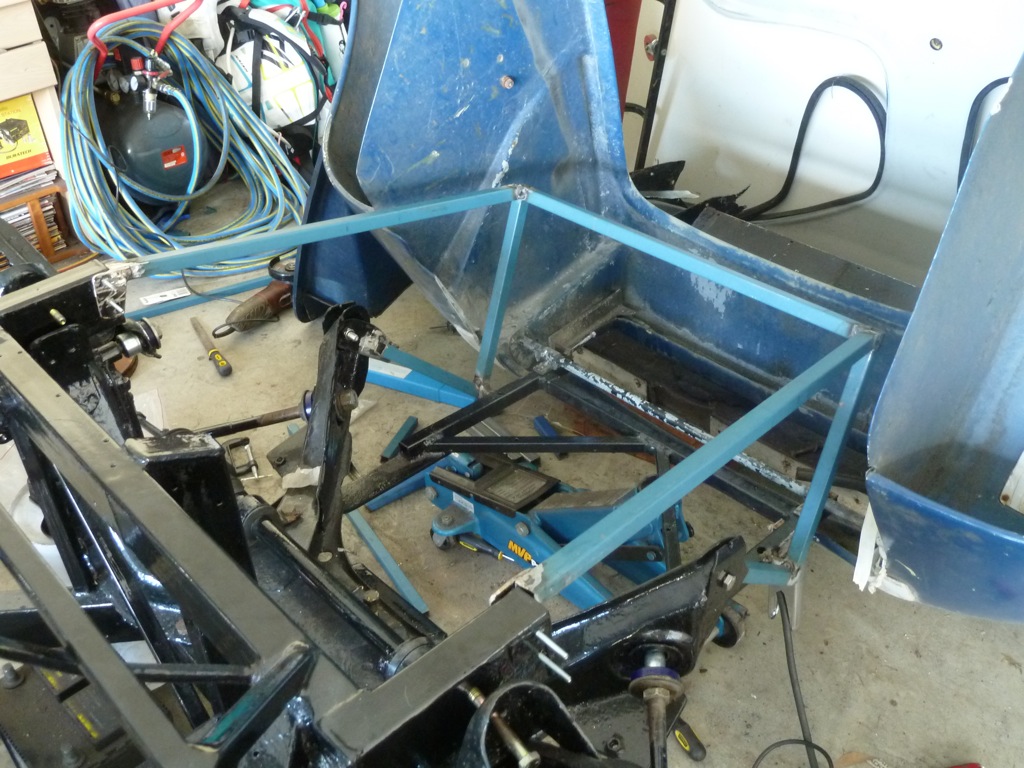
Next up, we put the radiator on. We're seriously happy with how well this radiator fits within the body. The only problem is that it's a little too tight. If it's not in precisely the right spot, the front won't fully hinge open. After spending some time trialling different positions, we ended up with the framework tacked in place. We've decided to make the front-end fully bolt in. That means we can easily remove the entire front end back to the K-frame if major suspension work is required.
Radiator in place. We will bolt through the top brackets with some rubber mounts in place.
When tidying up, we put the nostril panel back in. Only one words sums this up.... bugger!
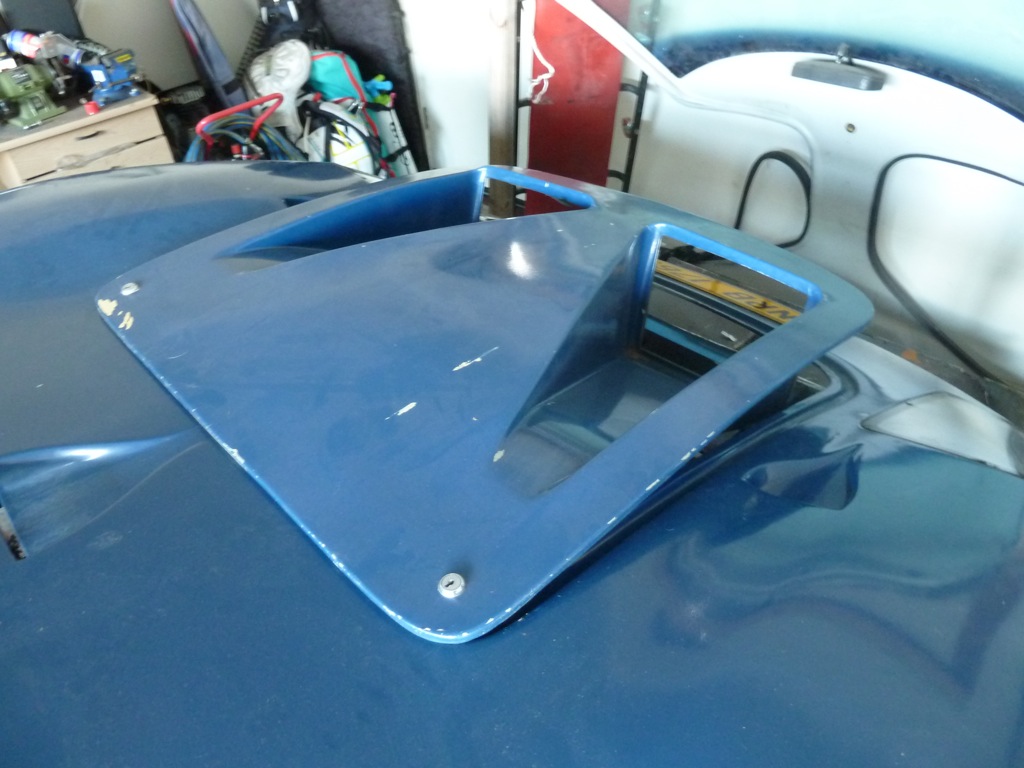
It hits our new steel work. Fortunately it will be easy to shift the horizontal bars outwards an inch or so.
Anyway, so that's about it for now. Unfortunately I'll be doing 'supervisor only' work on this for the next 4-6 weeks, since I can't do heavy work. I'm sure Dad and Tim will continue.
So, it's been 3 months since an update, what the hell has been going on? Well, personally, lots has been going on. My wife now has a baby on the way, I've spent about 2 out of the past 3 months on a drilling rig in Thailand, Tim has finished studying Medicine and is now working full-time and Dad's been busy in and out of India and working on the house. Unfortunately, this means that not much has happened on the car.
Anyway, enough excuses, with this much time off the car, we are all itching to get back into it. For the last 2 weekends Tim and I have finally managed to squeeze some GT40 time in. We've decided to focus on getting the radiator in and mounted and to run the coolant lines. In order to mount the radiator correctly we needed to reinstall the front bodywork. This was seriously an exciting and motivating moment. It really makes the car look like a GT40 again and damn it looks good
This photo really doesn't do it justice (plus it shows that we badly need to reorganise the garage). We decided to throw the doors back on since we don't have anywhere better to store them. In order to get the body work to fully close we had to remove some of the fibreglass as it was fouling on some of the new chassis bracing we've added.
Next up, we put the radiator on. We're seriously happy with how well this radiator fits within the body. The only problem is that it's a little too tight. If it's not in precisely the right spot, the front won't fully hinge open. After spending some time trialling different positions, we ended up with the framework tacked in place. We've decided to make the front-end fully bolt in. That means we can easily remove the entire front end back to the K-frame if major suspension work is required.
Radiator in place. We will bolt through the top brackets with some rubber mounts in place.
When tidying up, we put the nostril panel back in. Only one words sums this up.... bugger!
It hits our new steel work. Fortunately it will be easy to shift the horizontal bars outwards an inch or so.
Anyway, so that's about it for now. Unfortunately I'll be doing 'supervisor only' work on this for the next 4-6 weeks, since I can't do heavy work. I'm sure Dad and Tim will continue.
Fun with a Pipe Bender
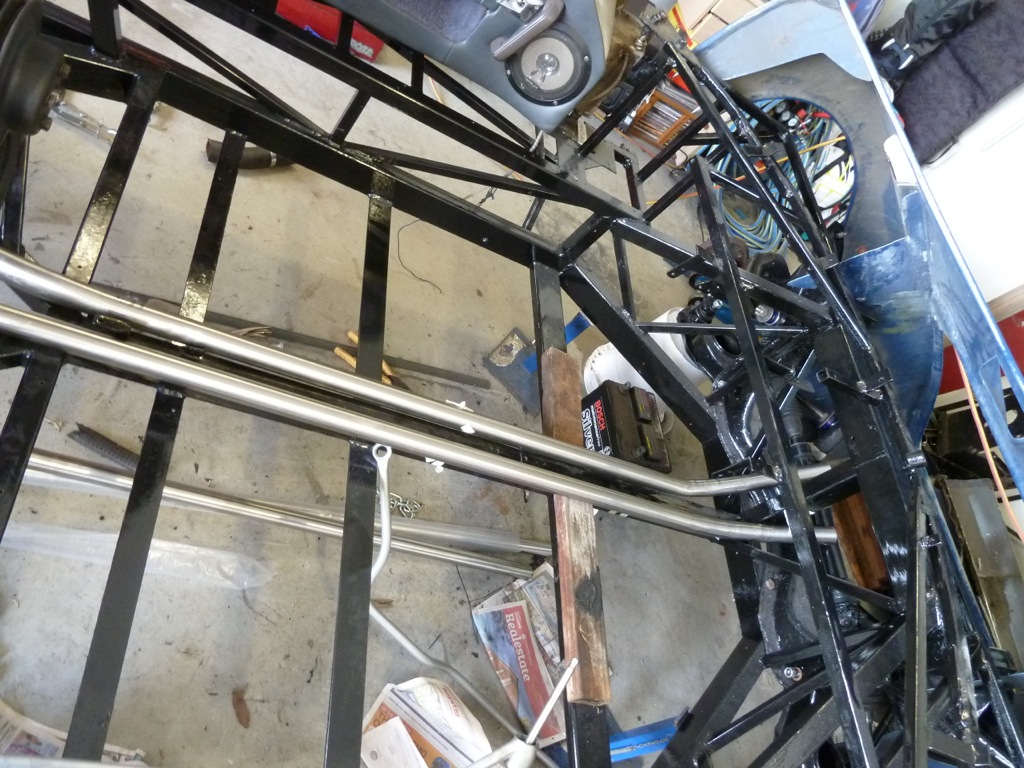
Well the Easter weekend has gone and passed and I can happily say we had a great time working on the car. We managed to get 2 days of work on it.
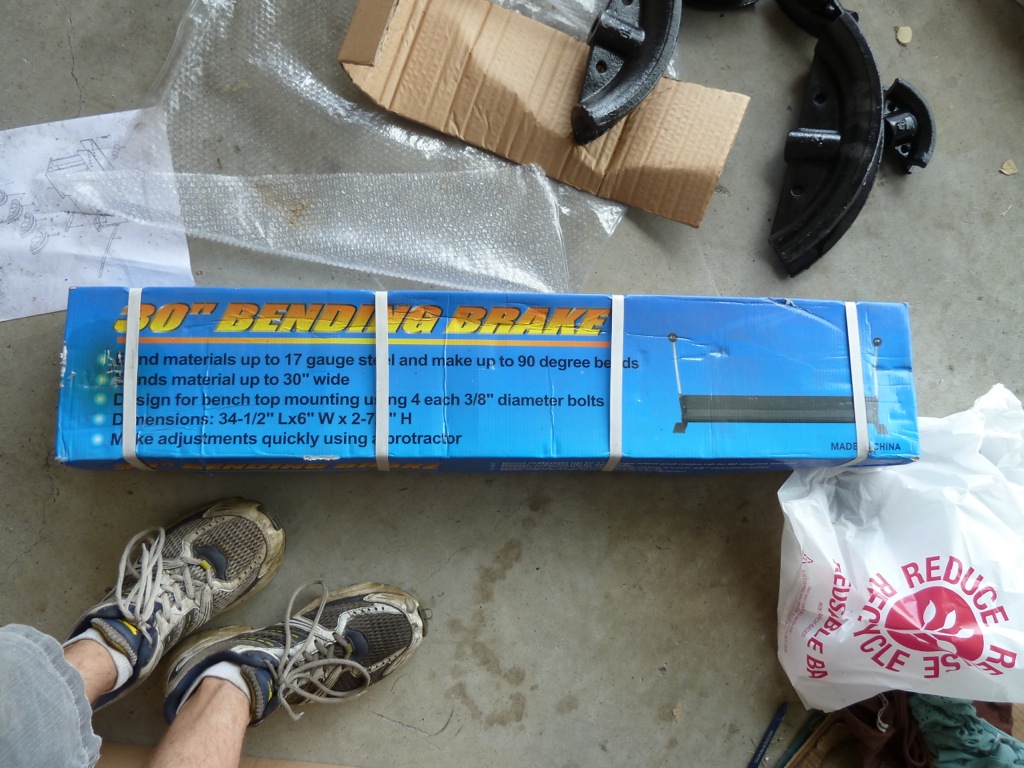
First up, I purchased a cheap pipe bender, some 1.5" stainless pipe and a bending brake for the panels (coming soon).
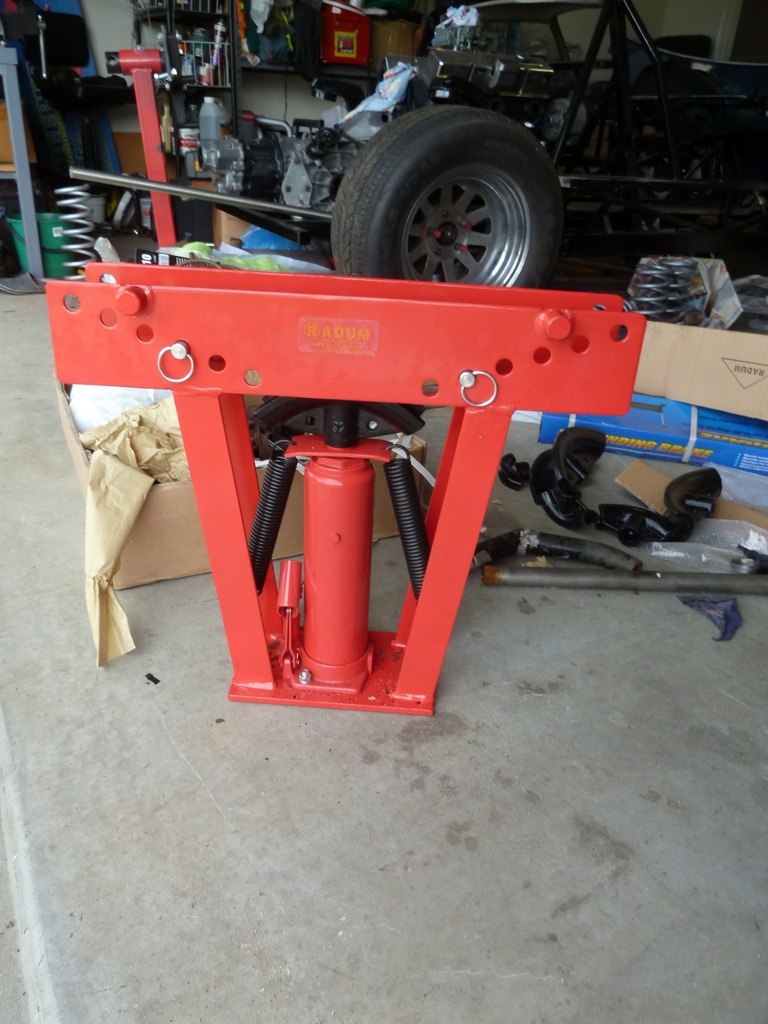
After practicing on some scrap metal, we discovered the press benders are not as easy as they look. It is quite easy to crush a piece of pipe. Anyway, after a bit of Googling and experimentation, this is what we found:
After a few hours (yep, we work slow), we had two pipes done with minimal crushing in the bends. We're pretty happy with the result.
I'm glad to say that I'm recovering quickly from the hernia operation, so while Tim was bending pipes, I was busy finishing the welding of the radiator support.
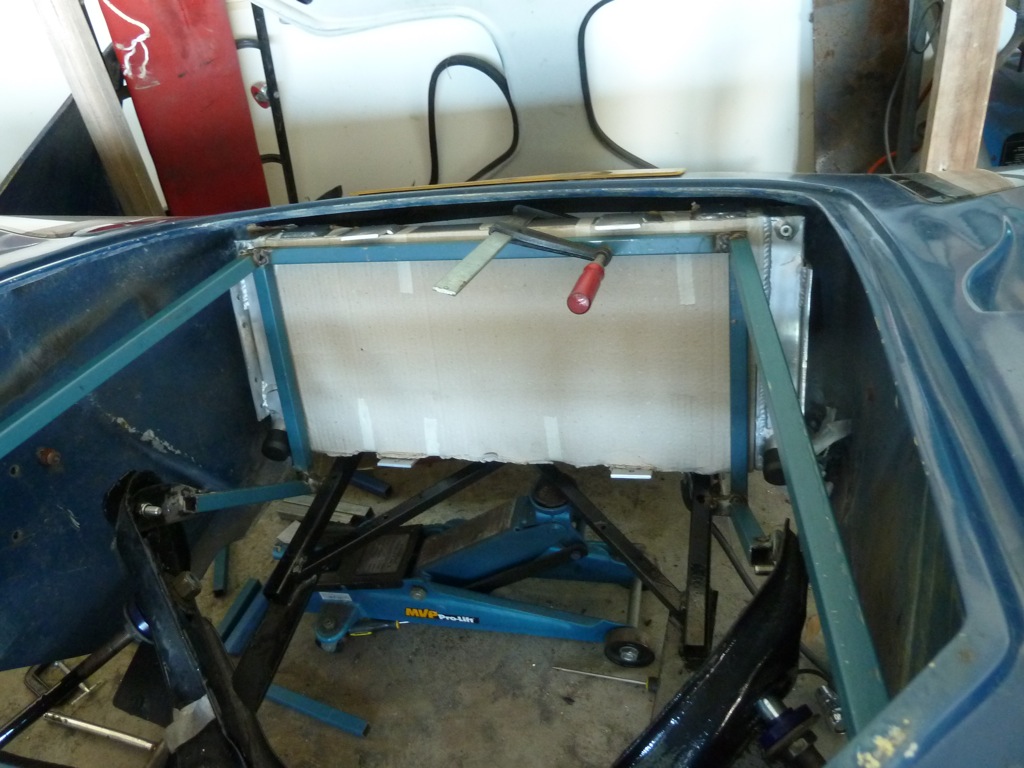
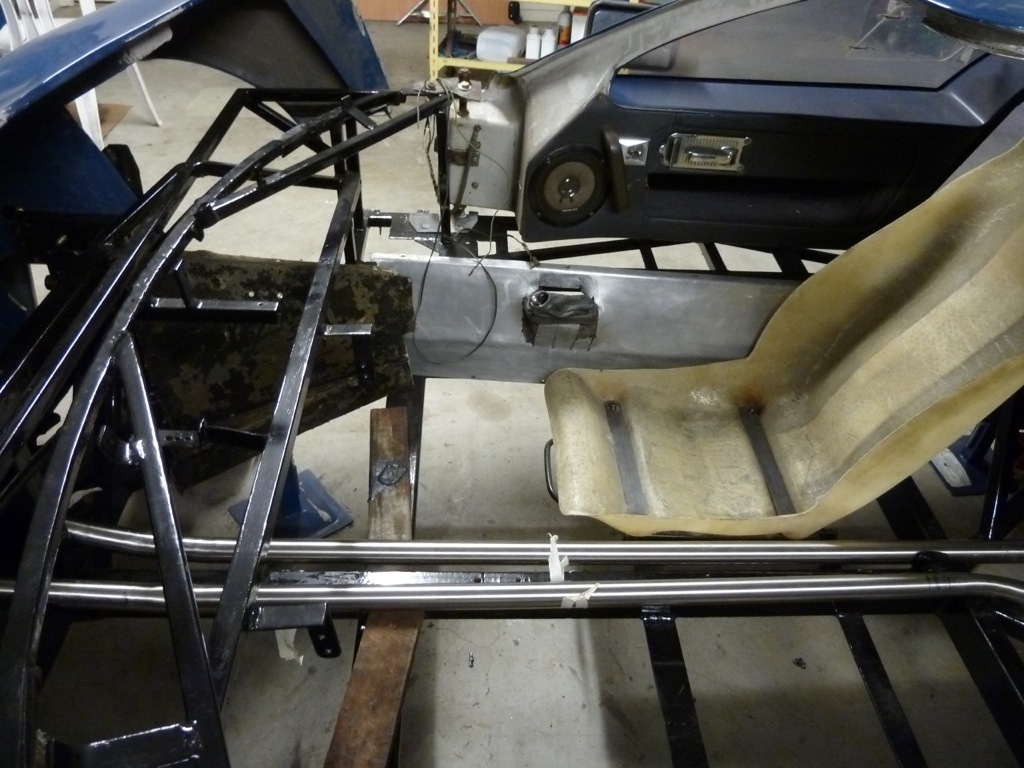
On the second day, Tim got out the Satan Spawn (aka Paint Stripper) and cleaned up some of the interior panels. It's not a nice job at all and somehow Tim always gets the messy jobs... The panels came up pretty good. See the pic below. We haven't decided yet if we're going to carpet the interior or leave it as exposed metal
Finally I gave the garage a much-needed clean. I couldn't help but take a few pics of the GT40 when it's not surrounded by mess. Loving it!
Well, that's it for now. Next up, we need to finish off the rest of the pipework and start the panelling. The pipework around the thermostat is going to be very tricky. We've added a new bar across the back of the cabin and it's going to make things a bit tight in that area.
Well the Easter weekend has gone and passed and I can happily say we had a great time working on the car. We managed to get 2 days of work on it.
First up, I purchased a cheap pipe bender, some 1.5" stainless pipe and a bending brake for the panels (coming soon).
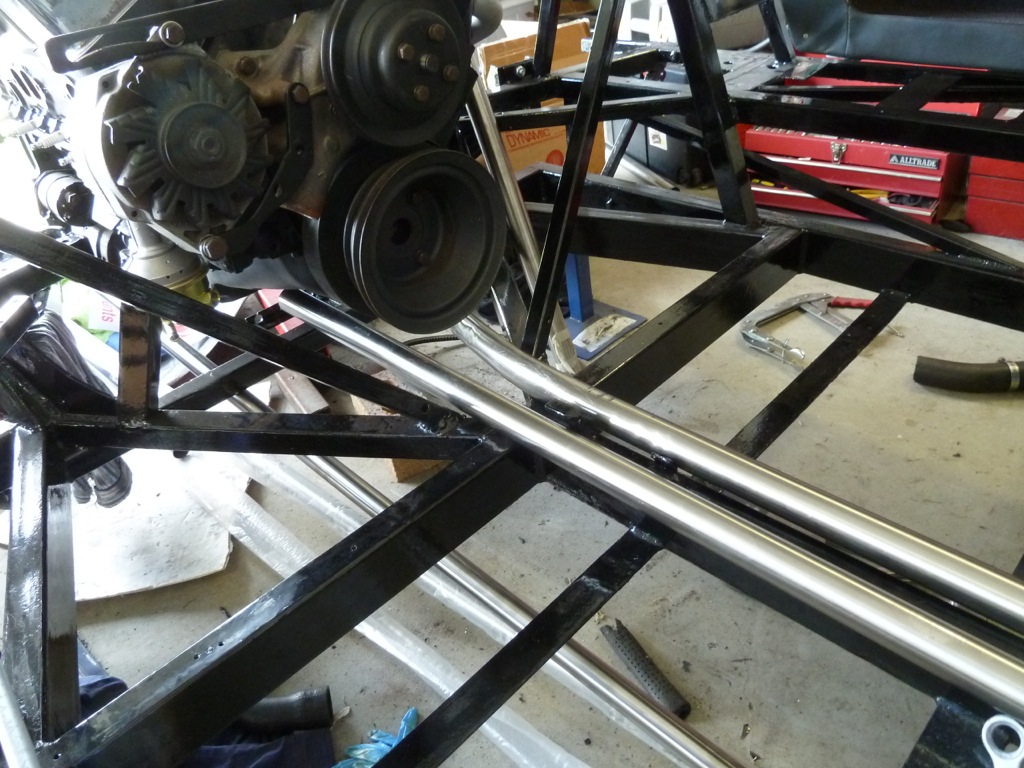
After practicing on some scrap metal, we discovered the press benders are not as easy as they look. It is quite easy to crush a piece of pipe. Anyway, after a bit of Googling and experimentation, this is what we found:
- Fill the pipe with wet sand. Jam something in there so you can keep the sand under pressure.
- Grease up the shoe and rollers.
- Go nice and slow and keep an eye on it.
After a few hours (yep, we work slow), we had two pipes done with minimal crushing in the bends. We're pretty happy with the result.
I'm glad to say that I'm recovering quickly from the hernia operation, so while Tim was bending pipes, I was busy finishing the welding of the radiator support.
On the second day, Tim got out the Satan Spawn (aka Paint Stripper) and cleaned up some of the interior panels. It's not a nice job at all and somehow Tim always gets the messy jobs... The panels came up pretty good. See the pic below. We haven't decided yet if we're going to carpet the interior or leave it as exposed metal
Finally I gave the garage a much-needed clean. I couldn't help but take a few pics of the GT40 when it's not surrounded by mess. Loving it!
Well, that's it for now. Next up, we need to finish off the rest of the pipework and start the panelling. The pipework around the thermostat is going to be very tricky. We've added a new bar across the back of the cabin and it's going to make things a bit tight in that area.
Thanks mate. We should have her back on wheels soon. We had to order shocks from the UK about a month ago. They've finally been dispatched. Horray!
On the topic of shocks, interestingly the KCC manual recommends Cortina front shocks in the front and the rear. This thing uses Granada trailing arms in the rear, but I guess Granada shocks are too long and probably not designed to have a 350 chev sitting above them The Cortina shocks just need to be modified slightly to fit.
On the topic of shocks, interestingly the KCC manual recommends Cortina front shocks in the front and the rear. This thing uses Granada trailing arms in the rear, but I guess Granada shocks are too long and probably not designed to have a 350 chev sitting above them
The Cortina shocks just need to be modified slightly to fit.Back on Wheels!
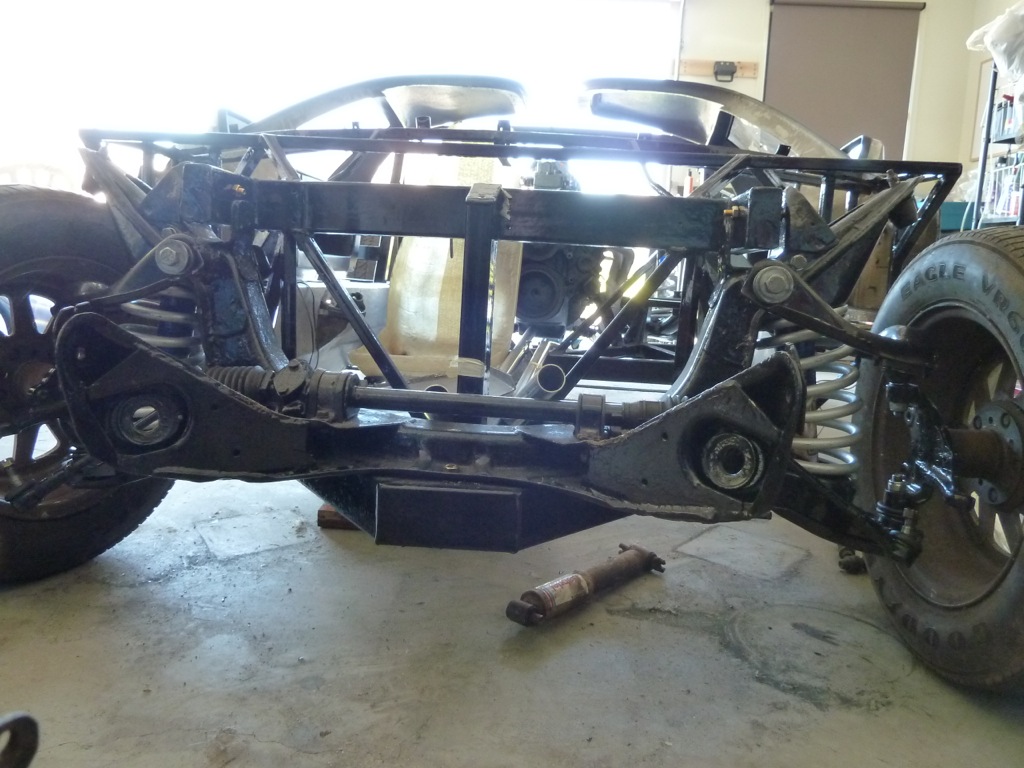
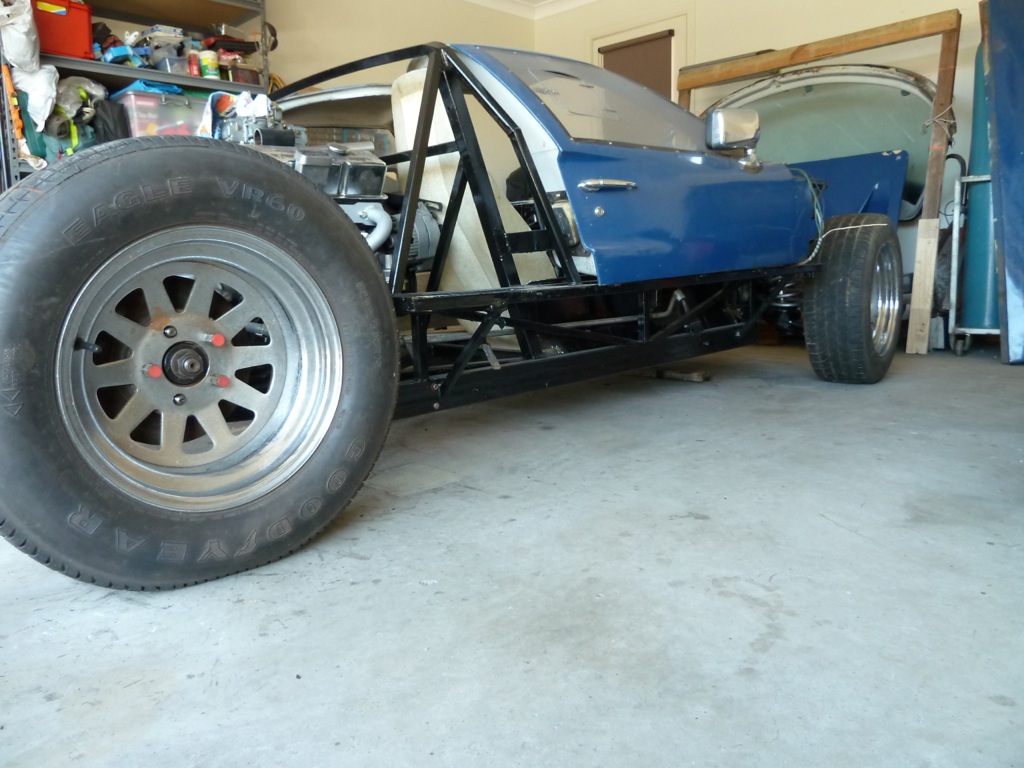
Well, we just had an excellent weekend of car work and finally reached a milestone. For the first time in nearly 2 years, the GT40 is back on its wheels again!
We ordered these nice Gaz shocks from the UK. Tim ordered them months ago. I guess Cortina parts are not in high demand...
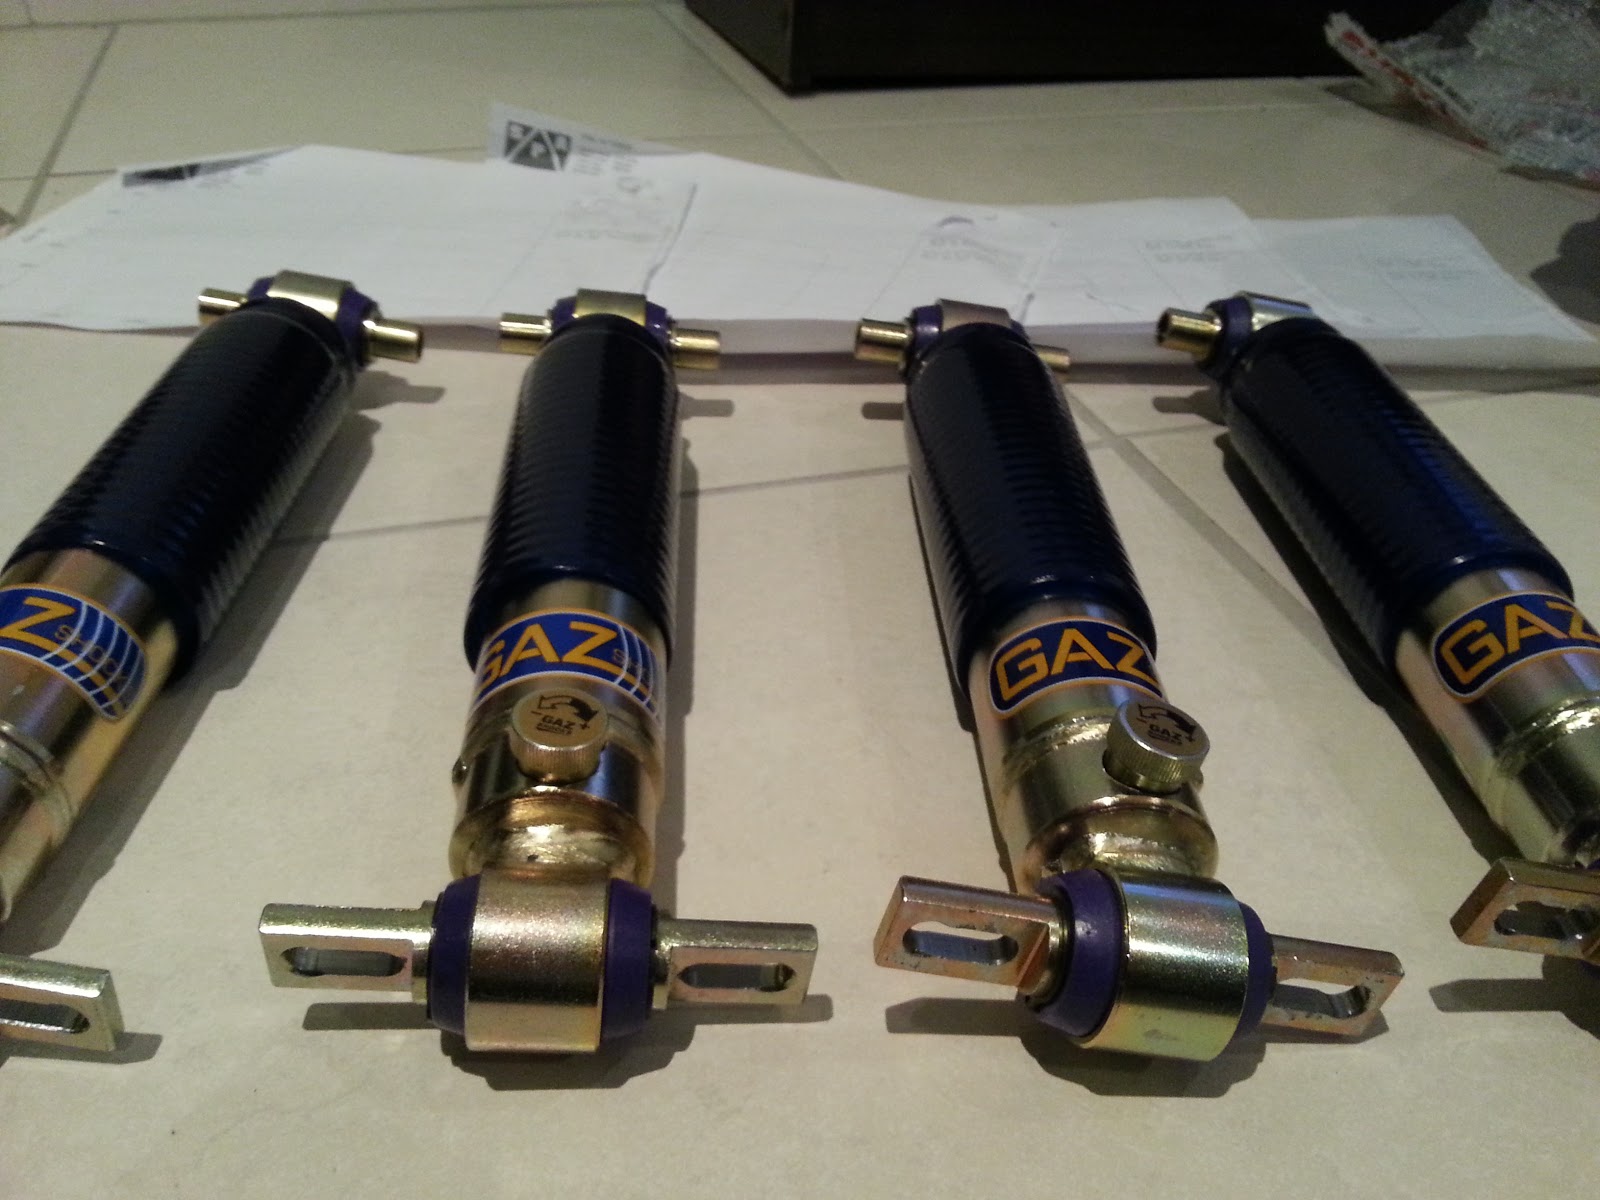
Interestingly, our KCC kit manual recommends Cortina front shocks in the front and rear. I guess due to the extra weight over the rear wheels, it makes sense. The lower mounts had to be cut-off and the lower tube drilled out to mount these.
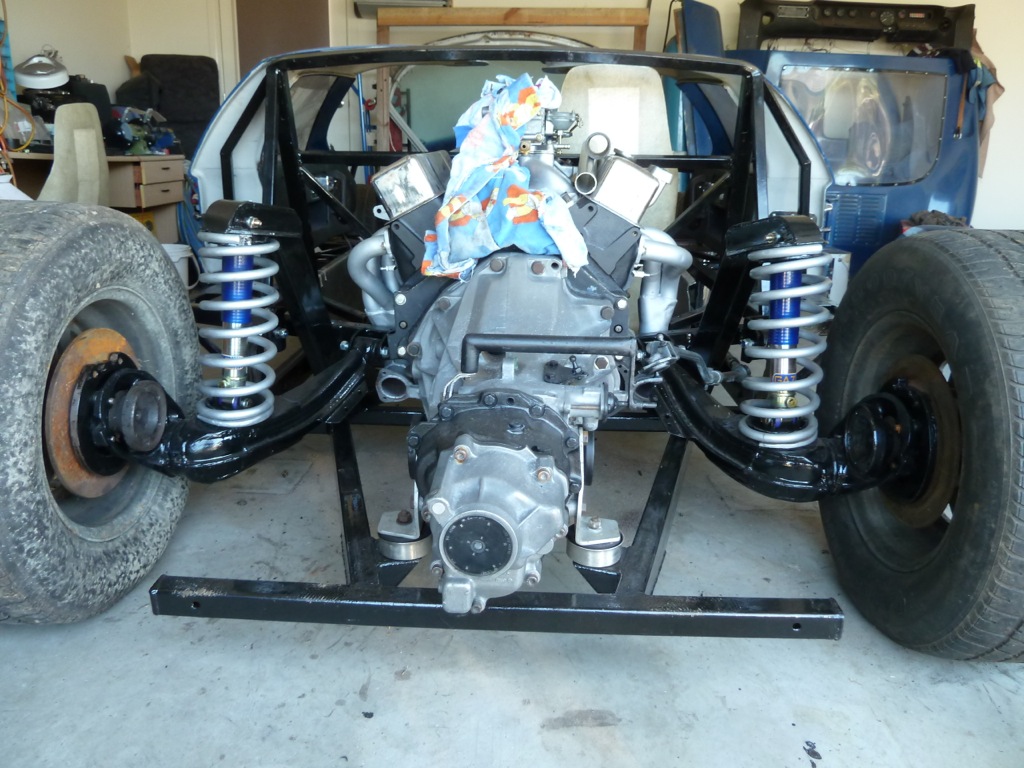
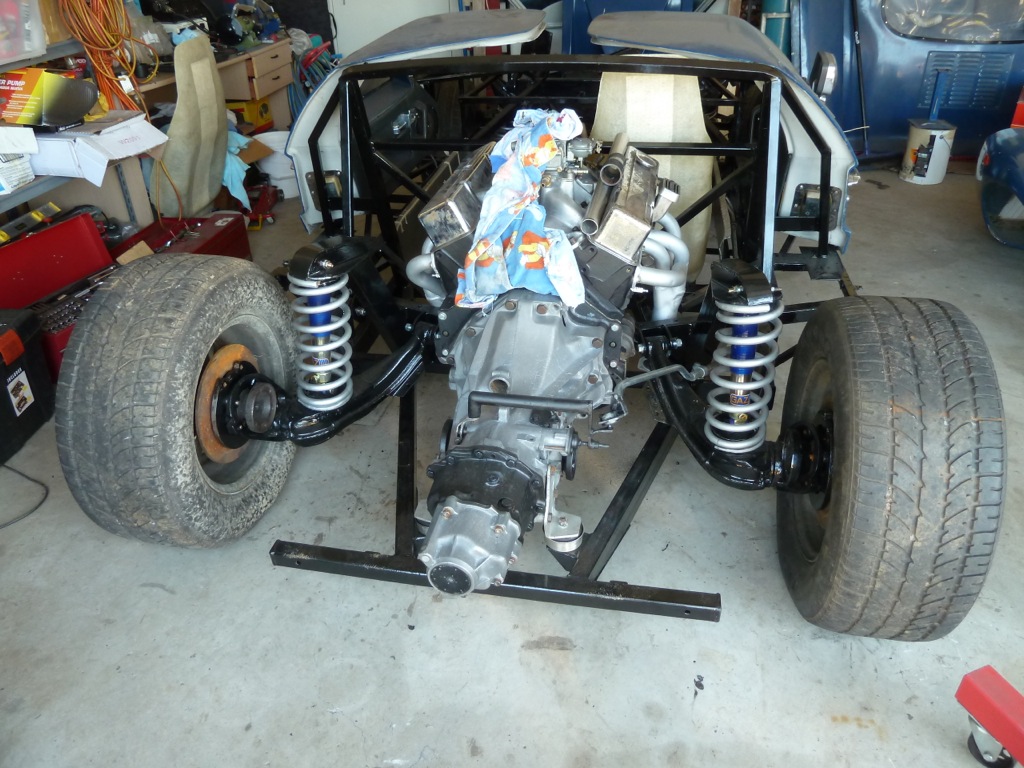
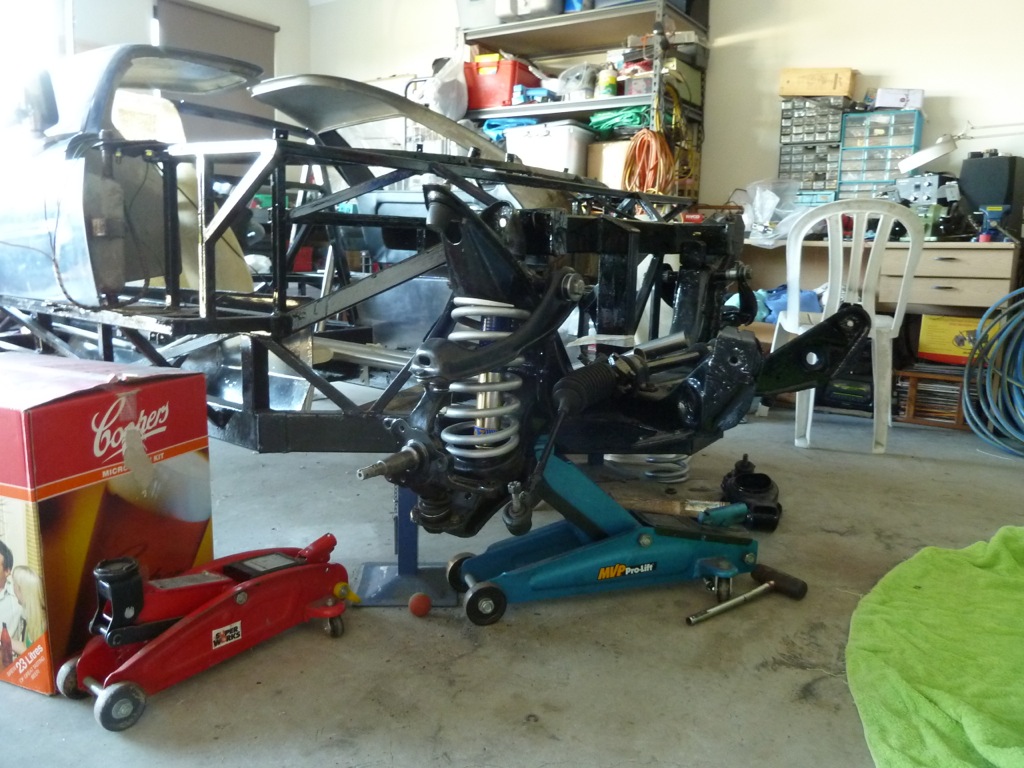
Here's how the front looks. The shocks needed a small amount of modification of the top mount to get them in. I guess this is a difference with the South African Cortina K-Frame.
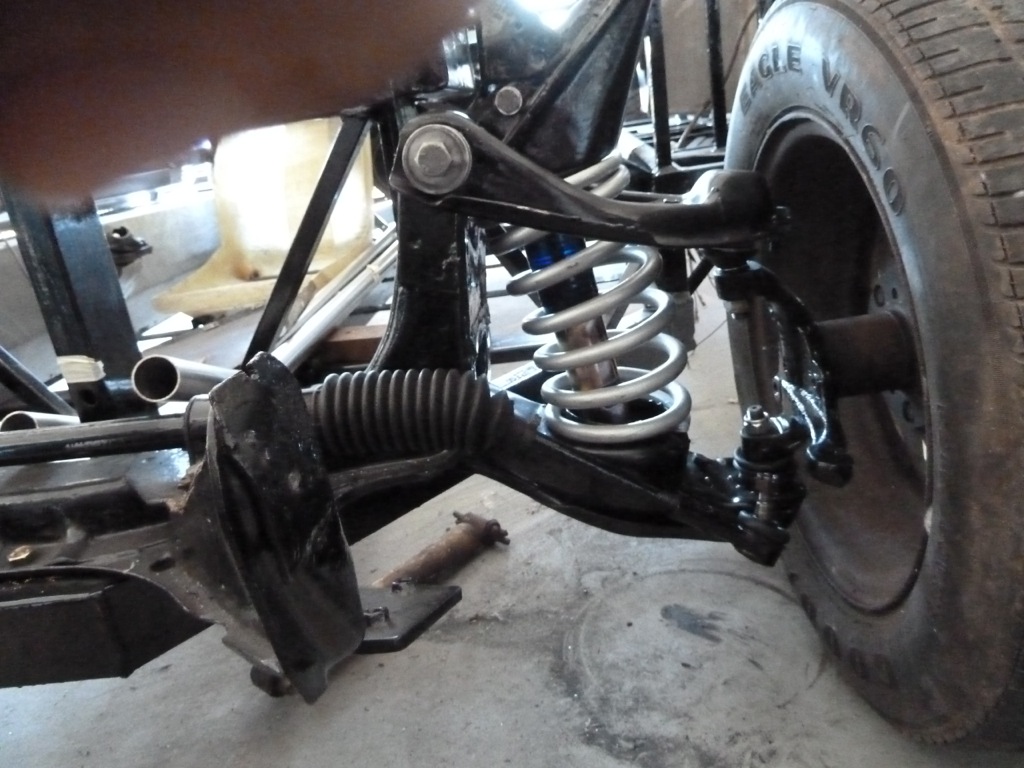
Back on the wheels, she's definitely sitting high in the front at the moment. There is next to no weight in the front, so I guess that's expected. At the moment the suspension feels quite soft in the rear and hard in the front. We'll sort that out later if it's an issue.
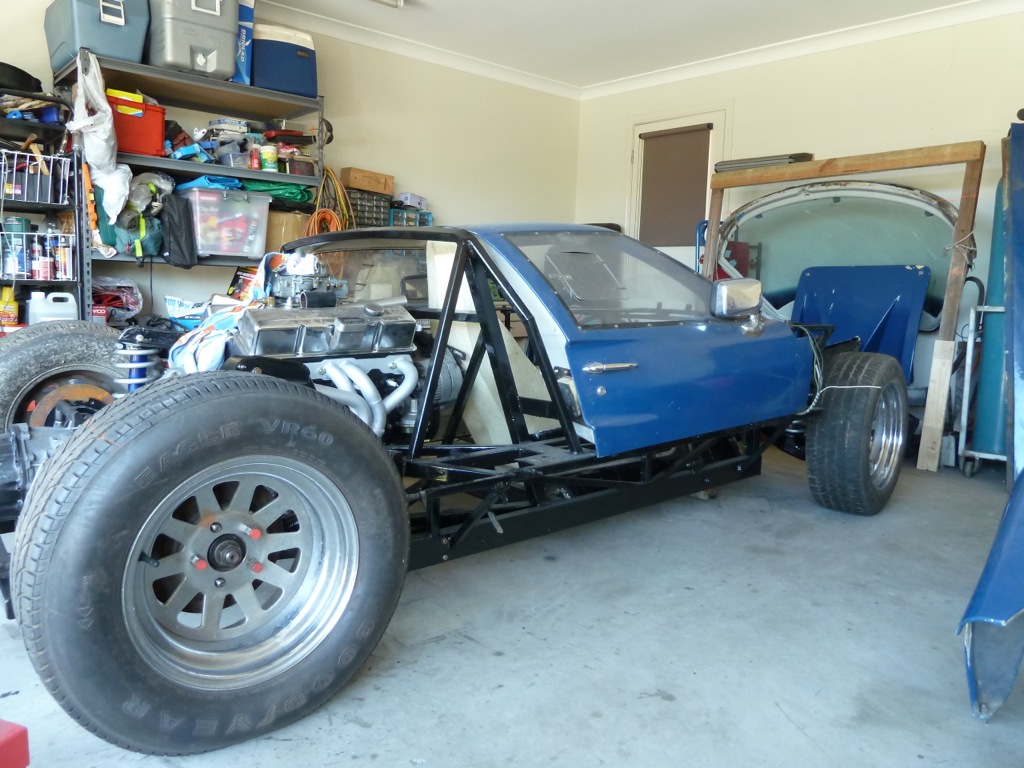
Tim also painted the radiator support frame, so the front should be going back together soon. It sure is nice to be making progress in the forward direction.
Well, we just had an excellent weekend of car work and finally reached a milestone. For the first time in nearly 2 years, the GT40 is back on its wheels again!
We ordered these nice Gaz shocks from the UK. Tim ordered them months ago. I guess Cortina parts are not in high demand...
Interestingly, our KCC kit manual recommends Cortina front shocks in the front and rear. I guess due to the extra weight over the rear wheels, it makes sense. The lower mounts had to be cut-off and the lower tube drilled out to mount these.
Here's how the front looks. The shocks needed a small amount of modification of the top mount to get them in. I guess this is a difference with the South African Cortina K-Frame.
Back on the wheels, she's definitely sitting high in the front at the moment. There is next to no weight in the front, so I guess that's expected. At the moment the suspension feels quite soft in the rear and hard in the front. We'll sort that out later if it's an issue.
Tim also painted the radiator support frame, so the front should be going back together soon. It sure is nice to be making progress in the forward direction.
Hi - This is looking great - mine has not progressed for a year now - but you are certainly giving me inspiration! - do you have any details on your gearlinkage - as this is my next task?
Cheers
Richard
Cheers
Richard
Thanks for the comments Richard. The gear linkage is the one that came from the previous owner, so I don't know much about it. I can take more pics if you like. We haven't finished it off yet, though. Some of the small linkages in the rear need replacing.
Don't worry, we haven't start on cosmetics yet. The mirrors will be the first to go!
Hi Simon, a couple of pics would be good showing how the linkage fits to the box and chassis down to the lever as I'm redesigning mine from a very bad contraption as it was to hopefully something that will now work!
Similar threads
- Replies
- 2
- Views
- 1K
- Replies
- 4
- Views
- 3K
- Replies
- 2
- Views
- 1K
- Replies
- 46
- Views
- 9K