Panel gapping body filler technique?

I found this photo, but can't find any discussion about this, appears to be a technique to get the panel gaps exactly where you want them.
1. Is body filler strong enough to become the new edge of a body panel? Or is this not filler, something like 3M™ Marine High Strength Repair Filler? Looks like body filler...
2. Do you put tape on the backside and just fill the gap with filler?
3. Do you let the filler harden before creating the gap?
4. Does this only work on composites, or do shops do this with metal panels as well?

Thanks!
Dave

img_5231-jpeg.132761
 

Randy V

Moderator-Admin
Staff member
Admin
Lifetime Supporter
I found this photo, but can't find any discussion about this, appears to be a technique to get the panel gaps exactly where you want them.
1. Is body filler strong enough to become the new edge of a body panel? Or is this not filler, something like 3M™ Marine High Strength Repair Filler? Looks like body filler...
2. Do you put tape on the backside and just fill the gap with filler?
3. Do you let the filler harden before creating the gap?
4. Does this only work on composites, or do shops do this with metal panels as well?

Thanks!
Dave

img_5231-jpeg.132761

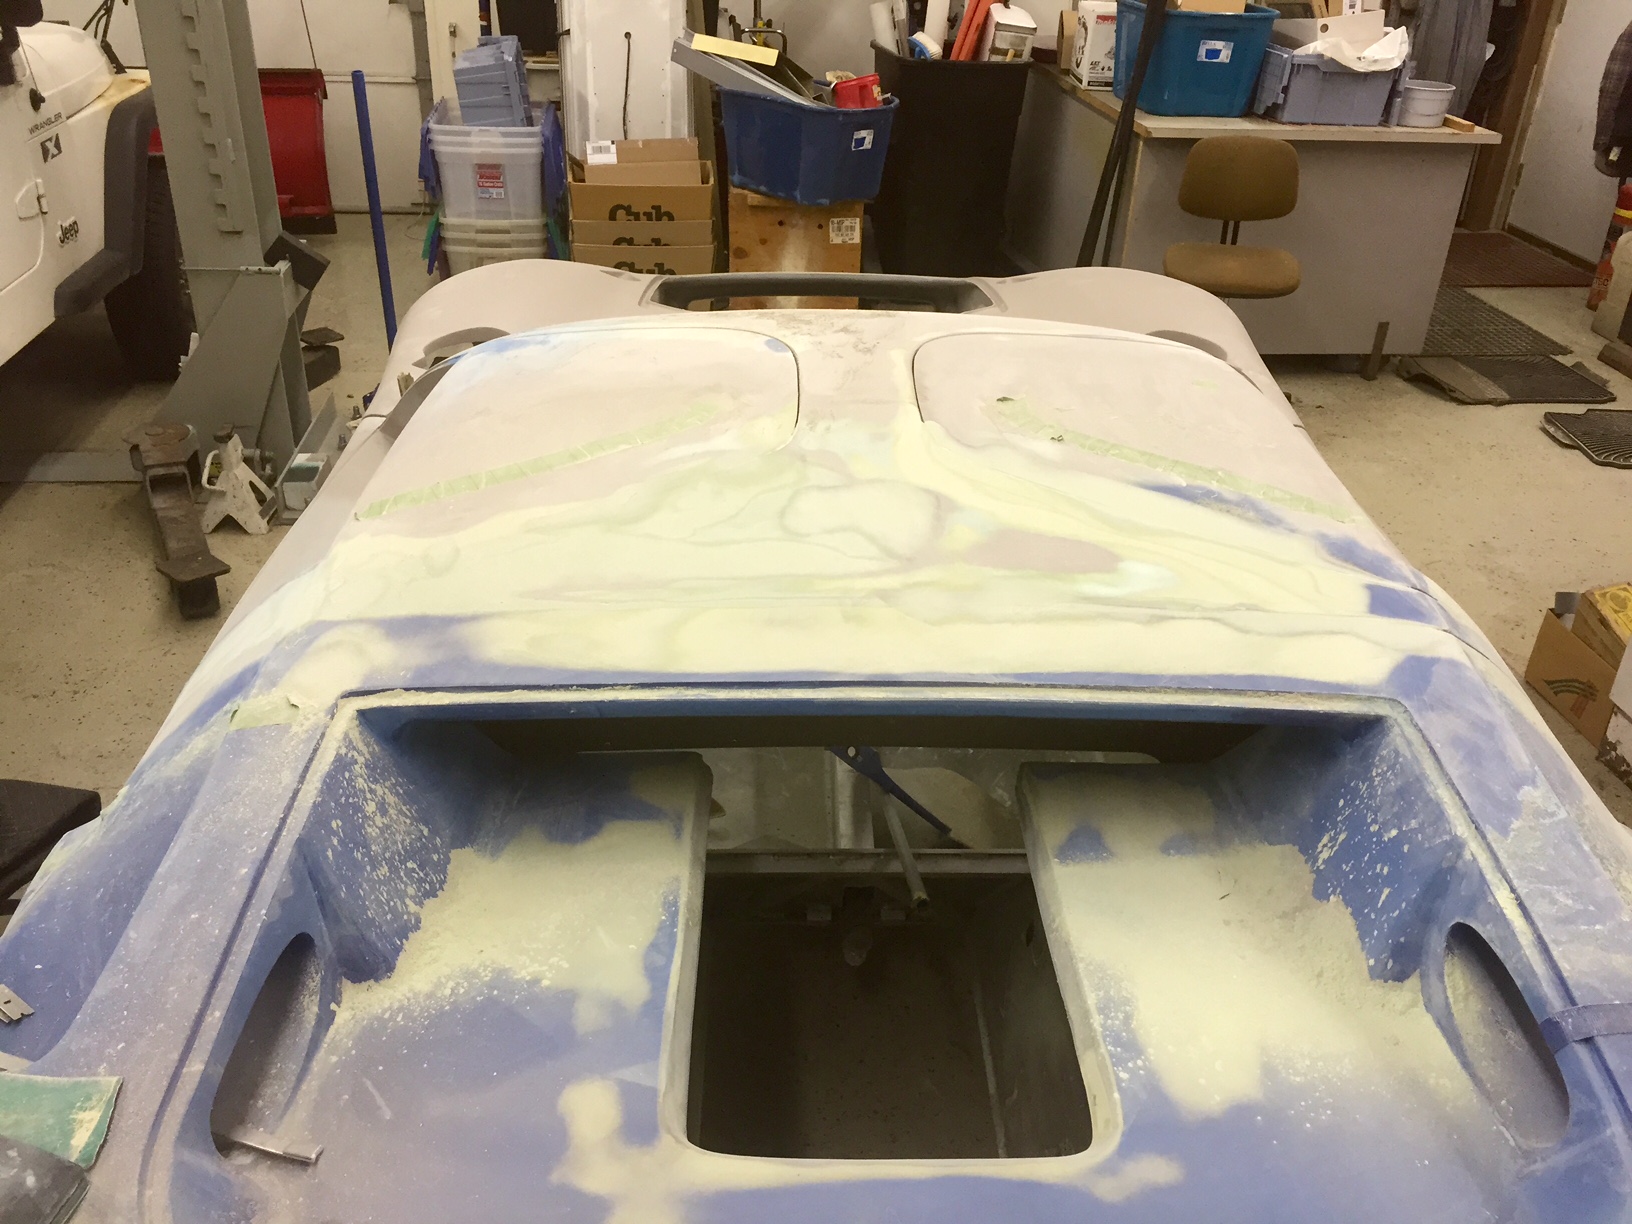
That’s my car / work
I’ll address your questions below.
First - make sure you’ve got your door gaskets in place and all adjustments are done and “locked” (IE - won’t be doing anymore adjustments of the hinges/latches, positioning of spider)..

1. Is body filler strong enough to become the new edge of a body panel? Or is this not filler, something like 3M™ Marine High Strength Repair Filler? Looks like body filler...
That is body filler - Rage Gold to be exact. No, the filler by itself is not strong enough. Once I cut the gap open, I used HSRF, West Systems & chop strand glass behind the filler to give it strength - it doesn’t take much.

2. Do you put tape on the backside and just fill the gap with filler?
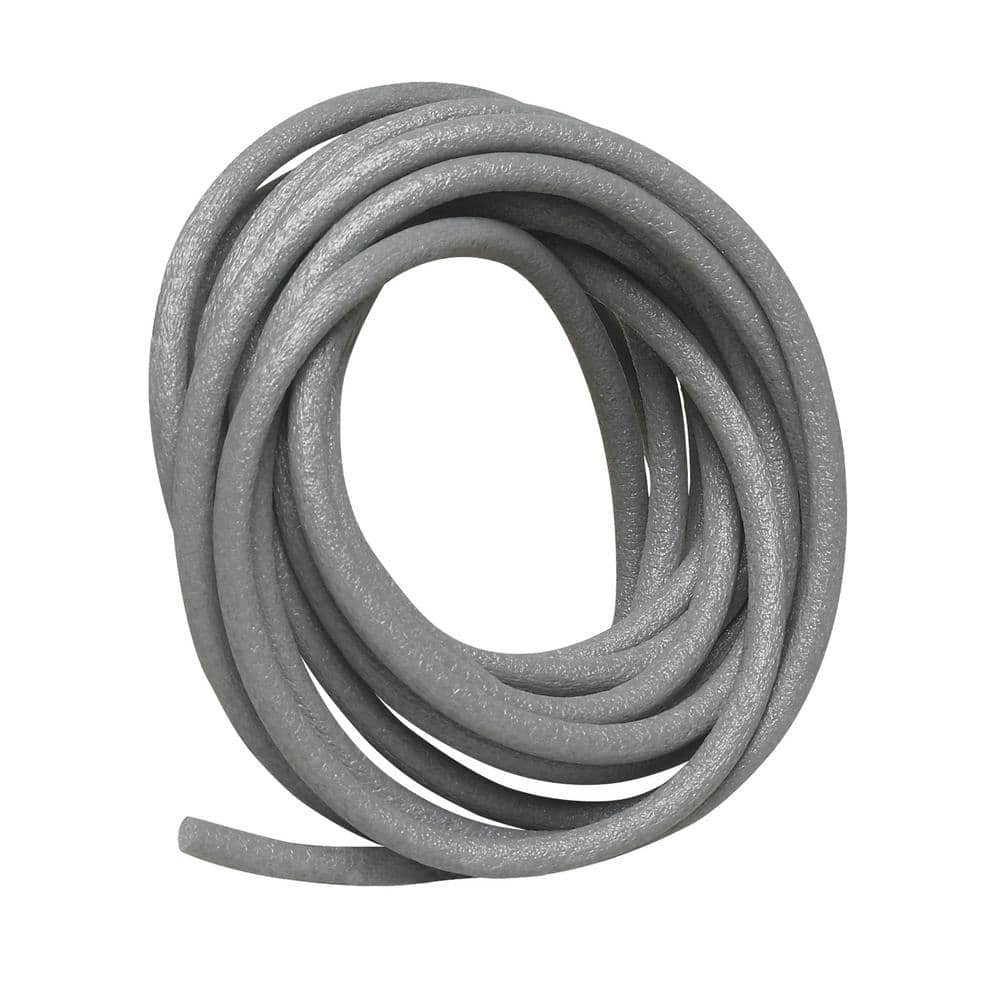
I use tape over the gaskets and foam backer rod (looks like a thin pool noodle) inside the gap - but you need to use stuff that’s small enough so it does not push on the door or spider - you’re just looking for a sacrificial filler to stop the migration of the body filler.

3. Do you let the filler harden before creating the gap?
Yes. I take very accurate measurements from a fixed point on top of the door before I do any filler work. Once I sand the panels to be perfectly aligned, I go back to my measurement, draw my line where I want the gap and cut on the line with a Dremel Cutting wheel. The cut goes all the way through the body filler. Once I open the door again, I pull off all the tape, foam backer rod and check to make sure the alignment is perfect. I then use the HSRF or WS Epoxy/glass (I have even used Evercoat Fiberglass filler AKA Tiger Hair) to support the filler. I sand the gaps to a minimum of 1/8” to 3/16” which gives room for primer & paint.

4. Does this only work on composites, or do shops do this with metal panels as well?
I have done the same thing on steel cars - actually that’s where I learned how to do it.

Doing it this way takes a lot of time, but if you want perfect shut lines and perfectly aligned body panels - I know of no better way.

Foam Backer Rod -
 

Bill Kearley

Supporter
I just did a whole lot of gap fixing on a Cobra I'm building. I ground down the part I wanted to add to from the inside ( half the thickness inward about 3/4 inch and added a new fiber glass backing for filler. Let the glass harden, clean and add filler to finish. Slowly file or grind a new edge to fit. IE, Randy's method
 
I've watched this video each time I've started bodywork on a new project. So far I've done a 69 street/track Firebird and a 66 Mustang with great results. I've got the back half of my AP GT40 gaped and nearly ready for bodywork...squaring away the front clam now. There are a lot of videos on panel gapping steel cars. You just have to replace "steel" with "fiberglass" when talking about edges. There is also a great book that I've read a few times called "Painting Your Show Car". It explains gaping quite well.
 
When I start my doors, I'll establish the shape I want by applying filler to the spider and shaping it. Then apply fiberglass where needed (gap too wide) to the door edges and cut the door edges back based on the shape established by the spider. Similar to adding metal to a door or fender edge by welding on tig filler rod or placing thousands of mig tacks and then grinding the gap back to the desired width.
 

Randy V

Moderator-Admin
Staff member
Admin
Lifetime Supporter
Great video Joe. Neat trick with the razor blades - I’ll give that a try when I do the bodywork on my 57 Chevy project…
 

Randy V

Moderator-Admin
Staff member
Admin
Lifetime Supporter
One other thing. The GT40 door-tops comprise a major part of the car’s roof. When opening and closing the door, you’ll notice that part of the door-top actually overlaps the edge of the spider by a couple mm. That’s why you have to knife-edge the door at that point and sand in an angular relief into the spider. Once it’s painted, the increased gap is barely noticeable..
IMG_5396.jpeg
 
I've watched this video each time I've started bodywork on a new project. So far I've done a 69 street/track Firebird and a 66 Mustang with great results. I've got the back half of my AP GT40 gaped and nearly ready for bodywork...squaring away the front clam now. There are a lot of videos on panel gapping steel cars. You just have to replace "steel" with "fiberglass" when talking about edges. There is also a great book that I've read a few times called "Painting Your Show Car". It explains gaping quite well.

I was going to link to that video as well. !
One thing I would add, is that its also important to have an understanding of how much gap you need to set up and at which stage of the process. I don't have an answer for this yet as I am yet to go through the process, and it will depend on which products you are going to use, and when you complete the gapping process.
I have been watching a bit of Richard Astill's stuff recently.
(42) Astill Design - YouTube

getting the gap consistent, as well as with the same radius, whilst maintaining or pre-empting sufficient clearance to allow for the number of coats of paint will be critical for the finished result.

You will need to know if the car is going to get a polyester hi-fill/high build primer stage after setting gaps?
You will need to know how many coats and layers of paint are going to be needed for the particular color. Ie if it is a multiple layer candy paint, that has tinted primers, translucent base coats and tinted clears then all these layers are going to add to the paint build up and will require additional panel gaps to be developed at the setup stage.

I think Howard mentions that he shoots for a 4.5mm (3/16") or was it 3.5? (1/8") finished gap width on the show cars that go into summer nationals' competition. For a road car or a driver you might go for a 6mm (1/4") gap on the finished paint. I think Howard is in or around the Riverina area of Australia, so somewhat consistent temperature with no major fluctuations. ie between 10° to 35° year-round, and he would be working in a heated and cooled garage. So say setting gaps at 20°.
Check with your paint supplier to get appropriate build thicknesses.

ShowPdf.aspx (ppg.com)

I've just looked up the PPG Hi-Build Primer D804 data. Its saying something along the lines of up to 250 microns (0.25mm) build thickness per surface. So on a door jam, that is 0.25mm each side. i.e minus 0.5mm out of your gap and that's just the high build primer.
 
Back
Top