Hallo
After my post on mounting my Lexan covers ( see my built log) i got a lot of positive feedback and requests about sourcing the parts.
Therefore i decided to put together all the reqired parts in one complete kit.
Oftentimes you see fine cracks initiating from the mounting holes. I think the reason is very often the use of countersunk bolts. THe countersunk is weakening the glass and the spreading force apllied by the bolt helps for the rest. Also i want to use a fastening method which could be reused all the time without damaging the fiberglass.
THE PRINCIP:
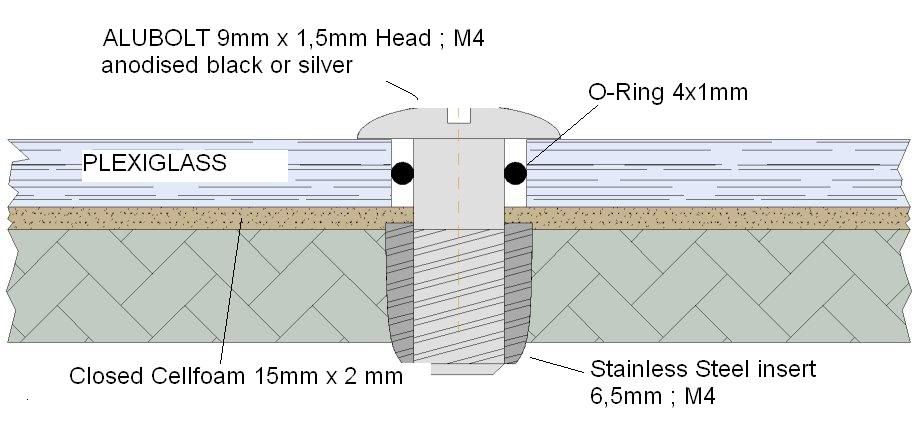
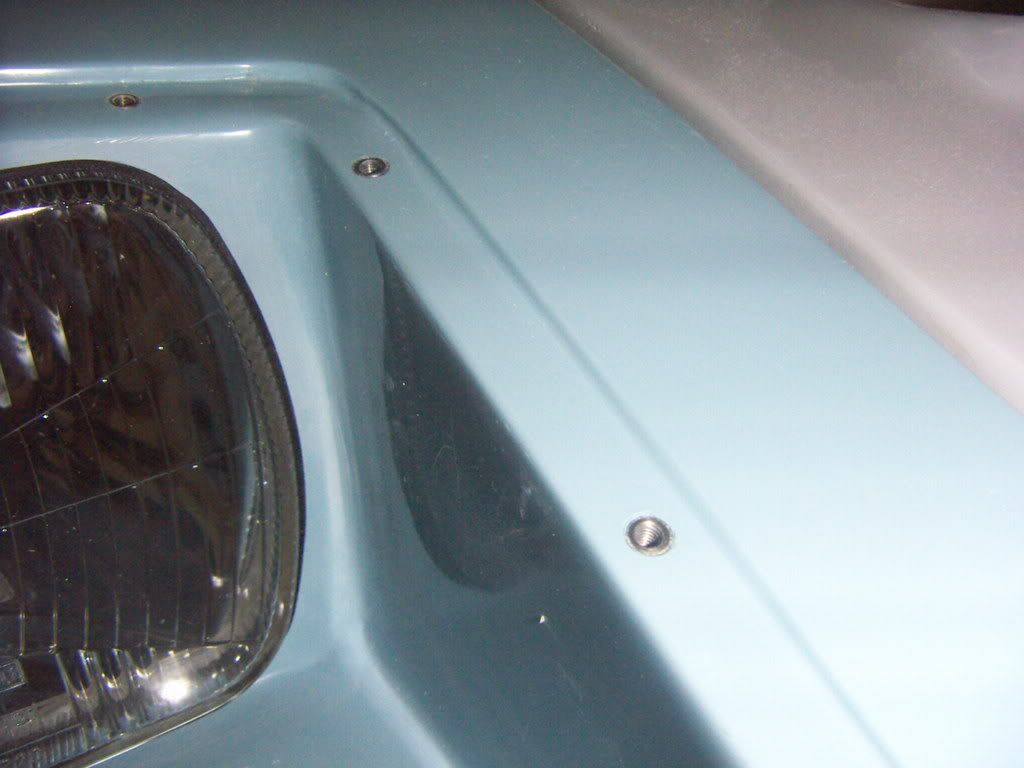
Using self threatening stainless inserts (6,5 mm outer thread, M4 inner thread ,type ENSAT from KERB KONUS) which are screwed and epoxy glued into a 6,1mm hole. The holes in the covers where drilled with 6 mm diameter. For drilling the holes i use a plexiglass drill which has more a scraping action than a cutting action.
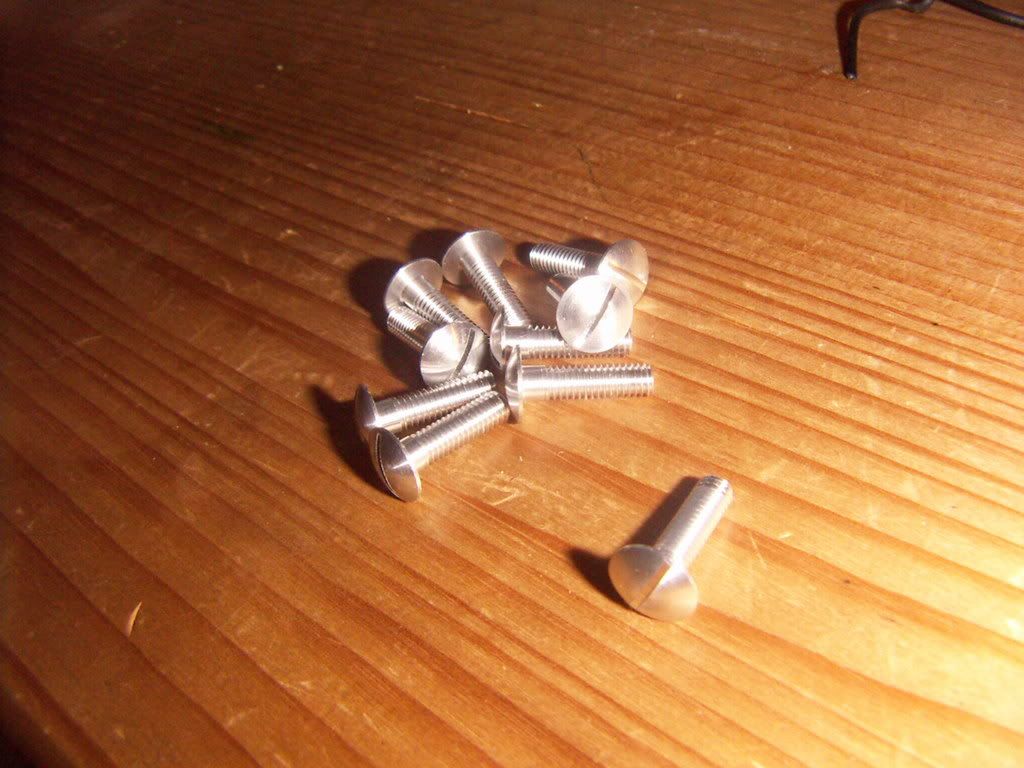
The plexiglass will be mounted with a custommade M4 Aluminium bolt.
This bolt has a classic slit design head with very low profile ( 9mm x 1,5mm). It is made out of F51 ( strength 520 Nm/mm2). It features a unthreated part of 3mm ( for headlight and sidewindow) or 5mm ( for rear window), which avoids tightening the bolt too much. It will be anodised black or silver (other colors on request). On request it could also be supplied in stainless steel.
An O-ring (4x1mm) will protect the plexi from hard contacts with the bolt and gives some flexibility for expansion and or vibrations.
mounting princip
STAINLESS STEEL INSERTS

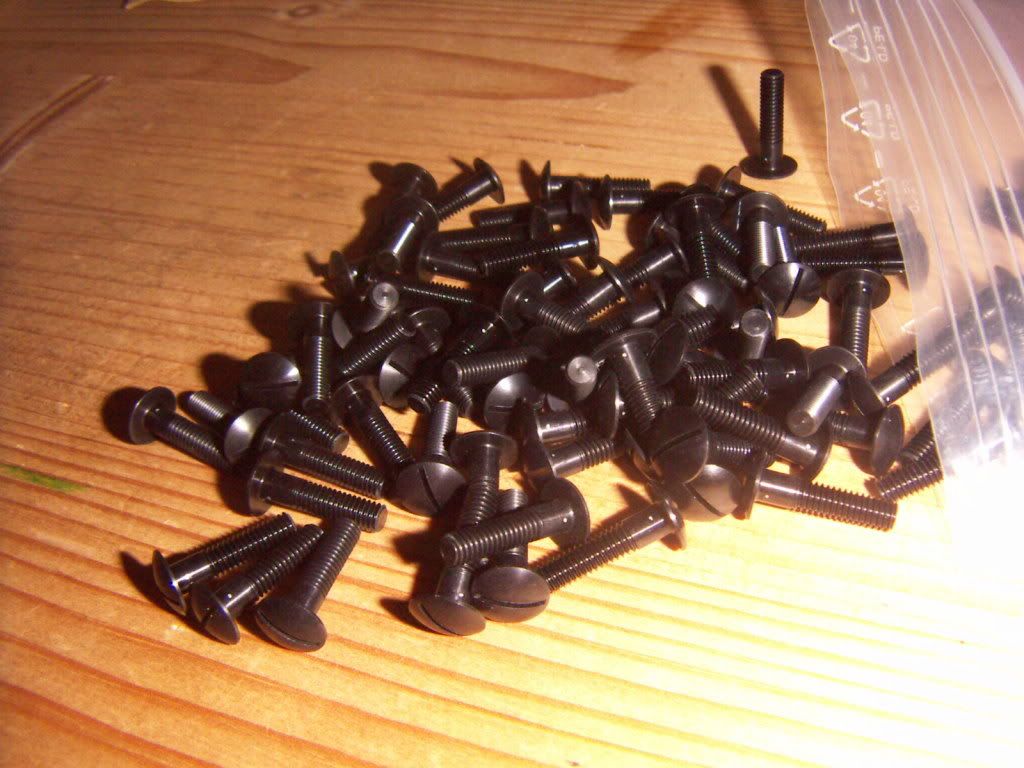
ALUBOLTS
INSERTS INSTALLED
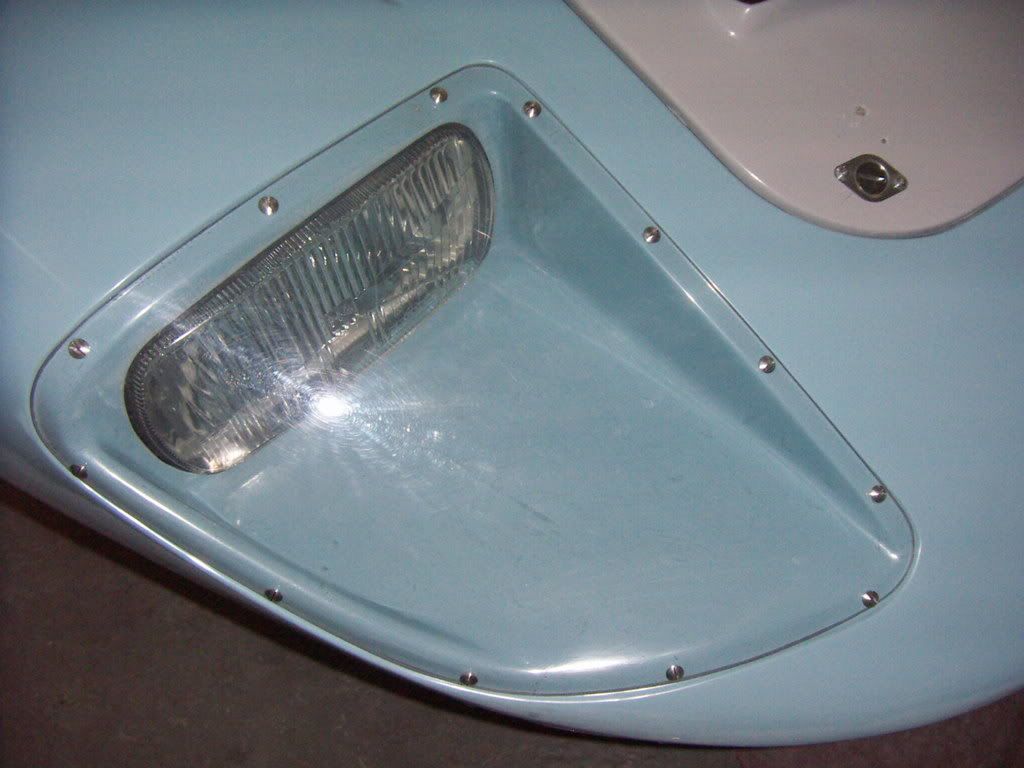
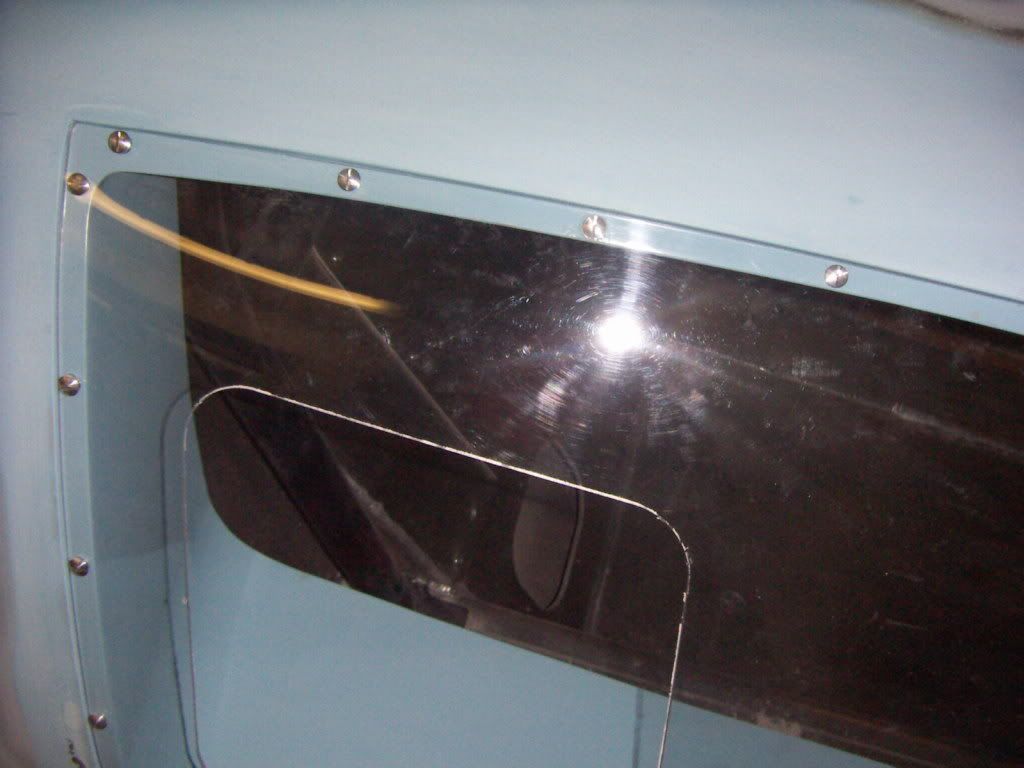
HEADLIGHT COVER MOUNTED
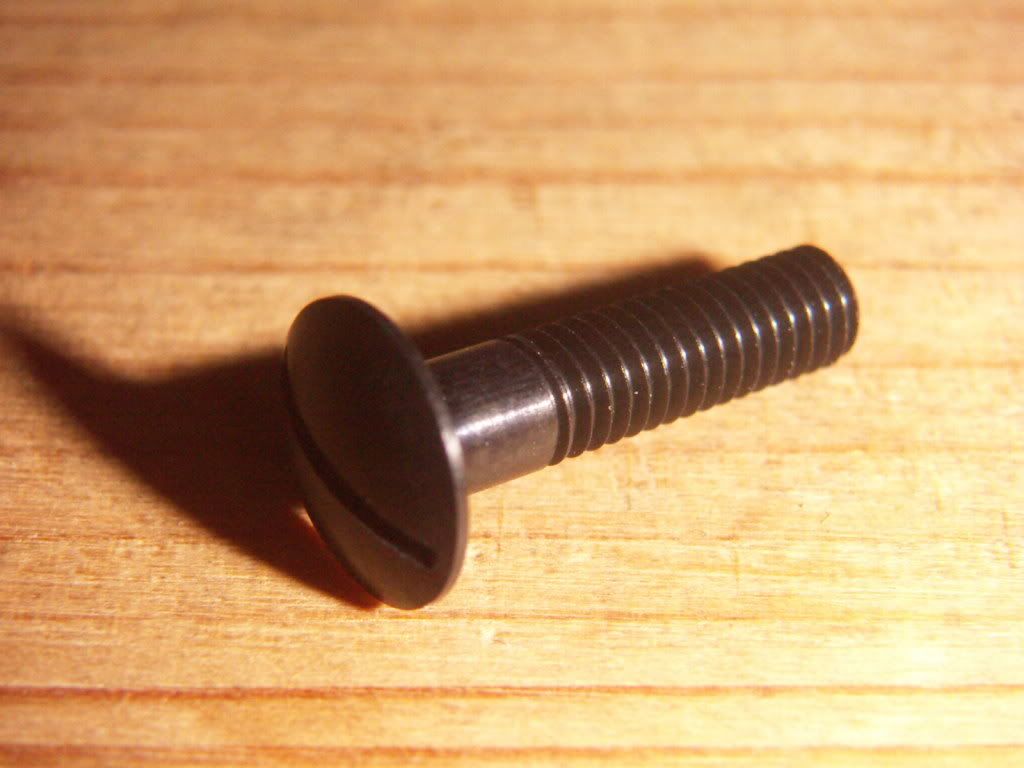
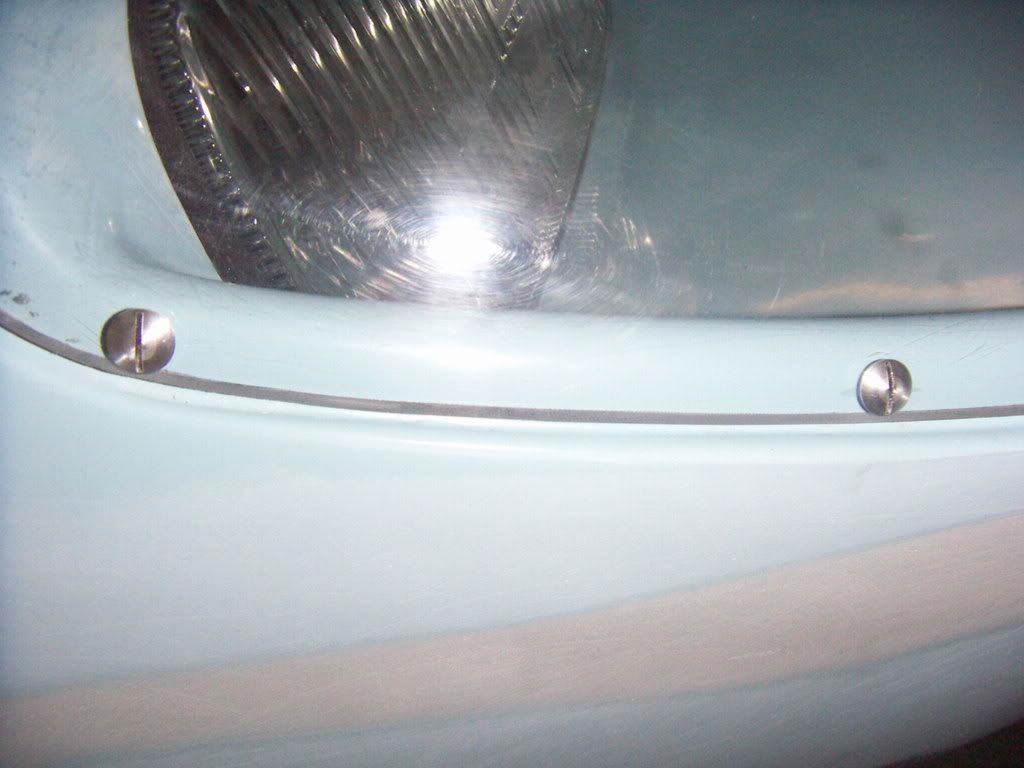
DETAIL VIEW ALUBOLT
SIDEWINDOW MOUNTED

DETAIL SIDEWINDOW
in all the pictures the closed cellfoam stripe is not installed yet.
The mounting is pretty straight forward:
The kit contents all parts to mount the complete plexiglass of your GT 40.
It is available in 2 versions, one including the bolts for the rear window and one without.
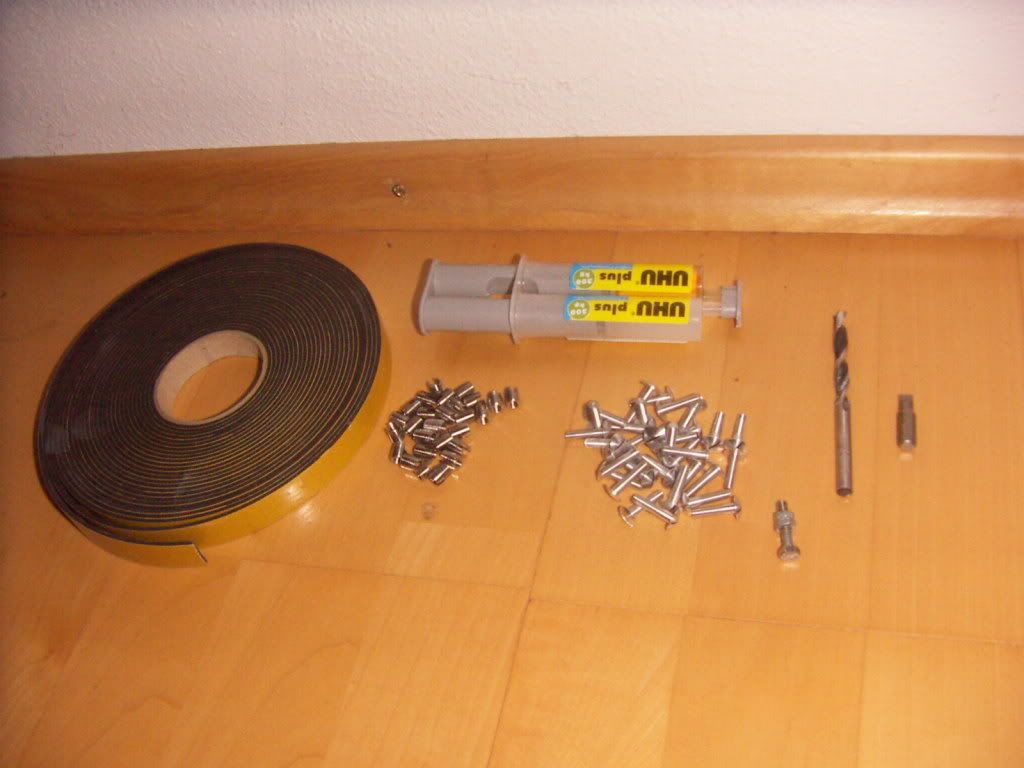
KIT CONTENT
PRICING:
KIT INCL REAR WINDOW ( 135 bolts): 252 EURO
KIT W/O REAR WINDOW ( 105 bolts): 204 EURO
Shipping costs on request
KITS will be available within the next three weeks.
Thanks
TOM
After my post on mounting my Lexan covers ( see my built log) i got a lot of positive feedback and requests about sourcing the parts.
Therefore i decided to put together all the reqired parts in one complete kit.
Oftentimes you see fine cracks initiating from the mounting holes. I think the reason is very often the use of countersunk bolts. THe countersunk is weakening the glass and the spreading force apllied by the bolt helps for the rest. Also i want to use a fastening method which could be reused all the time without damaging the fiberglass.
THE PRINCIP:
Using self threatening stainless inserts (6,5 mm outer thread, M4 inner thread ,type ENSAT from KERB KONUS) which are screwed and epoxy glued into a 6,1mm hole. The holes in the covers where drilled with 6 mm diameter. For drilling the holes i use a plexiglass drill which has more a scraping action than a cutting action.
The plexiglass will be mounted with a custommade M4 Aluminium bolt.
This bolt has a classic slit design head with very low profile ( 9mm x 1,5mm). It is made out of F51 ( strength 520 Nm/mm2). It features a unthreated part of 3mm ( for headlight and sidewindow) or 5mm ( for rear window), which avoids tightening the bolt too much. It will be anodised black or silver (other colors on request). On request it could also be supplied in stainless steel.
An O-ring (4x1mm) will protect the plexi from hard contacts with the bolt and gives some flexibility for expansion and or vibrations.
mounting princip
STAINLESS STEEL INSERTS
ALUBOLTS
INSERTS INSTALLED
HEADLIGHT COVER MOUNTED
DETAIL VIEW ALUBOLT
SIDEWINDOW MOUNTED
DETAIL SIDEWINDOW
in all the pictures the closed cellfoam stripe is not installed yet.
The mounting is pretty straight forward:
- Cut and grind your plexi to the correct size
- install it with painter tape
- mark holes
- drill plexi and glassfiber in one action with 6mm plexi drill
- secure with 6mm bolt
- drill next hole
- screw in ss inserts with epoxy
- the only critical part is the top edge of the side windows where you will drill through, after installing the insert you will have to grind it on the backside and close the hole with body filler), but this is as critical as with every other screwing method in this section.
- after hardening install plexi with cellfoam, oring and alubolt
The kit contents all parts to mount the complete plexiglass of your GT 40.
It is available in 2 versions, one including the bolts for the rear window and one without.
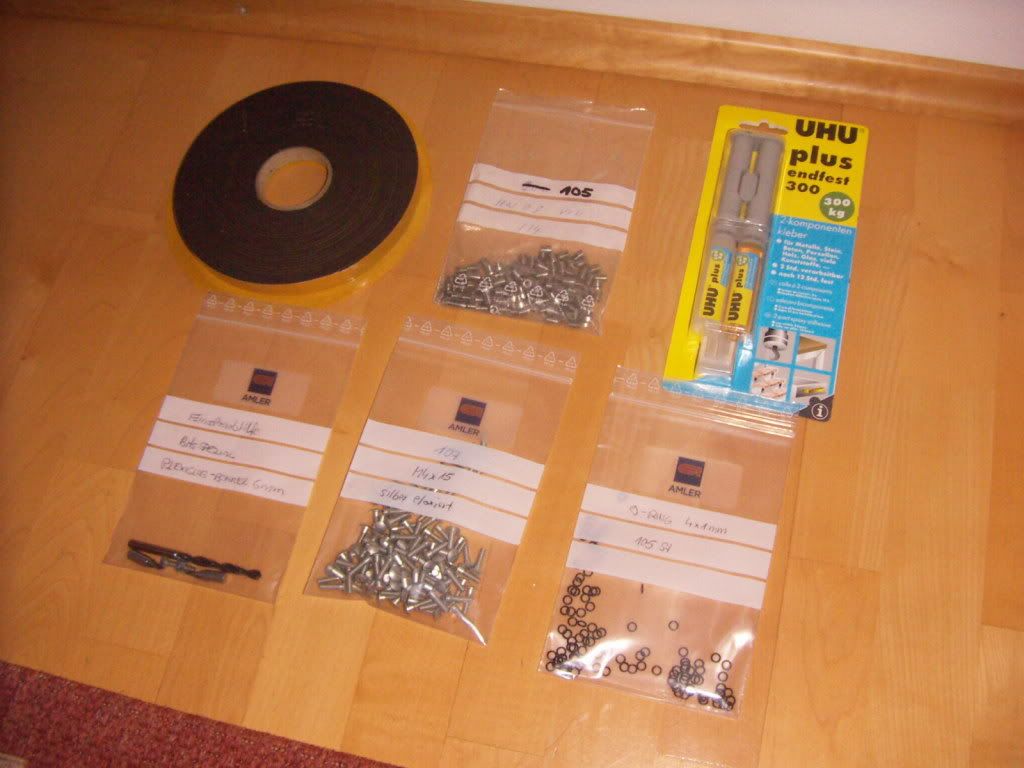
KIT CONTENT
- ALUBOLTS (105 or 135)
- STAINLESS STEEL INSERTS ( 105 or 135)
- O-RING 4x1mm (105 or 135)
- PLEXIGLASS DRILL 6mm (1)
- CLOSED CELL FOAM STRIPE 15mm x 2mm selfadhesive (10m)
- 2 K Epoxy Glue (1)
- Screw bits for ALUBOLT (2)
PRICING:
KIT INCL REAR WINDOW ( 135 bolts): 252 EURO
KIT W/O REAR WINDOW ( 105 bolts): 204 EURO
Shipping costs on request
KITS will be available within the next three weeks.
Thanks
TOM