Yep. What Pete said. I can post a video of how it works.

You are using an out of date browser. It may not display this or other websites correctly.
You should upgrade or use an alternative browser.
You should upgrade or use an alternative browser.
Scotts build thread
- Thread starter Scott R.
- Start date
Ok, makes perfect sense. I have seen both types of start buttons, but is there a specific one that works better/easier install than others?
I used a $10 momentary button off Amazon. Seems to work ")
Thanks guys. I will go on a hunt for one.
So, one quick hit of momentary button turns acc on. Then push and hold for engine start. I am under the assumption that while engine is running that a quick push turns engine off?
Just checking to see since most oem push buttons have both start and stop logo, if ISIS works the same it gives me lots of choices.
Just checking to see since most oem push buttons have both start and stop logo, if ISIS works the same it gives me lots of choices.
I saw the newer corvette push start buttons are a rocker. Looks like possibly rocker down is acc on, then main up is engine start. I will wait until I get to that point to see exactly how ISIS has it wired. It would be nice to have a separate switch/key activate acc position or on position, with momentary switch set only for engine on/off.
It's a good idea how they did it, but I have also unlocked and locked my other cars with the fob bumbling around in my pocket while in my house or out and about. Hate to have it doing the same thing while in somewhere and not only do the doors unlock, but they can jump in and go! The lights would flash to let them know they are ready for take off! Haha
It's a good idea how they did it, but I have also unlocked and locked my other cars with the fob bumbling around in my pocket while in my house or out and about. Hate to have it doing the same thing while in somewhere and not only do the doors unlock, but they can jump in and go! The lights would flash to let them know they are ready for take off! Haha
Finally past the point of just looking at it. Had a tough time digging in at first since car looked so good together, but it has to be done and it is go time! Got most of my plan worked out and lots of parts on order.
Heres a few pics.
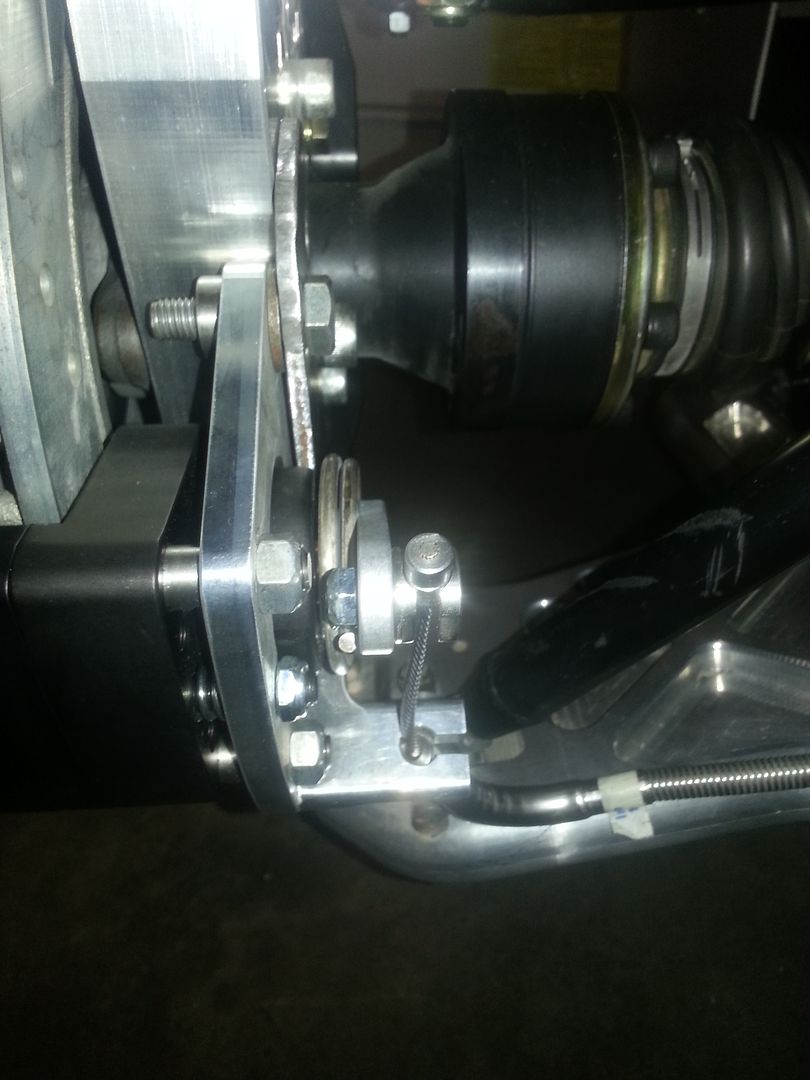
Parking brake bracket. Was very simple to make. Out of 1/4 plate steel. Will drill and tap into upright 2 more bolts, should be plenty strong. Pic also shows cable attachment, but need to make brackets still.

Battery box for gel cell battery. Mounting in front for better weight dist. and it is just ununsed space. Havn't decided to put remote post in front or rear yet.
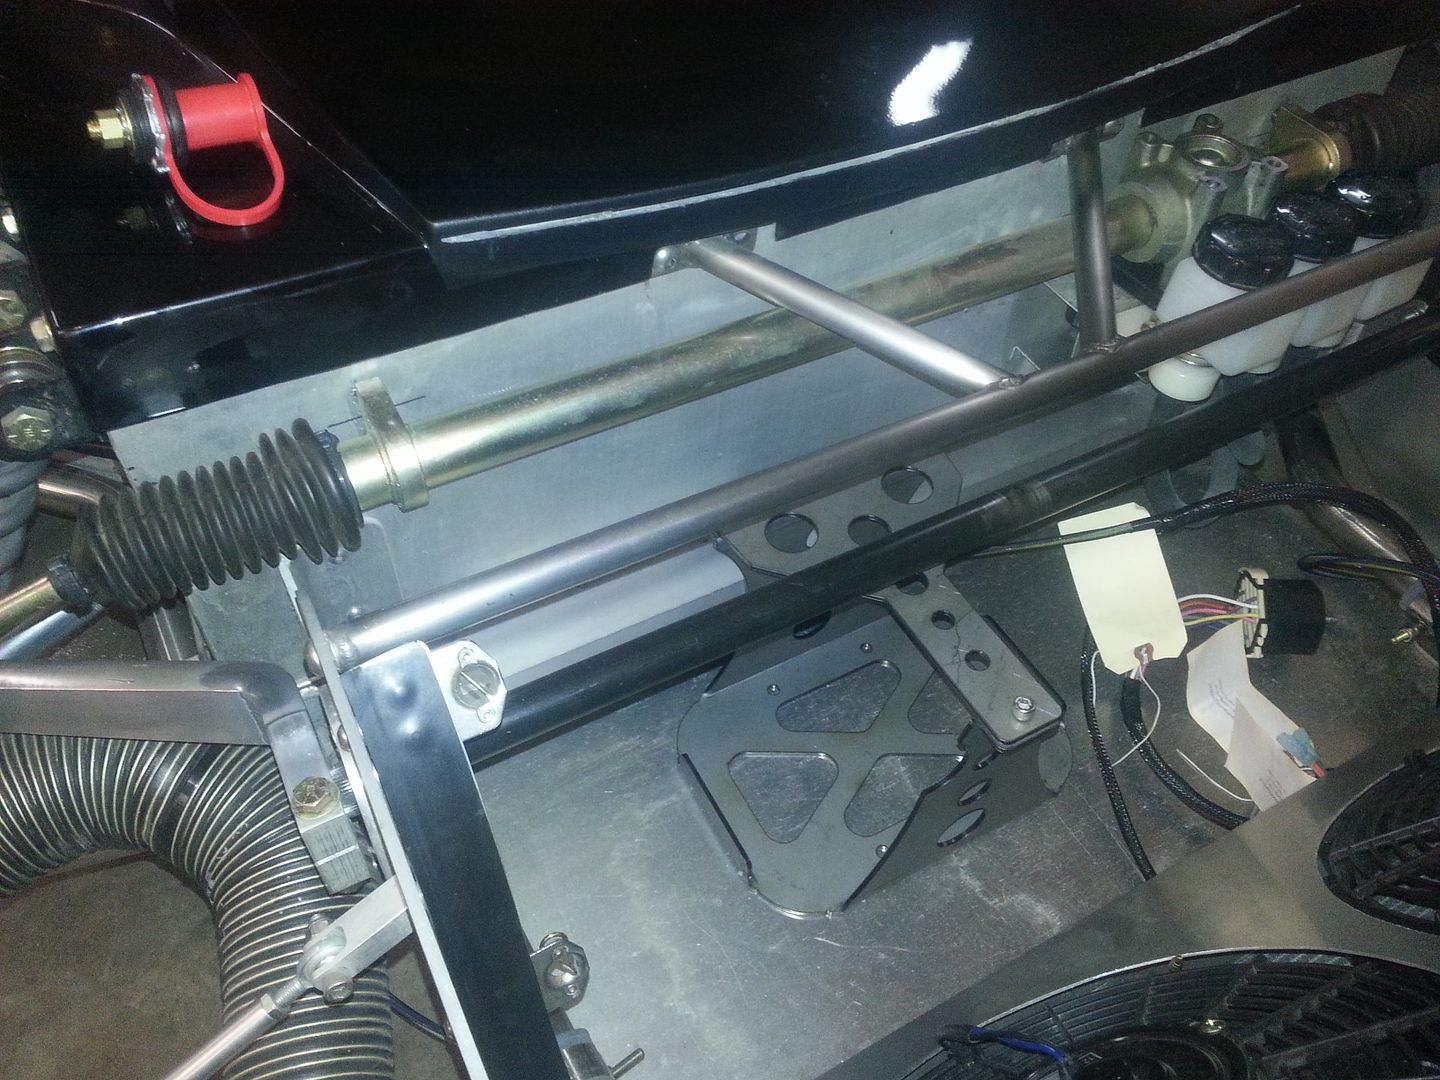
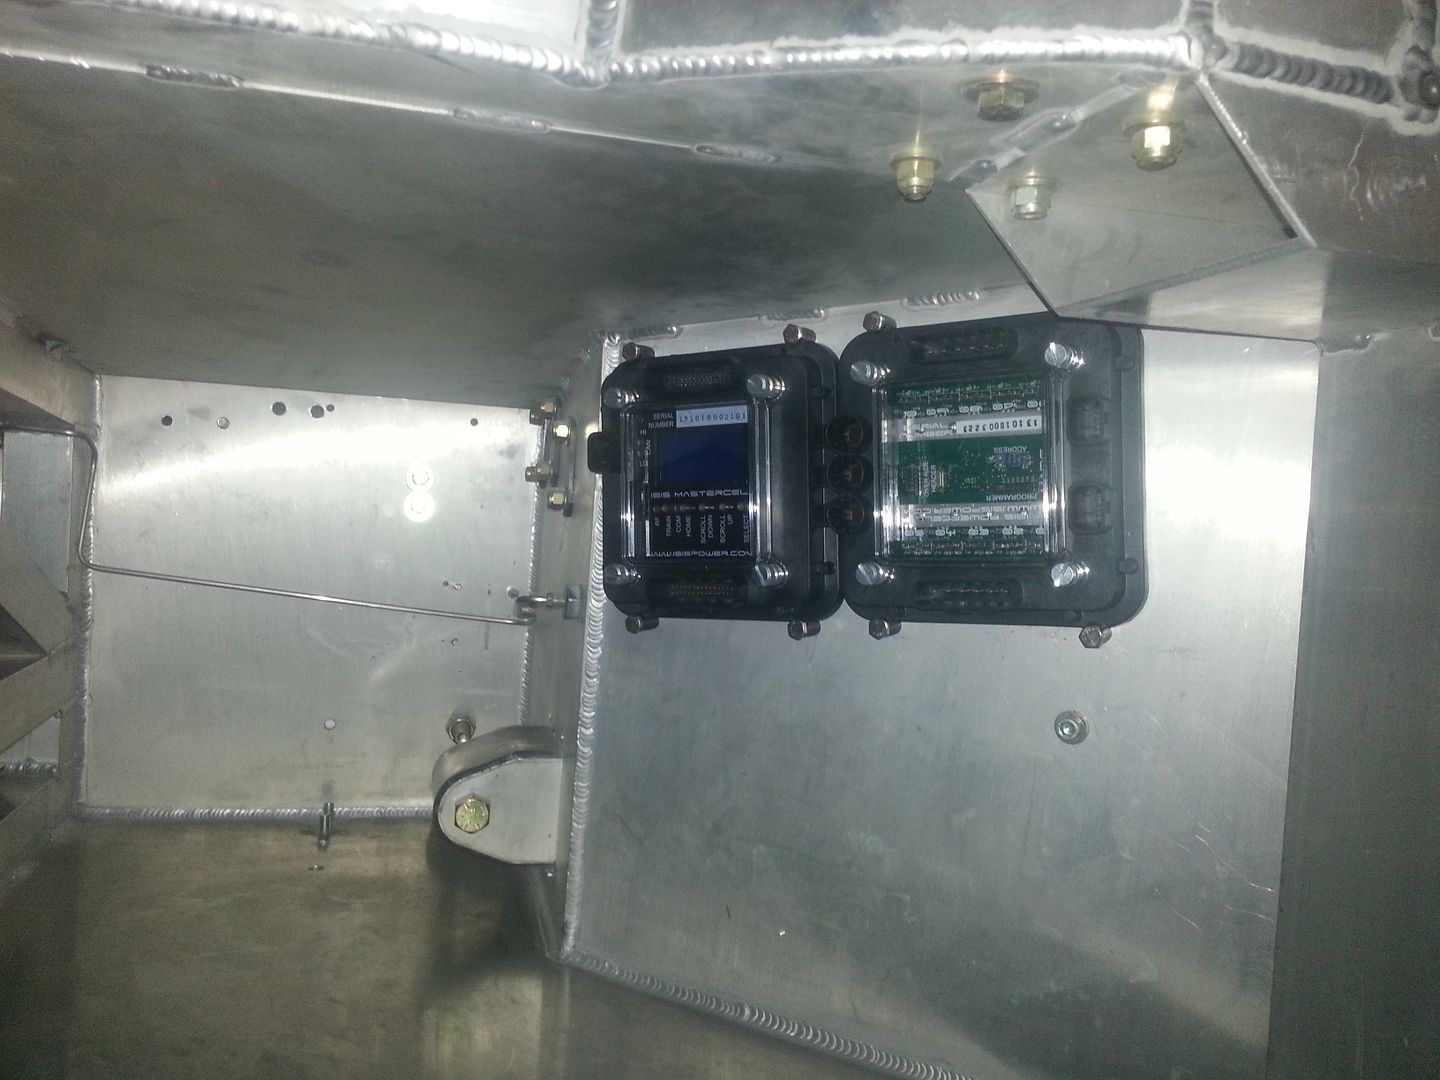
Decided to mount these guys on passenger side. Reason is if you need to diagnose a break down on the side of the road, I would rather be doing it on the sidewalk side than traffic, and the steering column in your way too. So all wiring will be on right side.
I bought this stereo for another car 3 years ago. Ended up no way to install in that car, and now my last 3 builds either! IT IS GOING IN THE SLC!! :thumbsup: Have to cut the beam behind the dash though. Will be bending up some 1.75 dom though and tying it into the upper bars as well. It will be just as strong if not stronger when done.
Lots more will be happening to the dash, this was mearly a test fit and so I could see how much of dash needs to come out.

Been fixing and polishing other stuff too.
Heres a few pics.
Parking brake bracket. Was very simple to make. Out of 1/4 plate steel. Will drill and tap into upright 2 more bolts, should be plenty strong. Pic also shows cable attachment, but need to make brackets still.


Battery box for gel cell battery. Mounting in front for better weight dist. and it is just ununsed space. Havn't decided to put remote post in front or rear yet.

Decided to mount these guys on passenger side. Reason is if you need to diagnose a break down on the side of the road, I would rather be doing it on the sidewalk side than traffic, and the steering column in your way too. So all wiring will be on right side.

I bought this stereo for another car 3 years ago. Ended up no way to install in that car, and now my last 3 builds either! IT IS GOING IN THE SLC!! :thumbsup: Have to cut the beam behind the dash though. Will be bending up some 1.75 dom though and tying it into the upper bars as well. It will be just as strong if not stronger when done.
Lots more will be happening to the dash, this was mearly a test fit and so I could see how much of dash needs to come out.

Been fixing and polishing other stuff too.
Finally realized I will need to move the ISIS cells down abit for the heater install.
Scratch above post. I will be mounting ac/heater unit length wise fully back into passenger footwell. Nobody says it has to go width wise. ")
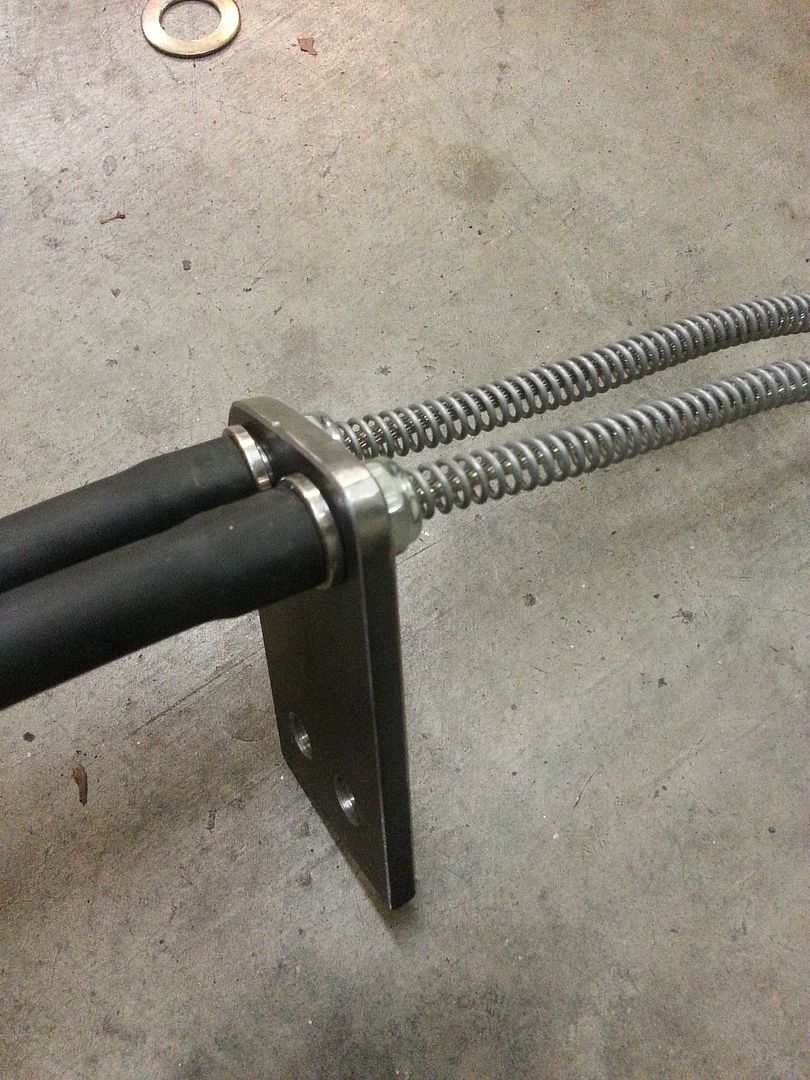
Will be making new rear pushrods and rear toe bars out of 7075 7/8" hex alum. Strong, easy to turn while under pressure, and gain back more droop. Am only getting 1.75" droop from ride height with current set up. Fine for race car, not so much for a street car negotiating angles and driveways. Little grinding here and there and the new rods should get me the full 2.5" I have calculated.
Ratio appears to be 1.5 for shock travel to tire travel, so setting shock at sweet spot should give 2.5" more travel in compression, and 2.5" in droop.
More parking brake fun today. I will be running the brake handle in the middle (offsetting seat slightly to compensate, maybe 1-1.5") so will be running cable through same channel as shifter cables.
Both upright brackets made now and calipers mounted. Since openng for shifter cables is offset, and I had equal length cables, I routed the cables a little differently on each side to compensate and meet perfectly at the entrance of the tunnel. Got the bracket made to hold both cables and will be attaching to frame crossmember via riv-nuts. Bracket is 1/4" steel.
The cables I have will be merging inside of the tunnel, there is no room to use brackets to hold them together. Will be cutting off the ends and tig welding the 3 cables together, one for each rear, and one heading forward to shifter. The lines will not be independantly adjustable, but adjusted as one at the shifter. Weld section and cables inside of tunnel will have a rubber sheath to make sure there is no chaffing of the shifter cables.
All in all, a good feet of McGuyverism!
Pic of bracket. More pics of weld section and bracket mounting in a day or two.

Checking to see how many have been lucky in pulling a body with windshield installed and NOT cracking it? To do what I need to do I really need the body off.
I do have the pull cutters and such to remove windows and have done so without breaking them before, but, with the wicked curve of the SLC one I know I am rolling the dice!
I do have the pull cutters and such to remove windows and have done so without breaking them before, but, with the wicked curve of the SLC one I know I am rolling the dice!
Checking to see how many have been lucky in pulling a body with windshield installed and NOT cracking it? To do what I need to do I really need the body off.
I do have the pull cutters and such to remove windows and have done so without breaking them before, but, with the wicked curve of the SLC one I know I am rolling the dice!
I've done it successfully twice. Keep the body well supported and try not to flex it at all. Having the tires off helps for clearance and make sure everything is disconnected from the main body.
Thanks Allan. Do you mean successfully twice after many breaks, or you are batting 1000 with twice? Hahaha.
Thanks Allan. Do you mean successfully twice after many breaks, or you are batting 1000 with twice? Hahaha.
Thankfully it's 2 for 2 since it's an expensive windshield.
I went through the middle too with my e-brake cables. It's a squeeze, but you can get the shifter cables under the e-brake assembly if you route them right.
Thankfully it's 2 for 2 since it's an expensive windshield.
Just checking. Lol. I think I will try to pull it first (I know, even more dangerous) but someone didn't take alot of time masking the rubber trim around it and want to replace it also. Since I will be repainting, you can mask that trim very well if done right, but it is never 100% unless you paint under it imo.
So Fran, how much for a windshield? lol.
I went through the middle too with my e-brake cables. It's a squeeze, but you can get the shifter cables under the e-brake assembly if you route them right.
Got a pile of parts waiting for me when I got home, excited to get the brake cables wrapped up, and Oregon decides to have a heat wave and it's 92 in the garage. Ugh.
Ya, looks like there is plenty of room for just the cables to go through. I decided I better make each cable adjustable via either a balance bar or keeping adjusters on each line, so that will have to happen once past the tank inside.
Further solidifying my decision to rip car down to nothing and essentually start again, is the steering column. New one came today simply so I could add back in the tilt and telescope functions that had been removed from existing column. When I went to remove the existing one, the output shaft was very loose. Finally got it out and started playing with output shaft, and low and behold pulled the rear section off and out fell all of the bearings from the housing.
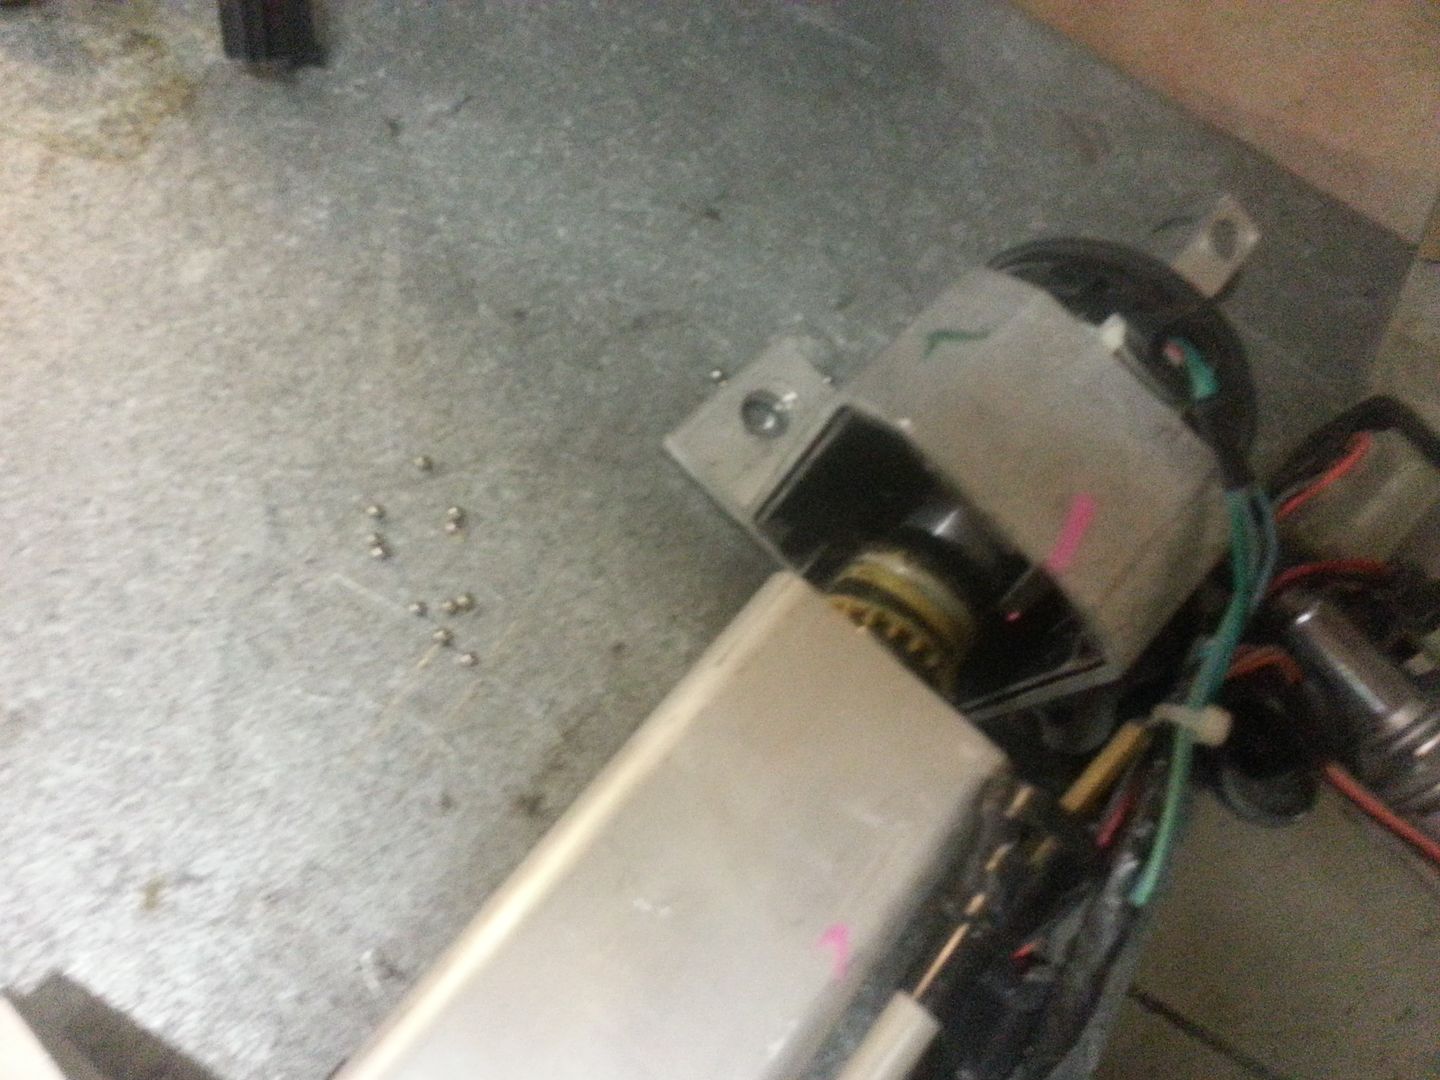
Atleast I have a spare now in perfect working order with all functions intact. I removed tilt motor and will be rotating and making a new bracket for it so it does not interfere with pedals or foot room at all. Pics as I get to that project. I have about 6 micro projects going on at once on this thing right now. :thumbsup:

Atleast I have a spare now in perfect working order with all functions intact. I removed tilt motor and will be rotating and making a new bracket for it so it does not interfere with pedals or foot room at all. Pics as I get to that project. I have about 6 micro projects going on at once on this thing right now. :thumbsup:
Similar threads
- Replies
- 5
- Views
- 770