
You are using an out of date browser. It may not display this or other websites correctly.
You should upgrade or use an alternative browser.
You should upgrade or use an alternative browser.
Scotts build thread
- Thread starter Scott R.
- Start date
Dang brother!
Thanks everyone. I have never had to build a full sealed headlight before, so I am very happy with the finished product. Still need to work out a bezel for the projector and make tabs for the projector mounts, but it is very close. Need to finish front clam before I can really move further on them to glue lens on and aim projector.
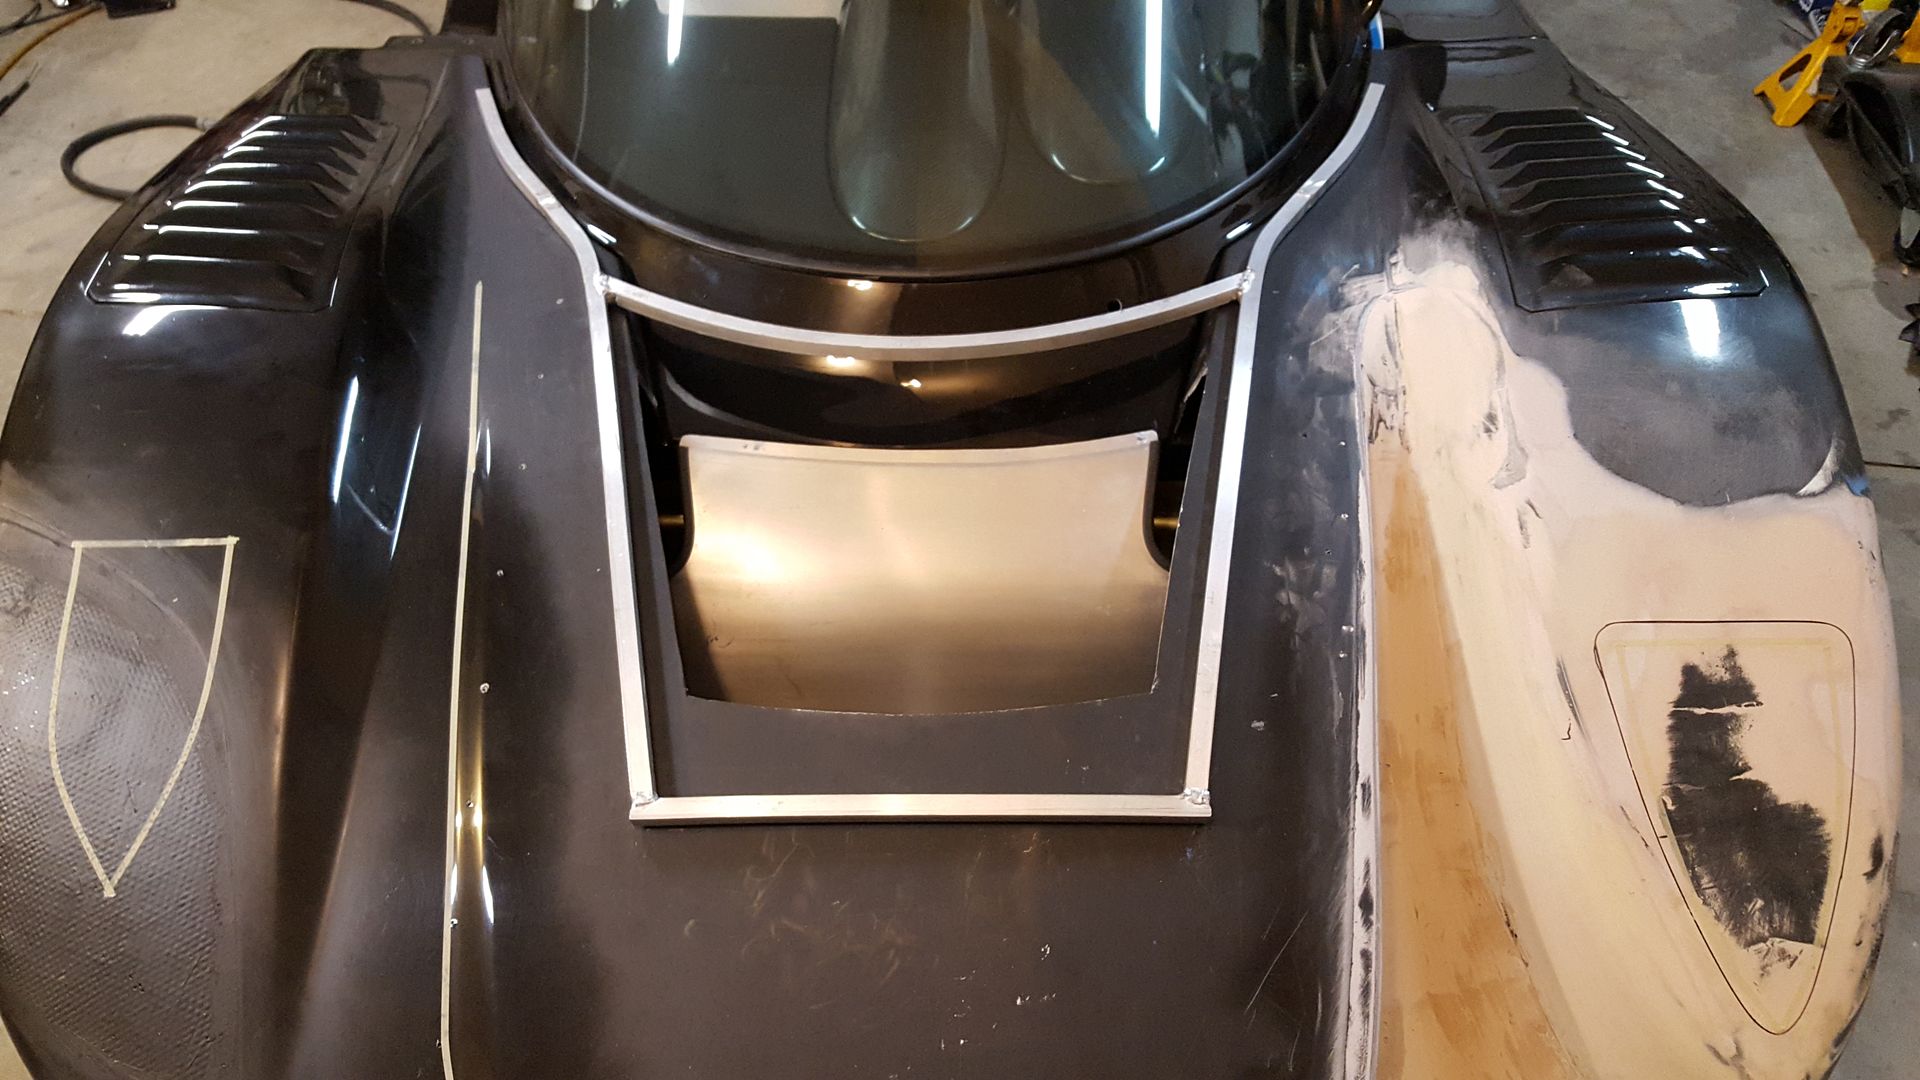
Todays project is back onto the clam. Making an alum frame to strengthen it back up. Got the frame made very quickly, and ready to bond in. It will give a place to hook two more gas shocks mounted transversly to work with the billet hinges I have. Transverse mounting of them should make the clam very steady going up and down, and fastened to the alum frame, will make them lift on the frame, not the clam itself. Shooting for a one person, two fingered operation of the front clam. Oh ya, without adding tons of weight! Frame and mat and resin should come in about 7-8lbs. Not bad considering.
Upper cross bar is to add some torsional strength, but also a mounting point for the fin arrangement that will fill opening. Plenty of room still for wiper behind it, and the screw in tow eye in front of it.

Scott, beautiful work with your headlights! Question, do those projectors do high beam as well or are you nixing the high beams?
Also, what is the difference between "structural type mat" vs the normal weaved or chopped commonly available?
Thanks Mark. The projectors I am using have a solenoid in them that drops the cut off line when high beams are activated. So you can get away with one projector, and get both low and high beams out of it. I am using 55w ballasts and 55w 6k color bulbs. Most are 35w. So basically I connect the solenoid wires to the high beams wires in the wiring, pretty simple.
Found them on ebay for like $60 and they take the H1 bulb style and 2.5" lens.
The mat I am using has random chop on one side, and straight linear weave on the other. Doesn't do sharp corners very well, but very strong and you can line the linear weave up with the needed strength axis to take further advantage of it. I do not remember the weight, but it is pretty thick. 2 layers of it and then some bondo to smooth out, and you will end up with about 1/4" thickness, which seems pretty consistent with the thickness of the original body work.
Got the alum frame installed and a few days to let it dry. My before test showed I could lift one side of the hood 15"(!!!!!) before the other side would lift up at all. Now I cut alot out of the center, so it was way less strong than original. Mine was twisting soooo much, I was fearing it would just rip the center apart.
Now, I can only get about 3" of lift out of one side before the other starts to lift. Huge improvement! I now have a place to solidly mount some gas lift shocks to the frame itself, so with those helping lift on frame, I shouldn't have any twist when trying to lift it open. All hinging placement and lift shock placement figured, just need to get all the parts done and ready.
Now, I can only get about 3" of lift out of one side before the other starts to lift. Huge improvement! I now have a place to solidly mount some gas lift shocks to the frame itself, so with those helping lift on frame, I shouldn't have any twist when trying to lift it open. All hinging placement and lift shock placement figured, just need to get all the parts done and ready.
Coming along. I think I'm going to add some fins inside the channel, like the white piece.


Coming along. I think I'm going to add some fins inside the channel, like the white piece.
I don't know squats about this, but that front looks like it would keep the front end down and stabilize side to side movement. Headlights are going to look great. Not bad for a northwest boy.
Thanks Al.
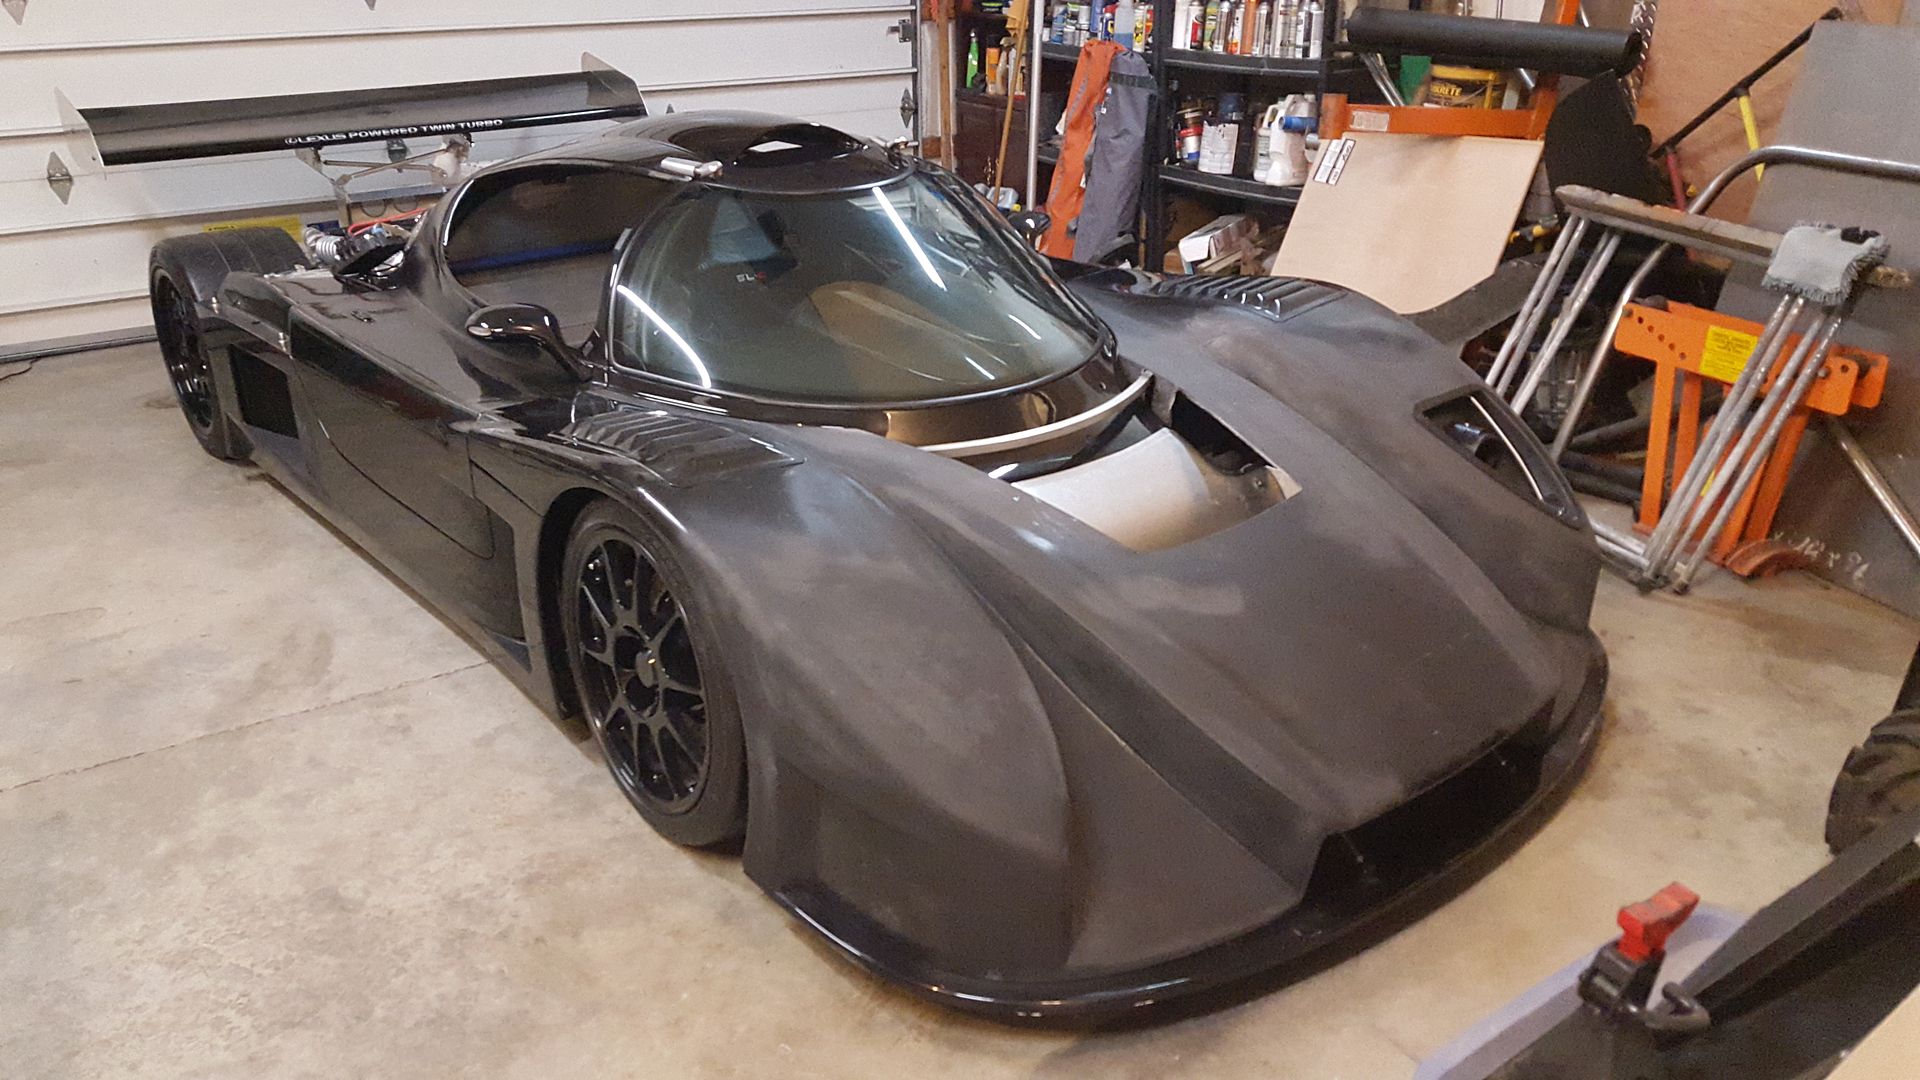
I think I may have a cure to eliminate such a high pressure and resistance in the "pinch" of the upper fender. With adding that mid wing, it will add to downforce surface area, and redirect the air that would have also funneled into the "pinch" over the pinch area and should smooth out the flow coming out of that pinch area down the side of the windows. Which in turn may add cleaner air to the wing.
In other words, even more downforce, yet took abit off of the high pressure resistance that would have created some drag. I knew there was a reason I kept seeing this type of wing in that type of channel on Ferrari and others.
I do have a pro driver that will test it all when done. Since there isn't another SLC in Oregon to compare times to, we will just have to look at track times and comparable cars at PIR or ORP here in Oregon. Thats abit off timewise though.") Lots more work to do!
Lots more work to do!
I think I may have a cure to eliminate such a high pressure and resistance in the "pinch" of the upper fender. With adding that mid wing, it will add to downforce surface area, and redirect the air that would have also funneled into the "pinch" over the pinch area and should smooth out the flow coming out of that pinch area down the side of the windows. Which in turn may add cleaner air to the wing.
In other words, even more downforce, yet took abit off of the high pressure resistance that would have created some drag. I knew there was a reason I kept seeing this type of wing in that type of channel on Ferrari and others.
I do have a pro driver that will test it all when done. Since there isn't another SLC in Oregon to compare times to, we will just have to look at track times and comparable cars at PIR or ORP here in Oregon. Thats abit off timewise though.
Lots more work to do!Does anyone know the weight of the original front end? I can still one hand press the whole thing over my head a few times, so I am guessing i am about 70lbs right now.
In a full structural mat hand laid piece with no bondo needed for finishing though, it would shave off ALOT.
In a full structural mat hand laid piece with no bondo needed for finishing though, it would shave off ALOT.
Last edited:
That's why you need to take what you have done and make a mold
That's why you need to take what you have done and make a mold
Finally decided to do it. Materials are cheap to make mold, then make myself a lightweight version. So at some point, this one will be up for sale I'm guessing.
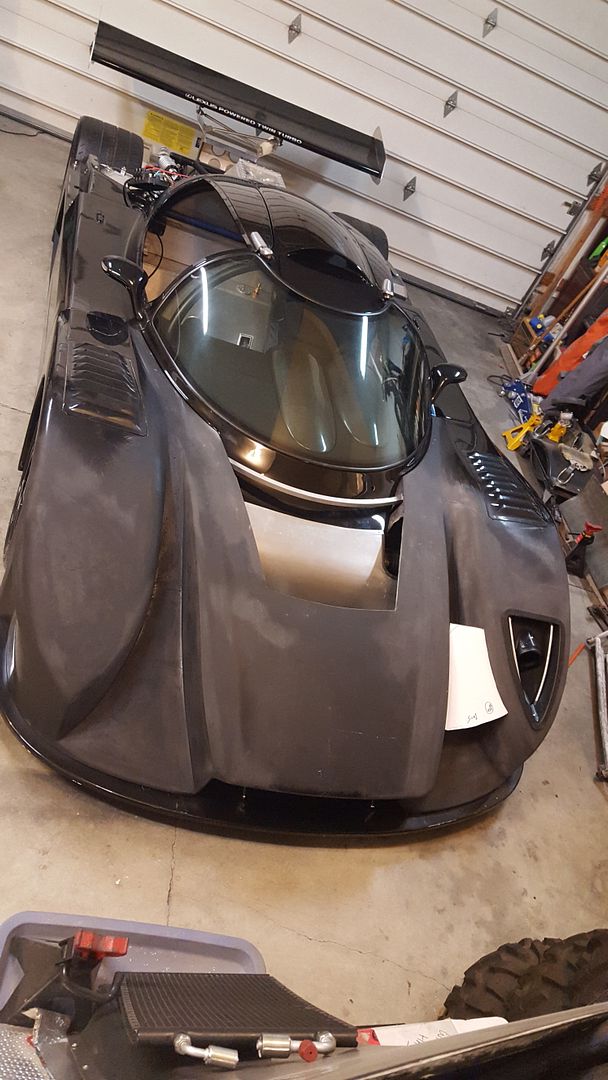
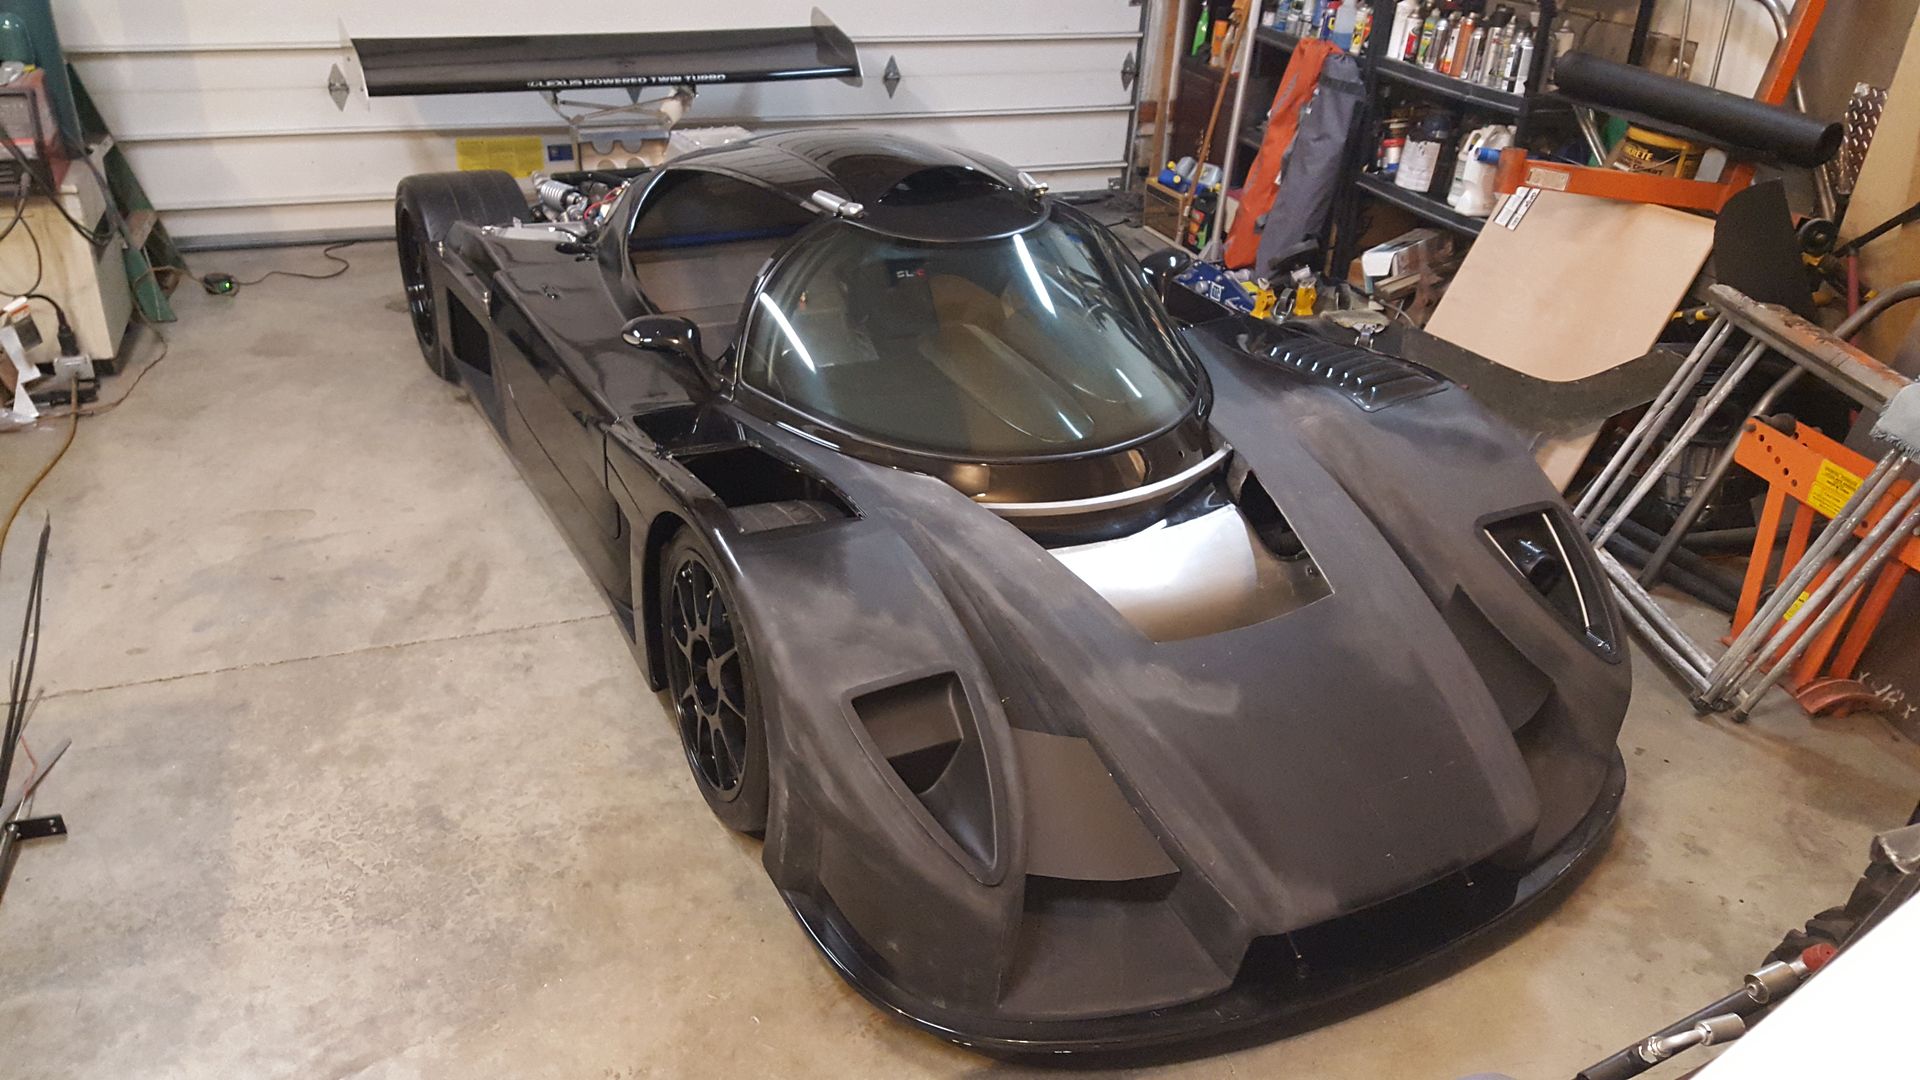
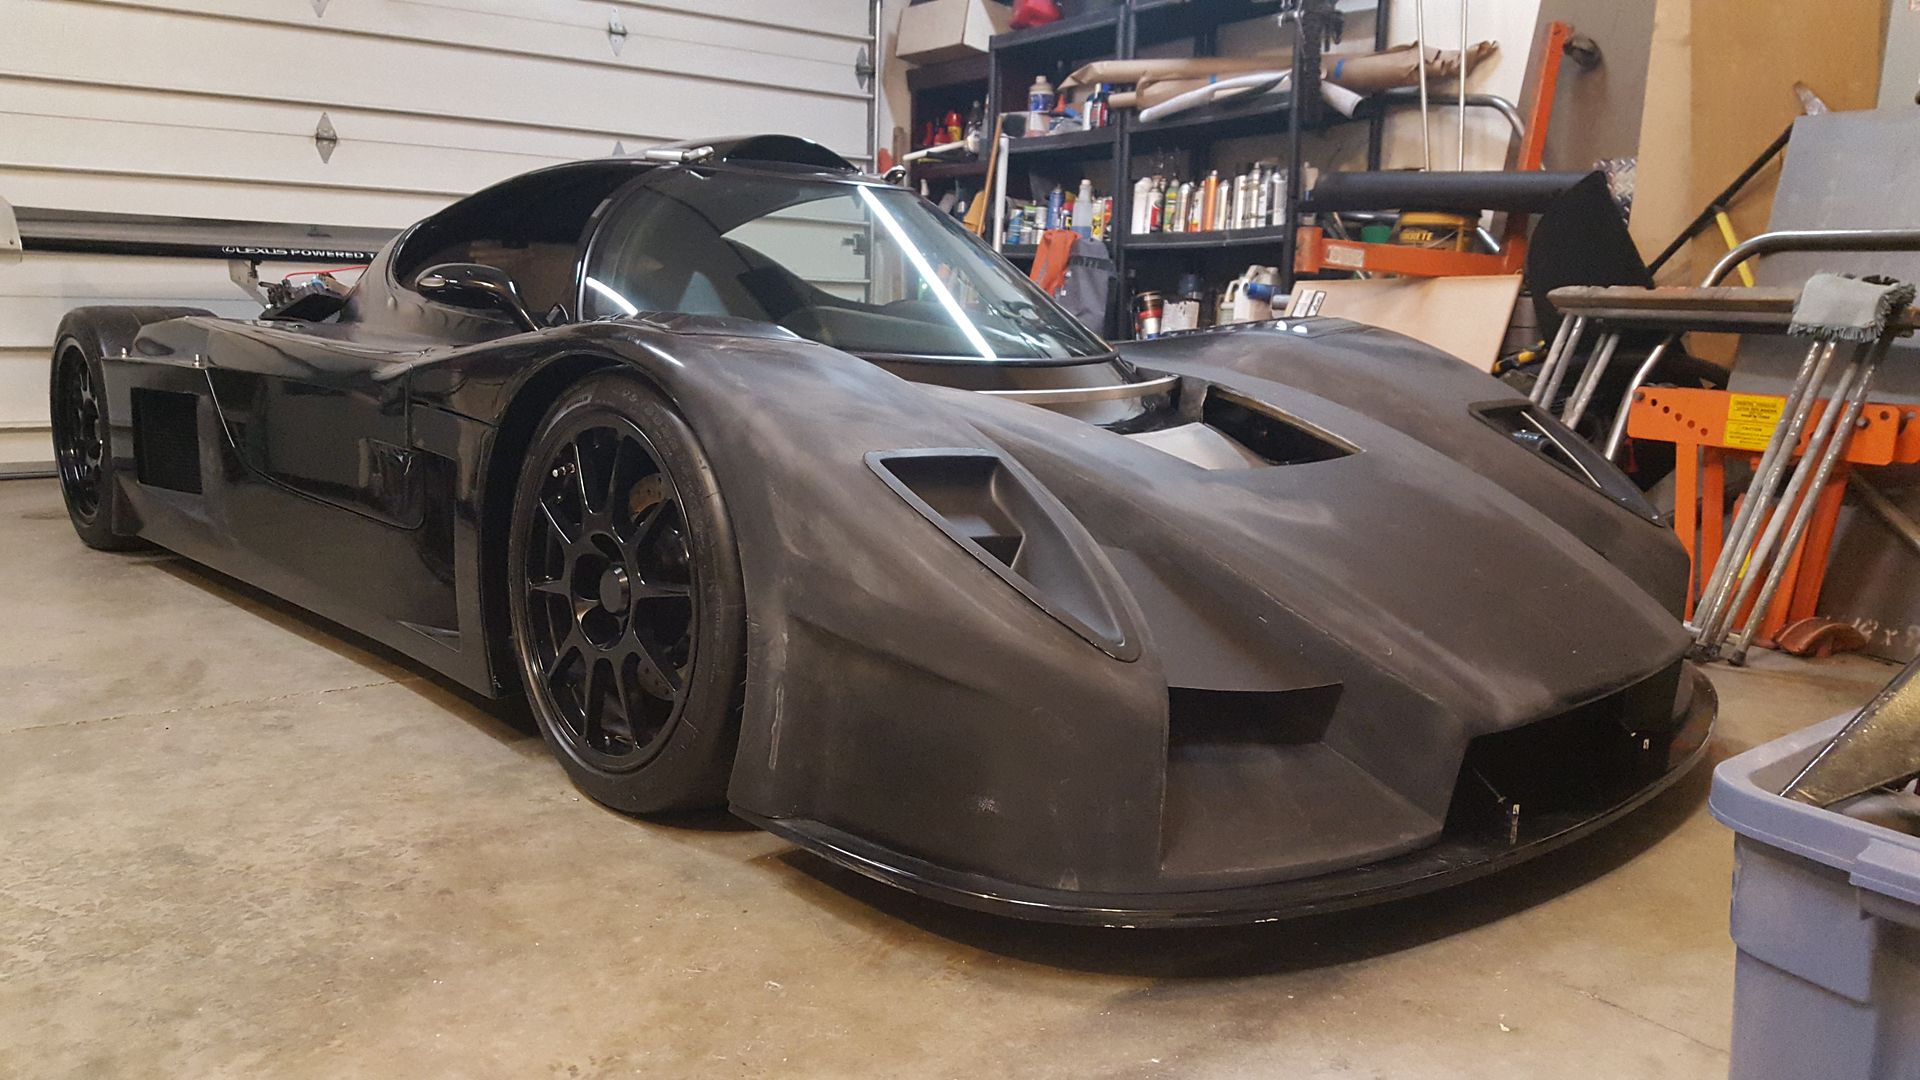
Seems like a good way to end the day. Mid wings are just thin mock up, but I think it looks great with them and really wraps up the front. Will make thicker and wing shape in final. Design wise it is very close to done. Exceeded my expectations.
Headlights are also just set in opening. They will mount from underneath, so the mount flange makes them look bigger than they will finish at.
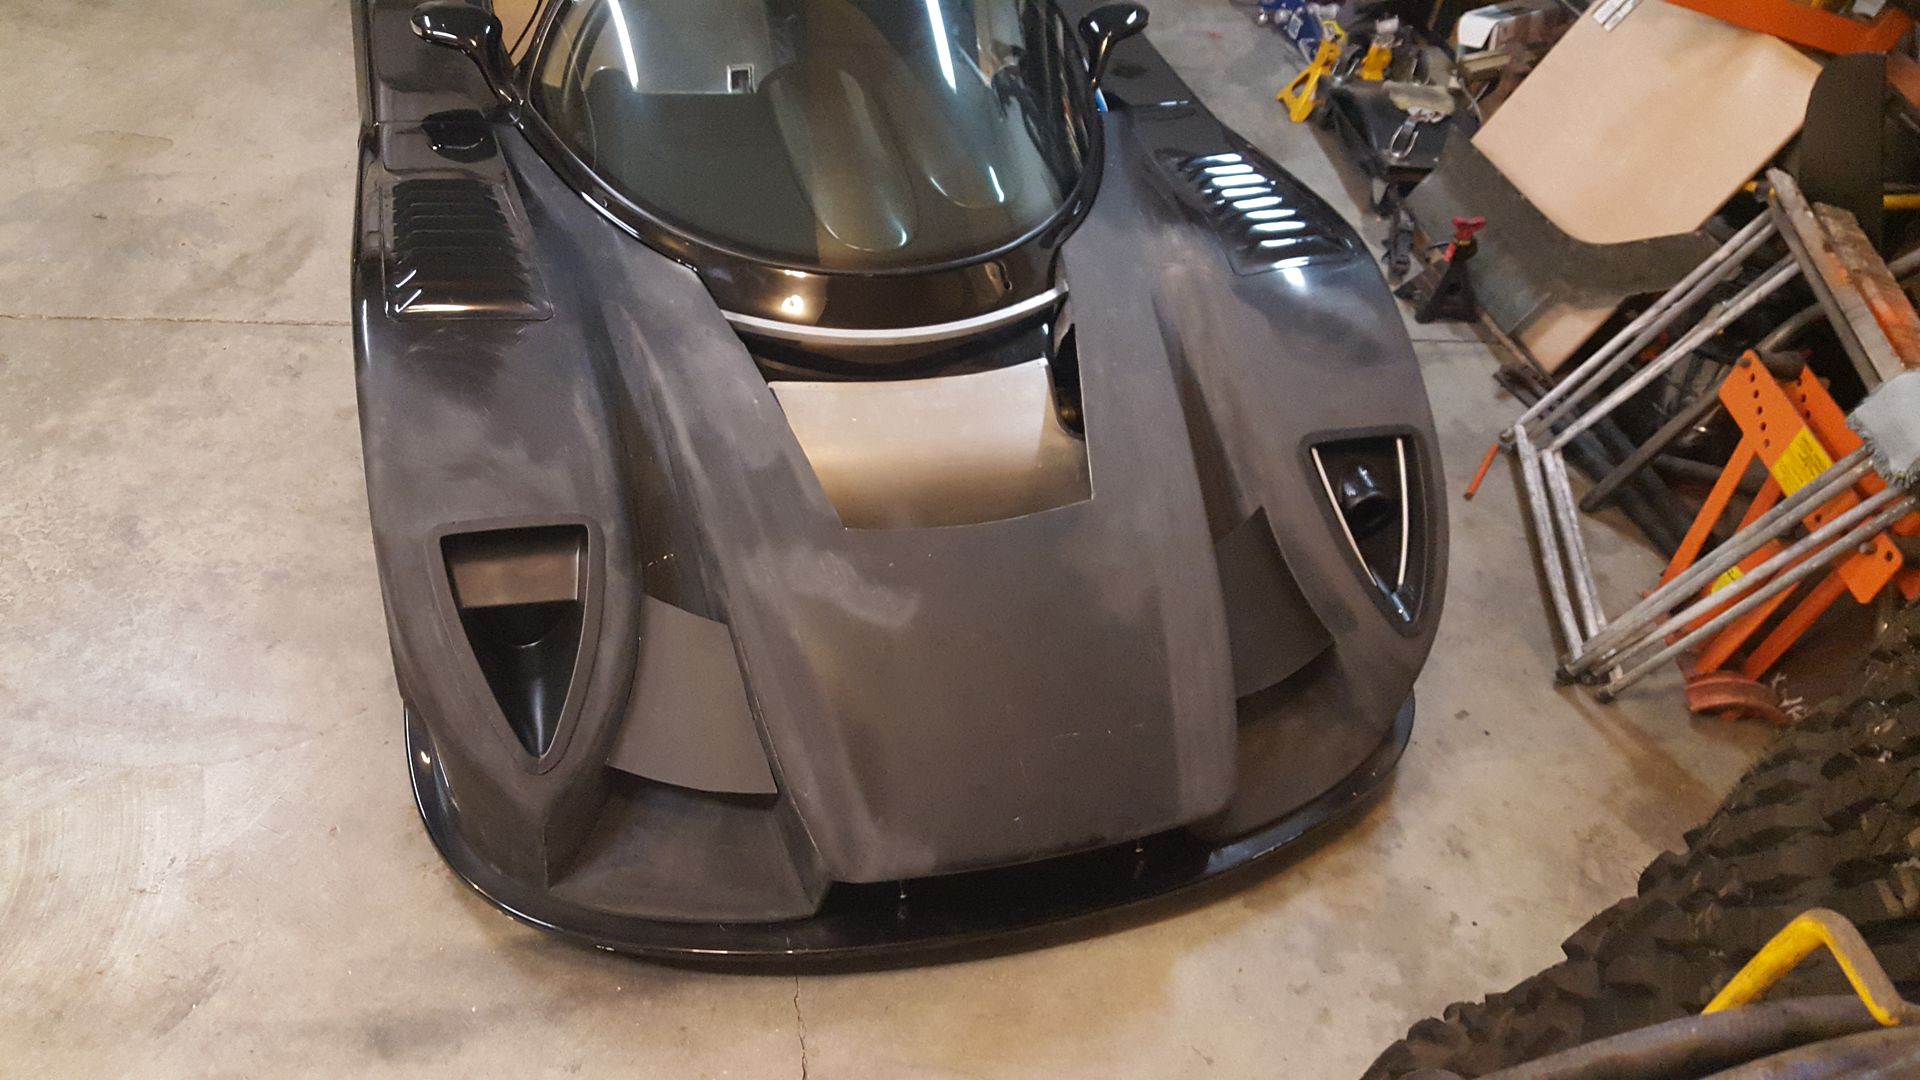
Now what to do with wheel well venting. The original style doesn't really match the new look. Half tempted to just leave them open.

Headlights are also just set in opening. They will mount from underneath, so the mount flange makes them look bigger than they will finish at.


Now what to do with wheel well venting. The original style doesn't really match the new look. Half tempted to just leave them open.

Check out the fender vents on a Saleen S7. I have always loved the look and I bet with your talent with glass and design, you could come up with an even better variant.
Thanks Ken, for the idea. I think something a little smoother with the body line should do the trick.
Wasn't sure about the winglets at first but you were right they look great.
Every time I look at the radiatoropening area I feel it should be wider. Most images, you can follow a natural line about 6 -9" wide up off each side of the new valleys you made, this way they could be wider as well
My question is for strength and possibly for appearance, how would things look if you used double nostrils instead of a single opening.
My question is for strength and possibly for appearance, how would things look if you used double nostrils instead of a single opening.
Last edited:
Wasn't sure about the winglets at first but you were right they look great.
Ya, it took me about an hour also. Now that I look at it, it really did need it to add detail (and function) to it. They will have to be molded as a separate part though. No biggy.
Every time I look at the radiatoropening area I feel it should be wider. Most images, you can follow a natural line about 6 -9" wide up off each side of the new valleys you made, this way they could be wider as well
My question is for strength and possibly for appearance, how would things look if you used double nostrils instead of a single opening.
As far as the drop section dimensions, I am maxed out on the size it could be made without moving rads to the rear and being able to turn the front tires. Either way, it's not changing now.
The alum frame I made makes the front plenty strong, so no worries for that. I have thought of the possibly doing fully formed rad air exits, but am still liking the alum fin idea too. Hoping to get doing whatever I am going to do there this week though.
Similar threads
- Replies
- 5
- Views
- 771