Scotts build thread

So it is final, headlights are going the way of the wind. They were not going to be dot compliant, which obviously wouldn't work in a product atmosphere, but could have posed a problem with titling the car.
After many weeks of searching for just the right dot/sae headlight housing, found that Hella makes a 60mm sealed projector (original ones are 90mm). Unfortunately, you have to have 4 of them since they do not have a hi/low combo projector.
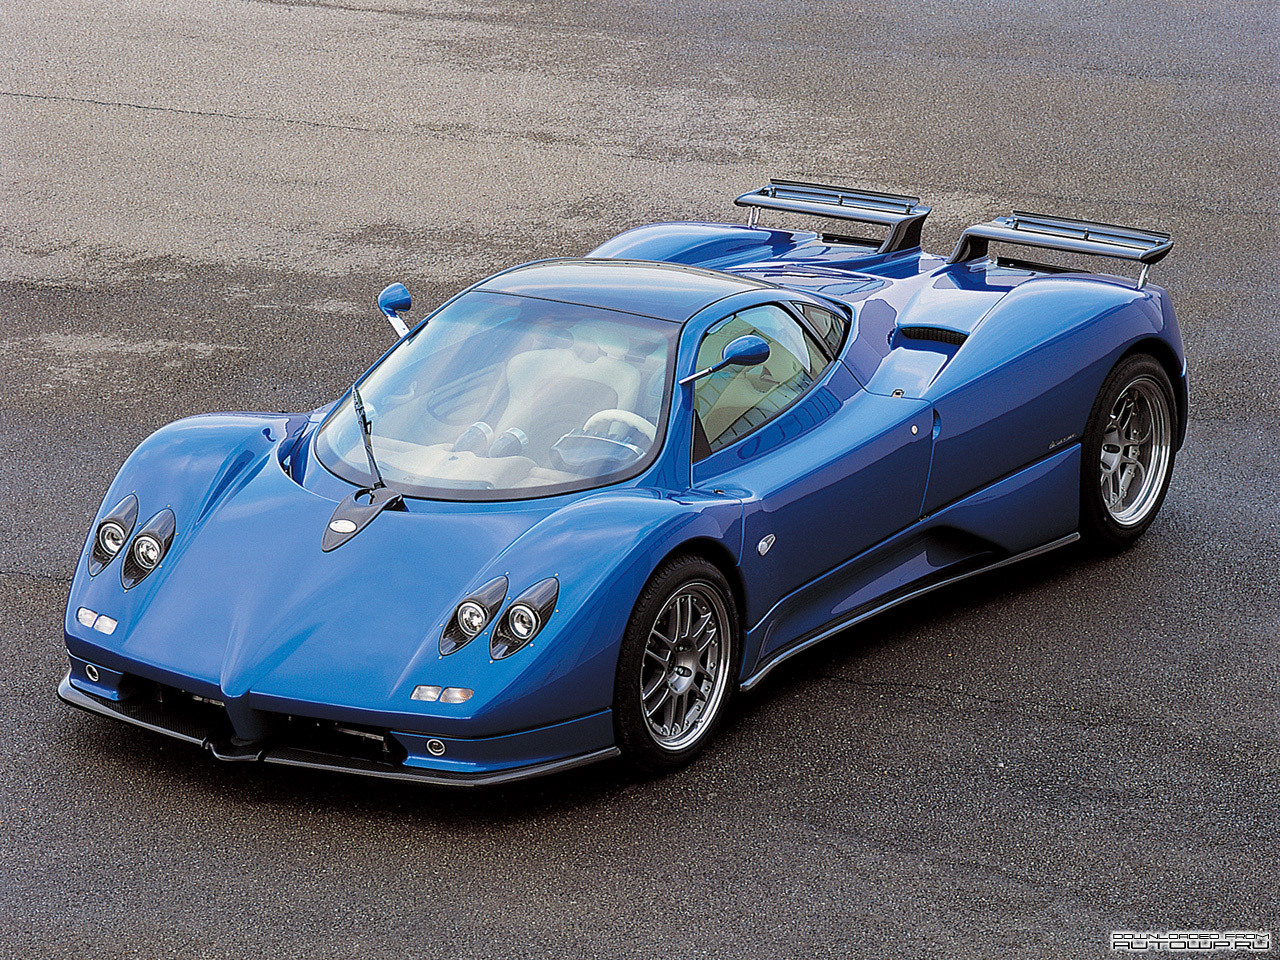
Design process has begun, and projectors coming in tomorrow. I am 80% sure I will be doing an install similar to how the Pagani's and TVR's and FXX install them with no lens cover. It will really clean up the molding process, and eliminate the need for a separate lens and worrying about how to fasten it.
On my searches though, I did find other suppliers for led and hid small dot projectors, but price is a pretty good commitment. They could be optional though.

Pagani with our original 3.5" style hellas

autowp-ru_pagani_zonda_c12_s_7-3_32.jpg


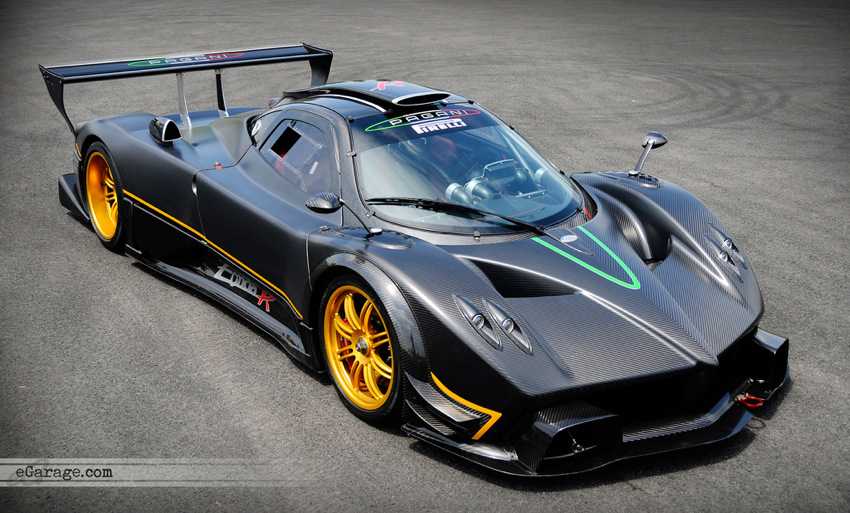
Zonda R which appears to have the 60mm ones

Pagani-Zonda-R.jpg


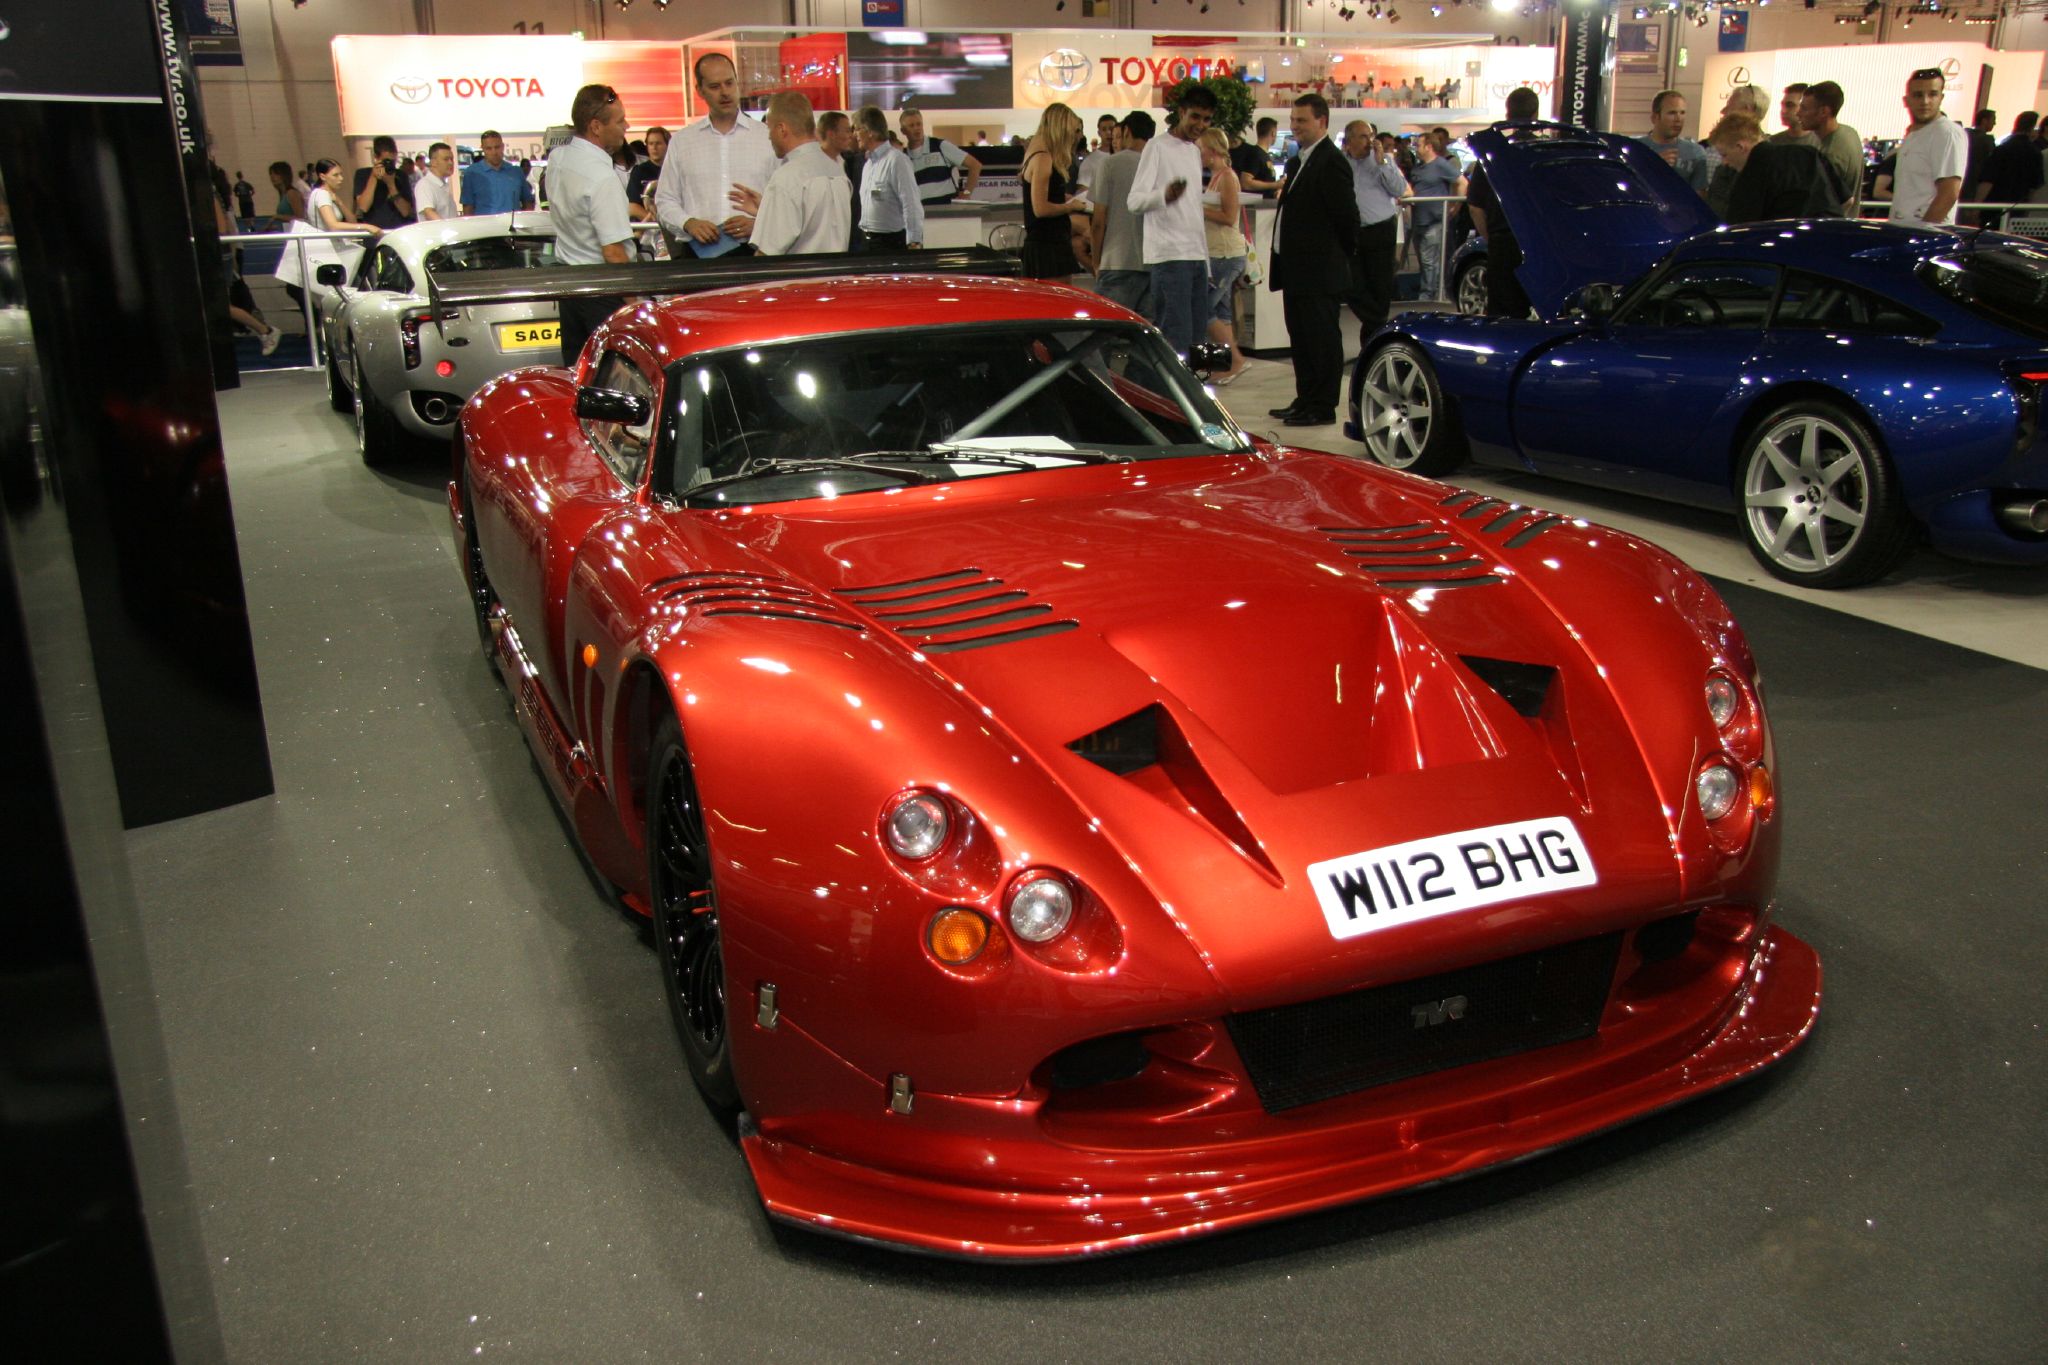
TVR Speed12 with 90mm

Cerbera_Speed_12.jpg


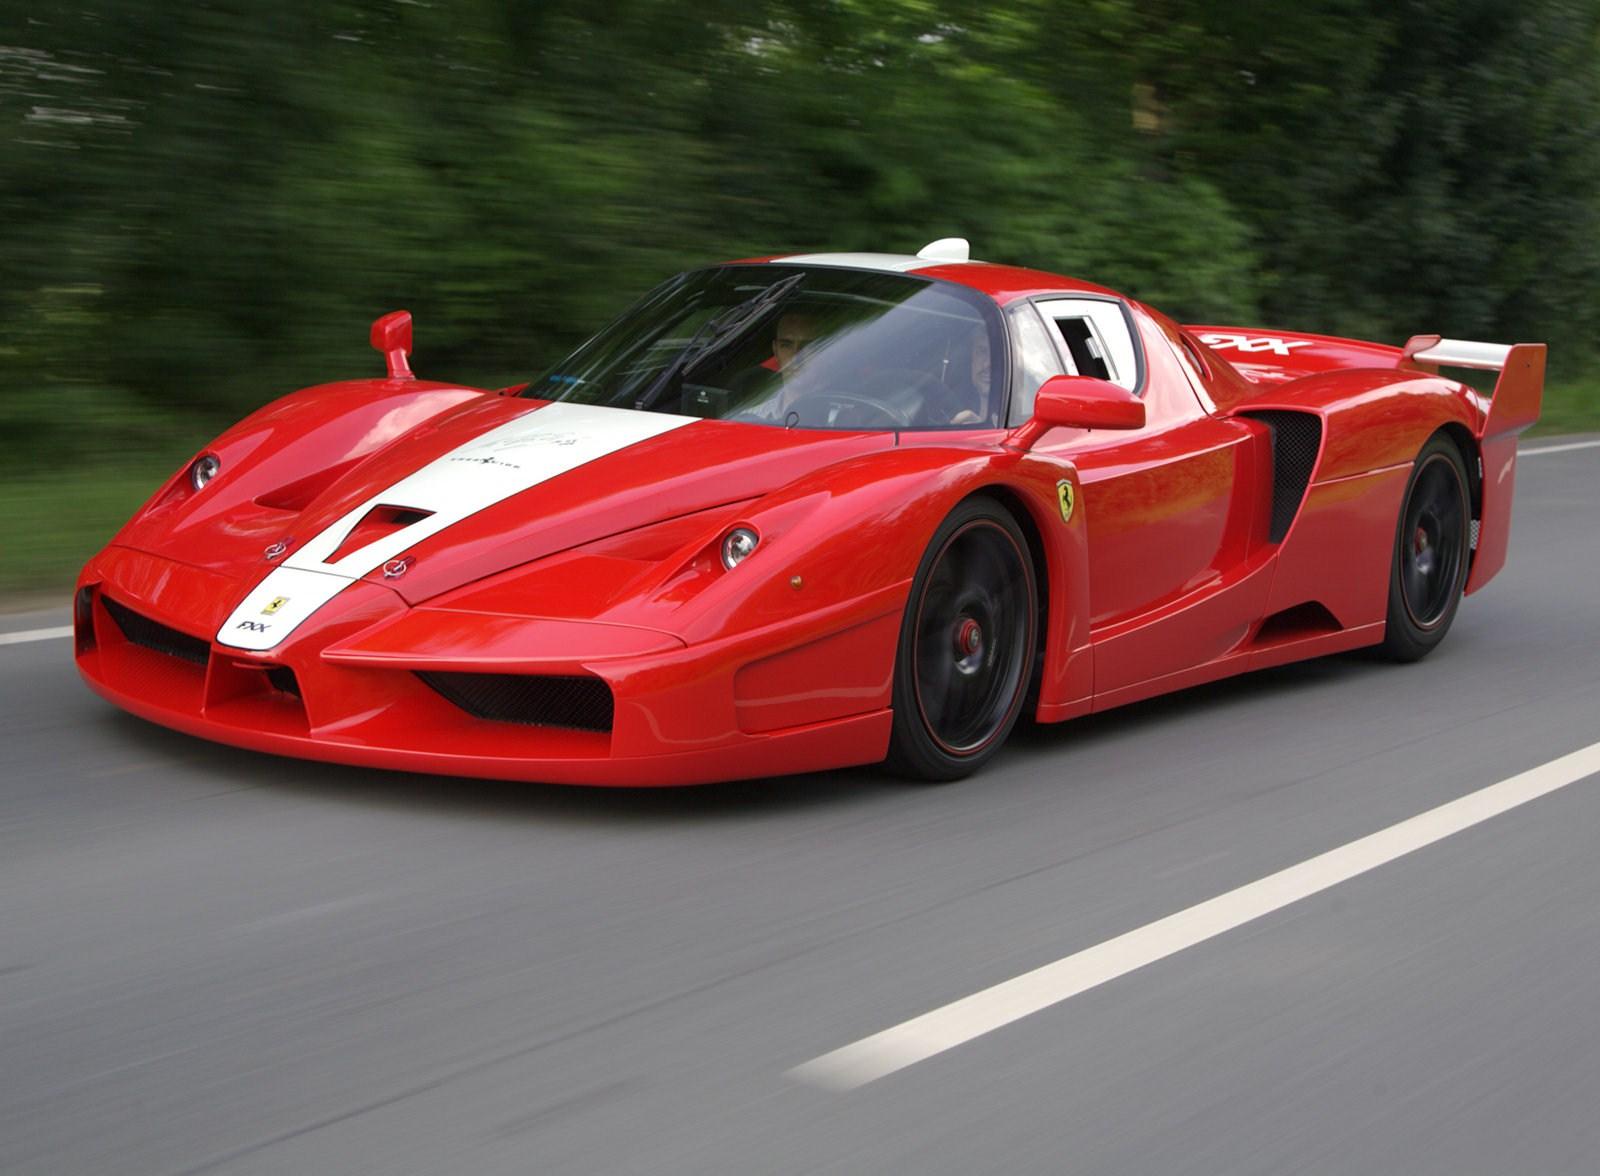
Fxx which appears to have a custom dual hi/low housing, but scale I would guess to be a 2.5" (60mm) lens.

Edo-Ferrari_FXX_2008_1600x1200_wallpaper_01.jpg


Pretty excited about this. Easier, cheaper, less time for mold and install, plus taking a styling flare from some of the most beautiful cars in the world isn't all that bad either!
 
BTW- the 60mm hellas are all aluminum and glass. So, ditching the halogen bulb for an hid one is an option. I will run hid on both hi and low. Lighting should not be a concern at all!
 
The 60mm Hellas are deeper than the 90mm modules. Hope you have room back there!

Looking forward to seeing the pics of the dual 60s installed.
 
Looks like the 60mm is approx .7" longer. Since they will be splitting the plane of the body, I should have room, with beam height in the 20-21" range from floor. My car is pretty low, so around 22" on normal ride height.
 
Finally dry enough (and grew the balls to lift, carry, and install by myself!) to set on car. Looking pretty good in my opinion. Working on different types of winglets currently.
So with new headlight design, and new wings, it still will not look like these pics. Ugh.


Hmm, just a quick first try on new winglets, and I am liking it! I like it hiding the brake duct holes and more substantial ( ei more effective)than the first version. My drl's will relocate to the front rim of the winglets once headlight work is done.


Larry L.

Lifetime Supporter
"...new winglets, and I am liking it!"

Likewise!!! :thumbsup::thumbsup::thumbsup::thumbsup:

The original design looked darned good as well, but, for some reason these look even 'gooder'. :pleased:
 

Larry L.

Lifetime Supporter
Will there be an issue of highly compressed air near the "back" of the winglets between the wing and body?

I was wondering about that too...but, the winglets appear to be parallel to the body surface beneath them...so, I doubt it would amount to a huge issue if any at all.

A slight 'duck tail' at the rear of the winglets ought to deal with that if there turns out to be a problem...or perhaps adding 'fender vents' in the winglets from amidships back! (In fact, the latter is the way I'd choose to go...)
 
Last edited:
Already got it figured out. They do run nearly parallel with the body line underneath. Plus, as Larry mentioned, I will be doing a "gurney" on the trailing edge to help the air have a larger area to expel. It will be shaped like Larry mentioned also (great minds think alike! Lol). I do not plan to shape the underside like a wing on this one. The smaller one a wing shape may have worked, but the size of this one and angle, I think the air will separate (a stall in aero terms) near the trailing edge underneath. So, the "duck tail" will act as a turbulance generator along with making the part look thicker also. Front edge will be about 1/2" radius, 180 degrees from top. So while it will be about 1/4" thick, it will appear 3/4"-1" thick when viewed from either end.
This makes it a very easy part to mold and make.

Having those wings as far forward as possible also will create more downforce due to better leverage also.
 
Thanks everyone for the compliments. Been alot of work so far. Rewarding though!

I am expecting the rear to take longer. It will be VASTLY different. Opening, will also be completely different too. Can't wait to get cracking on it!
 
Scott- You are hitting some real homeruns here. When your're finished you'll have something reeeeal special!!! I would love to stop by and see it on my way to Alaska in May if you around? Keep up the beautifuf work.
 
Scott- You are hitting some real homeruns here. When your're finished you'll have something reeeeal special!!! I would love to stop by and see it on my way to Alaska in May if you around? Keep up the beautifuf work.

Thanks Vaughn. I will be working out of town off and on, just let me know when you will be passing through, and can we figure it out.
 
I was wondering about that too...but, the winglets appear to be parallel to the body surface beneath them...so, I doubt it would amount to a huge issue if any at all.

A slight 'duck tail' at the rear of the winglets ought to deal with that if there turns out to be a problem...or perhaps adding 'fender vents' in the winglets from amidships back! (In fact, the latter is the way I'd choose to go...)

I should have clarified a bit more. The opening at the front under the winglets are much wider than they are in the back. The winglets do appear to be parallel to the body. The opening at the front seems to be about 2x wide by 1x tall where the back is 1x by 1x. I hope this is more clear.

I'd be concerned about a lot of pressure building under the winglets near the back side of it, which could lead to higher pressure near the front, ultimately negating 50% of the effects of the winglets.

Ok... Maybe I'm over thinking it....
 
Yup, your not really looking at it correctly. That compression is the force that transmits to the body and equates to downforce. Because of this, friction is raised. But, you can't have downforce without friction anyways no matter how good you are or computer programs.
I understand exactly what you are saying though. I cut the winglets off at the point I felt that pressure would raise to a point it may start pushing up on the bottom of the winglet. Hence the gurney flap at the trailing edge.
The design is sound though. While the Enzo was more of an inspiration than the FXX, if you look close at the front, it has even a higher ratio of inlet/outlet with nearly the same angles and winglets.
Don't forget, I also have the brake duct in there, which will be reducing slightly the ratio of air entering, to exiting out the top.

2006-Ferrari-FXX-Racing-Spa-Red-Turns-1600x1200.jpg
 
Last edited:
Back
Top