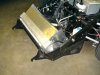
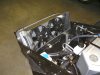
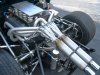
Superformance MK1 upgrades

Kevin, It's best you get yourself some art cardboard, tape or a glue gun, a scale or rule, a straight edge and a pair of sisors. Alum is .080 5051. Make a template with the cardboard. Cut the pieces from the sheet alum. Form any angle with a sheet metal break and assemble in place. Mk1 and Mk2 are different as mk1 nostril lifts out and mk 2 nostril is hinged and the arc of the hinged nostril has to be accomodated. I have attached pictures of both mk1 and mk2 to illustrate.
 

Attachments

  • P1010267.jpg
    P1010267.jpg
    48.9 KB · Views: 304
  • P1010268.jpg
    P1010268.jpg
    47.2 KB · Views: 335
Last edited:
Did you completely replace the rear sway bar? Or did you keep the SPF bar and just dump the way-wrong end links? Did you re-use any of the SPF end link hardware and just use a longer rod, or did you redo the whole thing?

What was your solution for the front sway bar? I know the stock setup consists of a simple bar with splined ends, and splined links, which unfortunately fail to grip the bar and just spin. I see you welded the end onto the bar but if you weld both ends, then you can't take the bar out for servicing etc.

So what's the deal there?

Very sharp-looking car, by the way!:thumbsup:

Mike, I made a complete new rear sway bar, Shock tower saddle mounts as original and new 16" links retaining heims and pinch mounts. Because the front bar fits in a pocket and drops out the bottom of the pan, it can be installed/removed with the ends welded in place. the front links were shortened as well.
 

Attachments

  • P1010351.jpg
    P1010351.jpg
    61.3 KB · Views: 301
Back
Top