GT-Forte GTs40 build

Ian Anderson

Lifetime Supporter
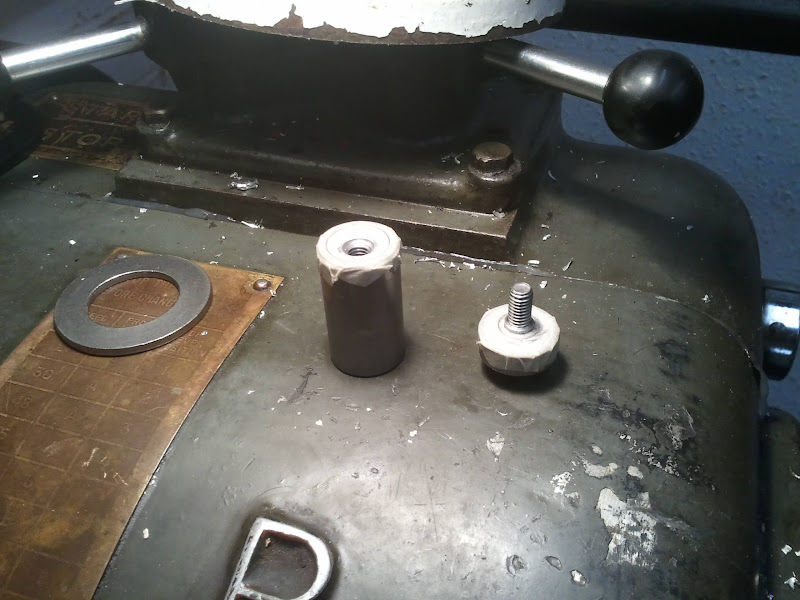
I used 2mm by 13mm stick on closed cell foam strip (from Baines)
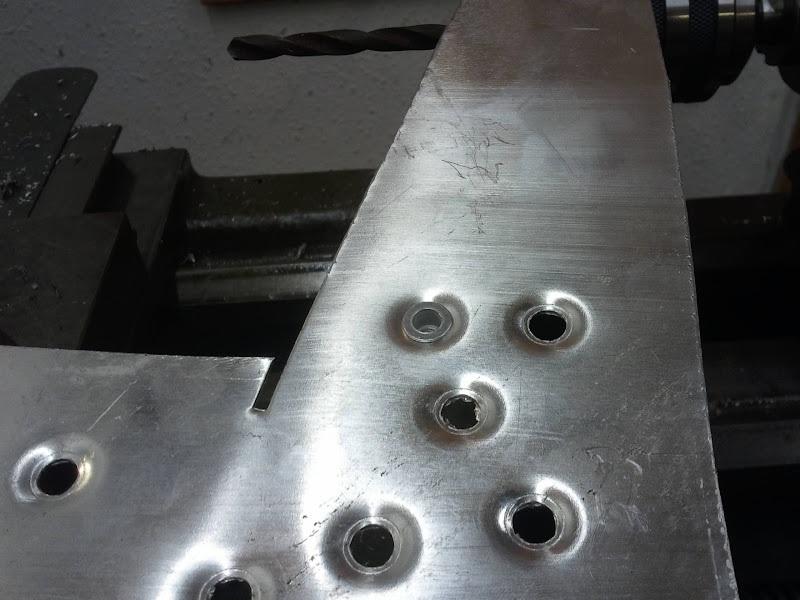
I found a belt hole punch was the easiest way to get neat holes for the bolts.
I also stuck the strip on the cover instead of the bulkhead - damn slight easier to work it on the bench than inside the car!

Sealed brillintly - up to then I did get fumes in the cabin

Ian
 
Thanks Ian, is that the one on page 93 EXPANDED POLYETHYLENE STRIP Self Adhesive (P.E.)
Or the one from page 92 NEOPRENE NON-INTERCELLULAR SPONGE With Adhesive Back (SAB/N)?

I shall add a leather hole punch to the tool list.
 
Hi David, What might happen if you make a really nice finished job of that panel is that you may have to cut a hole in it later for pulleys etc. to miss.
Mine has two panels that fix to the rear bulhead.
The 1st has a cut out for access to the engine bay that is rivetted to the bulkhead and the 2nd panel is rivnut fixed to the 1st.
I feel looking at this it may fail somewhere so I wont final fit the
2nd panel till the engines in.
Some cars have a panel / bulge where the pulleys touched.
 
David,
I would suggest leaving the space open until your engine is in and you have made your engine choice and also know whether you are going electric pump etc. Then you will know if you can use a flat panel or need to put a bump in it.

Brett
 
Good points there. I suppose how big the panel wants to be in the first place also depends on the engine.

How I mount it then also depends on how big it is so I'll leave the bulkhead it un-cut for now.
 
Slacking a little bit due to a double whammy of my son being a little bit poorly and being unwell myself so nothing done the last few days.

Anyway, another panel trimmed
2011-11-19%25252002.36.23.jpg


I have at least been doing *something* to do with the car the last few days, I've bought/ordered a load more bits.

I've already got through a load more special tools, pipe cutters, benders, flarers and some brake pipe, brake nuts/bolts, splitters and clamps. I've decided to go with plain nylon for the clamps that sit hidden inside the panelling and a few of the aluminium / rubber lined for when the brake line is visible (well visible when the front/rear clips are raised). :)

Oh I've also ordered some of my gauges, I've got a temp, fuel and oil pressure gauge (generic unbranded ones) plus a Smiths 8cyl tacho. All black dials with black rims.

Just now need to decide on what to fill the other two gauge holes with and which speedo to get. Best look up how best to cut the dash holes too...
 

Ian Anderson

Lifetime Supporter
Thanks Ian, is that the one on page 93 EXPANDED POLYETHYLENE STRIP Self Adhesive (P.E.)
Or the one from page 92 NEOPRENE NON-INTERCELLULAR SPONGE With Adhesive Back (SAB/N)?

I shall add a leather hole punch to the tool list.

Sorry David

I had a look for the invoice but cannot find it.
I called Baines and asked which to use and took their advice!

Ian
 
No problems Ian, thanks for looking.

Brett, my plan is to automate tank changeover, use a swirl pot with a level switch. Level drops enough for the switch to trigger and it'll pump from the fullest tank (with a right tank bias) and overflow/vent into the right tank. Fuel gauge will be averaged across both tanks so again it'll only need one.
 
The 3 gauges I have so far. Two different 'makes', identical gauges, even down to the instructions...

Saves me worrying about them matching ;)
2011-11-19%25252013.15.14.jpg


Also ordered a Forstner bit to cut the holes.
 
Last edited:
Didn't get much done over the w/e. Spent yesterday evening going to see RHCP, then tonight just made this
2011-11-21%25252002.31.32.jpg


(should really have photographed it before putting the tape on)

Doesn't look like much but it lets me do this
2011-11-21%25252002.32.16.jpg


So now to fit a M5 nutsert I drill a 7mm hole, deburr, screw this together through the hole and tighten. Tada one recessed hole and the nutsert sits flush with the surface.

I played about a bit with how to do it (my initial version was much simpler but deformed the sheet. :() and I'd make a few changes if I was to do it again, mostly because it could do with some radiused corners (which is why its taped and leaves a ring in the centre) but it'll work perfectly for what I want as the ring is covered by the nutsert itself.

I'll put up a plan for anyone else to copy if they want.
 
I've got a temp, fuel and oil pressure gauge (generic unbranded ones) plus a Smiths 8cyl tacho. All black dials with black rims.

Hi David

Something to watch out for on the gauges is the bezel. I understand some of the 'V' Smiths style bezels may fail IVA due to their 'sharpnes'! I can't really tell from the photos the profile on the ones you have, but if necessary they can easily be changed to 'half round' which would be fine.
 
It's something you'd hope the examiner would exercise some discretion on. eg if the car was an otherwise pass, you'd hope they'd overlook it. But if you have half a page or so of fail points (which most people do), they may add it on.
 
Just realised while looking through I forgot to mention I trial assembled the front suspension.
2011-11-19%25252002.39.12.jpg


Missing the track rod extensions (escort rack), the camber adjuster locknut and all of the nuts and bolts are wrong. Still gives an idea of how it fits together.

I also really need to sweep up the kerf!
 
Ian, Not a bad idea, I've got to see how the 165mm sphere fits in the 'gap', might be on the GT40 its never fitting in there anyway and it's all a moot point! :)

Having a little thought about it and a little google, I think I'll get an 160mm 'oasis' flower arranging foam sphere to test such things, at about £5 for 2 it wont break the bank (and if it 'passes' with 160mm it'll pass with 165mm). I'll probably get some 100mm spheres too.

Andy, I tried the countersunk nutserts and I just wasn't happy with how little they 'engaged' on the top when countersunk enough to sit properly flush. Ok so its really the underside you need to worry about as they'll be pulling 'up' but then there is very little material there and wouldn't take much to deform and start rattling. Probably depends on the thickness of panel and material you are using. I'm using 1.2mm S1C for the front outside mostly due to the ease of forming and 2mm, 1.2mm and 1.5mm NS4 for the inside depending on location, far tougher to form but also less likely to be damaged from use.

Edit: Just looked at the link and the countersunk section is 1.5mm, I'd consider 1.5mm sheet to be the minimum thickness for those.
 
Well a bit of news, I have an engine!

Or at least I've had my silly offer on an engine accepted. Slightly sorry to say its not a Ford (Sorry Brett) but it is of course a V8.

Its a ~90k early Toyota/Lexus 1UZ-FE, as stock 191 kW (256 hp), torque of 353 N·m (260 ft·lbf).

Engine, ancillaries, ecu, wiring, ignitors etc, in fact everything needed to run it bar the fuel pump for £250.

It should be pre-95 as its the early model but will need to get some proof from Lexus.
 
Back
Top