CANAMSA - SA stratch build

Jim Albright

Supporter
The panel on the passenger side covers the fluid reservoirs, the fuse box and most of the relays. I'm not yet sure what finish to use on the dashboard, this panel as shown above is sanded with 600 grit and brushed with purple scotchbright in straight lines.

Fred,
I did a black crinkle finish on my dash to avoid any sun reflections.
 

Attachments

  • 319329671_702697978184948_5368522079624982393_n.jpg
    319329671_702697978184948_5368522079624982393_n.jpg
    183.8 KB · Views: 83
Thanks foe thr responses gys

Mark H - The venting system is fairly rudimentary, the pipe into the cap of the catch can is just a push fit and is not airtight. Also, the Rover V8 has another breather at the rear of the block, you can see a small filter fitted to it next to the right hand side backstay in the photo below.

Jim A - I am considering a black finish to the dashboard. Thanks for the photo, it looks good.


1771878221586.png
 

Mark H.

Supporter
Sorry, missed that breather. Looks like you could put a PCV valve in the back of the manifold in the two bolt cover plate or maybe pipe one in at the black plug in the intake runner to the valve cover? Think you would have a cleaner running engine in the long run. Really enjoy following your build.
 
I haven't posted for a while, been busy with a non car project.

What I have done recently is confirm the exhaust fitment. I made the manifolds and silencers a very long time ago, well before I made the bodyshell.

The manifolds are made up from sections of carbon steel 38 mm (1.5") diameter 1.6 mm wall thickness mandrel bends and pipe. The head flanges are laser cut 10 mm thick. I used MIG welding process. Each header pipe is 850 mm (33.5") long (tolerance +/- 10 mm). The collectors taper to 2.5", fabricated from 3" pipe. The external pipe welds are metal finished flush. Since then I have bought a TIG welder and my fabrication standard has improved somewhat. I will not be surprised if some of the welds develop cracks in service and I may end up having to remake the manifolds. The manifolds weigh 6.4 kg (14.1 lbs.) each.

2fc8e4dbbb37.jpg


35269814fb95.jpg


96df024792b0.jpg
 
The silencer cans are 500 mm (19.7 ") long, made from 4" stainless thin wall tube, with 2.5" perforated tube inners. The perforated tube is welded to the rear closing ring and has a slip fit joint connection to the foremost ring that is welded to the collector connection flange. The silencers are filled with ceramic wool and weigh 4.17 kg (9.20 lbs.) each.

230dab89090a.jpg


10009acdbf06.jpg


e35f476d9bf0.jpg


The silencers are supported by saddle brackets with securing springs that come from a karting source. The saddle brackets are connected to mounts on a supporting subframe by an aluminum bracket and 2 rubber bobbins per silencer.

1d39aacbd379.jpg


05fba551d264.jpg
 
In one collector I welded a boss for a Lamba sensor that drives an air / fuel gauge mounted below the dash. I didn't incorporate it into the dash layout proper as it doesn't match the other gauges and may not stay on the car permanently.

89e1f7718f8b.jpg


53b7e01ace17.jpg


This last picture illustrates the outcome of a problem that mystified me for quite a while. When I made the manifolds I first did one side and then mirrored the layout, bends, lengths etc. to the other side. Once I trial fitted the bodyshell I had to adjust the angle of the silencers slightly to get them symmetrical in the body openings. Then when I stood back and looked at it I found one silencer protruded more from the body than the other. I finally twigged that I had neglected to account for the fact that one of the heads is offset from the other on the engine by the width of a connecting rod. I had to shorten one collector by 3/4" (19 mm).

8333898c0154.jpg
 
Hi Fred, exhaust looks great!

With your o2 being quite close to your muffler perorated inners and the outers being slip fit, I can see a scenario where you could get a wee bit of free air reversion at idle and lower rpm impacting your wideband readings. Obviously any leak at the flange will create the same issue. You'll know when you tune it to lean best idle the old fashioned way and the indicated AFR looks wacky that you have some air running back up the system.

Cheers, Andrew
 
Thanks for the responses guys

Andrew, thanks for the note. I do intend to add some exhaust sealer at the collector flanges when the pipes are finally fitted. I'm hoping that as slip joints of the exhaust silencers are quite a snug fit and are bolted down they won't cause too much of a problem.
 
So the last major task is the wiring. Although I do have some understanding of the theory and I have done some wiring work on cars previously in no way am I an accomplished automotive electrician. I've never wired a car from scratch before.

Apologies for a rambling post, I'm hoping that writing this all out will help overcome some analysis paralysis and I would be pleased by any comments where I might be making this needlessly complicated, or just plain going wrong.

As I would like to get the car registered for road use I need to at least make provision for those requirements which complicates matters.

As a starting point on the layout and components, a friend donated a new universal wiring kit. This has a prewired fuse panel with 14 fused circuits. I have allocated them as below. I add (notes) as to what each circuit supplies:

1. Water pumps (water pump relay) .
2. Fuel pump (fuel pump relay).
3. Indicators (indicator flasher/ relay).
4. Headlights (brights relay) .
5. Hooter (hooter relay).
6. Brake lights (brake lights).
7. Hazards (hazards relay).
8. Fan 1 - Automatic (automatic fan relay).
9. Fan 2 - Manual switch (a second fan relay).
10. Instruments (dash lighting via one pole of light switch + tail lights).
11. Dip lights (dip relay).
12. Relays "Run" (activate fan automatic relay from thermo switch + via 4 dash switch's to activate the relays for 2 water pumps, fuel pump, fan manual and a relay in the ignition circuit).
13. Relays "Lghts" (dash switch's to activate relays for all the lighting circuits except as noted on circuit 10).
14. Aux (Relay as a provision for additional driving lights).

Circuits 1 to 7 are always live (but those circuits with relays activated by power from switched circuits are not live unless applicable relay power switch is on).
Circuits 8 to 14 are supplied from a keyed ignition switch.

So a lot of relays. To explain the relay in the ignition circuit. The Cartek battery isolator I'm using has a positive connection that connects directly to the MSD ignition via the dash switch. As I'm also using a key switch I thought to put the MSD power through a relay activated only from the key switch. I don't think I can use the connection from the isolator as the supply to the main key switch as the max load on the isolator circuit is to be no more than 40 Amps.

Any glaring issues so far?

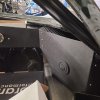
There are lots of switches and lights on the dash, but this post has gone on long enough already. Pic showing wires is really early in the process of figuring this all out.

201e08b01cd1.jpg


ec68296821e1.jpg


7851d57cedc5.jpg
 
As you can see I splashed out on a set of Stack gauges. They are really nice albeit expensive parts, although the illumination in the oil pressure gauge doesn't work when I connected it up for the first time.

Following the supplied instructions the fuel gauge was really easy to calibrate to the cheap level sensor I happened to have on hand.

ed36f4305ee3.jpg


7f93b689250d.jpg
 
All looks great Fred. Do you have a pretty bright shift light in your main field vision?

That is one change I am currently making to the M1. I can't hear the buzzer I originally fitted or see the small light I originally fitted when the engine is full noise at shift RPM. You must be pretty close to making noise of your own?!

Cheers, Andrew
 
Thanks again Andrew, yes, it won't be much longer until I can start up.

The revcounter is a Stack ST 700 which incorporates a host of different features. I liked it as it includes a speedometer and a facility for lap timing, as well as 4 LEDs for a shift light that can be configured to flash in various ways. It's pretty bright, see pic below I caught as it starts up.

It can also monitor 2 channels of pressures and temperatures if you add the required (expensive!) sensors, but I prefer individual gauges you can monitor at a glance, rather than having to rely on programmed alarms.

It can also record and display later maximum and minimum speeds during a lap, which might be quite fun to monitor.

Link to brochure - Stack ST700

the Stack ST700 provides a comprehensive monitoring solution, displaying engine RPM, speed, system voltage, odometer, tripmeter, and acceleration timers (1/4 Mile and 0-60, and user selectable rolling speeds) as standard. An in-built sequential shift light and the ability to enable lap timing and two configurable inputs for either temperature or pressure via optional accessories

IMG_20260407_093750.jpg

I
 
Last edited:
the illumination in the oil pressure gauge doesn't work when I connected it up for the first time.
I must retract the above statement.

Well, the statement as written is actually true, but it implies that the Stack instrument was faulty. In fact, now it transpires that in spite of methodical work by the Electricians Apprentice, the Electrician and the Works Forman followed by careful inspection by the Project Manager, the Chief Engineer, the Quality Assurance Manager, the Purchasing Manager and even the CEO, the instrument was connected incorrectly.

Appropriate steps have been taken to ensure that the Electricians Apprentice / Electrician / Works Forman / Project Manager / Chief Engineer / Quality Assurance Manager / Purchasing Manager / CEO doesn't do that again.

Apologies to Stack.
 
After considerable trial and error on the wire routings and lengths, I now have all the wiring circuits (excluding the indicators) working and am getting them tidied up. The harness is not yet wrapped as the indicator wires and relays will be added later.

55726516856c.jpg


5b68c44cbeaa.jpg


409033c7d71e.jpg


The plan is to shake the car down initially without the body fitted at our local track, so I made up some temporary brackets for the taillights as it would be rude to not have brake lights at least. The lights are Lucas pattern as on early Landrovers etc. and on original T70s.

8ff19e0c3bb7.jpg


747007cd3242.jpg


Another temporary bracket for the external kill switch.

779846bd1a12.jpg
 
Last edited:
So I thought I was making good progress toward getting the motor running. Then I went to bleed the clutch and found that the clutch piston and pushrod between the slave cylinder and release bearing locating arm came right out of the cylinder.

So this is the state of play at the moment, I had to pull the whole backend apart again.

63fb2f3d0a85.jpg


Seems I had made an error in my calculations all that time ago when I designed the conversion flywheel. I had tried to replicate the geometry of the Audi setup, which relies on just the pressure from a spring behind the clutch cylinder piston to retain the push rod which has 2 rounded ends which are located in sockets in the cylinder and the end of the release bearing locating arm.

It seems I have to move the release bearing forward, but how much?

Things I'm not sure of at the moment:
How much actual travel does the release bearing need to operate the clutch?
What forms the hard stop in the system when the clutch pedal is fully depressed, do I need a stop on the pedal?

Anyone with experience of these matters care to comment?
 
It would be good practice to put a hard stop at the pedal end regardless. I usually depress clutch pedal to the clutch release point and then add another 1/2" pedal travel (at the pedal pad where your foot is)

Once that is set, test operation with the engine running and adjust as needed.
 
Thanks Ricky, I will definitely do that.

So after some time fiddling with it I decided I need to move the release bearing front face about 15 mm forwards. The bearing slides on a tubular spigot which is too short to allow that so it needs to be extended. Its plastic or nylon so I can't weld a bit on. It's bolted to the transaxle so easy enough to put a spacer behind it. But it has a lip on the rear face that seats the oil seal on the input shaft so it can't be a plain flat spacer, it needs to be machined. Plus, the bolts that secure it to the transaxle are M7. Who has stock of M7 bolts!

So I put that to one side and looked at what I could do to modify the clutch arm to bring it forward. Leaving the original bottom mounting position would have the arm at an extreme angel to make the full travel and require a much longer pushrod which would probably fall into the bell housing if the cylinder was removed.

I happen to have 2 more dirty 016 gearboxes buried in the back of the garage that I acquired from a friend who had them as part of a package of spares that came with a sports racer he had bought. Before I started to cut and weld on the clutch arm I thought to see if one of them had a clutch arm that I could experiment on.

So I dug them out. Not only did one have a clutch arm fitted, but it had a different release bearing and a manufactured steel spigot fitted that brought the contact face out 14 mm further. So that's a result.

c27557d43dc9.jpg


fc86b7c18dfe.jpg


I'll get the parts cleaned up and gearbox test fitted with a suitable length push rod and see if this solves the problem. I really should have bench tested the assembly before I put it into the car in the first place.
 
Back
Top