I’ve been debating about running the heater core up front from the hot side of the radiator loop. This frees up space to run the AC lines under the tank instead of along the side rails. In preparation fabricated this coupler that has a diverter that protrudes into the main coolant pipe for the heater feed, while the return is flush.
Hmmmm... Not so sure your heater lines will work right - unless you are running a motorized pump. At the least, you will want to reverse the angle on the return line and/or have it return to the other water pipe also angled with the direction of flow..
Adding an EBP to mix will definitely be in the mix if I'm not getting enough flow to the HC. Will run some practical experiments on a running vehicle before adding it to this build. Still in the throw it against the wall and see if it sticks phase :thinking:
Saw this easy tool modification on youtube to make a hand bead roller from a pair of wire crimper/cutters. Have already been using it to make hard coolant tubes, and thought I'd share.
Randy was spot on with his assessment. Did some bench testing and was able to fill the heater core, but achieved little to no flow. After adding a Bosch electric water pump to the mix it worked beautifully.
I've seen some beautiful custom headers come out of this group, but I wasn't quite ready to attempt that task. Ordered a set of ceramic coated shorty headers from BBK. They look great and don't see a fitment issue. Though the exhaust will need to make an almost immediate bend to get under the axles.
Those headers look as though they were made specifically for your car to this point!
Are you going to be running catalytic converters?
The GTR looks to be roomier than the GT40 by a pretty great degree!
(Glad you found a good heater solution)
One of my biggest concerns starting this build was if there was going to be space for the supercharger under the rear clam. The moment of truth came over the weekend… and the TB motor housing just kisses the fiberglass by maybe a tenth. I didn’t have any body spacers in and the Lexan will sit above the FB cut out, so I think I’m in the clear for now.
The GT-R's that I have seen (two) have the exhaust going over the axle. Can the exhaust go under the axle, having ground clearance and suspension travel?
Your car is moving along very well! I love the color and the headers. Sometime I will connect with you to see you and your car in person. Thanks for the build log.
The graz is currently out of the car (waiting on b/o flywheel). But based one of Deans' prior posts, and some prototyping I think it will work under the axles. This route affords me some space to mount the SC heat exchange above the K-member brace.
Still debating muffler choices and exit location... cutting two big ports on either side of the license plate sure looks good in my head.
Had a minor setback earlier this month while installing the e-brakes. I’m sure most builders especially first timers have had some “learning” moments, so I thought I’d share mine.
Because e-brakes are an option the mounting holes aren't predrilled. Allan had a great video on locating and drilling the holes. Unfortunately I didn’t set the punch deep enough 2nd hole and the drill bit walked on me. It was only .091” off, but I decided to redrill the hole (in hindsight thicker spacer would have worked quicker). I considered filling it with weld or brazing rod, but after talking to a machinist they suggested just making a plug. So turned & threaded a rod to M10x1.5 and added some loctite for good measure, then tried redrilling the hole. Unfortunately this didn’t work as planned and what was left of the plug wall rotated into the new hole.
After some Internet searching I ended up finding a company 15 minutes away that makes press-in threaded bushing. The bushings required a 17.5mm hole, but luckily the wonky hole I made was right in the middle of a web in the aluminum, with a good amount of material on either side. Bushing worked great and caliper bracket installed perfectly straight.
Lesson learned and the rest of the critical holes were drilled on the press.
Couple backordered parts came in this week. Most of the mechanicals are wrapping up and will be able to start on the wiring soon.
The replacement hubcentric wheel spacers.
And the Coyote/Graziano flywheel & spacer.
The holes on the flywheel are realllly tight for the stock 19mm heads of the Coyote bolts. So much that I needed to turn down an already thin walled socket to fit.
By modifying supercharger inlet manifold, some interference with the stock fuel rail was created. I picked up some new rails from Holley, but in turn those didn’t clear the Intercooler. Swapping out the injector top hats from 14mm to 28mm provided the right clearance.
Also replaced half saddle clips that came with the Holley rails, and instead tapped mounting holes underneath the rail with fab’ed spacers to match the height of the new injector hats.
Can highly recommend T1 Race Development, who swapped out the shorter top hats free of charge even though I didn’t initial purchase the ID1000s from them.
I've been tackling a bunch of miscellaneous tasks. While none are 100% there yet I wanted to post some progress.
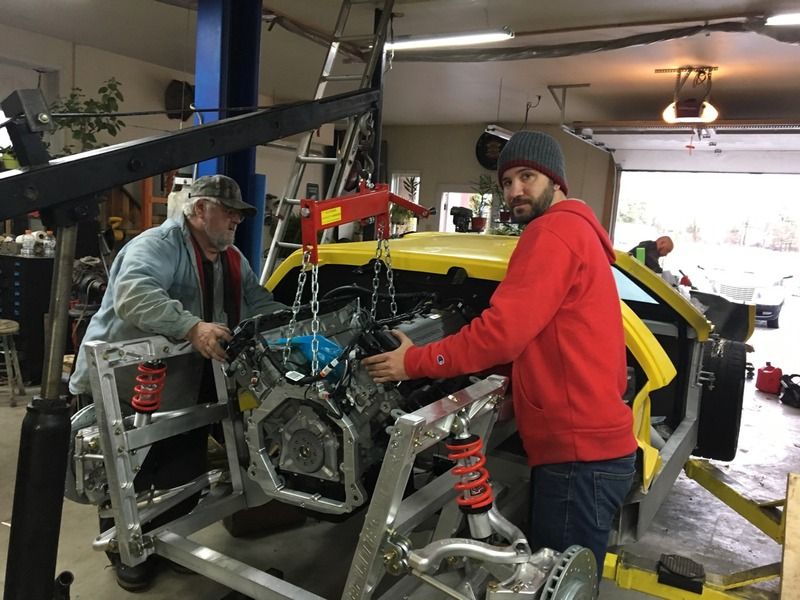
The Graz is in
I initially tried using the clutch alignment tool mentioned in the wiki, but the diameter of the tool was much smaller. A machinist friend made this one for me, and alignment went smoothly.
Happy to loan this one out if anyone has a graz/coyote combo.
Had to take a step backward on the AC compressor. After making custom brackets, tensioner, and machining S/C plate & timing chain cover I had overlooked that the ports would be facing down and would shorten the life of the compressor.
So decided to just buy one that mounted to the stock Coyote location (chose "UAC CO 10905C A/C Compressor). The boss that came with the Vintage Air compressor fit the new compressor. So I was able to reuse the VA hoses, but the O-rings under the boss needed to be swapped.
The GT-R comes with some nice LED taillights, but are about 1.5" smaller than OEM. RCR ships a nice trim ring to compensate, but it wasn't quite the look I wanted.
I found some 8 1/4" stop light lens, LED neon tube, reused the innards from the RCR taillights and packaged them in a 8" stove pipe cap as a bucket.
Prototyped
Lens
Brakes
Running lights
Still want to fine tune defusing and maybe print a custom PCB for a denser brake light.