Chris Kouba
Supporter
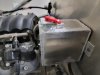
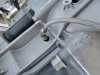
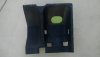
Is the lead-acid battery mounted behind your seat on your radar? I would be most inclined to change to a different type or move it.

Yeah I will likely be using an optima yellow top and I'm building a cubby that's accessible from beside driver seat. Fuel tank will be isolated from the battery well, since im not using the standard ports on the side of the tank and everything that's normally in that location.Is the lead-acid battery mounted behind your seat on your radar? I would be most inclined to change to a different type or move it.
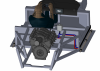
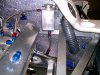
The plan is My interior bucket will have a removable panel. From mocking up the seat sits far enough toward the center console it should be easily accessible. If not I'll design the seat mount to either hinge forward or quickly removed. The access panel is critical for me so I can access and work on the fuel pump as well if need be.How will you access the battery once seats are installed?
 www.dropbox.com
I did the same thing for access to the top of the fuel tank (fuel level sender, vent line)-- made a removable panel on the fuel tank firewall, and another on the interior tub.The plan is My interior bucket will have a removable panel. From mocking up the seat sits far enough toward the center console it should be easily accessible. If not I'll design the seat mount to either hinge forward or quickly removed. The access panel is critical for me so I can access and work on the fuel pump as well if need be.
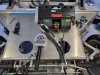
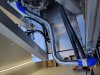
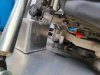
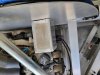
I know you have the car in front of you, but that won’t be a fun location for the tank. Maybe you already rerouted your gas fill hose. But between the fill hose, access to the belt, roll bar, it’s an incredibly tight location.
I can't tell if your being sarcastic, but since this is the internet I'm going to assume that you are. If you are not, it's much like any other customer. Most formula 1 teams use their parts. We had this Honda f1 V8 in a crate as part of trade shows to display connecters and such. The engine Honda would lease to it's race team at $800k per race season per motor. Pretty crazy.
As far as making integrated circuits (small things which the media always inaccurately refers to as "computer chips") that Ferrari purchased from us, Ferrari's attitude was "You should be honored that Ferrari is buying your product". Their attitude was condescending to say the least.@geoff Pritchett, in another, more appropriate thread, might you give us some insight into what is was like making parts for the Ferrari F1 team? Thanks!
Yes, and it wasn't always that snotty attitude. I wrote to Ferrari in Modena asking about the proper engine bearing clearances if I needed to rebuild my 250GTE engine and their chief engineer wrote back a very long letter with engine clearance specs and his recommendations. It was in Italian but it was a personal letter, not a form letter. Ferrari used to be quite nice to deal with in the late '60s.Kinda par for the course for Ferrari. They’re known for that attitude, even just to buy one of their cars.