need G50 clutch install help

Howard Jones

Supporter
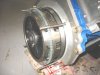
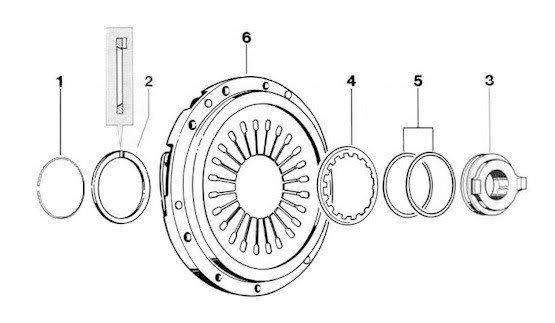
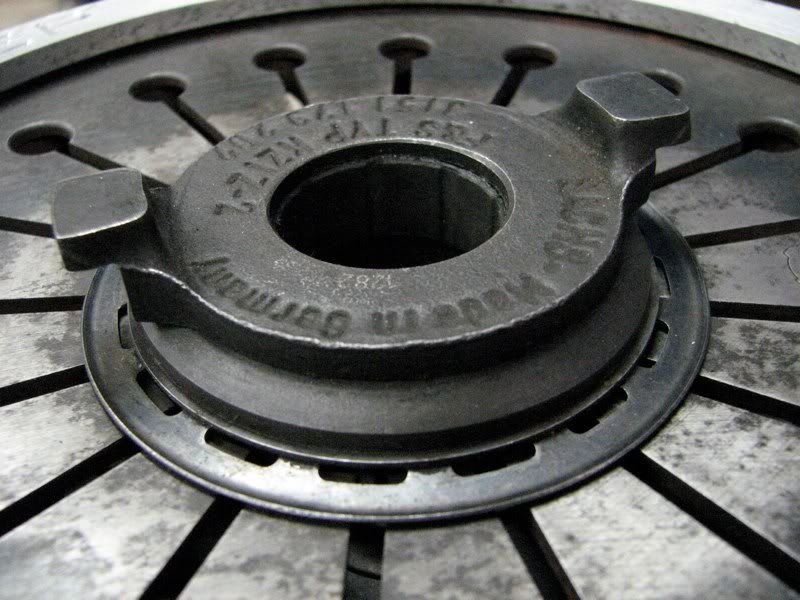
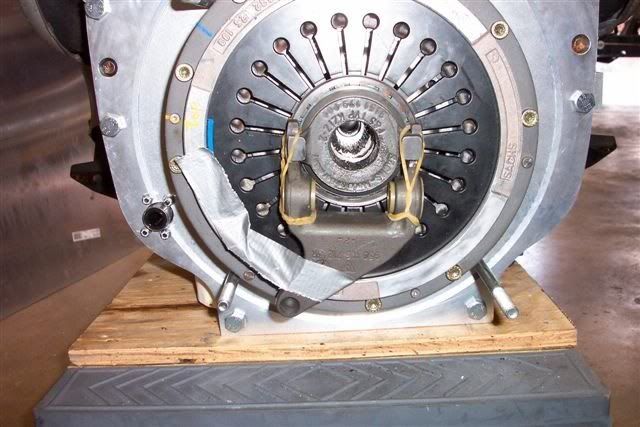
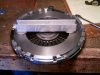
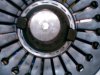
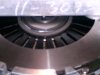
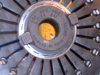
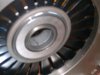
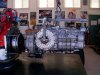
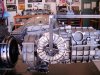
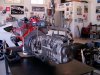
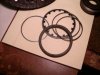
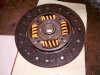
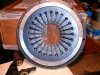
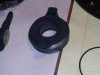
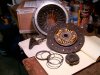
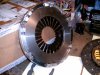
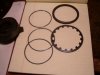
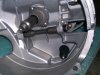
I am looking at my brand new Sachs clutch and I haven't a clue where to start. I believe it is a turbo type and it a hydraulic drawn release type. The release bearing is in several parts and I can't even get that together. I have a feeling that the T.O. bearing goes between the flywheel and the pressure plate. I have never worked on a Porsche and I've never even seen one together before, so I need some help getting started. Pictures would be helpful.

Pictures of what I have attached, thanks.

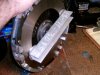
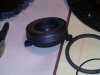
Oh I forgot. Once you have the lock tab removed from the T.O. bearing fork shaft how do you get it out so that the fork can be installed. I didn't want to start pounding on things so I though I should ask first.
 

Attachments

  • HPIM0626.jpg
    HPIM0626.jpg
    210.3 KB · Views: 483
  • HPIM0627.jpg
    HPIM0627.jpg
    129.2 KB · Views: 372
  • HPIM0628.jpg
    HPIM0628.jpg
    212.2 KB · Views: 385
  • HPIM0629.jpg
    HPIM0629.jpg
    227 KB · Views: 432
  • HPIM0631.jpg
    HPIM0631.jpg
    109.3 KB · Views: 435
  • HPIM0632.jpg
    HPIM0632.jpg
    115.5 KB · Views: 432
  • HPIM0630.jpg
    HPIM0630.jpg
    211.1 KB · Views: 421
  • HPIM0633.jpg
    HPIM0633.jpg
    116.4 KB · Views: 383
  • HPIM0634.jpg
    HPIM0634.jpg
    152.7 KB · Views: 689
  • HPIM0635.jpg
    HPIM0635.jpg
    227.8 KB · Views: 529
Last edited:

flatchat(Chris)

Supporter
Heres a clue :-

The fork shaft -- take out the retaining bolt and pull the shaft out --should slide out freely
 

Attachments

  • Picture 200.jpg
    Picture 200.jpg
    41.4 KB · Views: 599
  • IMAGE0015.PDF
    98.8 KB · Views: 346

Peter Delaney

GT40s Supporter
Howard, I can't help with the guts of the clutch itself, but I have had more experience than I wanted with the release fork & g/box r&r !

As Chris says, once the locking tab has been removed, the fork shaft "should" just slide out - mine didn't. I ended up cutting a couple of short lengths of steel tube with an ID just larger that the shaft dia. Place the tube over the outside end of the shaft & use a large dia washer to cover the end of the tube. Then run a suitable bolt thru the washer & into the threaded hole in the shaft (5mm, I think). Tighten up the bolt & it pulls the shaft out. Mine was very tight & I had to use a second, longer tube to get it all out (travel is limited by the depth of the threaded hole in the shaft).

The re-installation of the fork & shaft as you are installing the g/box can be a nightmare, BUT, can be made a whole lot easier by :

a) grinding a 2mm chamfer around the blind end of the shaft - this makes it so much easier to get it thru the fork bearings & into the far-end bell-housing bearing. (Remember, you are doing this with the g/box closed up to the adaptor plate, so access is only via the small openings in the bell-housing).

b) when you slide the g/box into place, you need to suspend the release fork so that the fork lugs are in front of the release bearing lugs & all is centralized. Bill Bayard gave me the clues on this one - suspend the fork by running a number of elastic bands under the fork lever & up to the ring-gear teeth. You can centralize the fork my moving the elastic bands over the teeth of the ring-gear as required.

c) Once the g/box is mated up, you can twiddle the lower end of the fork to get the shaft to go through the fork bearings, then into the RHS bell-housing bearing hole (hugely easier if you have the chamfer on the shaft as per (a) above).

After this, I usually (how depressing to have to use that word !) pull as much of the elastic bands out as I can with a hook on a coat-hanger, then let the starter motor grind up the rest.

I hope that this helps a bit.

Kind Regards,

Peter D.
 

Howard Jones

Supporter
Thanks guys, that really helps. At least I think I know what I am trying to do now. It aint in yet though so keep the comments commin.
 

Howard Jones

Supporter
Now you can't ask for more than that can you. ....Tom a special thank you to you. You have several beers waiting the day we are in the same place.

This forum is the bomb!!!!!!!!!!!!!!!!!!!!!!!!!!!!!!

Moderator. Can you change the name of this thread to "Porsche G50 Clutch install directions" I think it will help with the search engine. It is really all you need to do this job. How about move it to the DIY section?
 
Last edited:

Howard Jones

Supporter
Went out in the garage and in 15 min had it together. The pivot shaft came right out aftr I pulled off the plastic plug and the T.O. bearing went right together. I made up a press from some leftovers and..........WALA done.
 

Attachments

  • HPIM0643.jpg
    HPIM0643.jpg
    159.8 KB · Views: 459
  • HPIM0644.jpg
    HPIM0644.jpg
    146.1 KB · Views: 412
  • HPIM0642.jpg
    HPIM0642.jpg
    112.8 KB · Views: 373
  • HPIM0645.jpg
    HPIM0645.jpg
    170.6 KB · Views: 493
  • HPIM0647.jpg
    HPIM0647.jpg
    119.8 KB · Views: 392
  • HPIM0650.jpg
    HPIM0650.jpg
    107.4 KB · Views: 421

Howard Jones

Supporter
Here's the thing I made to "one-man install" my G50. It can be made out of anything, even wood I guess, but it's worth the effort if you are tired of crawling around on the cement floor mating up your GRBX. I wish I had made this 20 years ago.
 

Attachments

  • HPIM2505.JPG
    HPIM2505.JPG
    917.2 KB · Views: 92
  • HPIM2507.JPG
    HPIM2507.JPG
    1,001.1 KB · Views: 96
  • HPIM2506.JPG
    HPIM2506.JPG
    957.1 KB · Views: 96
Back
Top