Roaring Forties 66

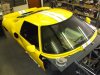
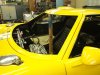
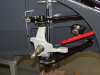
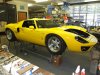
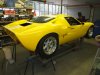
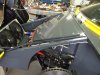
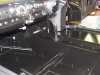
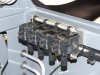
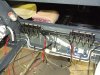
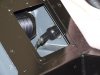
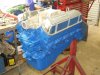
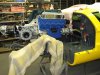
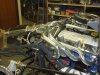
Had the Front and rear screens installed by the professionals.
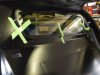
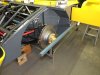
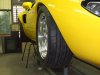
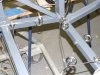
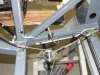
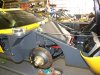
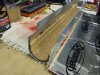
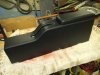
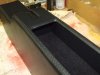
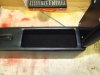
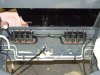
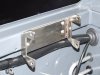
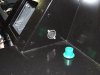
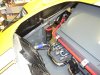
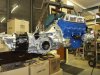
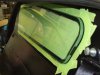
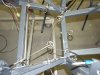
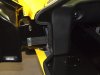
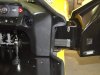
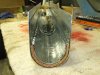
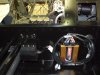
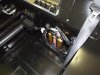
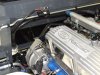
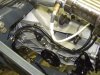
I glued in the bulkhead window, hence all the tape to stop the adhesive going all over the place....
Then glued the surround trim panel over that.

Clayton
 

Attachments

  • DSCF0599.jpg
    DSCF0599.jpg
    150.6 KB · Views: 332
  • DSCF0667.jpg
    DSCF0667.jpg
    165.9 KB · Views: 365
  • DSCF0605.jpg
    DSCF0605.jpg
    106.8 KB · Views: 364
  • DSCF0603.jpg
    DSCF0603.jpg
    106 KB · Views: 349
  • DSCF0607.jpg
    DSCF0607.jpg
    116.9 KB · Views: 330
Front suspension fitted and caster, camber & toe adjusted.

Clayton
 

Attachments

  • DSCF0564.jpg
    DSCF0564.jpg
    120.9 KB · Views: 345
  • DSCF0602.jpg
    DSCF0602.jpg
    153.9 KB · Views: 371
  • DSCF0629.jpg
    DSCF0629.jpg
    146.7 KB · Views: 356
  • DSCF0631.jpg
    DSCF0631.jpg
    130.9 KB · Views: 353
Rear suspension fitted.

Clayton
 

Attachments

  • DSCF0689.jpg
    DSCF0689.jpg
    198 KB · Views: 307
  • DSCF0707.jpg
    DSCF0707.jpg
    137 KB · Views: 277
  • DSCF0696.jpg
    DSCF0696.jpg
    174.1 KB · Views: 311
  • DSCF0699.jpg
    DSCF0699.jpg
    147.7 KB · Views: 304
  • DSCF0718.jpg
    DSCF0718.jpg
    151.9 KB · Views: 288
Test fit of the wheels and had to relieve a small section of the rear guard return lip. Apart from that all are clear when moving through the suspension travel.
Rim centres will be painted graphite grey.

Clayton
 

Attachments

  • DSCF0751.jpg
    DSCF0751.jpg
    193.7 KB · Views: 316
  • DSCF0746.jpg
    DSCF0746.jpg
    155.7 KB · Views: 291
  • DSCF0758.jpg
    DSCF0758.jpg
    119.8 KB · Views: 289
Handbrake cables and pulleys fitted.
Brake and clutch pipes finished off.
Tow / tie down hook added.

Clayton
 

Attachments

  • DSCF0761.jpg
    DSCF0761.jpg
    157.3 KB · Views: 328
  • DSCF0766.jpg
    DSCF0766.jpg
    155.9 KB · Views: 324
  • DSCF0763.jpg
    DSCF0763.jpg
    142.5 KB · Views: 310
Brake light switch fitted.
Clutch switch fitted (for starting purposes, ADR requirement...)
Aircon hoses, drier etc fitted.
Front clip stay is a telescoping tube that can be locked open if a bit of wind around.

Clayton
 

Attachments

  • DSCF0657.jpg
    DSCF0657.jpg
    169.4 KB · Views: 309
  • DSCF0660.jpg
    DSCF0660.jpg
    145.4 KB · Views: 350
  • DSCF0662.jpg
    DSCF0662.jpg
    206.1 KB · Views: 363
Front cover uses 4 camlocs which pull down onto the rubber seal.
Makes access to the fuses / relays and master fluid levels easier.
Horn added and wiring finished out front.
Tried hiding the horn in the light box area, but it muffled it too much.

Clayton
 

Attachments

  • DSCF0623.jpg
    DSCF0623.jpg
    195.4 KB · Views: 314
  • DSCF0632.jpg
    DSCF0632.jpg
    170 KB · Views: 320
  • DSCF0633.jpg
    DSCF0633.jpg
    174.4 KB · Views: 293
Door stops, interior light switches and door seals finished.
Drivers side console fitted and gear stick finished off.

Clayton
 

Attachments

  • DSCF0784.jpg
    DSCF0784.jpg
    100.2 KB · Views: 333
  • DSCF0787.jpg
    DSCF0787.jpg
    138 KB · Views: 345
  • DSCF0793.jpg
    DSCF0793.jpg
    143.9 KB · Views: 324
I wanted to put more insulation around the centre console, but the water pipes were very close to the sides. This is what I ended up with, shouldn't have worried as the aircon centre duct dumps cold air directly down onto it.
The console is cold to touch on the run.

Clayton
 

Attachments

  • DSCF0808.jpg
    DSCF0808.jpg
    189.5 KB · Views: 340
  • DSCF0817.jpg
    DSCF0817.jpg
    160.4 KB · Views: 306
  • DSCF0820.jpg
    DSCF0820.jpg
    145.7 KB · Views: 304
Got the rear / centre console back from the trimmers and it turned out quite well. Not much room in the pocket, but any extra space is gold.

Clayton
 

Attachments

  • DSCF0827.jpg
    DSCF0827.jpg
    154.5 KB · Views: 349
  • DSCF0830.jpg
    DSCF0830.jpg
    126.1 KB · Views: 318
  • DSCF0833.jpg
    DSCF0833.jpg
    157.2 KB · Views: 284
Time to fit the coils.
I looked at a lot of different coil packs, but ended up with the good old LS1 coils.
Made a simple mount that holds them in banks of 4.
Lots of wires to connect though...

Clayton
 

Attachments

  • DSCF0835.jpg
    DSCF0835.jpg
    118.6 KB · Views: 276
  • DSCF0837.jpg
    DSCF0837.jpg
    130.6 KB · Views: 271
  • DSCF0863.jpg
    DSCF0863.jpg
    185.2 KB · Views: 238
  • DSCF0878.jpg
    DSCF0878.jpg
    139.6 KB · Views: 296
  • DSCF0879.jpg
    DSCF0879.jpg
    153.3 KB · Views: 280
Finished off the wiring to the Motec.
I didn't want a loose connector floating around the back of the seat for the laptop, so mounted it in the side wall where the seatbelt retract mounts.
The UTC that plugs into it clears the door when its closed, so on road testing can be done.
Seat belts fitted as well.

Clayton
 

Attachments

  • DSCF0852.jpg
    DSCF0852.jpg
    128.1 KB · Views: 256
  • DSCF0858.jpg
    DSCF0858.jpg
    112.9 KB · Views: 281
  • DSCF0859.jpg
    DSCF0859.jpg
    162.6 KB · Views: 291
  • DSCF0888.jpg
    DSCF0888.jpg
    166.2 KB · Views: 272
I needed a minimum of a 1 litre windscreen washer bottle, boy you have to love the ADR's...
Couldn't find a bottle to fit as I've widened and deepened the nostril vent, so had to make one.
Also you can see the front mount of the clip stay and pinch weld rubber that seals the wheel arch.

Clayton
 

Attachments

  • DSCF0881.jpg
    DSCF0881.jpg
    165.5 KB · Views: 306
  • DSCF0886.jpg
    DSCF0886.jpg
    150.8 KB · Views: 258
Battery box is made from sheet S/S with a drain tube, so it can be washed out for spills etc.
The clamp is at the bottom and uses the wedges on the battery case.
I'll make a lid for it when I get bored (still hasn't got one yet) :laugh:

Clayton
 

Attachments

  • DSCF0927.jpg
    DSCF0927.jpg
    136.2 KB · Views: 239
  • DSCF0928.jpg
    DSCF0928.jpg
    143.4 KB · Views: 241
  • DSCF0940.jpg
    DSCF0940.jpg
    132.7 KB · Views: 245
  • DSCF0942.jpg
    DSCF0942.jpg
    138 KB · Views: 277
Engine is from an AU Falcon and is stock std, all I did was to give it rings and bearings. This is to meet ADR 37 requirements.
I was surprised to see Crane roller rockers as std fitment.
Over time things may evolve....:lipsrsealed:

Clayton
 

Attachments

  • DSCF0911.jpg
    DSCF0911.jpg
    177.5 KB · Views: 273
  • DSCF0913.jpg
    DSCF0913.jpg
    126.3 KB · Views: 260
  • DSCF0920.jpg
    DSCF0920.jpg
    179.1 KB · Views: 266
  • DSCF0921.jpg
    DSCF0921.jpg
    172.7 KB · Views: 238
  • DSCF0922.jpg
    DSCF0922.jpg
    159 KB · Views: 247
Adapter plate, flywheel and clutch assy fitted.
Bolted up the gearbox to check the throw-out bearing and found it was almost off the end of the housing at rest.
Machined up a longer housing and all seems to work now ??

Clayton
 

Attachments

  • DSCF0952.jpg
    DSCF0952.jpg
    135.4 KB · Views: 233
  • DSCF0954.jpg
    DSCF0954.jpg
    151.2 KB · Views: 240
  • DSCF0956.jpg
    DSCF0956.jpg
    81 KB · Views: 219
  • DSCF0962.jpg
    DSCF0962.jpg
    131.7 KB · Views: 229
  • DSCF0965.jpg
    DSCF0965.jpg
    147.9 KB · Views: 265
All bolted together.
Aircon compressor and starter fitted.
Then had fun trying not to scratch all the paint....

Clayton
 

Attachments

  • DSCF0969.jpg
    DSCF0969.jpg
    188.8 KB · Views: 274
  • DSCF0974.jpg
    DSCF0974.jpg
    182 KB · Views: 296
  • DSCF0982.jpg
    DSCF0982.jpg
    177.2 KB · Views: 274
  • DSCF0984.jpg
    DSCF0984.jpg
    206.3 KB · Views: 312
  • DSCF0985.jpg
    DSCF0985.jpg
    209.2 KB · Views: 296
Engine loom finished (apart from the MAP sensor plug....)
Speedo and Lambda sensors wired up.
Time to refit the exhaust system.

Clayton
 

Attachments

  • DSCF1045.jpg
    DSCF1045.jpg
    159.4 KB · Views: 263
  • DSCF1068.jpg
    DSCF1068.jpg
    165.4 KB · Views: 272
  • DSCF1058.jpg
    DSCF1058.jpg
    208.8 KB · Views: 320
  • DSCF1063.jpg
    DSCF1063.jpg
    210 KB · Views: 287
  • DSCF1078.jpg
    DSCF1078.jpg
    135.3 KB · Views: 255
Back
Top