
You are using an out of date browser. It may not display this or other websites correctly.
You should upgrade or use an alternative browser.
You should upgrade or use an alternative browser.
Roaring Forties 66
- Thread starter otto69
- Start date
Clayton
Supporter
Clayton
Supporter
Thanks Jimmy
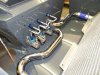
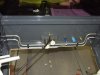
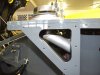
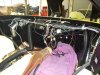
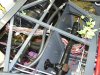
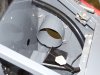
Now time to start plumbing.
The radiator bleed pipe fitted and header tank over flow in progress.
As I mounted the carbon canister in the L/H sill (trying to keep the rear bulkhead as clean as possible) had to run the fuel tank vent lines up the bulkhead then back into the sill.
High pressure fuel filter and reg mounted.
Fuel crossover pipes fitted.
Clutch and brake tubes fitted.
Clayton
Attachments

Clayton
Supporter
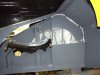
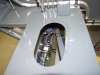
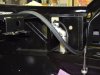
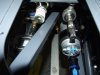
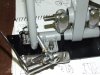
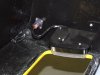
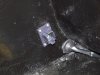
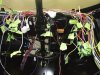
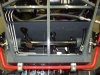
Header tank fill pipe and overflow finished.
L/H low pressure fuel pump, solenoid shutoff valve and pre-filter mounted.
Carbon canister fitted and most of the plumbing done.
Clayton
L/H low pressure fuel pump, solenoid shutoff valve and pre-filter mounted.
Carbon canister fitted and most of the plumbing done.
Clayton
Attachments
Clayton
Supporter
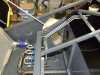
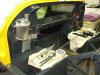
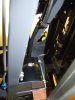
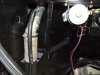
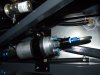
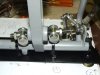
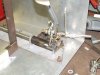
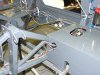
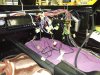
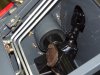
R/H High and low pressure fuel pumps fitted.
Shutoff solenoid, pre-filter and tank return diverter valve fitted.
The extra chassis tube that I fitted made hard work in fitting all the components....
Clayton
Shutoff solenoid, pre-filter and tank return diverter valve fitted.
The extra chassis tube that I fitted made hard work in fitting all the components....
Clayton
Attachments
Clayton
Supporter
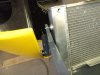
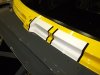
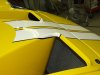
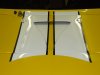
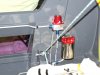
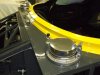
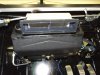
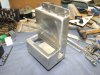
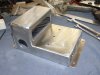
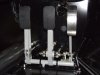
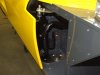
Living in the tropics, aircon is right next to fuel in the importance scale....
So I modified a std 4 outlet cover and left the 2 outer holes for the eyeball vents. Cut the largest hole between them and made a 90 deg duct to dump the air into the foot well / seat base area.
Can confirm that it works a treat. The outside temps are up to 39C and humidity is going through the roof.
Clayton
Attachments
Clayton
Supporter
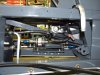
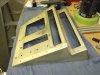
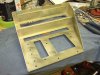
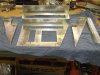
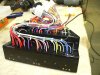
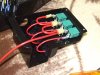
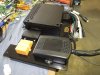
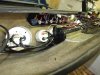
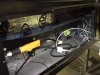
Time to wire the car.
First thing was to design all the circuits, then buy a mountain of wire and connectors etc.
The relay and fuse box was assembled and wired.
Tried to keep it simple, but it gets away from you.
Clayton
First thing was to design all the circuits, then buy a mountain of wire and connectors etc.
The relay and fuse box was assembled and wired.
Tried to keep it simple, but it gets away from you.
Clayton
Attachments


Clayton
Supporter
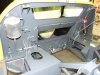
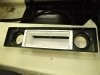
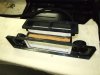
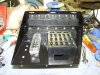
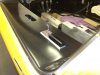
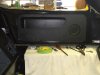
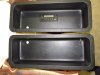
Door pockets and cover plates covered with vacuum formed vinyl, same as the dash.
Stereo control head fitted in drivers pocket.
Clayton
Stereo control head fitted in drivers pocket.
Clayton
Attachments
Clayton
Supporter
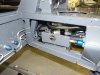
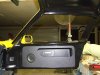
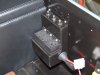
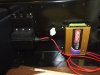
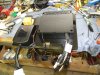
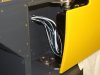
Added an extra CB and relay box for the ECU behind the passenger's seat.
You can just get access to the CB's with the seat fitted.
Clayton
You can just get access to the CB's with the seat fitted.
Clayton
Attachments
Clayton
Supporter
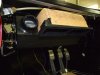
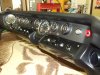
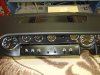
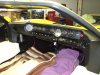
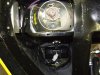
Dash wiring nearly finished.
Demister fan mounted.
Haven't decided on switch labels just yet, may go with engrave placards ??
Motorcycle ign barrel with extra push start button.
Clayton
Demister fan mounted.
Haven't decided on switch labels just yet, may go with engrave placards ??
Motorcycle ign barrel with extra push start button.
Clayton
Attachments

Clayton
Supporter
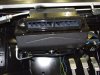
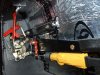
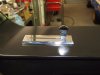
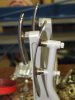
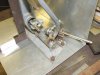
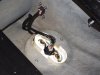
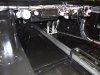
Pedals finished and installed.
To give me more clearance from the throttle cable, made an angle drive so the cable pulled in line with the chassis wall and not with the pedal axis.
Glued 3mm insertion rubber to the brake and clutch pedal for the certifying engineer.
Still looking for very small expanded S/S mesh to replace the rubber.
Clayton
Attachments
Clayton
Supporter
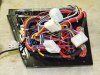
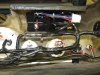
The wiring continues....
Started pulling wires everywhere and used the DT series bulkhead connectors for the front and rear clips.
Clayton
Started pulling wires everywhere and used the DT series bulkhead connectors for the front and rear clips.
Clayton
Attachments
Clayton
Supporter
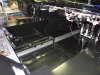
More wires pulled through, It's amazing how many circuits and wires end up in there.
Finished off around the doors.
Clayton
Finished off around the doors.
Clayton
Attachments
Similar threads
- Replies
- 37
- Views
- 12K
- Replies
- 38
- Views
- 10K