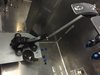
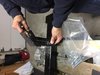
I only found one aftermarket DBW throttle switch for Ford. There are plenty for LS applications. I decided to use the throttle pedal that comes with the Ford Performance wiring harness. I cut the bottom of the pedal off to shorten it. I then mad a bracket and mounted it off of the front bulkhead. I made a linkage with hime joints on both ends and connected it to the Wilton throttle pedal.

You are using an out of date browser. It may not display this or other websites correctly.
You should upgrade or use an alternative browser.
You should upgrade or use an alternative browser.
Rufus GT-R
- Thread starter rufusmathewsjr
- Start date
![IMG_2166[1].JPG](/data/attachments/81/81893-ec43b2489177b21e936a93556d7e228f.jpg?hash=7EOySJF3sh)
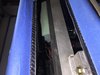
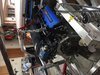
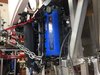
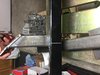
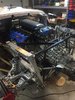
Finally got the GT350 oil pickup tube from Modular Motor Racing and Coyote windage tray and new main bolt/stud to anchor the pickup tube. The windage tray holds the pickup in place at the oil pump and the main stud holds it in place at the pickup end. Installed the Moroso oil pan #20571. Could not use the stock pan as it would not clear the front motor mount cross member and extended 3/8" below the bottom of the car. Installed the solid mounts from UPR and tried to mount the cross member. The cross member interfered with the front of the pan and the Moroso pan extended 3/16" below the bottom of the cross member. Ouch!! This is the same oil pan and solid mounts that Kurtis used and he had no problems. (Both Coyote engine Bblocks). Comparing some measurements with Kurtis and Ken, discovered that my uprights on the cross member were 1/4" too short. I added 1/4" spacers and slotted the holes on the mounts and cross member and got a fit with nothing extending below the cross member and only .050 clearance in front of the pan. Put the engine in the car and then found that the front of the engine 3/8" offset to the passenger side. So the cross member and uprights were totally incorrect. I cut the factory uprights off and fabbed up new uprights 3/8" taller. Installed the new uprights on the to the solid mounts that were fasted to the engine. I then put the cross member in place, centered the engine and set the engine/ uprights down on the cross member and tack welded them in place. I now have 3/16" clearance in front of the ban and the bottom of the cross member is 1/4" below the oil pan. Sorry that I don't have pictures. Something happened when I took the pictures??? I have a few of the new fabricated cross member
Attachments

Last edited:
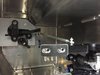
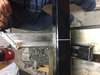
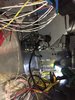
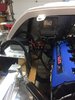
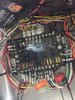
Been working on a lot of stuff but mainly wiring and insulating the firewall and frame. Electric power steering unit is mounted. Got some great info and service work from Ken Rosenbusch at ePowersteering.com. I would recommend if you are considering electric power steering, talk to him first. As you all know, a lot of put it in and take it out to fit items.
Attachments

Don't hesitate to ask any question. There are lots of very knowledgeable builders on the build blogs and they all don't mind sharing.
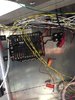
Engine and Graz back in the car. Wiring complete except for lights and interior options. Firewall insulated. Electric power steering unit installed and working. I've been testing wiring and has gone well. Only an few small hiccups. Starting on exhaust. Once exhaust is complete it will be time to fire the engine") ) Next will be semi finished suspension alignment then on to setting the body and anchoring the spider in the correct place.
) Next will be semi finished suspension alignment then on to setting the body and anchoring the spider in the correct place.
) Next will be semi finished suspension alignment then on to setting the body and anchoring the spider in the correct place.Attachments
epowersteering.comWhat electric power steering did you go with?
Paul it depends on your engine and your seating position preferences. The only option that I kept was the parking brake option. IMO it is well worth the money.
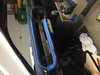
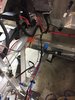
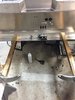
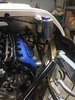
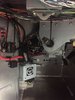
Finished running the AC hoses and crimped the last two ends that connect to the compressor. Borrowed a nice crimper from a friend and did them on the car. Put the vacuum pump on and ran it for 2 hours. Closed the valves in and has not moved for 5 hours. Will check it in the morning ) Installed the half shafts and torqued them down.
) Installed the half shafts and torqued them down.Sub'd
Hi Rufus, looking good. Have you made any progress lately?
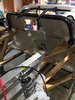
I've been fitting the body---spider, doors, front and rear clams and windshield. Lots of fitting, changing location of a component then refitting it all again. Getting close. Once the spider is in final position and locked down, I will install the dash and gauges. Once that is done, I will be ready to fire the engine for the first time. It is slow going right now. Will post pictures later.
Steven Lobel
Supporter
Which wiring harness did you go with and do they make a GT version or just off the shelf and build it out for your needs?
Steve I went with the Coach Controls like the one in Jarred's car. I believe it is the Coach-1
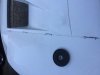
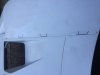
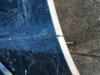
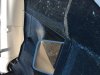
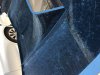
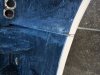
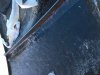
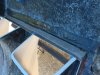
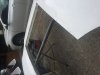
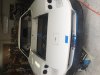
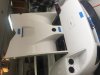
Sorry I haven't post in a while. I will try and update here now. I've been working on body modifications and fitment. I decided to cut the hood into the front clam like H did. Borrowed the fiber glassing templates from H and cut the slots for thew templates into the front clam. Inserted the templates into the slots and the used modeling clay to seal the slots around the templates to prevent the resin form running through. Applied multiple layers of mold release wax on the template sides. Laid multiple layers of fiberglass on the templates and to the clam. Let the glass work set for several days the removed the templates and cut the hood out.
Attachments
-
 IMG_2777.JPG180.9 KB · Views: 560
 -
 IMG_2778.JPG171.7 KB · Views: 546
 -
 IMG_2779.JPG595.8 KB · Views: 547
 -
 IMG_2780.JPG419.3 KB · Views: 498
 -
 IMG_2782.JPG493.7 KB · Views: 484
 -
 IMG_2784.JPG664.3 KB · Views: 525
 -
 IMG_2786.JPG447.6 KB · Views: 517
 -
 IMG_2787.JPG423.7 KB · Views: 496
 -
 IMG_2789.JPG631.5 KB · Views: 527
 -
 IMG_2790.JPG398 KB · Views: 501
Similar threads
- Replies
- 63
- Views
- 6K
- Replies
- 5
- Views
- 941