
Researching safety wiring for my pin drive wheels, I cam across an article on safety wiring. The article was borrowed from another forum by the poster. It has some info for even the seasoned builder. Save the info for that day you go to wire your bolts and other pieces:
Here is the next installment in the Rogue How To series. Today we will go through the steps of how to safety wire your bike. The first thing we will need to do is gather all the supplies we will need. One small note that I can not emphasize enough is to be patient and take your time. Do not get in a rush as this will only cause you grief. Before beginning read through the wiring requirements of your Organization and create a check list of things that need to be drilled and wired.
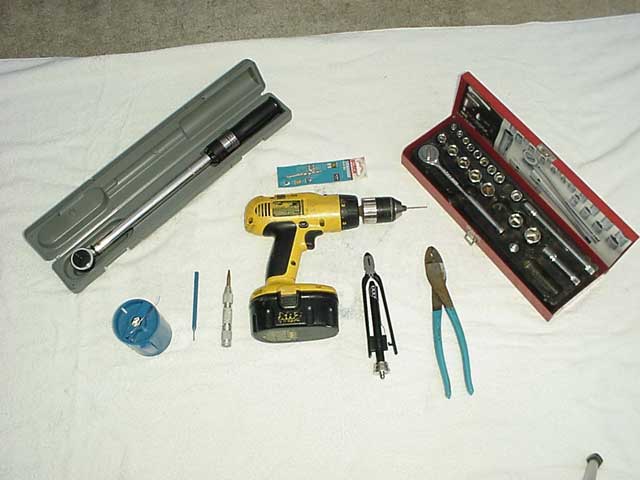
The first step is to gather all the tools and supplies you will need.
The Tools.
 <dt class="ol_min_title">Car Accident Lawyer
</dt>
You will need the following tools.
-Torque Wrench
-Metric Socket Set
-Drill either Corded or Cordless
-Plenty of 3/32 Titanium Drill bits
-Automatic Center Punch
-Safety Wiring Pliers
-.032" T-304 Stainless Steel Wire
-There are a couple of optional items shown. I like using my linesman cutters(the large blue pliers on the right) to cut the wire to length as the cutters on the Safety Wire Pliers are not as good. The small blue punch on the left is for removing any broken drill bits(You will break at least one).
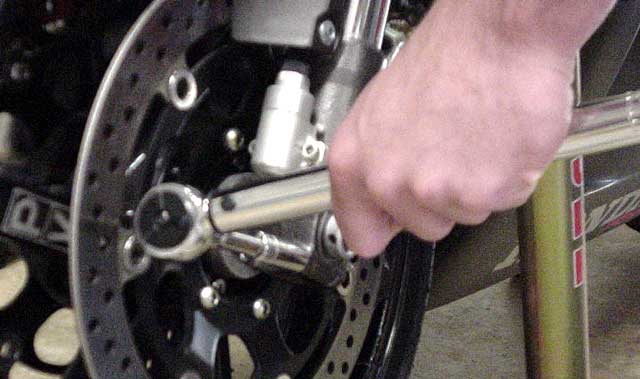
I will assume that if you are under taking this process that all the bodywork has been removed from the bike. If it hasn't then do so now. Next make sure all the bolts have been torqued to the proper specs. It's a good idea to check them again just to be sure.
Now that you have checked them all it's time to start marking them for drilling.
Grab a Sharpie and mark the sides of the bolt heads you plan to drill. Usually these will be the ones facing to the outside of the bike.
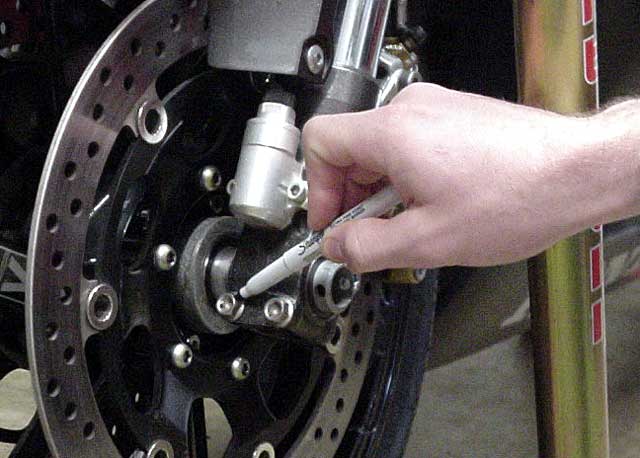
Once you have the side marked that you like to drill it's time to grab the Automatic Center Punch.
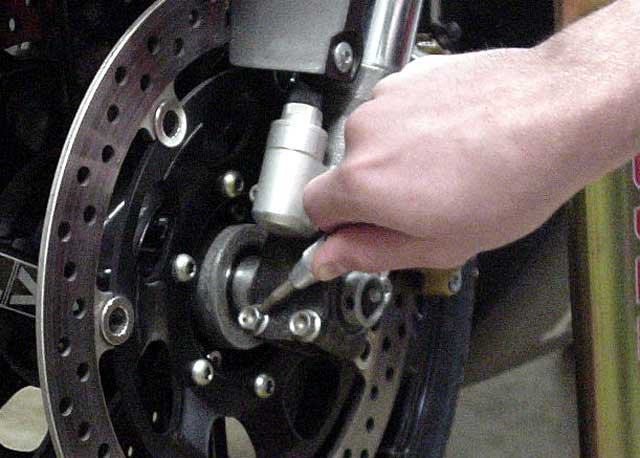
Before removing the bolt use the Automatic Center Punch to mark the location for the drill bit to start.The punch will create a divot in the bolt head so that the bit will stay centered were you want to drill. If you do not use a punch the bit will move around and make it hard to drill with any precision which is referred to as walking. Remove the bolts from the bike.
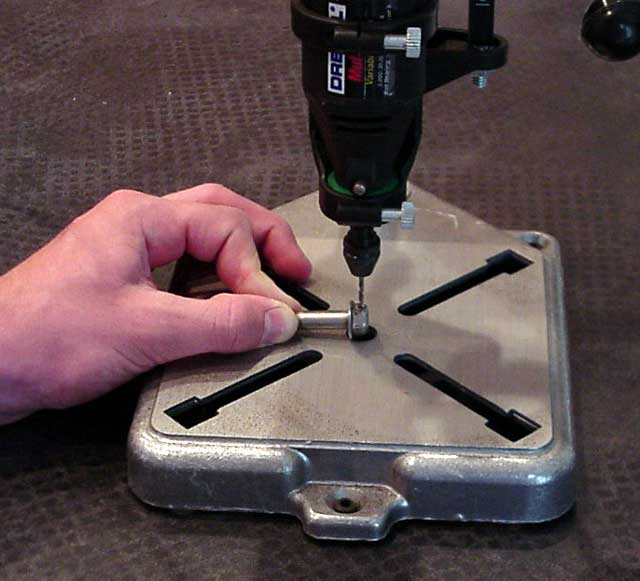
Now it's time to drill. I can not emphasize enough to take your time with this step. Rushing will only cause you to break bits and will end up being very frustrating. Also when drilling use a light weight cutting oil and keep the end of the bit coated in oil. This will make the bit cut easier as well as last longer before becoming dull. Also if the bit becomes dull toss it.
The best way to accomplish the drilling is on a drill press but some of you will not have these available. Those that do not have access to a drill press may choose to drill them on the bike. I personally drill mine on the bike but this will require you to be a little more thoughtful about how and where you drill. Drilling on the bike will also make you more prone to breaking drill bits. Again take your time and drill slowly.
IF YOU AREN'T HANDY WITH A DRILL I HIGHLY SUGGEST TAKING THE DRILL PRESS ROUTE.
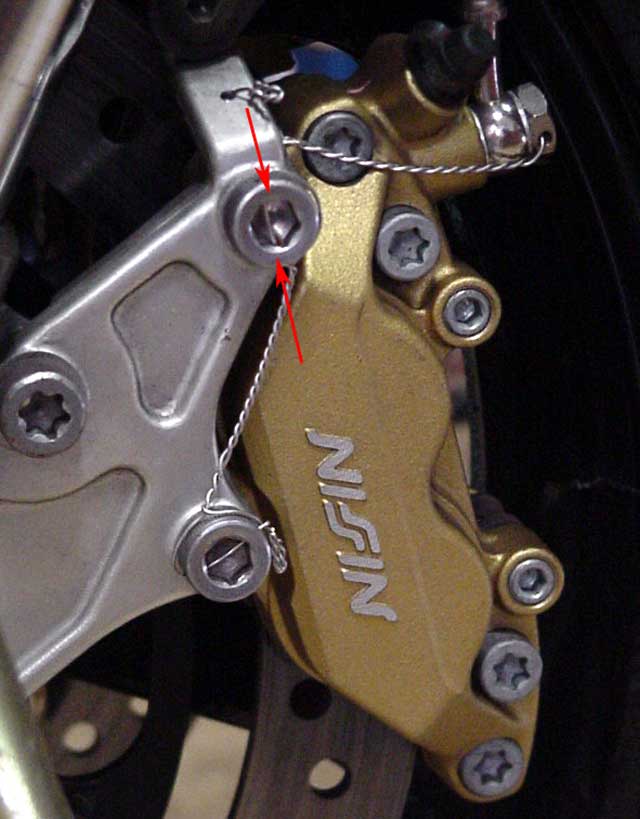
When drilling Allen Head bolts be sure to drill through to of the flats portions of the bolt as indicated by the 2 red arrows. This will assure you do not create a weak point in the portion of the bolt where the most torque is applied.
Work on one section at a time so that you do not miss any bolts that will need to be wired.
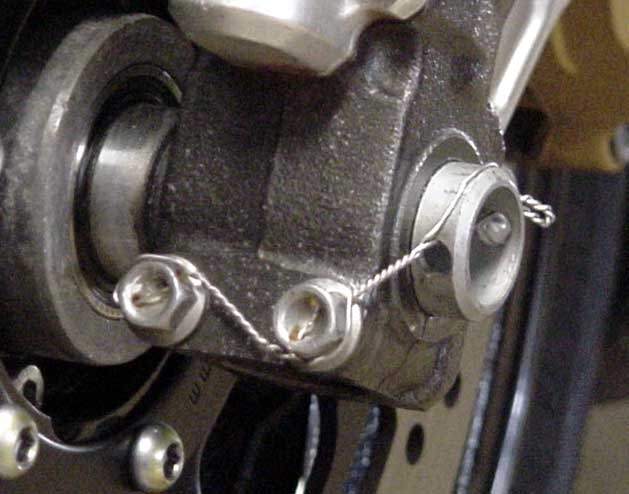
Now that things have been drilled it's time to move on to the wiring portion of this project. When routing safety wire you always want to route it in a way that it is always pulling in such a manner as to keep the bolt from coming loose. In the pictures below I will demonstrate the correct method of Routing and Securing the Safety Wire.
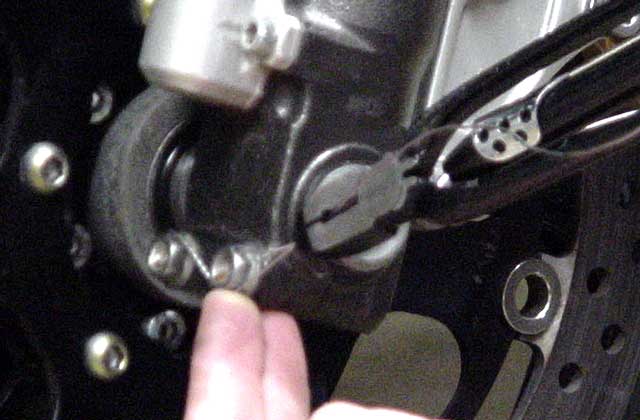
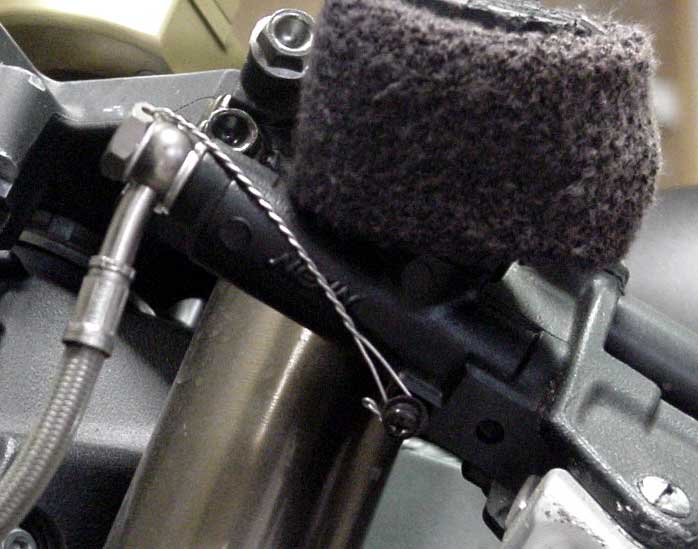
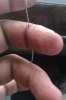
First pull about 10 inches of wire out of the container and cut it. Straighten the wire by pulling it through 2 fingers until the coils are fairly straight. Now pass it through the first bolt head and line the 2 ends up so that you have effectively found the center of the length of wire.
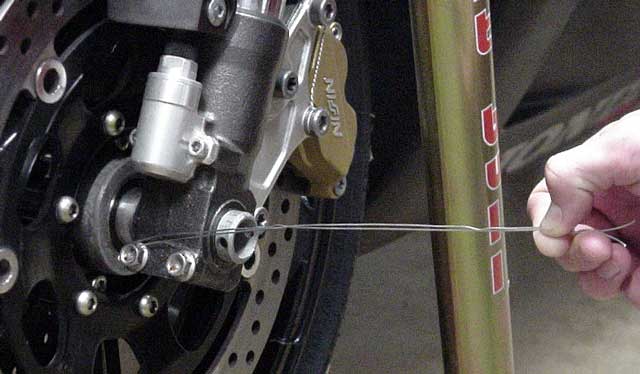
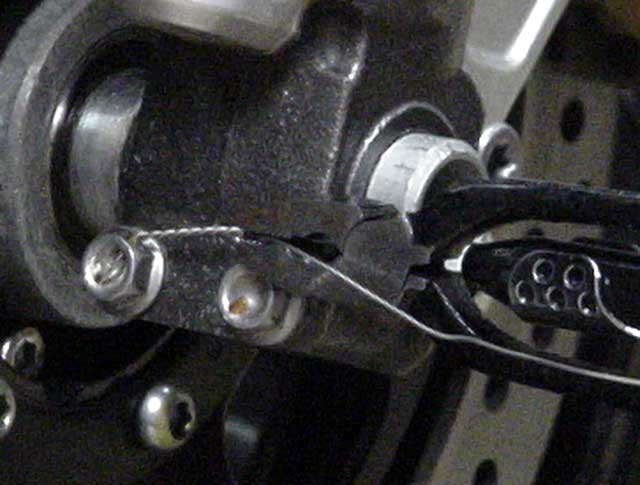
Notice in the photo above that I have looped and pulled the wire in the opposite direction of the way the bolt would loosen from the fork leg. Now grab the wire just before it reaches the other bolt head and clamp your Safety Wire Pliers onto the wire.
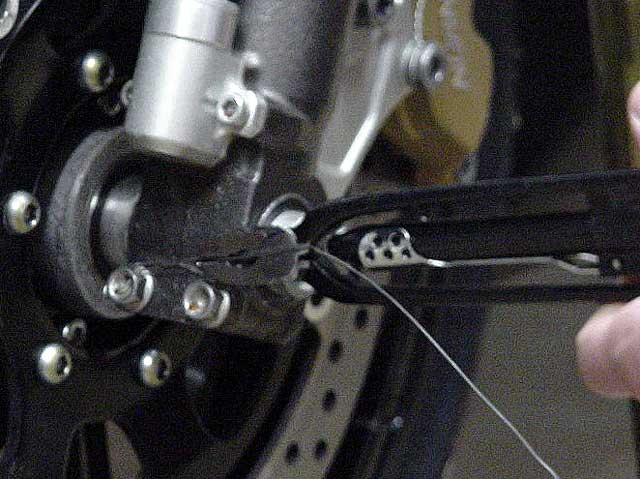
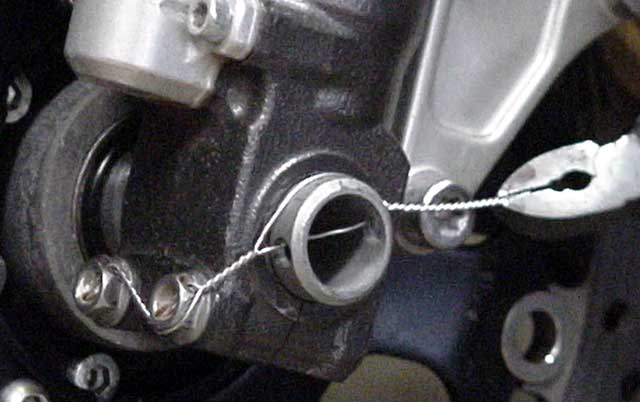
Now use the pliers to twist the wire to this point. Be careful not to over twist the wire. You are looking for consistent coils. If you twist it to tight the wire will break. This may take a few tries to find the ideal amount of twist. Be patient you will get better at it.
If you get it right it should look like the example above.
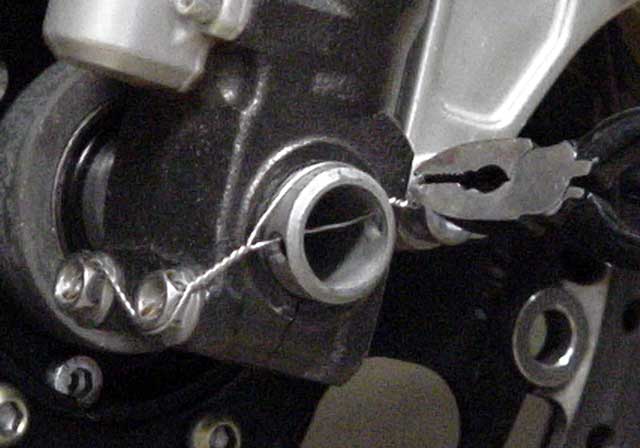
Now thread one side of the remaining portion of the wire through the other bolt head, again observing the direction in which you route the wire.

Again measure back to the next point and clamp the Safety Wire Pliers back onto the wire and twist.
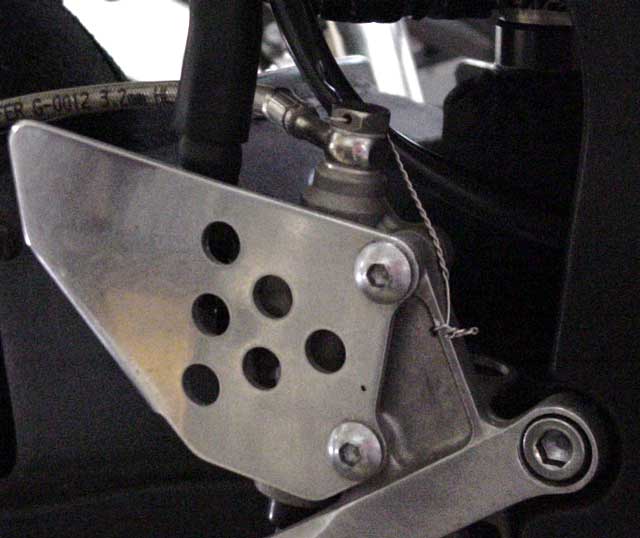
Now we will route the wire back to the final attachment point and secure the end.
THe final step is to cut the end to length and fold it over onto itself to lock the end of the wire in place.
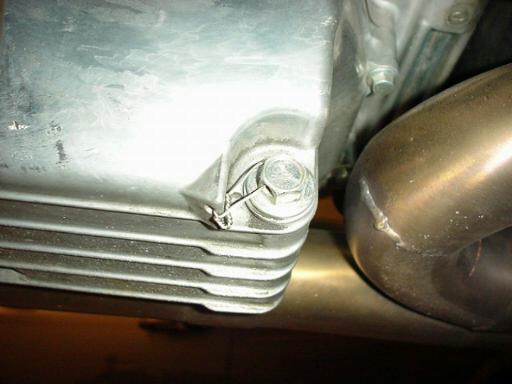
The end result should look like the example below.

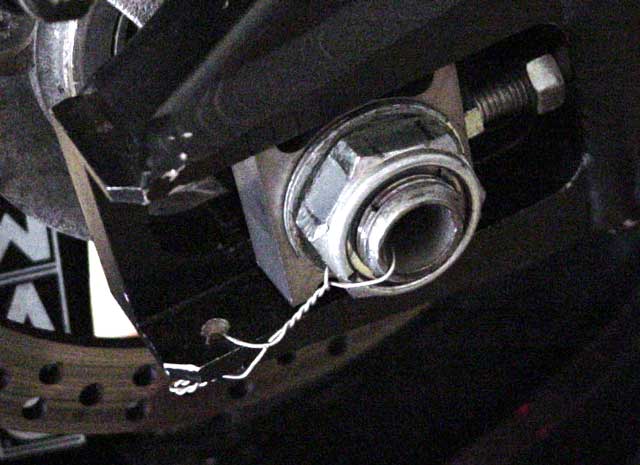
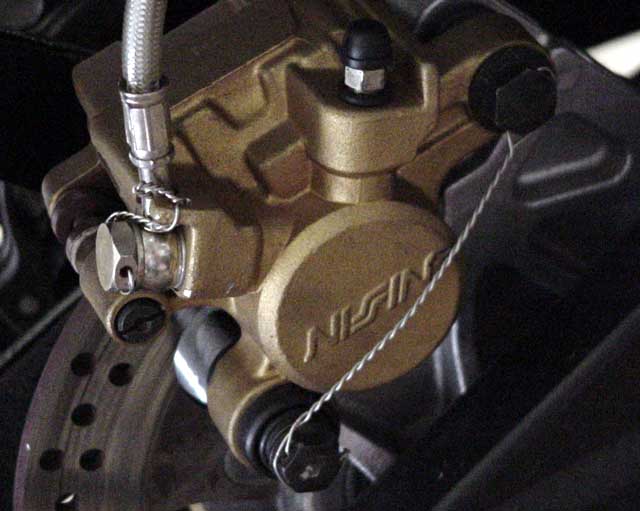
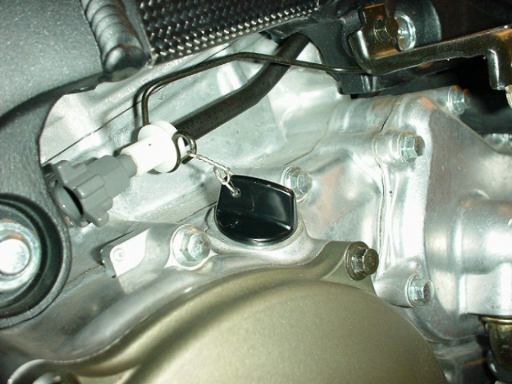
Here are some more samples of finished wiring to use as a guide.

<table id="ncode_imageresizer_warning_1" class="ncode_imageresizer_warning" width="640"><tbody><tr><td class="td1" width="20">
 </td><td class="td2">This image has been resized. Click this bar to view the full image.</td></tr></tbody></table>
<table id="ncode_imageresizer_warning_2" class="ncode_imageresizer_warning" width="640"><tbody><tr><td class="td1" width="20">
</td><td class="td2">This image has been resized. Click this bar to view the full image.</td></tr></tbody></table>
 <dt class="ol_min_title">Brake Repair
</dt>
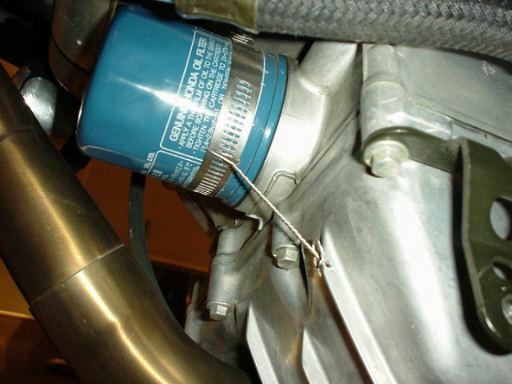
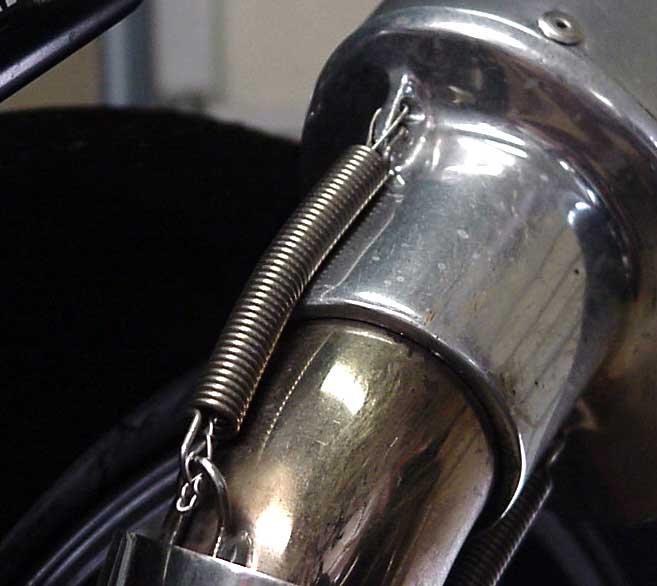
In the example above note that the Wire is routed through the inside of the spring. This will keep the exhaust on the bike should the end of the spring break off.
Here are some images of safety wiring and wiring devices:
Image Search Results for safety wiring
Here is the next installment in the Rogue How To series. Today we will go through the steps of how to safety wire your bike. The first thing we will need to do is gather all the supplies we will need. One small note that I can not emphasize enough is to be patient and take your time. Do not get in a rush as this will only cause you grief. Before beginning read through the wiring requirements of your Organization and create a check list of things that need to be drilled and wired.
The first step is to gather all the tools and supplies you will need.
The Tools.
</dt>
You will need the following tools.
-Torque Wrench
-Metric Socket Set
-Drill either Corded or Cordless
-Plenty of 3/32 Titanium Drill bits
-Automatic Center Punch
-Safety Wiring Pliers
-.032" T-304 Stainless Steel Wire
-There are a couple of optional items shown. I like using my linesman cutters(the large blue pliers on the right) to cut the wire to length as the cutters on the Safety Wire Pliers are not as good. The small blue punch on the left is for removing any broken drill bits(You will break at least one).
I will assume that if you are under taking this process that all the bodywork has been removed from the bike. If it hasn't then do so now. Next make sure all the bolts have been torqued to the proper specs. It's a good idea to check them again just to be sure.
Now that you have checked them all it's time to start marking them for drilling.
Grab a Sharpie and mark the sides of the bolt heads you plan to drill. Usually these will be the ones facing to the outside of the bike.
Once you have the side marked that you like to drill it's time to grab the Automatic Center Punch.
Before removing the bolt use the Automatic Center Punch to mark the location for the drill bit to start.The punch will create a divot in the bolt head so that the bit will stay centered were you want to drill. If you do not use a punch the bit will move around and make it hard to drill with any precision which is referred to as walking. Remove the bolts from the bike.
Now it's time to drill. I can not emphasize enough to take your time with this step. Rushing will only cause you to break bits and will end up being very frustrating. Also when drilling use a light weight cutting oil and keep the end of the bit coated in oil. This will make the bit cut easier as well as last longer before becoming dull. Also if the bit becomes dull toss it.
The best way to accomplish the drilling is on a drill press but some of you will not have these available. Those that do not have access to a drill press may choose to drill them on the bike. I personally drill mine on the bike but this will require you to be a little more thoughtful about how and where you drill. Drilling on the bike will also make you more prone to breaking drill bits. Again take your time and drill slowly.
IF YOU AREN'T HANDY WITH A DRILL I HIGHLY SUGGEST TAKING THE DRILL PRESS ROUTE.
When drilling Allen Head bolts be sure to drill through to of the flats portions of the bolt as indicated by the 2 red arrows. This will assure you do not create a weak point in the portion of the bolt where the most torque is applied.
Work on one section at a time so that you do not miss any bolts that will need to be wired.
Now that things have been drilled it's time to move on to the wiring portion of this project. When routing safety wire you always want to route it in a way that it is always pulling in such a manner as to keep the bolt from coming loose. In the pictures below I will demonstrate the correct method of Routing and Securing the Safety Wire.
First pull about 10 inches of wire out of the container and cut it. Straighten the wire by pulling it through 2 fingers until the coils are fairly straight. Now pass it through the first bolt head and line the 2 ends up so that you have effectively found the center of the length of wire.
Notice in the photo above that I have looped and pulled the wire in the opposite direction of the way the bolt would loosen from the fork leg. Now grab the wire just before it reaches the other bolt head and clamp your Safety Wire Pliers onto the wire.
Now use the pliers to twist the wire to this point. Be careful not to over twist the wire. You are looking for consistent coils. If you twist it to tight the wire will break. This may take a few tries to find the ideal amount of twist. Be patient you will get better at it.
If you get it right it should look like the example above.
Now thread one side of the remaining portion of the wire through the other bolt head, again observing the direction in which you route the wire.
Again measure back to the next point and clamp the Safety Wire Pliers back onto the wire and twist.
Now we will route the wire back to the final attachment point and secure the end.
THe final step is to cut the end to length and fold it over onto itself to lock the end of the wire in place.
The end result should look like the example below.
Here are some more samples of finished wiring to use as a guide.
<table id="ncode_imageresizer_warning_1" class="ncode_imageresizer_warning" width="640"><tbody><tr><td class="td1" width="20">
<table id="ncode_imageresizer_warning_2" class="ncode_imageresizer_warning" width="640"><tbody><tr><td class="td1" width="20">
</dt>
In the example above note that the Wire is routed through the inside of the spring. This will keep the exhaust on the bike should the end of the spring break off.
Here are some images of safety wiring and wiring devices:
Image Search Results for safety wiring

")