
You are using an out of date browser. It may not display this or other websites correctly.
You should upgrade or use an alternative browser.
You should upgrade or use an alternative browser.
Scotts build thread
- Thread starter Scott R.
- Start date
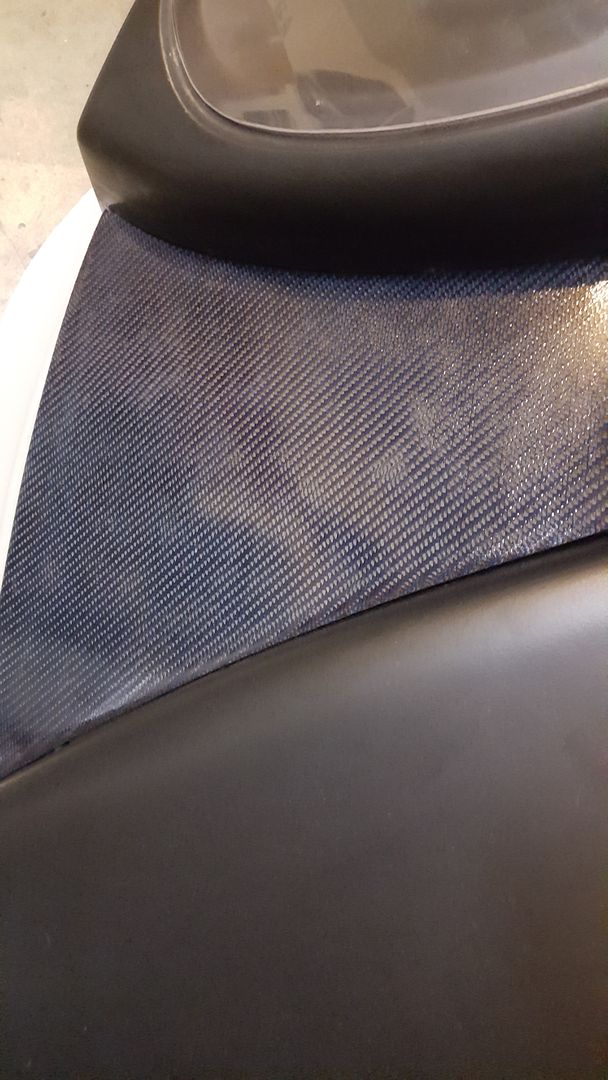
Well, My process ended up sucking. Haha. The color also came out very dark, almost black. Too dark for what I was wanting. I havn't seen it in the sun yet though.
I found another cloth that is black, blue, and light gray. It should be abit brighter and it has a really cool weave. Will be trying a different process next time.
The main problem I was having is with the kevlar. It absorbs sooo much more resin that it raises substantually over the cf threads. In sanding it down, I went through the resin and was not able to keep a consistent finish. If this new weave doesnt work also, I will just go with regular cf cloth. It is much easier to work with.
Here is a pic showing finished color, and you can see some of the inconsistancies in the finish.

Thanks Jack. That is the company I have been sourcing through. I thought they were advertising it as kevlar though. It is really hard to cut like kevlar for sure. Either way, that is the fabric I am using, and it was the colored part that really expanded.
The new cloth came today. Here is a picture between the two. Left is the first pattern, and right is the new one. The design is abit less directional, so I can save on materials by not having to have everything cut in the exact same direction. Hoping it would be lighter though in the blue color. Just going to have to try it and see the color I am left with. If it stayed the same color, it would be perfect. But, it darkens alot when resin hits it.

I am using a clear epoxy. It just darkens when wet. Even regular clear coat paint turns it dark.
This next time I will spray glue the part and put the mat on, then just pile a ton of clear on it. I know that will stay crystal clear, and I can pound on the last coat and make it all self level. It should work better and leave no chance of sanding through to the cloth.
This next time I will spray glue the part and put the mat on, then just pile a ton of clear on it. I know that will stay crystal clear, and I can pound on the last coat and make it all self level. It should work better and leave no chance of sanding through to the cloth.
I am using a clear epoxy. It just darkens when wet. Even regular clear coat paint turns it dark.
This next time I will spray glue the part and put the mat on, then just pile a ton of clear on it. I know that will stay crystal clear, and I can pound on the last coat and make it all self level. It should work better and leave no chance of sanding through to the cloth.
That's the best way to do it. The Kevlar makes life difficult anyway!
Yep the back is the best, really like how the body wraps around the diffuser. Just perfect. I on the other hand am not a big fan of the back of my own car. Sad but true
Thanks Mesa. The hinge set up is nearing completion. Took many maths and models, but I think I finally have it.
Having a rear face now and the wheel wells installed, it really stiffened up the torsional twist. Hinge is a 4 link set up, placed right about the center of gravity on the rear. Got a pair of 120# lift shocks on the way. Hoping for a two finger operation to open rear. :stunned:
Doesn't Koenigsegg use regular CF and then tint the clear to give the cars color, or do they use color in the cloth too?
I have thought of that. I have some cobalt blue candy concentrate here I can mix in with the clear. But, the blue cloth is so dark, I am not sure it will have the effect I want. I have also tossed around the idea of adding blue pearl powder to the clear, which typically has a purple flop color. Could be interesting. Pearls really work best over dark colors, so that may be a way to create a cool effect.
Last edited:
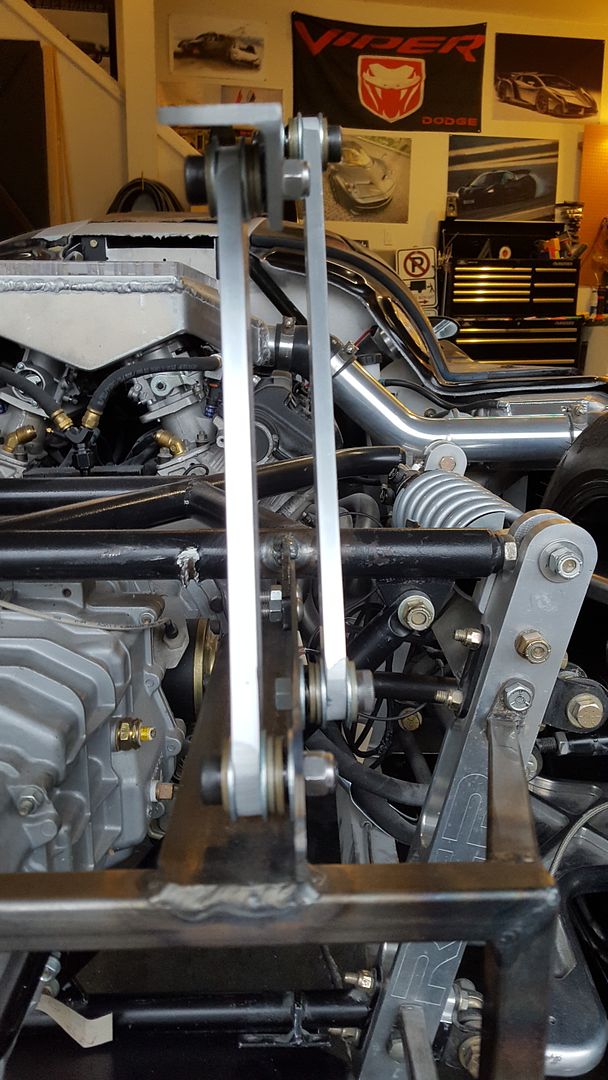
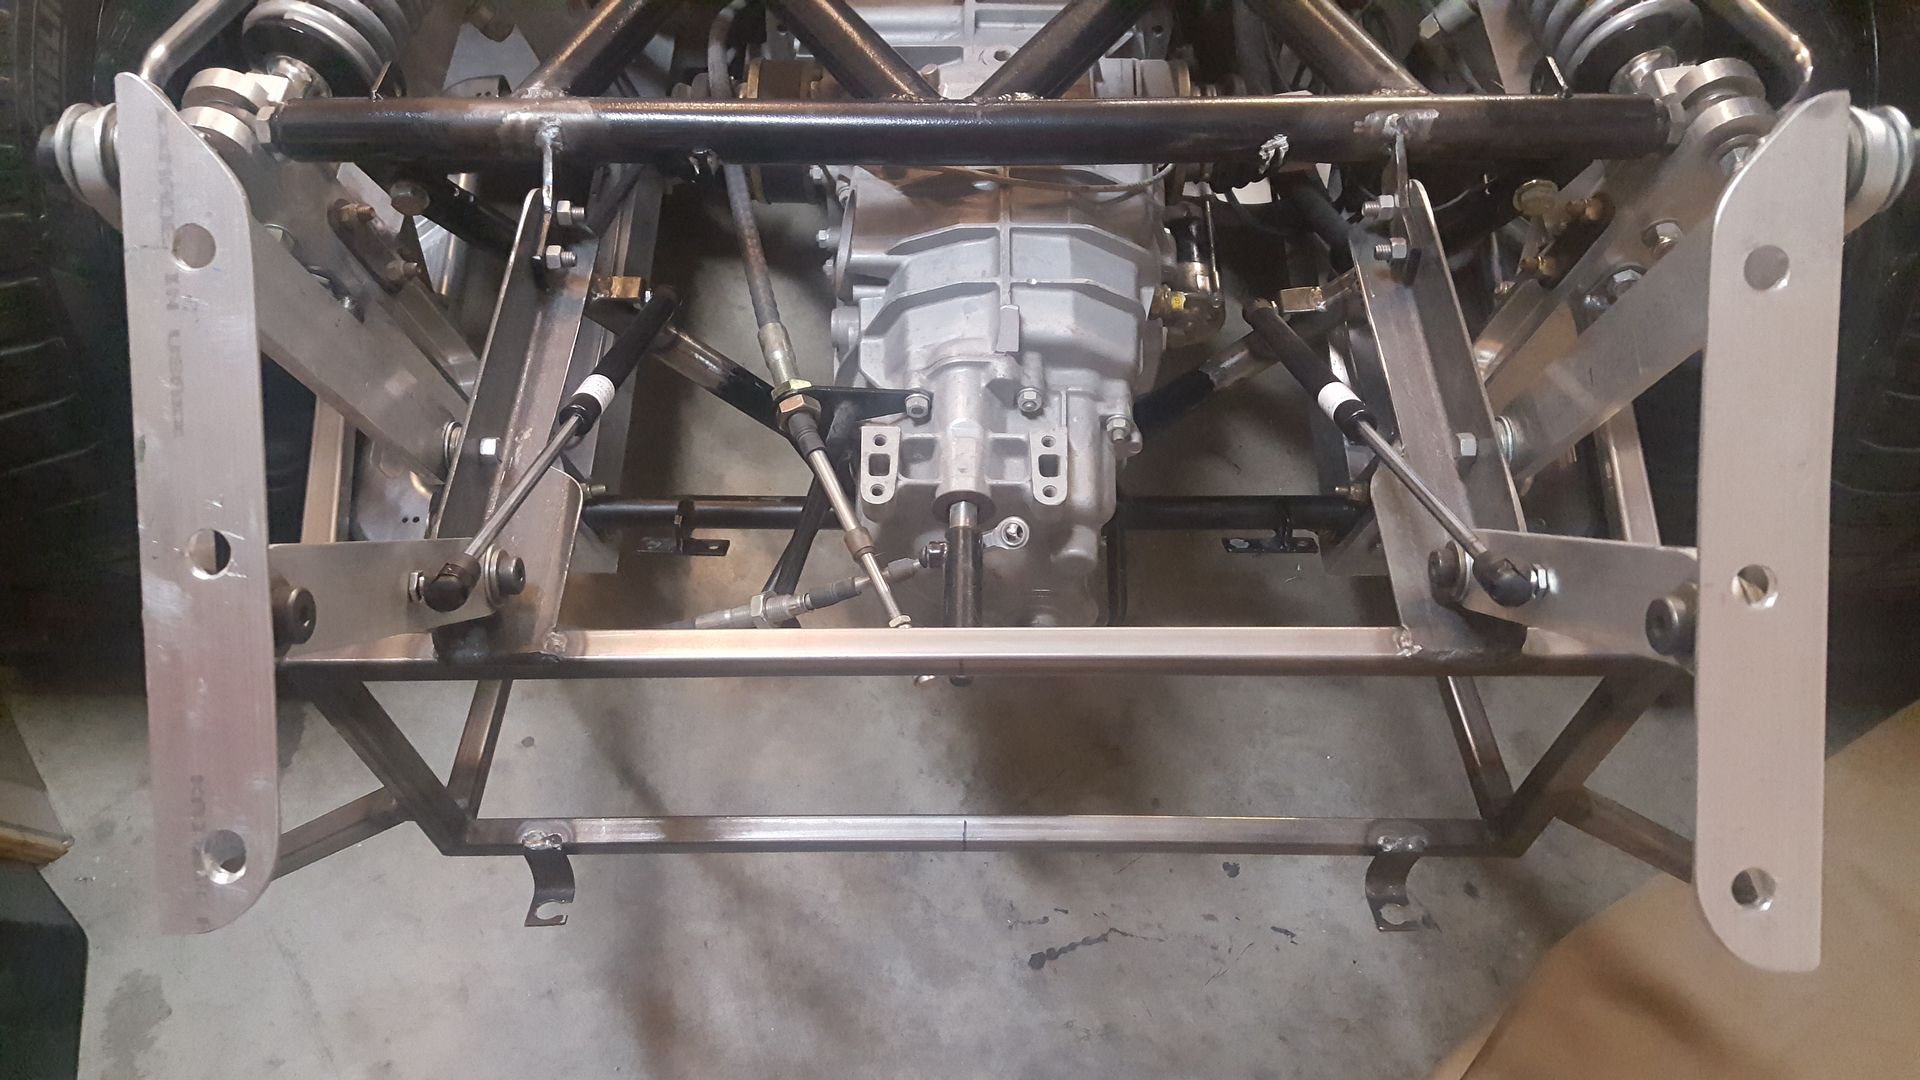
Here is what I have been working on lately. Wrapping up all of the loose ends under the rear. So made a rear subframe assembly that carries the rear diffuser, rear hinge system, and the wing will stack over top of that with alignment pins. So, was able to combine all of that in one 5# frame. Still need to drill lightening holes in the hinge bars. Need to get the pressure shocks mounted first to see where I can drill.
Rear wheel wells also epoxied in. Rear body work is very stiff now.
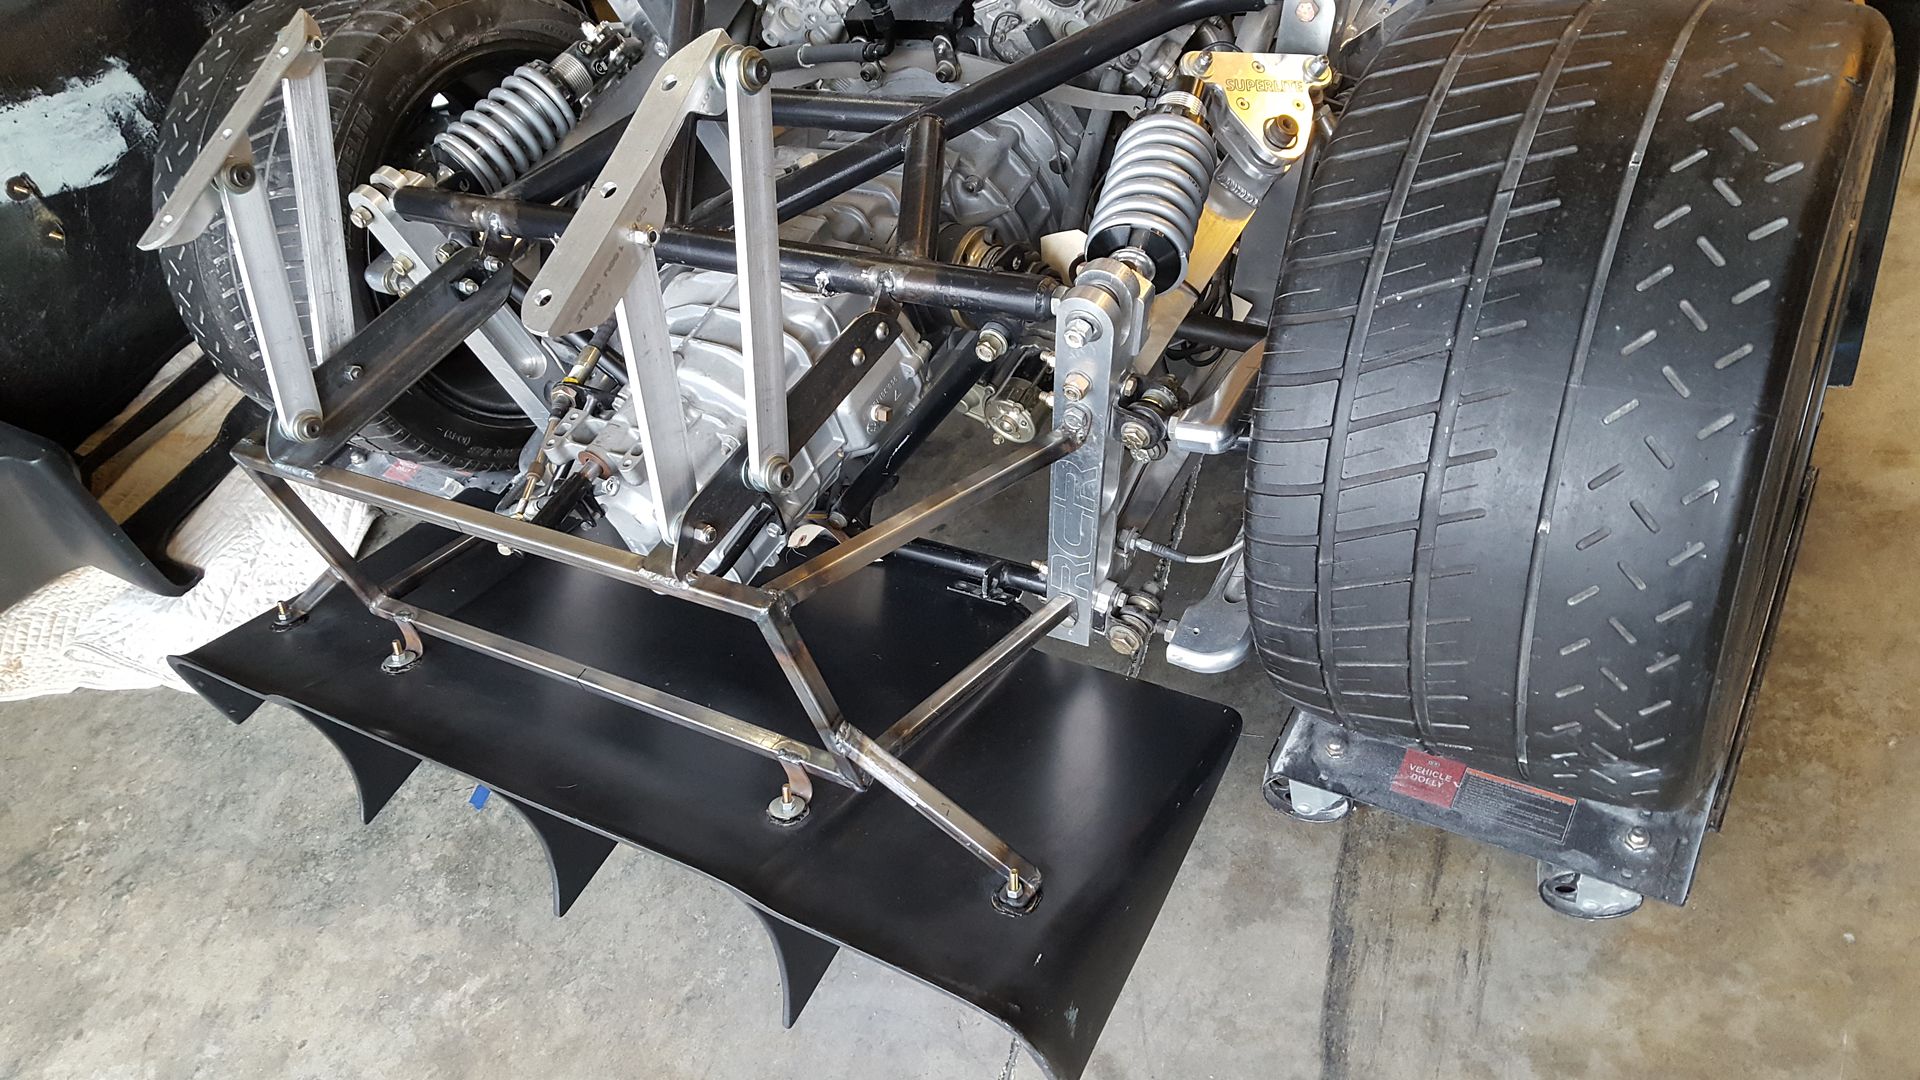
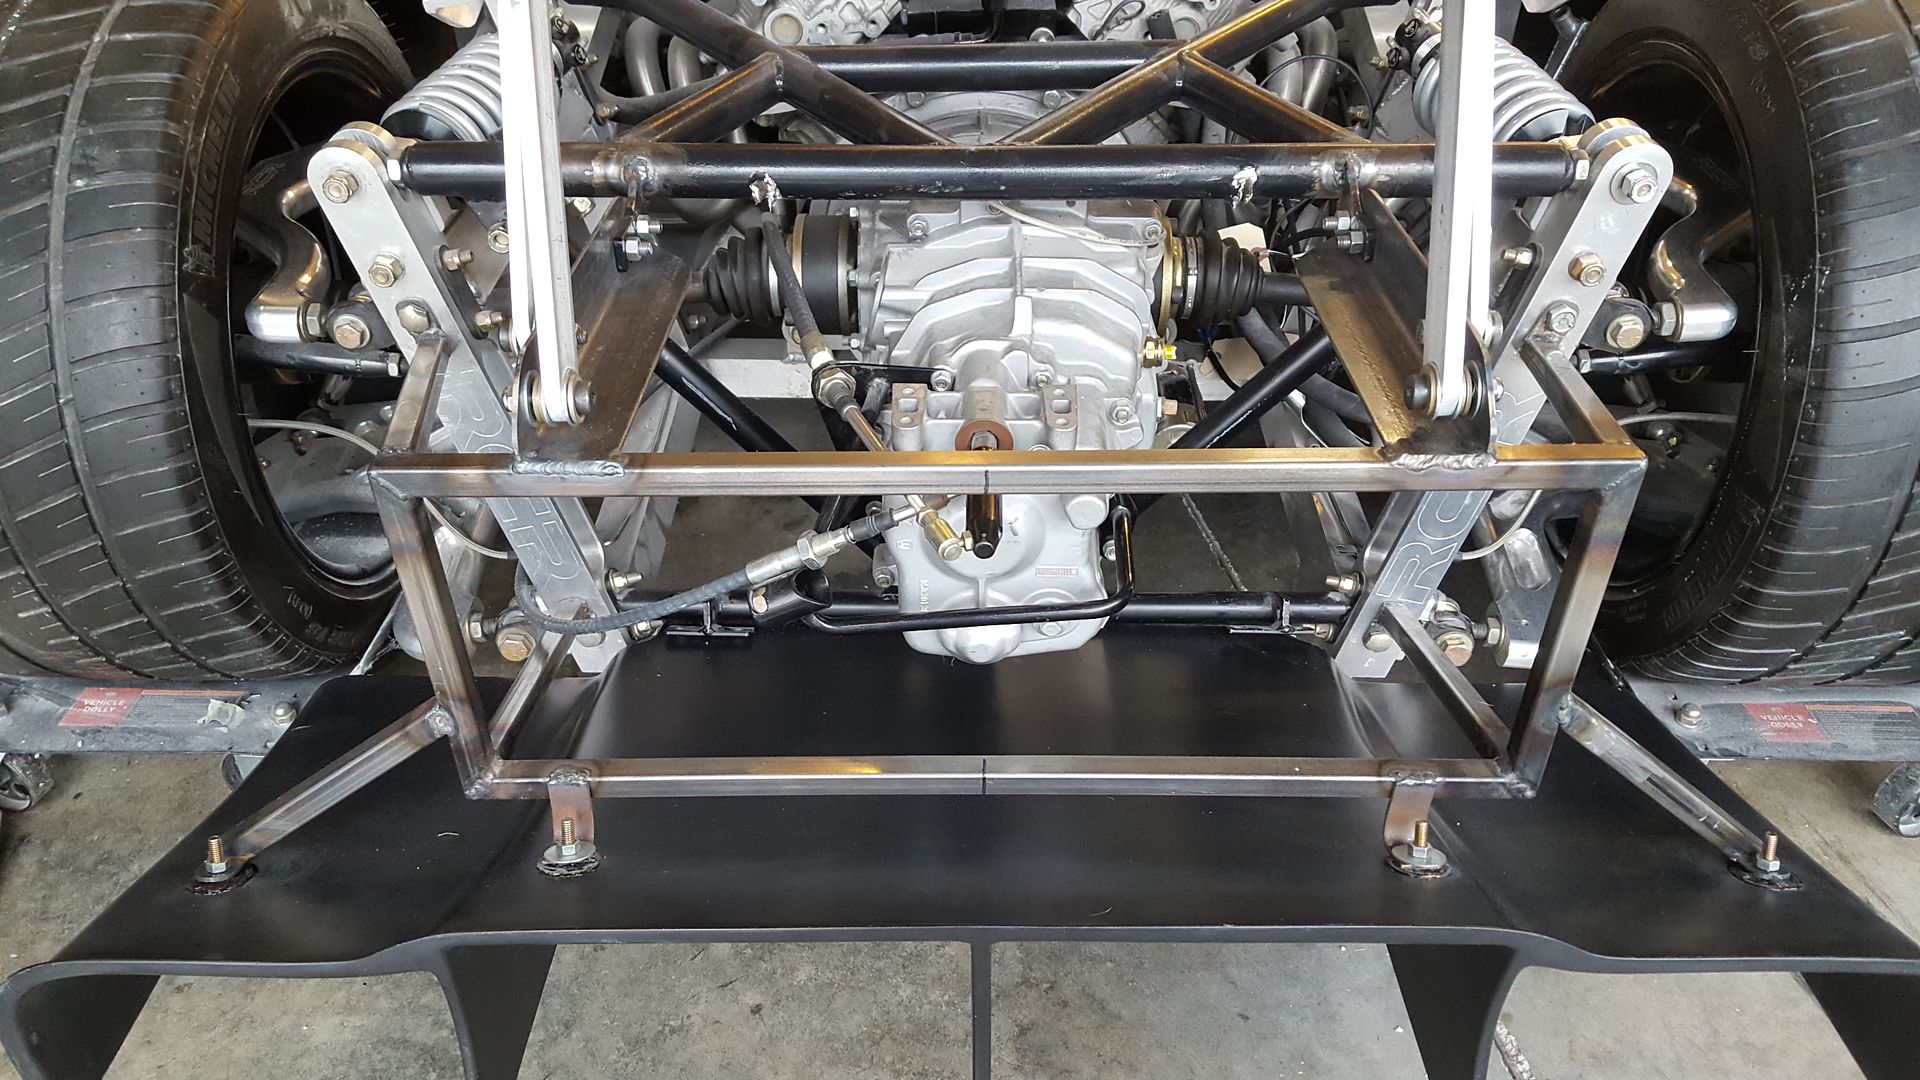
Used 1/2" shoulder bolts for the alum to ride on. Wave washers keep constant pressure on the stack without putting anything in a bind. 6 3/8" bond on fasteners were epoxied to the underside of the rear body work. Lifting point is very close to the center of gravity for the clam, so it should go up without much flexing at all. Was able to keep the hinge out of the "stall point" which will lock it if trying to only pull up in the front.
The wide stance of the arms and all measurements unequal, make the hinge square itself pretty good through its whole movement. The pressure shocks will be at a slight inward angle, so that should further help control it while opening and closing.
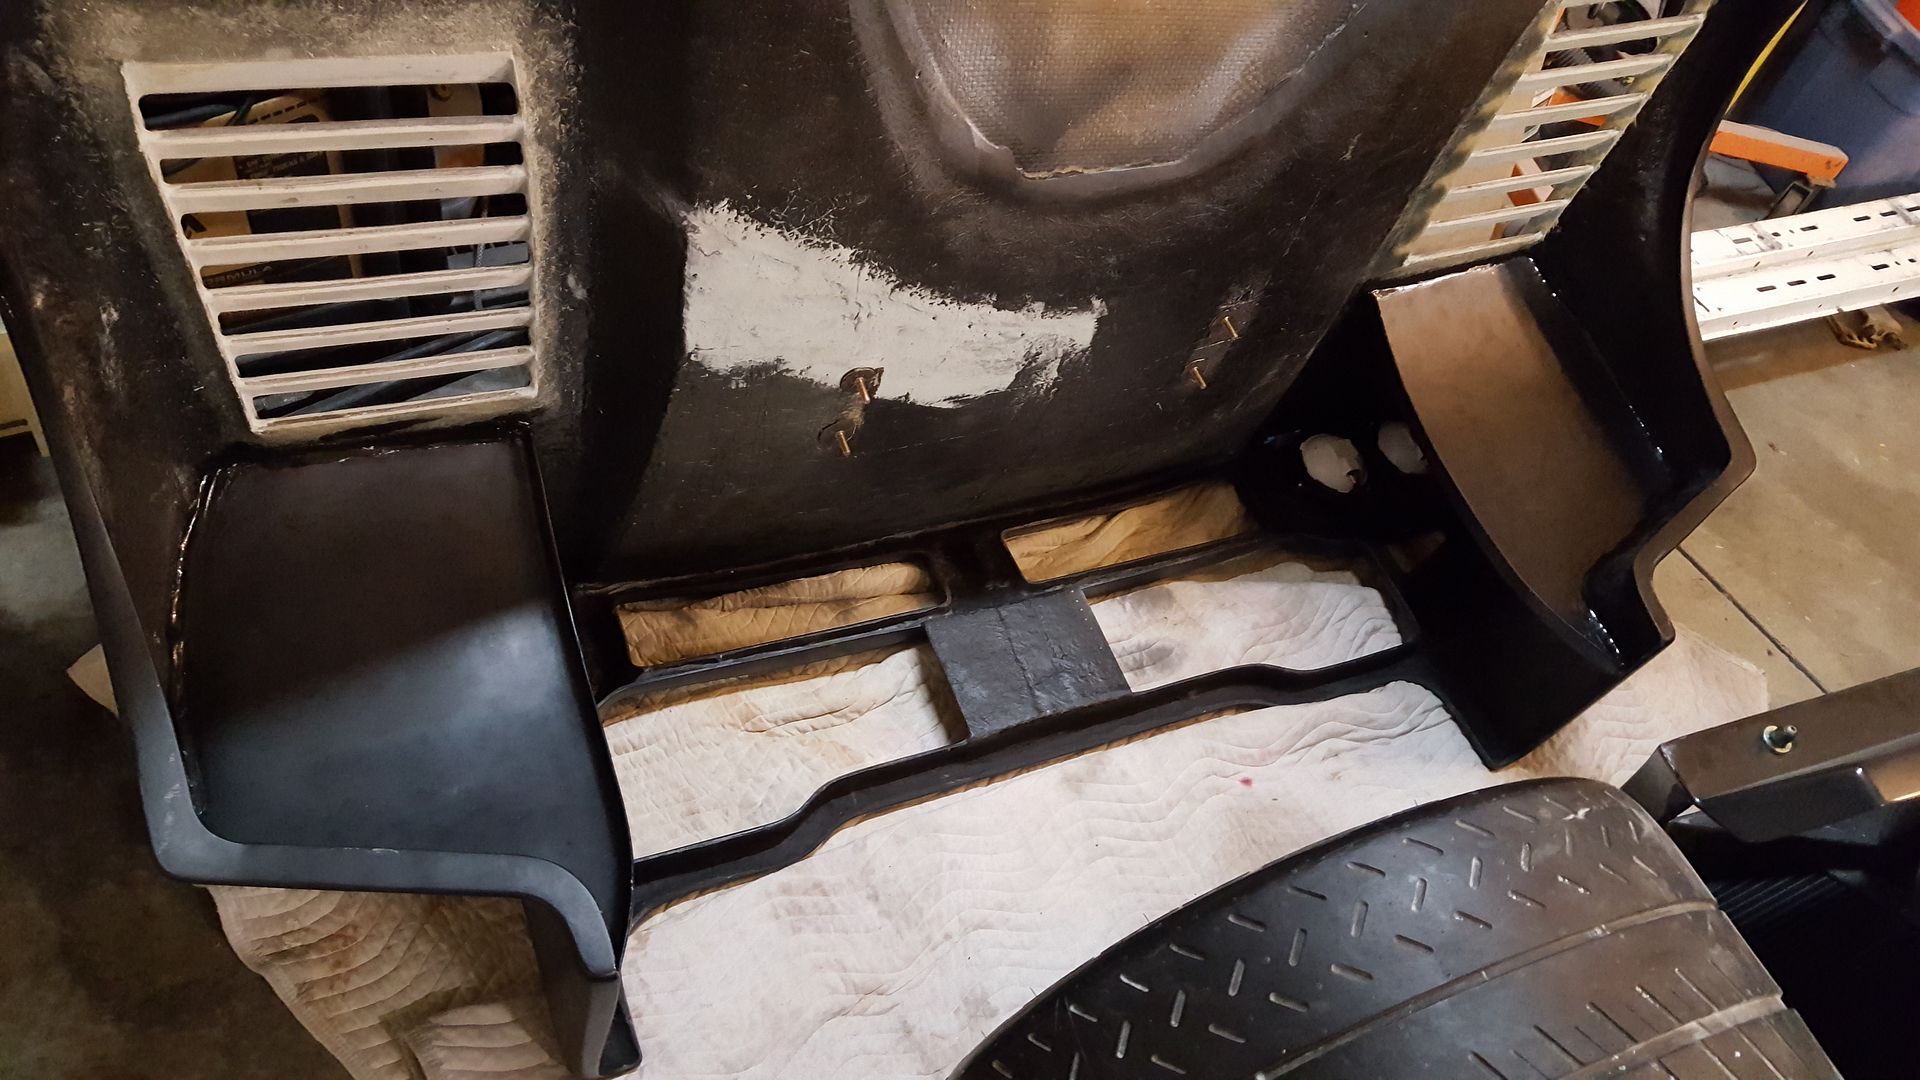


Calculating all of the weights to this point. The rear wing support that came on the car, was 35# that was taken off. I am at about +31# on my stuff, so 4# more to go to equal same as before. So, I may go a few pounds over since I still have to make my wing supports to make. They will only be 12" long though.
Well, I never thought I would see the day........


Wow! I love the way the rear of the body tilts back. Also the way the rear of the body fits against the diffuser is genius.. So when are you taking pre-orders? Unfortunately, the back of my SLC is my least favorite part.
Your back end puts the Aspira f620 to shame imo.
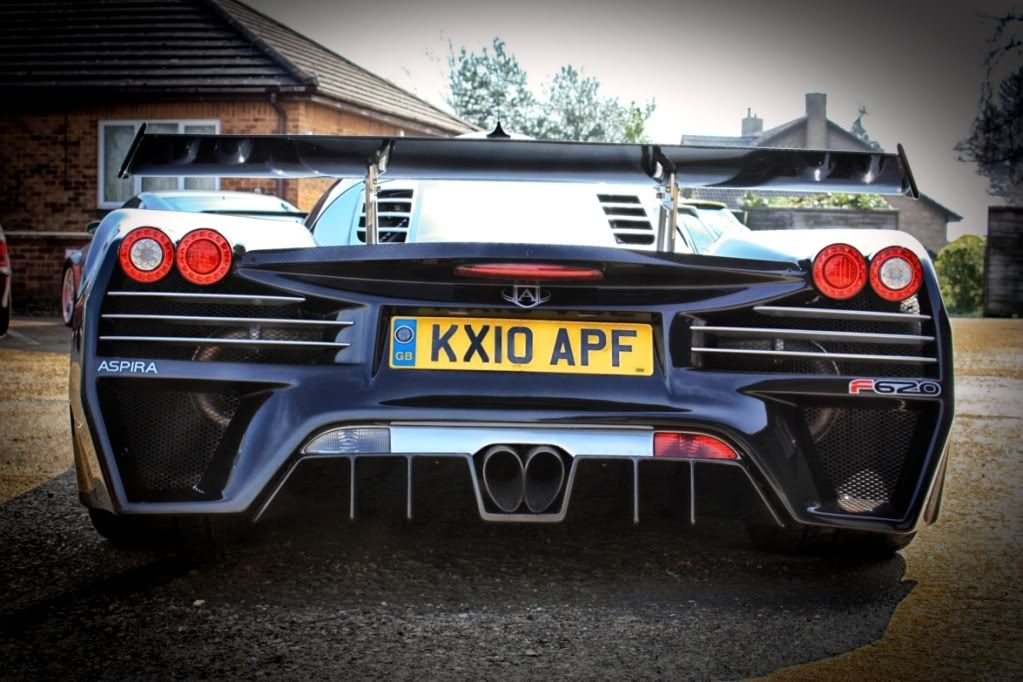
thanks Daniel. The Aspira did inspire me to do the rear, but had to make it different ofcourse.
Who knows at this point if I will be making molds or not. Will see response when it is nearing completion. I am still not happy with the rear engine cover/scoop, so that will be changing yet again.
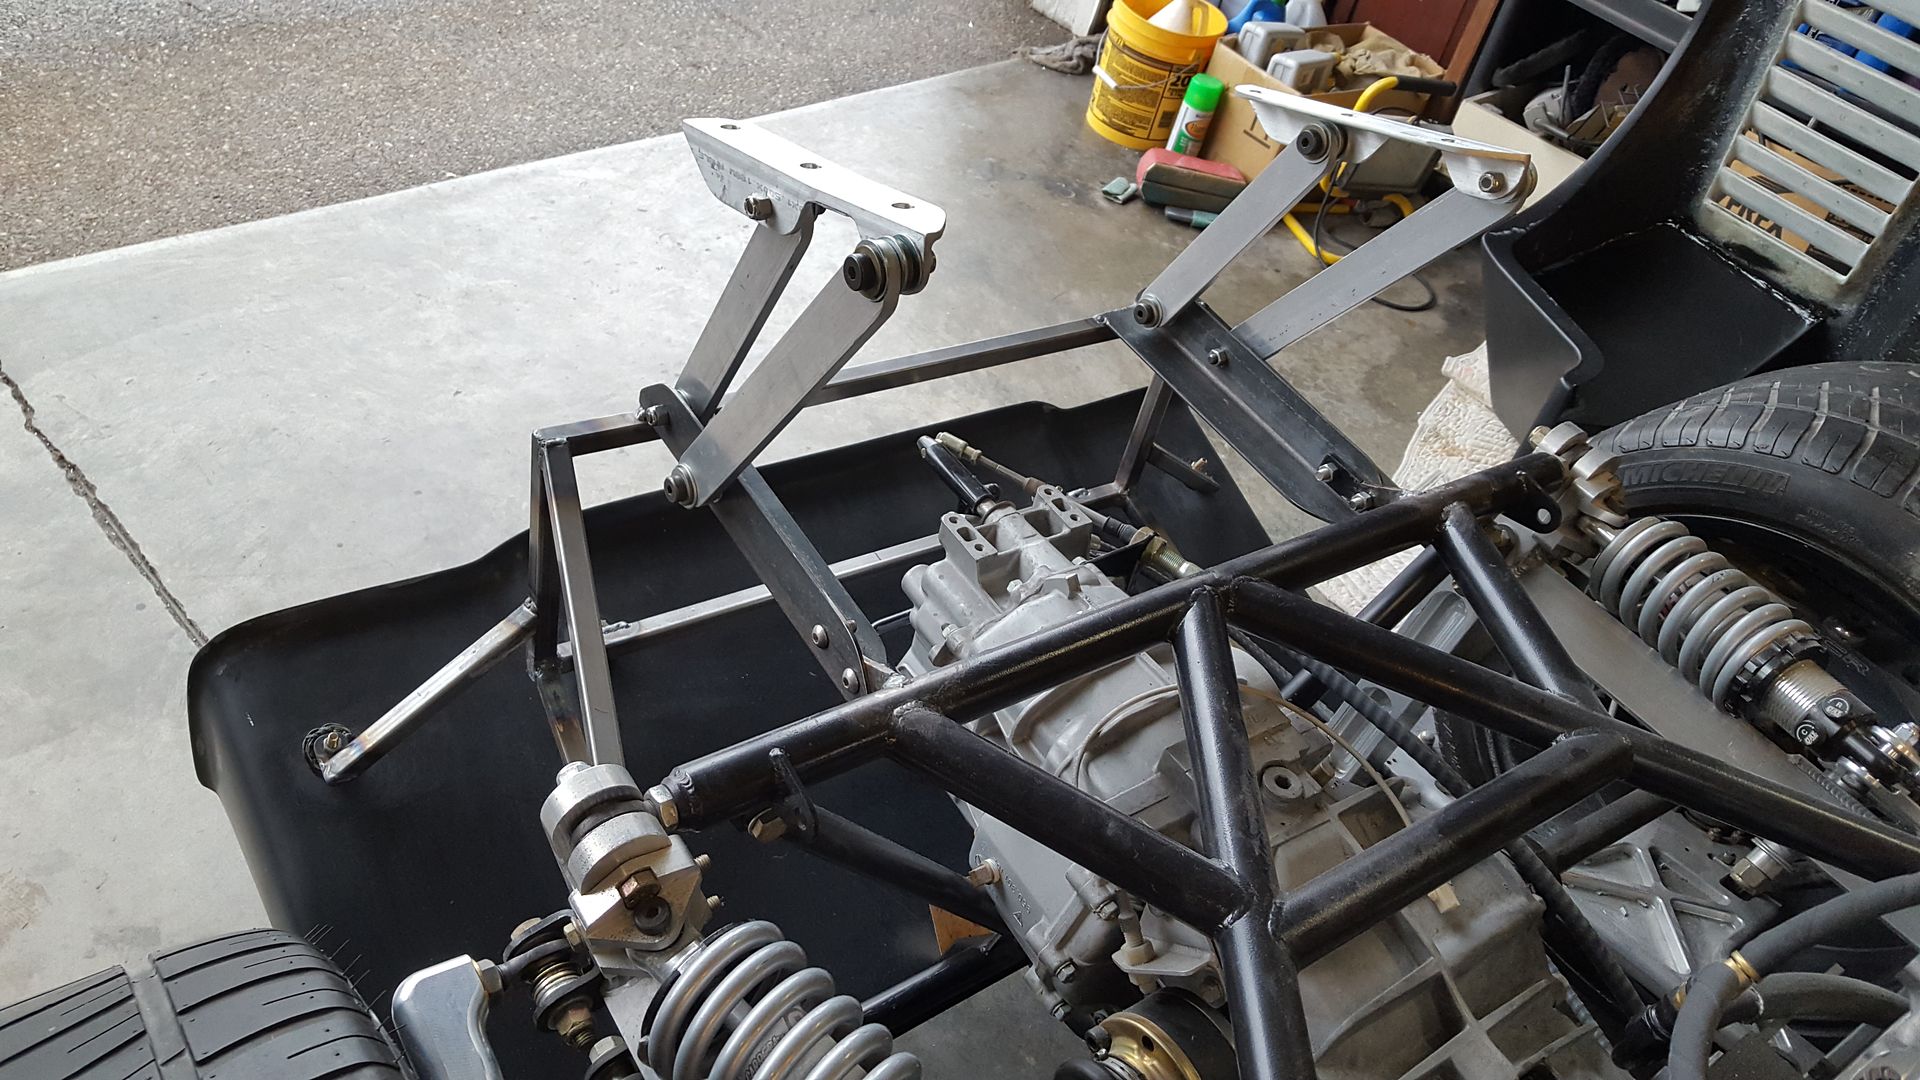
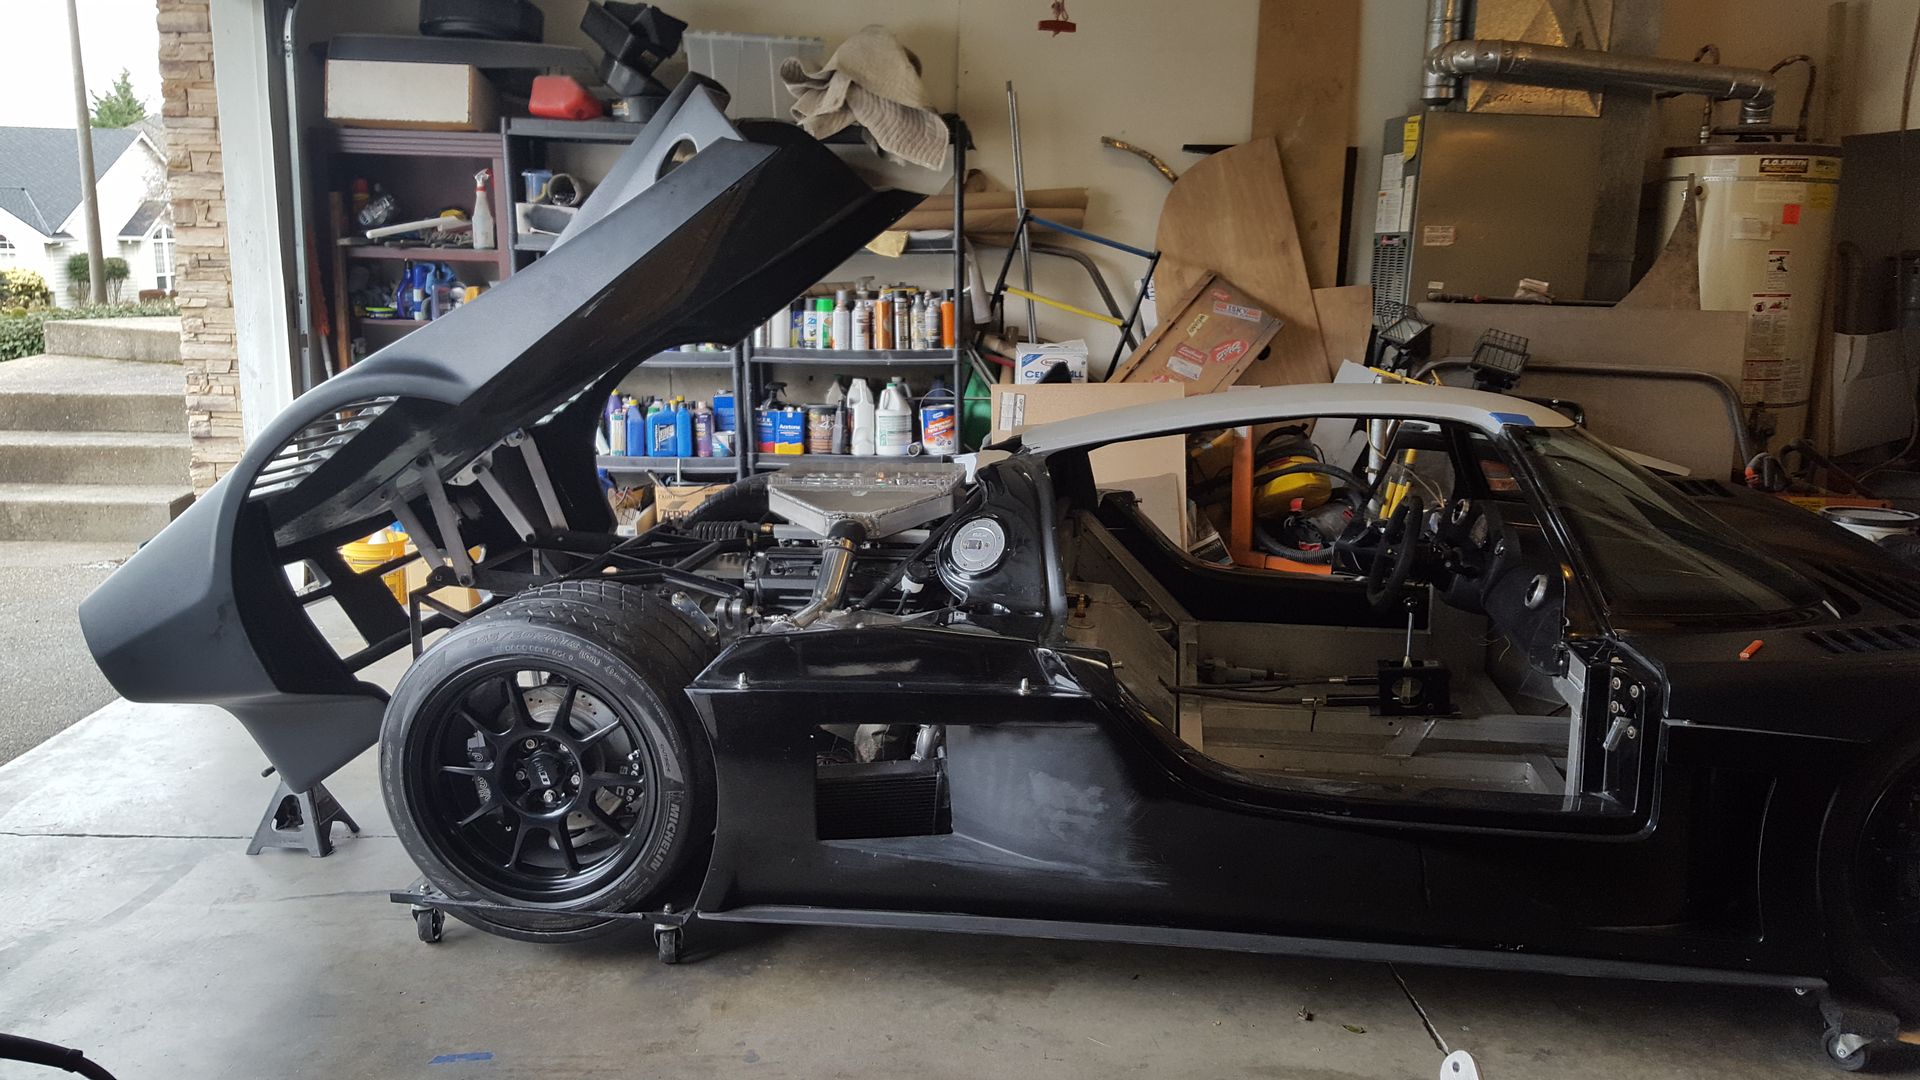
Finished hinge. Used 120# lift shocks. Where they are at on the arm will generate about 50# each of lifting force. I would love to put the clam back on and test it, but my "helper" had butter fingers while lowering the clam back down right after the pic above, and dropped it. It wedged against the diffuser on its way down, and ripped the epoxied bolts right off the clam. Ugh.
So, today will be reinforcing the area on the clam the hinges mount, and using a combo of epoxy and fg them in also. Will be a couple days before it can go back on.
So, today will be reinforcing the area on the clam the hinges mount, and using a combo of epoxy and fg them in also. Will be a couple days before it can go back on.

...I am still not happy with the rear engine cover/scoop, so that will be changing yet again.
Wheeeeew! 'Relieved to hear that. The 'P-51ish' scoop has never struck me as fitting/blending with/complimenting the rest of the car's lines. It's the only thing on the car right now that doesn't IMHO. So, great minds think alike once again! :2thumbsup:
Are you still considering the 'louvers' (for want of a better term) on the sides of the engine cover? 'Would probably look 'killer'.
 leased: 'Will look good either way, though.
Last edited:

Similar threads
- Replies
- 5
- Views
- 782