You are using an out of date browser. It may not display this or other websites correctly.
You should upgrade or use an alternative browser.
You should upgrade or use an alternative browser.
Southern GT #28
- Thread starter Hamish
- Start date
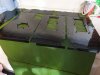
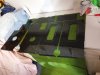
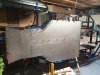
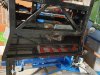
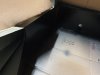
Two top coats done today. The PIR Top Coat seems slightly harder to get on consistently than the POR15. However, still think its going to look good for the engine bay. Lots of protection, as that's now 4 coats.
Attachments
Just a side note - on my super seven I painted the whole chassis with POR-15 - fantastic paint - but never used a top coat. Even though many pieces were exposed to sunlight (UV) they was all great. So not sure if the top coat is really necessary. I though used it on the roll-cage. Everything painted with a small roller and/or brush.
I plan to hire my girlfriend (great dinner, champagne,...") ) when the GT40 chassis need to have paint - she like painting, I don't
) when the GT40 chassis need to have paint - she like painting, I don't
I plan to hire my girlfriend (great dinner, champagne,...
) when the GT40 chassis need to have paint - she like painting, I don't 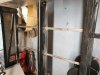
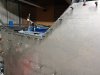
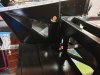
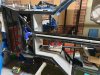
Now the bars are in I can flip the car and get the bottom panel on. Advantage of leaving the bottom off is being able to get into hard areas easier. Disadvantage is the car gets to heavy to turnover without help. As a result built half the car rotisserie tonight. Hope yo get the other half done tomorrow night.
Attachments
Davidmgbv8
Supporter
Hamish, what are the measurements where you put the straps, from the back bulkhead? I was going to do that to my chassis as well
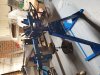
Some more progress today. I'm sure loads of you will experience the same thing. If you had more space, and lots of spare nuts, bolts and raw materials, each job would take 1/5th the time. So it's taken me a week to get the rotisserie attached to either end of the car but now it's done. Next job is to drill the millions of holes in the bottom get the pipes in, and then seal and rivet the bottom on.
Attachments

What gt40 kit type is yours?Looks a bit similar.....

Wow...you're a talent.It isn't a GT40 kit, it is something I designed and built. Both have stressed aluminum panels riveted on steel chassis tubes.
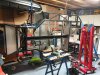
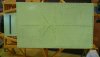
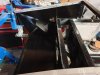
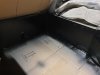
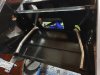
After over 2 months doing other things I finally got a day with the car today. One of those days trying to find things and then getting dependencies done. I cleaned, zinc'd and then painted all the areas I needed to before bolting the bottom on. Two coats of Por15 and the garage stinks!
Attachments
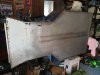
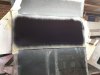
Just finished the por15, frost self etching primer, frost primer and top coat of front bay, engine bay and bottom under the steering. 6 layers of paint altogether. Now that all the panels are painted that are around the cooling pipes and steering, I will get the bottom on the car. Next weekends job.
Attachments

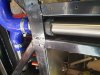
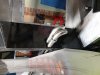
Progress today. Coolant pipes in and steering rack back in. Found the nuts bolting down the steering rack are very tight to the pipes, and the o rings on the pipes very tight, but it's in.
Attachments
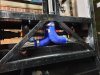
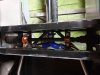
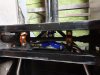
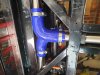
For anyone following the same path as me in the future, some details about the radiator cooling pipes. As Shaun says, the positioning of the pipes is really tight. Worth getting the pipes in when you have some of the front panels not connected, and before the base is on. The reason being the pipes are long, the workspace is small, and it's one of those space puzzles. Some, like me, had to cut the holes in the front panel larger to get the pipes in (the small pipes that poke out of the front pipes being a problem), and take the steering rack out. When the pipes were in , but not perfectly fitted, I then bolted the steering back in and tightened all bolts, nuts and pipe fasteners at the same time, as everything is in the way of everything else. Last note, as I was working through the bottom of the car, I made sure that the screws on the pipe fasteners were looking up, so in the future if I needed to get them off, I could get to them from the top. I also took Micks advice and cut some rubber from spare rubber connectors and placed it along the long pipes through the middle of the car to stop potential rattling of pipes against the chasis.
To all Sgt builders ahead of me. Checking something with those who have done their radiator plumbing. I've put the coolant pipes, with the top pipe pointing driver side at the back as Mick said. I assume it doesn't matter that at the front the top pipe is going opposite, to passenger side. The radiator and flow of coolant doesn't matter, circulating the whole system does it?
Finally got some more progress over the weekend. After more research discovered that the radiator pipe 90 degree pipes front and back need to turn the same direction front and back. Replaced my 90 degree turns on the front, coupled the back ones and finally got the bottom on the car. Used 3M Marine Adhesive Sealant with many many rivets. Big milestone for me.