Ken's SLC build thread

Ken Roberts

Supporter
Racelogic TC is no longer available. I picked up a second one shortly after they decided to no longer offer it. Sometimes they are offered up on EBay. A good tip is to check out EBay (UK). They can be spotted there more often. Just make sure it's for a V8 car. If the seller is unsure then the serial number can be emailed to Racelogic. They will gladly verify for you. They did for me on my second purchase.
+
 
Interesting, I have the racetronics traction control installed already, but does not have ABS, I will see how it works. I know the race logic TC system is very good. Will keep an eye out for used units , Just happy to at least have an option already on board .
 

Ken Roberts

Supporter
Can anyone show me a picture of the bottom side of your track splitter? I'm wondering how to shape the bonded in wood needed to strengthen it.

IMG_4329.JPG
 
Here's how I did mine. Foam carved to shape, later followed by a couple of layers of Kevlar/CF fabric.

If you use wood to cover the entire lower part it destroys the aero designed into the splitter.
 

Attachments

  • IMG_20190505_164835.jpg
    IMG_20190505_164835.jpg
    235.9 KB · Views: 284
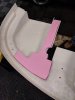
The nose of the car always seemed to be on a slant down (side to side) towards the drivers side as shown in this picture. I verified it by taking a measurement with a steel ruler resting on the square aluminum tubing and measuring up to the bolts that mount the vertical supports at each side of the foot box. The passenger side holes in the front wall of the foot box were spaced at 2"and 4" above the square tubing. The second picture shows the spacing on the drivers side. The holes are spaced at 1 11/16" and 3 11/16". Taking measurements of the difference in heights of the vertical nose plates from one side to the other also confirms the same thing. Pretty upsetting that I have to disassemble everything to repair this. Not happy at all having to do this. I read recently that someone with a GT-R had the same problem. The factory should be using a jig to locate these holes as it's important for the fit up of the the body parts (splitter and nose bodywork).

Can anyone else confirm what their measurements are?

Look closely at the top of the vertical plates and at the front upper suspension arm steel U brackets. You can see that the drivers side is lower by almost 3/8". I took measurements three different ways and they all confirmed the same thing. Check yours!

View attachment 99618View attachment 99619View attachment 99620
Ken, I got the same freaking problem as bad as yours. Not happy at all about it, such a simple quality control issue that should have been done.
I am hoping that I can fix it without taking everything apart. We will see.
 

Ken Roberts

Supporter
I redrilled my holes for larger fasteners Hector. That way I was able to correct the mistake without welding the holes closed first. Glad to hear you caught the mismatch at this stage.
 
Last edited:

Ken Roberts

Supporter
I modified my door hinges to eliminate the grinding sound. The hinge arm is now perfectly centred in the bracket as it swings through it’s arc. Two bearings with rubber treads were used. I was careful to make sure the strut end cleared the outboard bearing. The outboard bearing bracket had to be smaller to clear the fender obstruction. The nylon standoffs will be replaced with steel versions upon final assembly /install.
5214C396-72AF-4666-8DAC-0B09D17ADF17.jpeg
9557E6A6-5276-4B00-AEB7-B5DE8B44F2E5.jpeg
6DE85B6D-E85D-4D59-BDF4-929C88F14AD0.jpeg
040282FF-5ADE-4F76-A1BA-4BCBC682F659.jpeg
B7DF66A3-4687-446B-9588-1B730170E38B.jpeg
 
Last edited:

Ken Roberts

Supporter
The stock hinge bracket mounts to a large steel plate now to help spread the load out over a larger surface. The two plates were cut from a one foot length of 3 1/2” square tube. The C channel shape gives it additional strength. The extra large slot cutout by the factory really weakened that area.
image.jpg
 
Last edited:
I redrilled my holes for larger fasteners Hector. That way I was able to correct the mistake without welding the holes closed first. Glad to hear you caught the mismatch at this stage.
Your thread was super helpful in pointing me in the right direction, I was wondering if I was over thinking it or seeing things that were not there .
 
I modified my door hinges to eliminate the grinding sound. The hinge arm is now perfectly centred in the bracket as it swings through it’s ark. Two bearings with rubber treads were used. I was careful to make sure the strut end cleared the outboard bearing. The outboard bearing bracket had to be smaller to clear the fender obstruction. The nylon standoffs will be replaced with steel versions upon final assembly /install.
View attachment 112040View attachment 112041View attachment 112042View attachment 112043View attachment 112046
Great design Ken, another project to my bucket list, the list is getting awfully long , LOL.
 

Ken Roberts

Supporter
I’m taking a slightly different approach to mounting my dash. Six threaded posts will be located/bolted on the top of the foot box (their height will be adjustable). They pivot and have aluminum discs fastened to the top with a industrial type of hook and loop material bonded to the top. Each post will mate up to a aluminum disc with the same hook and loop material on them. These will be bonded to the bottom side of the dash. I’ll be able to adjust the dash for warpage and set the height of the dash accurately this way and in the future if needed. This type of industrial fastener by 3M is used on the plastic interior panels of GE locomotive cabs. I might even use this type of industrial hidden fastener on the interior door panels in one spot.

image.jpg
 
Last edited:

Ken Roberts

Supporter
My hvac anchor is mounted on threaded rods. I had to bond a aluminum base to the anchor so it can function on it’s own. Once the dash height is located correctly then the anchor can be adjusted up till it just touches the defogger slotted holes on the bottom of the dash.
A word of caution about cutting out the defroster holes in the anchor (or dash). I wouldn’t advise cutting out one big slot in each defroster outlet. Back pressure is needed to force the volume of air out the entire length of the slot. If you cut out one big hole than the air will just escape out the front part of the hole near the middle of the anchor. Unfortunately
others have found this out the hard way. Before you bond the window in experiment with different size of holes along the entire length of the cutout area. The goal is to create a back pressure in the anchor so that the warm air is forced out all the holes.

image.jpg
 
Last edited:

Ken Roberts

Supporter
I used a cheap choke cable and a adjustable hvac fitting to control the air going to the anchor for defrost. Trying to keep things simple is sometimes the best. The only thing electrical directly under the dash will be the heads up display box, automatic headlight sensor and the RCDLR receiver from a C6 Corvette. The RCDLR receiver receives the signal from the tire pressure sensors and the remote fob for keyless starting.

image.jpg
 
Last edited:
I’m taking a slightly different approach to mounting my dash. Six threaded posts will be located/bolted on the top of the foot box (their height will be adjustable). They pivot and have aluminum discs fastened to the top with a industrial type of hook and loop material bonded to the top. Each post will mate up to a aluminum disc with the same hook and loop material on them. These will be bonded to the bottom side of the dash. I’ll be able to adjust the dash for warpage and set the height of the dash accurately this way and in the future if needed. This type of industrial fastener by 3M is used on the plastic interior panels of GE locomotive cabs. I might even use this type of industrial hidden fastener on the interior door panels in one spot.

View attachment 112126
Super cool idea. Never knew about it . Lerners something new everyday in this forum . I can think of a few places where this is helpful . The versatility is very very helpful .
 

Brian Kissel

Staff member
Admin
Lifetime Supporter
Great work as usual Ken. Do you per chance have the part number for the 3M industrial fastener ? Only guessing but does it come in a roll or only round or square pieces?

THANKS
Regards Brian
 
Back
Top