
You are using an out of date browser. It may not display this or other websites correctly.
You should upgrade or use an alternative browser.
You should upgrade or use an alternative browser.
GT-Forte GTs40 build
- Thread starter fastdruid
- Start date
I trial fitted the dash along with the steering column

Somewhat annoyingly however I ran into somewhat of an issue.... The panels I made to seal the filler area intrude on the space needed to fit the vents. This is as close as I can get them.

So, I cut apart the two panels I'd made (thankfully I'd not yet fixed them in place) and re-made the top section.
Those panels were a royal PITA in the first place and re-doing them was just as much of a pain.
Somewhat annoyingly however I ran into somewhat of an issue.... The panels I made to seal the filler area intrude on the space needed to fit the vents. This is as close as I can get them.
So, I cut apart the two panels I'd made (thankfully I'd not yet fixed them in place) and re-made the top section.
Those panels were a royal PITA in the first place and re-doing them was just as much of a pain.
Trundling slowly ever forward.
Wired up the dash, the dash will be removable just by disconnecting a number of connectors.
It's got one connector/mini-loom for backlighting, one for the "gauges" then the warning lights are split in two lots. Earth to light and power to light. Finally the hazard warning light has it's own mini-loom (as it has an inordinate number of connections!)
This then let me test some lights. Ignore the wonky angles, they're all coming out again before I "place" them permanently.
"Earthed" first.

"Powered" #1

"Powered" #2

Also let me test the "backlights" which highlighted somewhat of a problem.


I'm not sure there is anything I can do about the Smiths tacho, the backlight just seems to be utterly shit on it. Even shining an insanely bright torch in and it barely shows any light. The backlights on the smaller gauges were different colours because I bought them at different times and they're a mix of bulb and LED. I'll need to sort that.
Because the tacho backlight is so poor I broke out the backlight into three, one constant 12v for the speedo (programmatically dimmable), one for the tacho and another for all the gauges that I can build in either a rheostat or a PWM circuit (depending on if I go LED or bulbs) to dim the 52mm gauges to the same brightness.
The switch panels then are also removable via individual connectors.
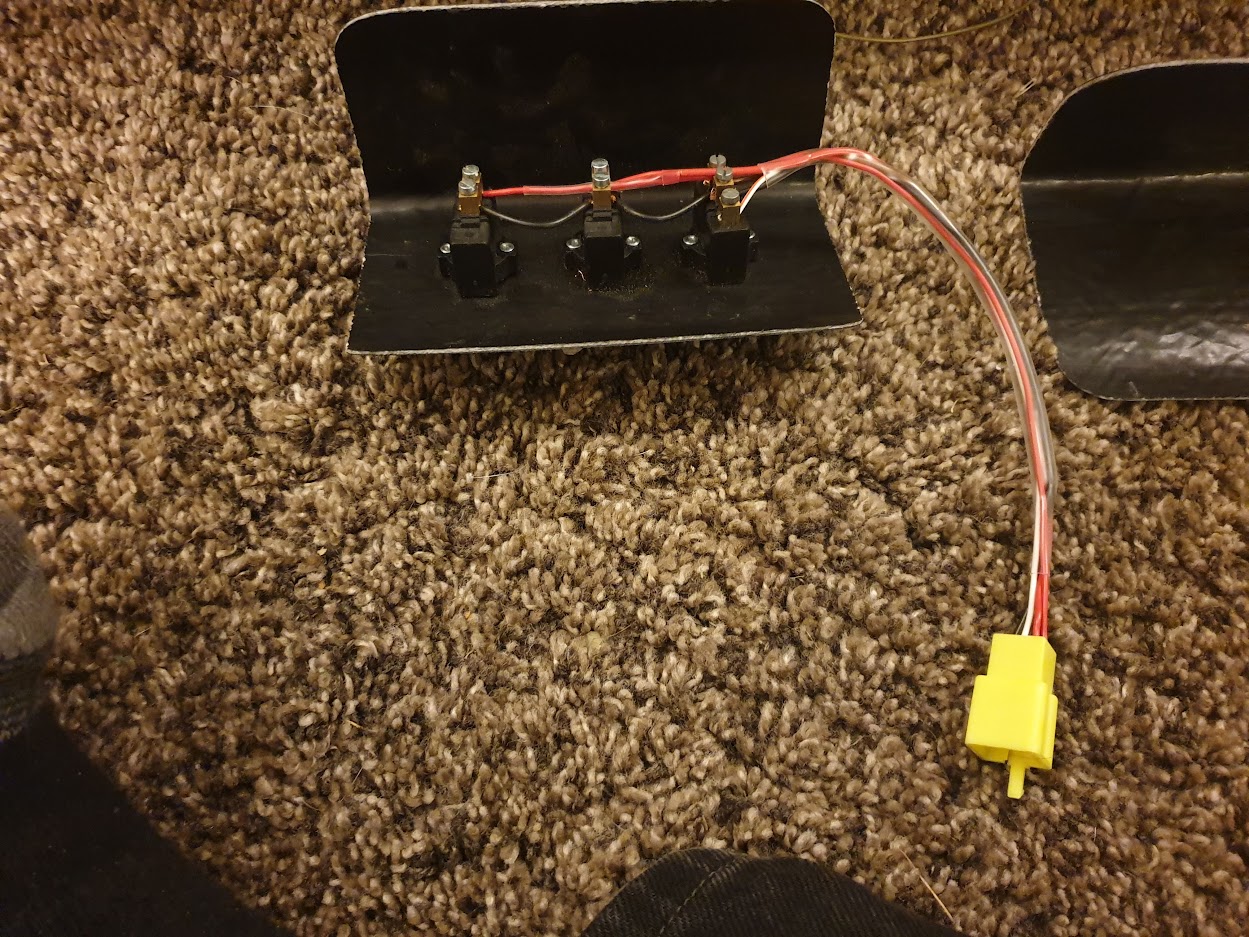

I used 2.8mm multi-way connecters throughout from here https://www.3waycomponents.co.uk/Automotive-Connectors/2.8mm-Mini-Connectors different colours and or sizes for each.
They're also the same type typically used on older motorbikes up to the 90's. They're perfect for the low ampage stuff although I struggled to find an actual rating I did find somewhere that said 6A, to put that into perspective that would be enough for a headlight bulb and more than plenty for the minor amps required for the dash.
They're not waterproof but if you're getting water into the area behind the dash you've got bigger problems!
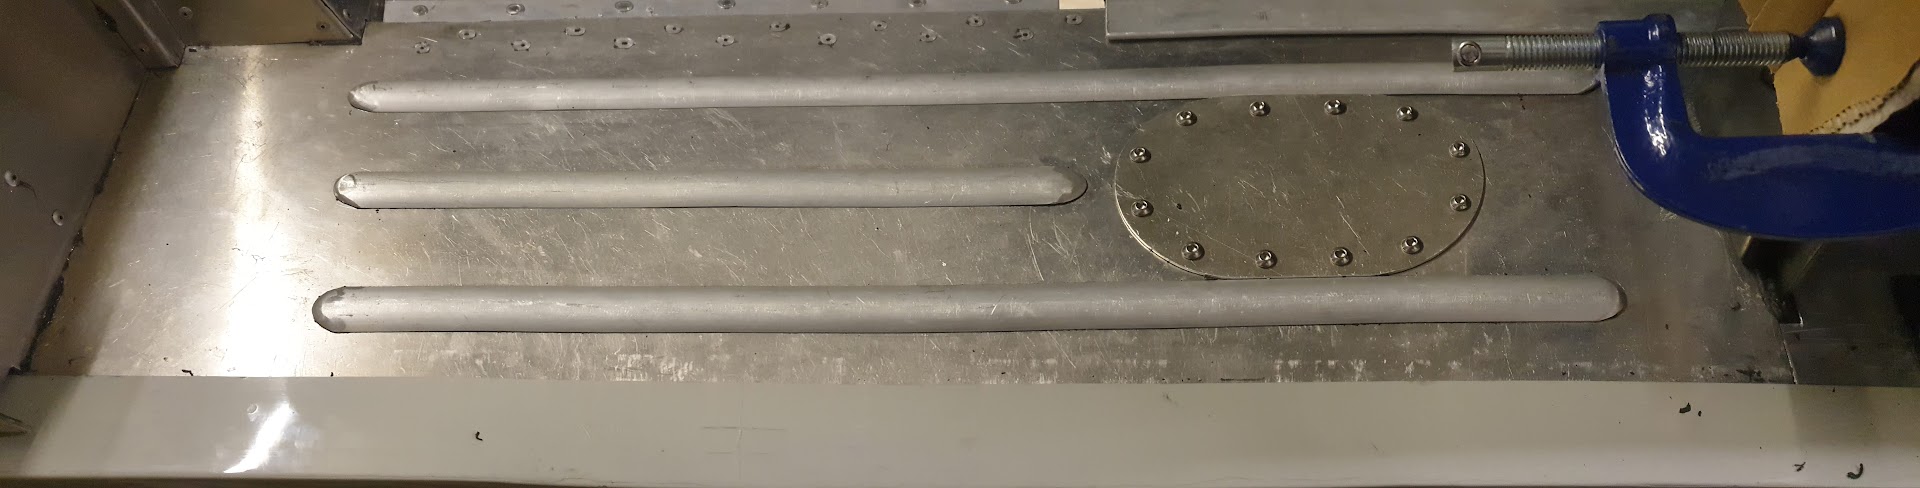
I also sanded the vent holes out until the balls fitted. I need to bond in some screws for those, I bought some Tee nuts for that, they're the type typically used in wood but I'll use them in reverse and put some fibreglass over them to hold everything securely.
Wired up the dash, the dash will be removable just by disconnecting a number of connectors.
It's got one connector/mini-loom for backlighting, one for the "gauges" then the warning lights are split in two lots. Earth to light and power to light. Finally the hazard warning light has it's own mini-loom (as it has an inordinate number of connections!)
This then let me test some lights. Ignore the wonky angles, they're all coming out again before I "place" them permanently.
"Earthed" first.
"Powered" #1
"Powered" #2
Also let me test the "backlights" which highlighted somewhat of a problem.
I'm not sure there is anything I can do about the Smiths tacho, the backlight just seems to be utterly shit on it. Even shining an insanely bright torch in and it barely shows any light. The backlights on the smaller gauges were different colours because I bought them at different times and they're a mix of bulb and LED. I'll need to sort that.
Because the tacho backlight is so poor I broke out the backlight into three, one constant 12v for the speedo (programmatically dimmable), one for the tacho and another for all the gauges that I can build in either a rheostat or a PWM circuit (depending on if I go LED or bulbs) to dim the 52mm gauges to the same brightness.
The switch panels then are also removable via individual connectors.
I used 2.8mm multi-way connecters throughout from here https://www.3waycomponents.co.uk/Automotive-Connectors/2.8mm-Mini-Connectors different colours and or sizes for each.
They're also the same type typically used on older motorbikes up to the 90's. They're perfect for the low ampage stuff although I struggled to find an actual rating I did find somewhere that said 6A, to put that into perspective that would be enough for a headlight bulb and more than plenty for the minor amps required for the dash.
They're not waterproof but if you're getting water into the area behind the dash you've got bigger problems!
I also sanded the vent holes out until the balls fitted. I need to bond in some screws for those, I bought some Tee nuts for that, they're the type typically used in wood but I'll use them in reverse and put some fibreglass over them to hold everything securely.
I need to bond in some screws for those, I bought some Tee nuts for that, they're the type typically used in wood but I'll use them in reverse and put some fibreglass over them to hold everything securely.
Vents fitted. Finished photo first.

Started of with 3D printing an alignment ring, this let me ensure that the vents were perfectly central to the hole (as they kind of fit "on" rather than in). Then fitted T-Nuts to the vents with a few washers to ensure there was some leeway.
These were then fitted into place with some milliput, just enough to hold them in place.

These were then glassed in to firmly hold everything in place. Rather overkill as it's only for the vents but they're not going anywhere!

One refit of the dash in place to ensure there was plenty of clearance behind them.


Then looked to the ignition. I'd planned to use the steering lock and ignition from the Agila column...except while the "key" side fit perfectly the actual ignition switch side didn't. It hit the dash. So I chopped the entire lot off.
All this lot was chopped off. It's a bit of an odd mix of plastic with embedded metal.

That left me with just the end bearing and a cup to support it. I was tempted to bin it all and make up a new end bearing holder (and still may) but the bearing is a bit rare and hard to get hold of which puts me off.

As I can no longer use the original steering lock/ignition switch I've also purchased a new ignition key switch and I'll need to fit an immobiliser for IVA. Previously I was going to have a combined alarm/immobiliser but not fit it for IVA (as if you have an alarm it needs to be "professionally fitted") and rely on the steering lock for that requirement.
Finally, I found my gear lever which had been awol for about a year. Quick trial fit and fettle of the lever so that there are no "limits" or binding.

Then fitted a bush to it and took 0.3mm off a washer to achieve a perfect fit and shortened a bolt so that it pivoted on the shank.
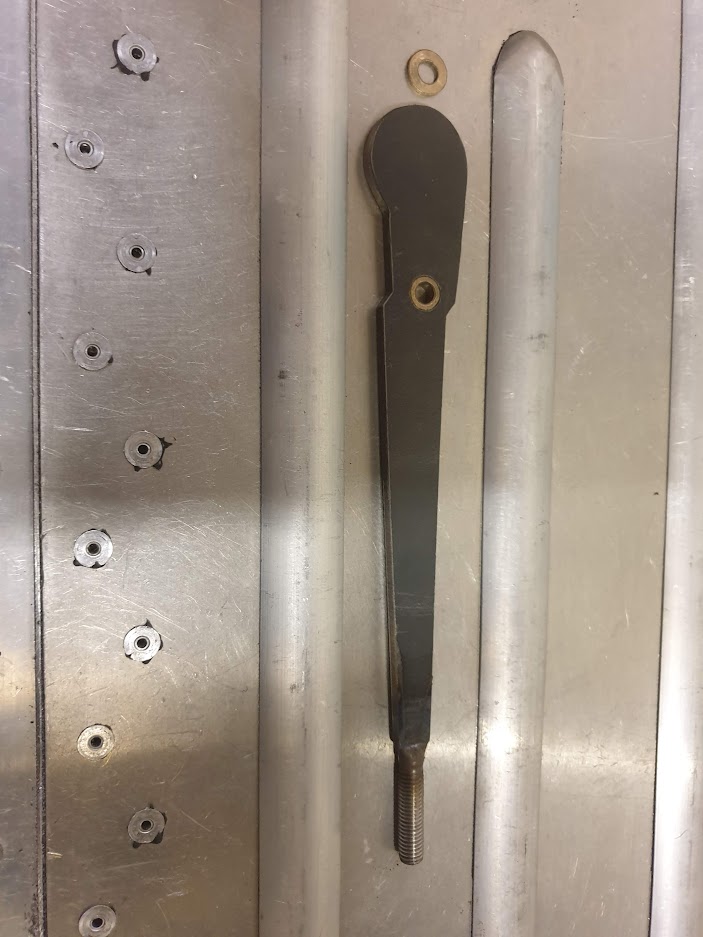
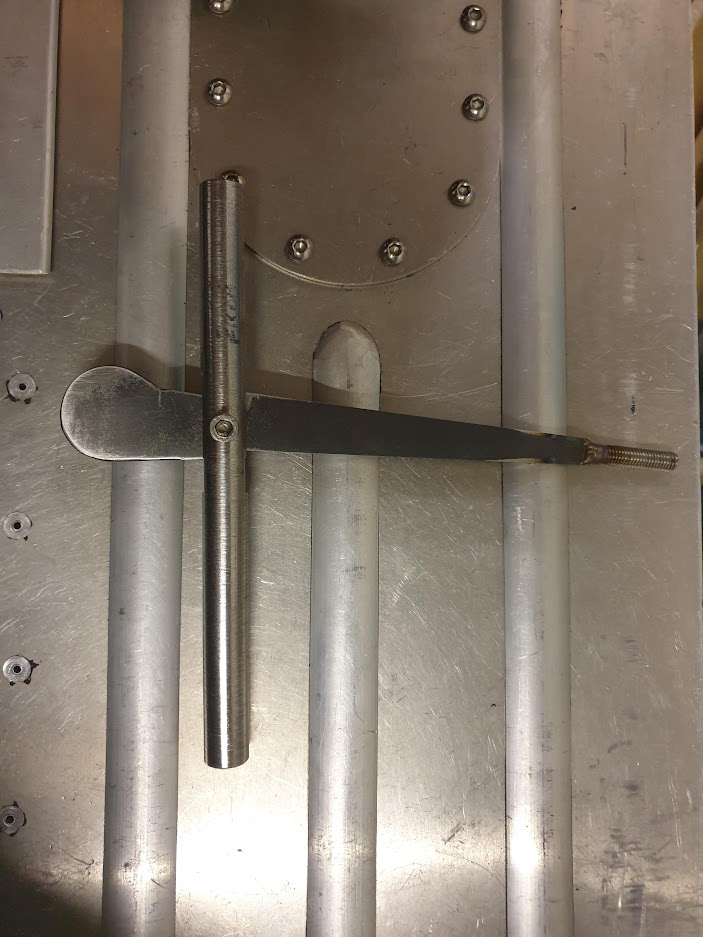
Finally, radiused the edges, cleaned it up and fitted it with a nylock. Bit of a pain to tbh, in hindsight I should have made the bush slightly larger rather than use a washer, it makes it a royal pain to fit in place and had to take the entire assembly off. Oh well, done now.

The gear knob isn't staying though. It's a fairly cheap nasty fake wood plastic item however it is the correct size/shape. I'll either buy or make a nice (real) wood one. I'll need to borrow use of a wood lathe for that though, I know you can turn wood on a metal lathe but it's not a particularly good idea (and it might be a good idea to borrow someone who knows wtf they're doing with a wood lathe at the same time!)
Hi David,
if you've a metal turning lathe, you can make your own wooden gear knob. Yes, it's messy, but nothing an air-line won't clean out and you've gained another skill. This was my attempt:

Regards,
Andy
if you've a metal turning lathe, you can make your own wooden gear knob. Yes, it's messy, but nothing an air-line won't clean out and you've gained another skill. This was my attempt:
Norfolk Tornado
Ditto on the luggage box.....:thumbsup:..good to see an example. I am planning to build similar for my project. Having a few simple tools and some oil/brake fluid on board will give me some piece of mind on longer trips.
www.gt40s.com
Regards,
Andy
Last edited:
What did you do for a speed senosor?Trundling slowly ever forward.
Wired up the dash, the dash will be removable just by disconnecting a number of connectors.
It's got one connector/mini-loom for backlighting, one for the "gauges" then the warning lights are split in two lots. Earth to light and power to light. Finally the hazard warning light has it's own mini-loom (as it has an inordinate number of connections!)
This then let me test some lights. Ignore the wonky angles, they're all coming out again before I "place" them permanently.
"Earthed" first.
"Powered" #1
"Powered" #2
Also let me test the "backlights" which highlighted somewhat of a problem.
I'm not sure there is anything I can do about the Smiths tacho, the backlight just seems to be utterly shit on it. Even shining an insanely bright torch in and it barely shows any light. The backlights on the smaller gauges were different colours because I bought them at different times and they're a mix of bulb and LED. I'll need to sort that.
Because the tacho backlight is so poor I broke out the backlight into three, one constant 12v for the speedo (programmatically dimmable), one for the tacho and another for all the gauges that I can build in either a rheostat or a PWM circuit (depending on if I go LED or bulbs) to dim the 52mm gauges to the same brightness.
The switch panels then are also removable via individual connectors.
I used 2.8mm multi-way connecters throughout from here https://www.3waycomponents.co.uk/Automotive-Connectors/2.8mm-Mini-Connectors different colours and or sizes for each.
They're also the same type typically used on older motorbikes up to the 90's. They're perfect for the low ampage stuff although I struggled to find an actual rating I did find somewhere that said 6A, to put that into perspective that would be enough for a headlight bulb and more than plenty for the minor amps required for the dash.
They're not waterproof but if you're getting water into the area behind the dash you've got bigger problems!
I also sanded the vent holes out until the balls fitted. I need to bond in some screws for those, I bought some Tee nuts for that, they're the type typically used in wood but I'll use them in reverse and put some fibreglass over them to hold everything securely.
What did you do for a speed sensor?
For the _speedo_ I'm using the 01E gearbox sensor. I'm however also fitting the ABS sensors to be able to track individual wheel speeds. This however is purely intended to be for traction control (and even then I may not bother, it's just easier to fit sensors and not bother with them than try and fit them later!)
No worries, I’m using the 01x box but don’t think the speed sensor is comparable with the smiths speedo I’m fittingFor the _speedo_ I'm using the 01E gearbox sensor. I'm however also fitting the ABS sensors to be able to track individual wheel speeds. This however is purely intended to be for traction control (and even then I may not bother, it's just easier to fit sensors and not bother with them than try and fit them later!)
Adrian Starling
Supporter
Hi David, I am going to follow you on the Agila steering and was wondering if you can share the Kyostar boss details? Kind regards, Adrian
Adrian Starling
Supporter
Hi David, your build is really impressive and your engineering skills very admirable! Do you by any chance have the template of your seats? I am building my seats in the same way and just wanted to compare. Kind regards, AdrianStarting to think about how things are going to go in the cockpit, ages ago got a SPF or CAV pedal box
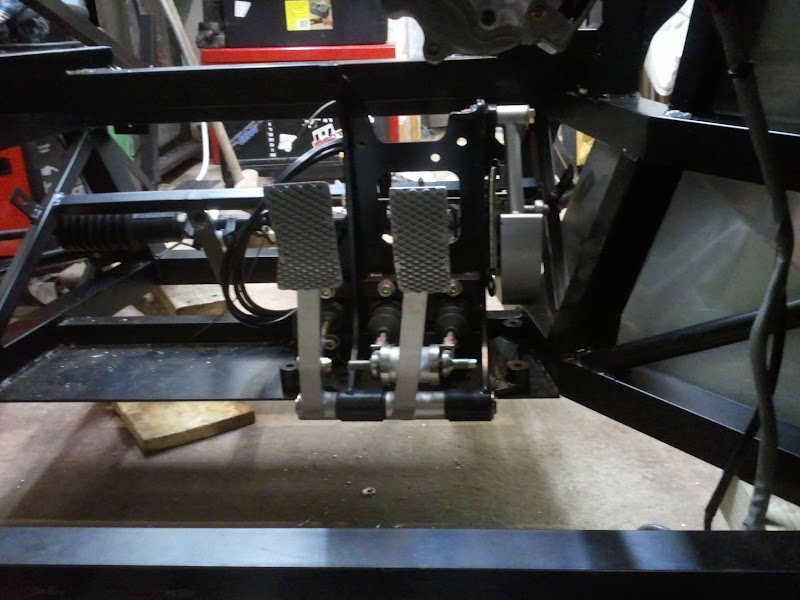
The only issue (apart from weight) is that it doesn't fit far enough to the right.
So a bit of modification is required...
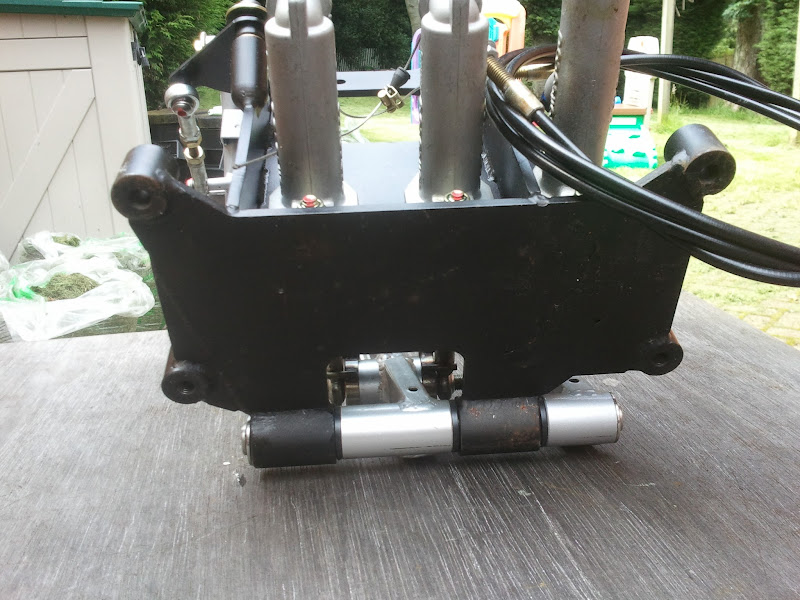
Bzzzzzzzzt
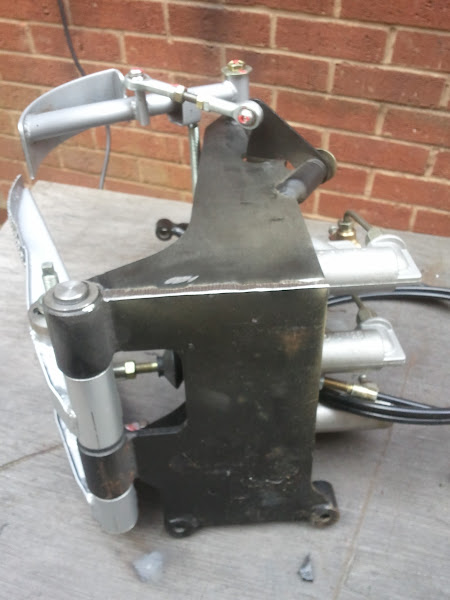
I'll have to sort out some new bolt locations but now it can sit with the brake pedal central under the steering column.

Even if I do panel the inside of the cockpit I may have to leave that section to the right unpanelled, not exactly a lot of room in there. I may even have to buy some driving shoes!
Had of course to try it out so introducing for the first time the Cardboard seat!
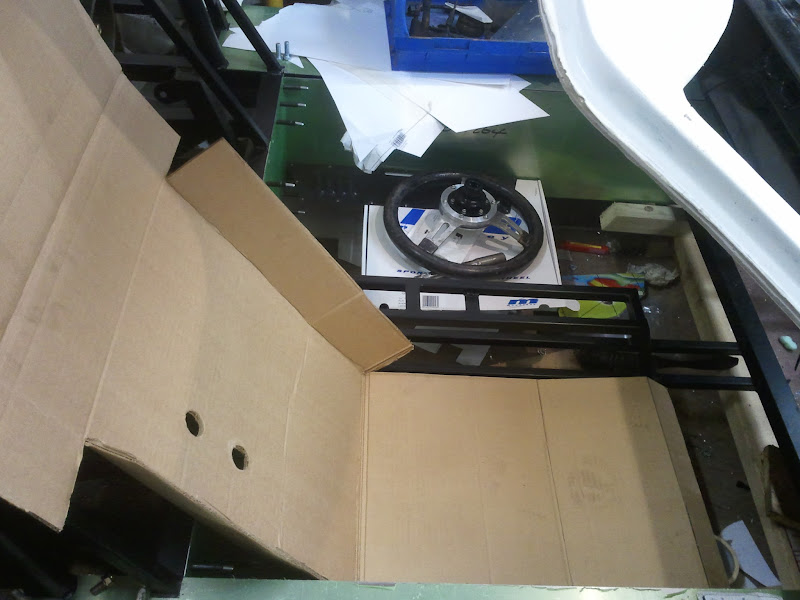
(any rumours that I sat there for a good 30minutes pretending to drive it while making V8 noises are totally unfounded)