
- Forums
- GT40 Replica Manufacturers' Corner
- RCR Forum - RCR40/SLC/917/Superlite Aero
- The SLC Clubhouse
You are using an out of date browser. It may not display this or other websites correctly.
You should upgrade or use an alternative browser.
You should upgrade or use an alternative browser.
Aaron's SL-C build...
- Thread starter Aaron Hamilton
- Start date
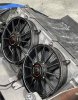
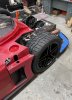
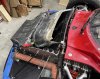
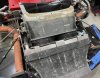
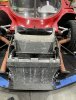
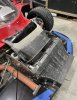
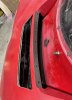
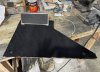
My radiator outlet duct has been a long time coming and today is the first drive with it installed. I’m anxious to see how much heat this drives away from soaking the foot box area. This modification is going to be really important to improve the capability of the A/C in the passenger area.
Attachments
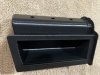
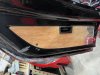
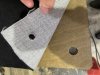
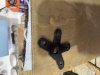
I'm wokring on interior door cards. I need to add a battery cutoff since opening up the rear clamp each time to activate the battery is a bit of work. I have to detach the rear wing uprights and bracing each time... I'm planning a mechanical battery cut-off as Dan Carter did on his build.
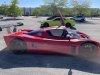
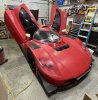
I'm gonna drive the shit out of this thing.. Let's see what fails...
I'm gonna drive the shit out of this thing.. Let's see what fails...
Most sanctioning organizations require a battery disconnect switch. Find out where they want you to mount it first so you won't have to move it later. there is a lot of el cheapo stuff on the market- use a good switch! I use the two-terminal version of this switch since my car does not have an alternator:I'm wokring on interior door cards. I need to add a battery cutoff since opening up the rear clamp each time to activate the battery is a bit of work. I have to detach the rear wing uprights and bracing each time... I'm planning a mechanical battery cut-off as Dan Carter did on his build.
I'm gonna drive the shit out of this thing.. Let's see what fails...

Joel K
Supporter
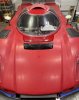
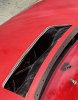
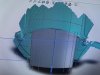
Roof inlet extension is in the works…
Looking forward to seeing this on the car.
Howard Jones
Supporter
Aaron, I would be interested in purchasing one from you if we can work that out. I'll watch your progress and we can talk later if you are so inclined.
Roof inlet extension is in the works…
I love seeing 3D scanning and design in your build!
Looks great, Aaron!
Sorry guys for the long wait... Recent updates are as follows:
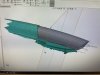
1) 3D surfacing for the side mirror pods is complete and the mold is developed. I plan to have a first part later this week. I'm planning on making carbon and fiberglass mirror housings. The mirror insert is 3D printed from PLA or PETG and bonded to the housing. This newly developed side mirror assembly uses convex glass. The glass is backed and surrounded by a 3D printed base that snaps into the housing allowing for easy "fixed" tuning for up/down tilt and side/side angle. I admit though that with the rear camera that I'm using I only use the side mirrors for blind spot viewing.
2) Part are out for powder coating and anodizing.
3) Mastercell sent to Jay for programming updates.
Last edited:
Similar threads
- Replies
- 2
- Views
- 1K