Costello’s GT-R / SC Coyote Build

On a rainy Saturday a couple weeks ago I took delivery this beautiful GT-R.
IMG_1858.jpg


Video walk around

As I’m pretty new to the forums, I wanted to first convey my thanks to those that got me this far and give a brief intro. So big thanks to Fran and crew at RCR for making such a quality product and sharing their vision with us. And to the all SL-C builders and gt40s forum contributors, thanks for sharing so much knowledge. Between the two you gave me the confidence to tackle this build.

I’m a software developer by trade, but have always had a love for the mechanical. While I’ve wrenched on my own cars, I’ve never attempted full build like this and consider myself a novice. I’m always open to advice and sharing my experience. I’ll do my best to document the process, but also feel free to send any questions my way.

Just by chance my car was delivered the same week I got engaged, so the plan is I stay in the garage out of her hair while she plans the wedding. So on with the fun stuff...
 
Thanks Mike! Looking forward to following your build as well.

Allan's videos & photos have been a gold mine for me as a first time builder. I've blatantly cribbed off his fuel panel layout from the GT-R album, with a few minor tweaks.
 

Kurtiss H.

Member
Supporter
Congratulations! My wife and I saw your car when we were visiting Fran at RCR. All I can say is the yellow is spectacular. I couldn't leave RCR without ordering a GT-R for myself - hope to see it early next year. Looking forward to following your build.

Kurtiss
 
What’s going into this beast? As you probably guessed by the thread title, I went with the low compression Coyote Aluminator and 2.8L Kenne Bell twin screw supercharger.

It’s all preference, but the Ford motor felt like the right choice for a tribute car and the aluminator enhancements address some weakness when power adders come into play (specifically the billet oil pump gears). I went the supercharger route to have a wide range of power output options, as a nod to the 05-06 street cars, and to aid the Coyote in a mid-engine configuration ...more on that later.

The GT-R package was spec’ed out with a V8 Graziano gearbox, CF interior tub, front lift kit, adj. pedals, and inner fender panels. Wheels/tires are 19 & 20s Forgestar CF5s in gunmetal grey, with 275/30 & 345/30 pilot super sports.

 
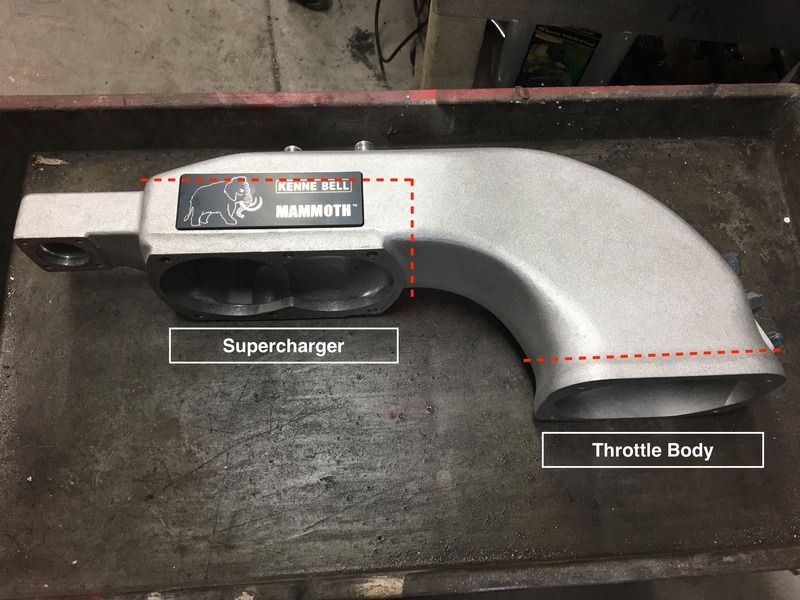
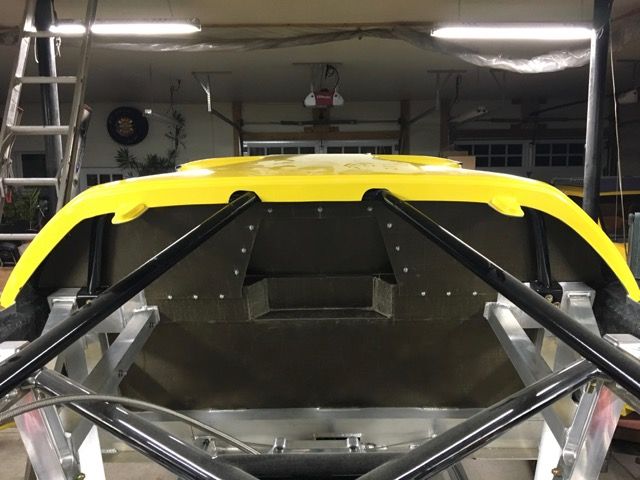
One hurdle with the Coyote is the intake manifold isn’t as friendly as a LS to 180° rotation for a mid-engine setup. If you want to pull air in from the front RCR has taken this into consideration by adding a pocket in the frame & firewall. Using a custom or adapting other FPR intakes are also options. Wanting to stay true to the FGT street cars I went the SC route. A few SC manufactures have rear inlets, but all used 180° inlet manifolds, and most of those cast their inlet manifolds as part of the SC housing. Kenne Bell however has a bolt on manifold, which provided an opportunity to adapt it for straight through use.

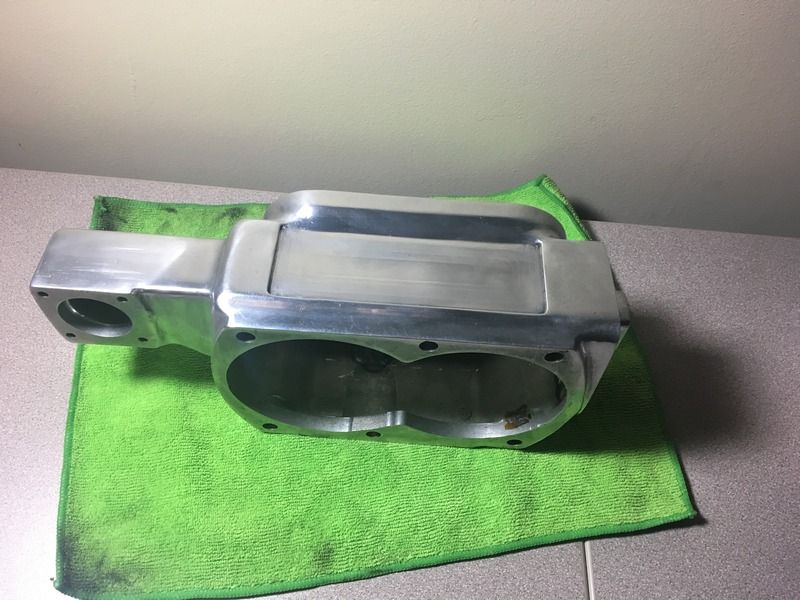
Using a band saw the original manifold was cut up along these lines. Milling down the TB flange, vacuum ports block, and other rough cut walls gave a nice starting point for fitting. The band saw was used again to shape & fit aluminum plate to fill the voids. I do not have access to a TIG, so a local shop welded up the fit pieces. After a lot of grinding, sanding & polishing and the piece came out pretty nice for being cast.


Nice work.

I have been looking at the 4.2L SC with the Big Gun intake option, for this same reason, as I am still trying to make my plans for a build, but this would be another good option.
 

Ron McCall

Supporter
One hurdle with the Coyote is the intake manifold isn’t as friendly as a LS to 180° rotation for a mid-engine setup. If you want to pull air in from the front RCR has taken this into consideration by adding a pocket in the frame & firewall.


Are you sure about that?


Ron
 

Attachments

  • KIMG1956.jpeg
    KIMG1956.jpeg
    286.8 KB · Views: 1,010
Using a custom or adapting other FPR intakes are also options.

The FPR Cobra Jet & Boss 302 ones look like great options. Just meant the stock one that comes with the charge motion control didn't look like it would flip easily. btw that FGT air box looks fantastic in your build, very clean!
 
I think that Dean Lampe reported on this in his thread. The folks at Ford Racing told me that they thought that the charge valve vacuum reservoir which is on the "back" of the Mustang engine would interfere with front dress. They indicated that any of the pre charge air valves would work.
Mike
 
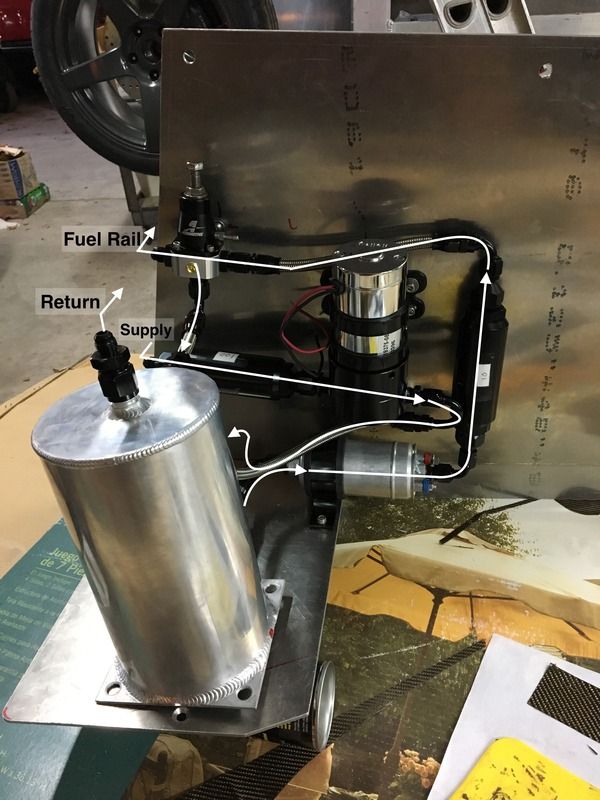
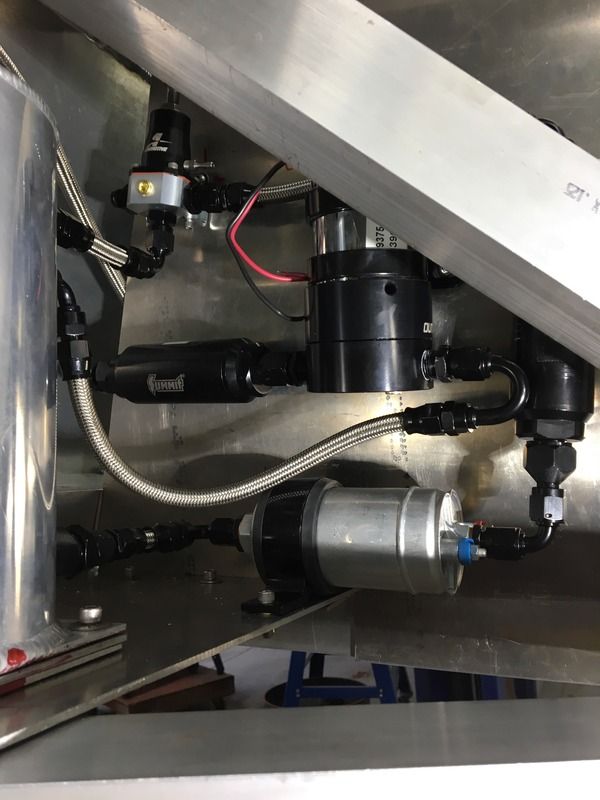
I got pretty close to wrapping up the fuel system this weekend. Instead of mounting to the firewall, I used a sheet of ⅛" 6061-T6. The panel is mounted on the outer edge of the innermost engine cradle rails. This was done to keep the space behind the side scoops free for possible side-mount SC heat exchangers or other cooling duty.

Components used in sequence were a 100μm filter => Holley 12-125 lift pump => RCR provided surge tank => Bosch 044 high pressure pump => 10μm filter => Aeromotive bypass FPR => stock fuel rail => ID1000 injectors. 15' of 6-AN PTFE line was enough plumb this setup.

Without access to a heavy duty break I found that a vice, a brass block, hammer and persistence work pretty well to bend the aluminum. ¼-20 rivnuts & SS socket caps were used for most of the fastening.


A brief aside this was my first time working with rivnuts, and ended up trying a couple brands and specs. All rivnuts were installed with an Astro 1442 13" hand riveter. The sample assortment of Astro rivnuts that came with the riveter have a thin flange that give them just enough depth to be used in ⅛” material. I quickly exhausted the ¼-20s and ordered some new ones from Uxcell. These came with a thicker flange and made it much harder to get a clean install. They work great on thinner stuff, but I didn’t want to risk having to drill one out of the rails. Finally went back to McMaster-Carr and used ones designed for 0.165" to 0.260" thickness. Even just outside their spec, these worked great.
 
Your car looks fantastic. We should form a novice builders club. Like you, I would never attempt this without the contributors to this forum. I look forward to viewing your build.
 
Making a few more small steps forward through the holidays.

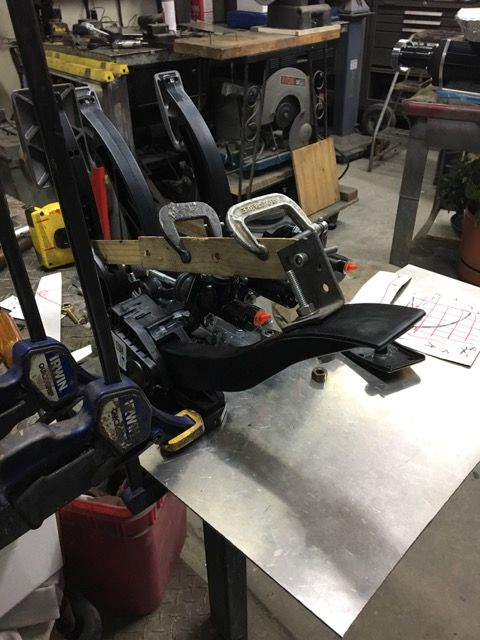
Tackling the DBW throttle linkage started with dusting off old Trig books and measuring arcs, then quickly devolved into paint stirrers and lots of clamps. Ended up with a setup pretty similar to what I’ve seen on other build threads, with just a couple notes that might be GT-R or Coyote specific.

To reinforce the plastic where the armature attaches to the pedal 2 metal bushing were cut and inserted in the pedal webbing, then the webbing was filled with a plastic epoxy.

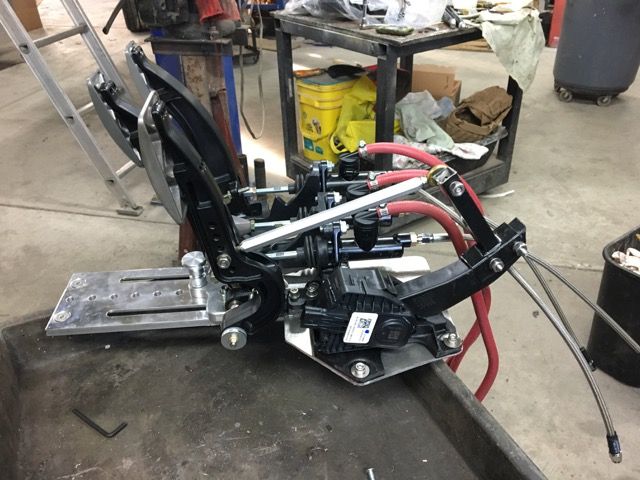
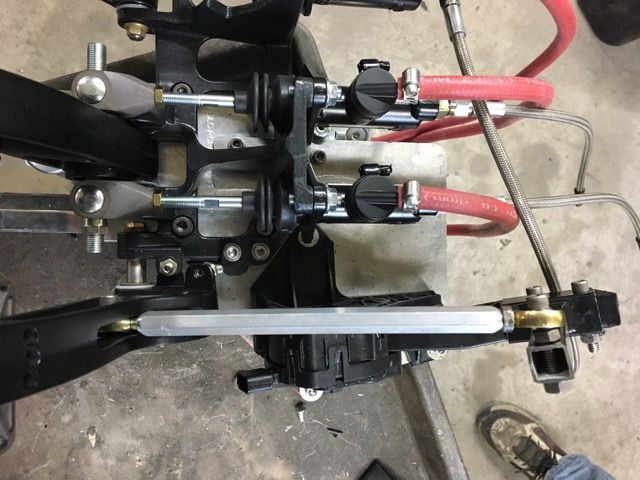
The TPS housing looks bulkier than the GM ones and mounts from the bottom, so I wasn’t able to adapt the RCR bracket. But there was room between the Tilton pedals and the RCR adj. pedals mounting block, to squeeze in another plate (with just a little grinding under the Tilton). Attached it in 4 places and there is no flex in the ⅛” plate.

While there is tons of legroom in the GT-R my guess is the footbox is a little tighter, due to center mount tank. I wasn’t able to squeeze the now wider pedal assembly past the tunnel and lower control arm mount. However right in front of the lower control arm bolt felt pretty comfortable for me at 6’1”. I did have to use a banjo bolt on the clutch MC to make it fit just in front of the control arm bolt.


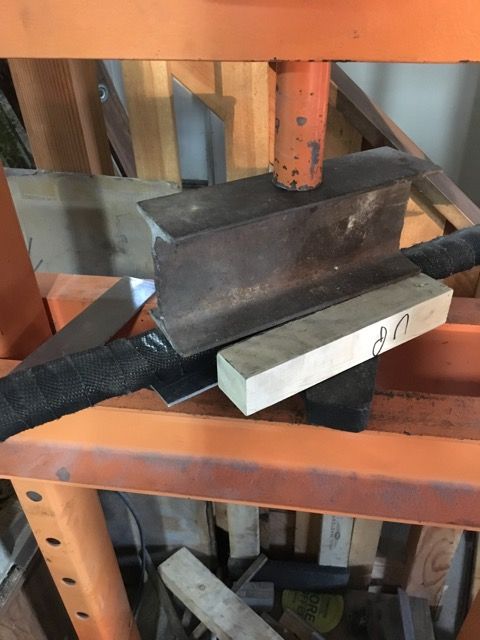
Gas tank got a layer of Lava Mat and I went the economical route by just wrapping the coolant tubes in exhaust wrap. With the wrap overlap it added just a little too much thickness and caused the tank to ride on the tubes. Oblonged/squashed the tubes with a press, making sure to to keep the ends round and they slid under the tank freely. Might have fit better with a fire sleeve or not overlapping the wrap. Added edge molding to the tank legs and 4 rivnuts along each side to keep it quiet and in place.

 
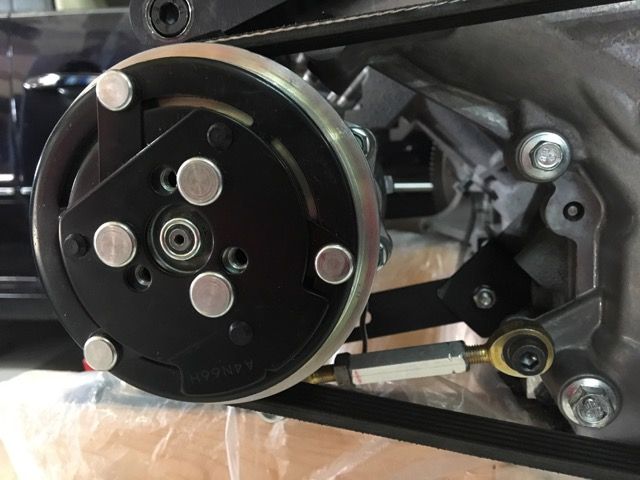
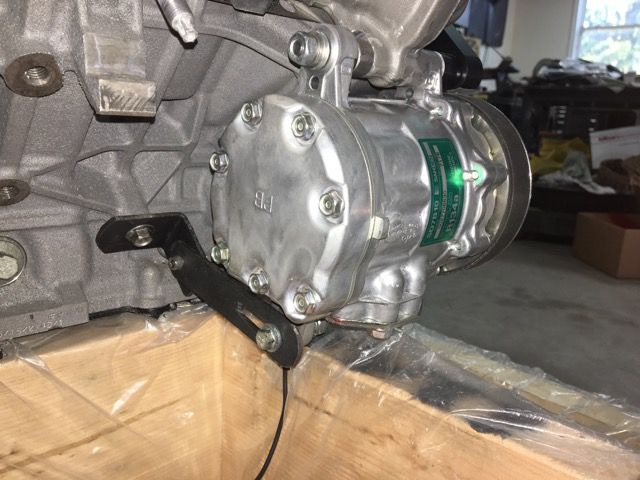
Mounted the Vintage Air AC compressor at the top using one of the timing cover bolt holes and on the bottom with a turnbuckle & slotted bracket.

Some steps of note
  • The threads need to be removed from the upper ear in front of the timing cover.
  • Then the face of the timing cover need to be ground back to get belt alignment.
  • The top bolt went all the way through cover and block, then needed a bushing to take up the space between the other upper compressor ear and engine block. Also ground down the block so the bushing would sit flush.
  • Initially a M8x1.25 120mm worked great, but the Kenne Bell SC requires a faceplate for pulleys that used the same hole in timing cover. Was able to modify a longer 130mm socket cap bolt on the lathe before adding some additional threads.
  • KB plate also made belt clearance an issue and some material needed to be removed just above the compressor pulley.


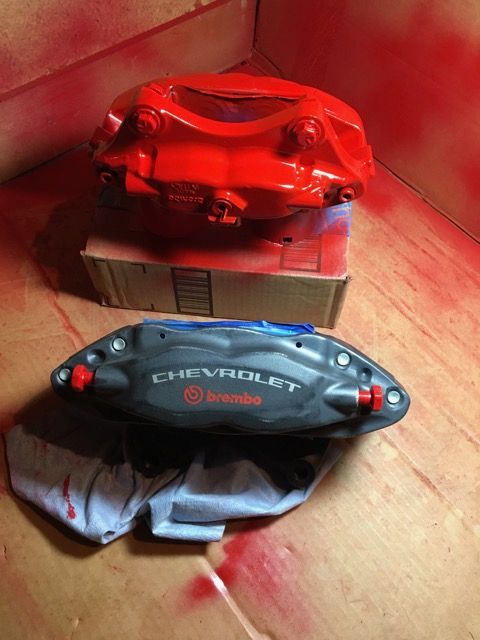
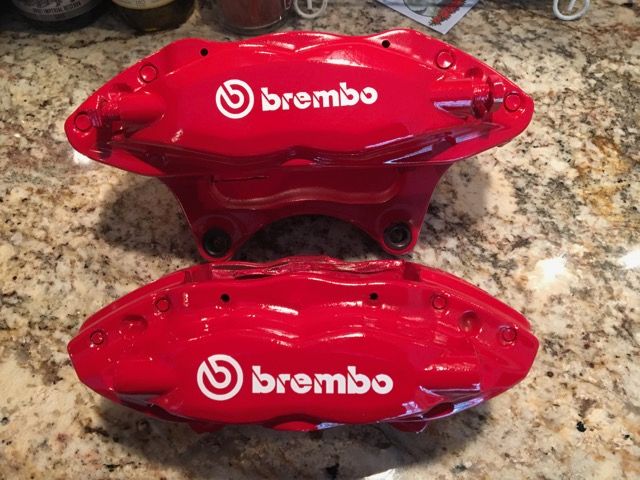
I decided to paint the calipers, as I had some luck in the past with my Porsche calipers and they’ve held up well. I’d used self leveling brush-on caliper paint before, but this time I tried VHT aerosol. It’s getting pretty cold outside of Philly so I set up in the basement and cranked the dehumidifier. Unfortunately I was get a lot of crinkle when applying clear over the red. Round 2. After striping them back down and sanding to bare metal I applied 4 coats of red, let them dry for 4hrs then cured on a grill (did not want to incur the scorn of a new fiancée, by using her oven) at 200℉ for 1 hr, then waited 7 days before applying hi-temp stickers and clear. Happy with the finish and hoping they’ll last a couple years.

If I had it over to do I’d probably powder coat them, but from the onset I worried about the higher temps if the seals were left in and I didn’t want to disassemble them.


Back
Top