Done! - well almost

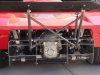
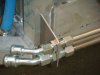
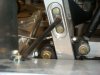
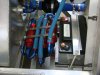
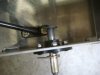
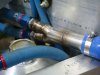
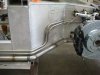
well we thought it was done. final tuning on the dyno and before we even got started the trans locked up. would not go into 3rd gear but all the others worked, then a big clunk and done. so didnt get the engine dialed in either and need to take the trans out and get it fixed.

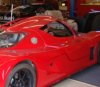
good news is we finished our 5 weeks of filming and the car did make the movie but not in a driving shot becuase it was not running yet but still a very cool scene in the movie that the car is in. you may have heard of the movie, its called Little Murder and was filmed in Detroit because of the tax advantages there but it actually takes place in New Orleans.

going to New Orleans in 2-3 week to finish filming for 3 days and get establishing shots, fill ins, inserts and a couple driving scenes so I need to fix the trans fast to get it down there in time. we need these shots to establish that it was shot in NOLA.

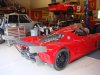
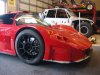
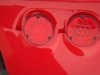
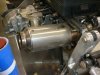
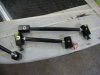
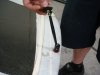
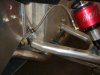
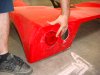
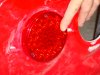
so quick quick on the trans and I hope Fran sends my one piece side windows next week or we wont be able to use it for the driving shots again. my mechanic is still waiting for them and is supposed to be to my house to install them as soon as they arrive. here are some pics.
 

Attachments

  • DSC00845.JPG
    DSC00845.JPG
    129.9 KB · Views: 579
  • DSC00850.JPG
    DSC00850.JPG
    127.1 KB · Views: 576
  • DSC00855.JPG
    DSC00855.JPG
    137.2 KB · Views: 520
  • DSC00842.JPG
    DSC00842.JPG
    129.6 KB · Views: 461
  • DSC00840.JPG
    DSC00840.JPG
    129.6 KB · Views: 560

Dave Lindemann

Lifetime Supporter
Look-in good! I really like the SLC in red. You have some interesting features on your car - did you do the build? I'm just noticing a couple of different features on your car compared to mine - tail lights and wing mounting struts in particular. My SLC has the aluminum wing struts but I must say that I actually like the tubular struts better. That said, I haven't decided to install the wing. May I ask where you were able to source the front turn indicators?

I hope you are able to get the car together for the movie.

Regards,
Dave L
 
Very nice job Tim! The wing struts are pretty neat as is the CF splitter. I also see exhausts peaking out the rear...do you have fab'd headers?
 
Nice.
Sorry to hear about the tranny but hopefully you can get it back together.

Would love to see more build process and completed pics if you have some time.
 
:love: :coolgleam:


Out of curiosity, was the Ricardo brand new? Hearing that makes me kind of worried; I thought the box was near indestructible and of the highest quality ..... would hate to have to crate it back up to the UK to get repairs done!
 
Me likey very much :love:

The only way it could look even better, is if it were white instead of red, haha! :laugh: (I kid, I kid! :thumbsup: )
 

Craig Gillingham

Banned because I can't follow the forum rules.
hi tim,

do you have the same problem as us that the doors are not aligning?

My doors when fitted have the same issue as seen in this photo.

Maybe your door isnt quite shut in this though.... ?

It would be strange as it is exactly our problem... when adjusting the side in the top pops out.... we have tried playing with all adjustment variables each with its own downside...

we are now playing with the door without the gas struts to see what happens..

looking good and keep up the hard work. :thumbsup:

regards
 

Attachments

  • Aaaaaaaaaaa11111.jpg
    Aaaaaaaaaaa11111.jpg
    28.8 KB · Views: 352
right side door is open a little, it aligns good except its too long. left side is open too but that about what it looks like when closed, top rear portion stick up. have over 40 hours trying to align the doors.

had the alum wing strut but it wobbles sooo bad even after reinforcing the diffuser so we built this instead. with the heims you actually get some adjustment and its rock solid, does not move at all. tail and turn lights I got from an offroad shop. you can get them almost anywhere on line just get the same size as the hole indent on the car. the tail lights turned out really well as opposed to the Dodge dekota, or whatever they are, tail lights that come with it. ha ha.

wheels dont line up in the wheel wells. they need to be completly rebuilt all around. we made the suspension square by remaking the mounts but the body was still missaligned before that.

the paint is Ferrari red.

headers were built in the car. stainless steel and very tight. if you can use the set that Fran has it is a much cheaper way to go. I was going to try and do an eight into one but as Fran has said, it is absolutly impossible so I spent WAY TOO much money on headers.
 
also so when you recieve your car, remove any and all tan masking tape as you will never get it off later.

few build pics
 

Attachments

  • AC lines.JPG
    AC lines.JPG
    117.1 KB · Views: 365
  • diffuser inside brkt.JPG
    diffuser inside brkt.JPG
    113.7 KB · Views: 343
  • fuel pump filter.JPG
    fuel pump filter.JPG
    116.8 KB · Views: 343
  • hood brkt.JPG
    hood brkt.JPG
    122.6 KB · Views: 338
  • hood pin4.JPG
    hood pin4.JPG
    123.4 KB · Views: 338
  • muffler.JPG
    muffler.JPG
    131.9 KB · Views: 335
  • rad overflow.JPG
    rad overflow.JPG
    125.3 KB · Views: 397
  • rad preasure tank.JPG
    rad preasure tank.JPG
    126.7 KB · Views: 357
  • rear lid hinge pin.JPG
    rear lid hinge pin.JPG
    102.4 KB · Views: 307
  • rear lid hinge pin2.JPG
    rear lid hinge pin2.JPG
    117.3 KB · Views: 325
  • splitter buckles.JPG
    splitter buckles.JPG
    130.8 KB · Views: 321
  • splitter buckles2.JPG
    splitter buckles2.JPG
    107.6 KB · Views: 312
  • susp frnt.JPG
    susp frnt.JPG
    128.1 KB · Views: 315
  • Tlight.JPG
    Tlight.JPG
    119.6 KB · Views: 343
  • Tlight1 (2).JPG
    Tlight1 (2).JPG
    128.3 KB · Views: 321
  • water pump3.JPG
    water pump3.JPG
    130.4 KB · Views: 340
  • water split.JPG
    water split.JPG
    108.2 KB · Views: 314
  • wtr line and AC.JPG
    wtr line and AC.JPG
    121.6 KB · Views: 327
  • wtr pump2 spliter.JPG
    wtr pump2 spliter.JPG
    121.5 KB · Views: 325
  • wtr split2.JPG
    wtr split2.JPG
    117.7 KB · Views: 380
Tim,

I appreciate the nice "detail" photos....very helpful. Would the X-strut have worked with the supplied aluminum wing supports to provide the needed lateral support?
 
I dont believe so. the alum supports to the wing allow for too much side to side movement. back to front even has a little movement. it also tips side to side. I didnt want my wing to move at all. it just looks stupid with the wing wobbling all over the place, doesnt speak quality car to me.
 
With the wing & supports in place, are you able to open up the engine bay? Or do you have to disassemble that to open her up, then re-assemble when finished?
 
rear opens fine. pivots on two pins in the rear. remove the pins and the whole thing comes off. hidden latches in the air vent area in front of the rear tires.
 

Dave Lindemann

Lifetime Supporter
had the alum wing strut but it wobbles sooo bad even after reinforcing the diffuser so we built this instead. with the heims you actually get some adjustment and its rock solid, does not move at all. tail and turn lights I got from an offroad shop. you can get them almost anywhere on line just get the same size as the hole indent on the car. the tail lights turned out really well as opposed to the Dodge dekota, or whatever they are, tail lights that come with it. ha ha.

Tim - Thanks for posting all of the detailed photos. The early SLC had tubular wing struts - I'll have to check with Fran to see if they are still available. Thanks for the tip on the turn indicators. I don't know, I kind of like the stock tail lights though you did a very nice job with yours.

Regards,
Dave L
 
Hey Tim,
You are welcome to my side glass if it looks like you are not going to get yours in time. They are the vented type not solid, give me a call if it will help.
 
rear opens fine. pivots on two pins in the rear. remove the pins and the whole thing comes off. hidden latches in the air vent area in front of the rear tires.

I was studying your pics a bit more and was curious - it seems to me that in order to remove the pin, you first have to remove the cotter pin, then washer, then you can pull the pin out?

If so, why not use those locking push-style race pins (where the pin is basically like in the pics, except it has 2 nubs on the ends that retract/extend into the pin body when you push the centre piece in)

Kinda like these:

r-qr6.jpg


You push the blue centre piece in, which makes the nubs on the end retract into the pin body, and the pin pulls out.
 
alex you are right. I have used the pins you show in your pic below before and they are nice. we actually made the pins we are using with a very large shoulder on them and since it doesnt come off that often we didnt use the race pins.
 
WOW, my guys already heard from Fran. Fran is sending a replacement trans. looks like we will make New Orleans after all. kudos Fran for making this happen! its been a long road on this film and will be cool to see the car on the streets of New Orleans.
 
One thing I've learned is nothing in the car business happens on the schedule we want it to. But damn if Fran doesn't get cars out the door and then take care of his customers after the fact.


--Donnie
 
Back
Top