First time front clip removal

Rick Muck- Mark IV

GT40s Sponsor
Supporter
Jack the front end up a little to help the clip clear the front tires and provide extra clearance to the ground to reduce the chance of contact of the lower front. For a "no chip" process a little masking tape applied to the door front edges and the clip will ensure no Boo-boos.

Watch the fuel filler caps. Remember to unplug the two wire connectors. This is a good time to mark the connectors for ease or reassembly so you do not need to trace the wire colors to ensure the correct reconnection. On a MK II the front outlet panel must be held open which is done by the third person or with a paint stirrer taped to the clip. On a MK I remove the outlet panel.

It is best done with three people (one in front to guide on the slides and one each side to lift and slide) but two can do it very well. Don't be jerk like me try it with just one person....it is possible but fraught with possibilities of disaster! I have done a single handed removal and install but am not eager to do it again............
 

Randy V

Moderator-Admin
Staff member
Admin
Lifetime Supporter
Rick,

Have any Superformance owners made the modification to make the front clip a tilt up like many of us with other brand replicas have done?
 

Rick Muck- Mark IV

GT40s Sponsor
Supporter
Rick,

Have any Superformance owners made the modification to make the front clip a tilt up like many of us with other brand replicas have done?

None that I am aware of. Only the early FAV cars had the tilt front.....that was dropped for weight and space early on in the production run of FAV chassis. It is a handy feature if you need to access the front area.
 

Mike

Lifetime Supporter
The one thing I fought with for a little bit was the front wiring harness and how it routes back into the chassis. Pay attention when you take it apart because it is not intuitive when it goes back together how to route the harness.
 

Seymour Snerd

Lifetime Supporter
Don't be jerk like me try it with just one person....

Too late....

Here's the 12-step program by which I do it all the time by myself on a Mk II:

1. One time only, tie down all but the last few inches of each wiring harness in an appropriate place so they're not flying around getting hooked on things.
-----
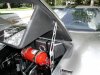
2. Open boot lid, disconnect harnesses.
3. Unlatch clip on each side.
4. Lift clip up at the rear enough to clear fuel fillers. It will rest with its corners on the tires.
5. Place moving blanket, cardboard, or similar under the front to give clip something soft to land and slide on.
6. Standing front and center, open and hold boot lid about midway on each side and use it to lift the whole clip up at the rear. Good core strength helps. Walk backwards with it and set it on the blanket-covered ground. I don't know how you would do this with a Mk I, but you can figure that out. You just need a way to grab the clip a little to the rear of its center of gravity. A couple of cleverly attached nylon belt loops would do, or maybe a pole that is a little longer than the width of the lid opening.
------
7. Assembly is the reverse of disassembly: while holding the clip by the lid you need to guide the subframe spools into their receivers while lifting the lid enough at the rears that its rear corners will "slide" over the tires to the "almost on" position you achieved in step 4.
8. Once that's done, stand at the front, hold the clip with both hands under the radiator opening, and give it a good shove upward and rearward. As the clip passes over the fillers it will probably open both of them (you needed to put in more gas, right?).
9. Go back and lift up each rear corner enough to close the fillers and set the clip back down.
10. Latch clip.
11. Connect wiring.
12. Close lid.

PS: if you really wanted to make this slick (so to speak) you would add small nylon bumpers or Teflon sheet or rollers, etc., in a few key places after which you would not need the blanket and the rear corners would slide smoothly over the tire surfaces.

PPS: adjusting the spacers behind the subframe spools, and their eccentric positions, helps a lot in allowing the clip to slide on smoothly.
 
Last edited:

Kirby Schrader

They're mostly silver
Lifetime Supporter
On a MK II the front outlet panel must be held open which is done by the third person or with a paint stirrer taped to the clip.

Don't be jerk like me try it with just one person....it is possible but fraught with possibilities of disaster! I have done a single handed removal and install but am not eager to do it again............

I added a front 'hood' prop on my car. Olthoff sells them, but you can get them almost anywhere. See pic.
Rather than drill a hole through and just put a bolt like I've seen others do, I just fiberglassed in the mount for it. Looks tidy. No holes drilled.

Are you calling me a jerk?
Just kidding... I, too, have taken the front clip off and on myself, but only after I had the prop installed. You definitely have to be careful!

FWIW,
Kirby
 

Attachments

  • photo.jpg
    photo.jpg
    195.8 KB · Views: 298

Kirby Schrader

They're mostly silver
Lifetime Supporter
Well do you fit the definition? I certainly do...just ask my wife!

My point is don't F-up your car just because you are too proud to ask for help R&Ring the clip.

I was kidding... I've been known to have other 'names' thrown my way, too.
:laugh:
 
Thanks guys for your input! I was thinking of adding the prop rod next, yeah easy to glass in the mount, have done that before on my FFR Cobra I had years ago.

Olthoff has some good stuff, already bought the insulated rear panel, the billet hardware for the window and the carpet set.

And Rick's a/c duct seals and his tempered bulkhead window!

Randy
 
Back
Top